As OLE grows to include more document types (patrons, bibliographic formats, licenses, etc.), OLE continues to integrate Search capabilities, where the search functions provide interoperability instead of some of the localized wildcards, limits on bibliographic fields, or other search-specific criteria below. Library users will be included in future testing and development of OLE Search, building upon our emerging search types for:
Docstore Search / Search Workbench – full Bibliographic searching, edit and modify bibliographic, instance and e-instance (holdings, items, and e-holdings) records
Acquisitions Search – includes limited Bibliographic searching
Order Holding Queue – search on requisitions: actions on individual documents, or Approve/Cancel/Calculate return for further action, group of requisitions
Receiving and Claiming Queue – complete receiving from search via queue, pay for the item, or claim
Serials Search and Receive - search for serials and create or modify receiving records
Fund Lookup – query general ledger for account balances and availabilities
E-Resource Search and License Request Search
KFS inherited transactional Searches (no Bibliographic fields, only transactional- vendor, dates, etc.)
Payment Request
Purchase Orders
Requisition - search on Title, Author, Publisher etc. added to eDoc transactional fields (selector, vendor, dates, doc id, delivery info, account/fund, etc.
Receiving
Other search functions available in OLE
Lookups (referenced as needed in several sections)
Lookup icon (referenced as needed in several sections; inherited from KFS)
Custom Document Searches (inherited from KFS)
Doc Search button
Saving Custom (Session) Searches (as applied in OLE)
Search Workbench is an OLE search interface, a portal used to locate bibliographic, holdings, eholdings or item records in OLE. From there you can take further actions on records, e.g. viewing or modifying them. The Search Workbench supports a variety of searches and both a title and a call number browse.
Access Search Workbench by clicking on the search workbench button. This button is located in the left corner of the upper menu and is visible at all times in any module.

Once you have opened Search Workbench, you can perform a search to find a record or set of records.

When Search Workbench is first opened, the user will see the simple search interface that is pictured above.
On the top portion of the search interface, on the right hand side, the user is given the option to perform two search types: Search or Browse. These options are found in the Select Records By area.

For information on searching, go to the searching section of this document. For information on browsing, go to either the general browsing, title browsing, or call number browsing sections of this document.
Select Search in the “Select Records by:” drop-down list in order to execute a search in OLE.

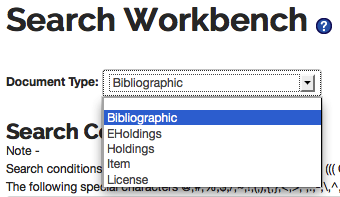
First select a Document Type from the drop down menu provided. Available Document Types are:
Bibliographic: This is the default setting.
EHoldings
Holdings
Item
License (Not available in this release)
Note
The Document Type selection drives the menu of available seach fields in the In Field menu.
The term(s) to be searched are entered in the Search For box.

Next, you can select from the drop down list with the following options:
All of these: all terms are found in the specified field
Any of these: any of the terms are found in the specified field
As a phrase: all terms must appear in the specified order

Using the In Field menu, you can select a field to be searched from a drop-down list. As mentioned above, this menu is driven by the Document Type that you selected for your search. You can include all listed fields in your search by leaving the In Field box blank or by selecting ANY from the drop-down list.

You may also select a Boolean operator to apply to your search. To do this, follow these steps:
Enter a term in the Search For field. It a term is not entered first, then the user will not be able to add fields.
Click the
 button, located on the right side of
the screen, to add an additional search bar.
 Enter a search term in the new Search For field.
Click
 to enter more fields, as needed.
Adjust the Boolean operators as needed by selecting clicking in the radio buttons next to AND, OR, or NOT

Note
OLE does not currently support cross-document-type searching. You cannot, for example, search for title data in bibliographic record and location data in a holdings record.
There are three options at this point:
Click
 to perform the search.
Click
 to clear search values and start a new
search.
to clear search values and start a new
search.Click
 to perform a new search after you have
performed an initial search.
You can also perform an “open search.” If you do not enter any search terms, all of the records matching the document type will be included in the search results when the Search button is clicked.
Once you clicked on
 you will see the search results:
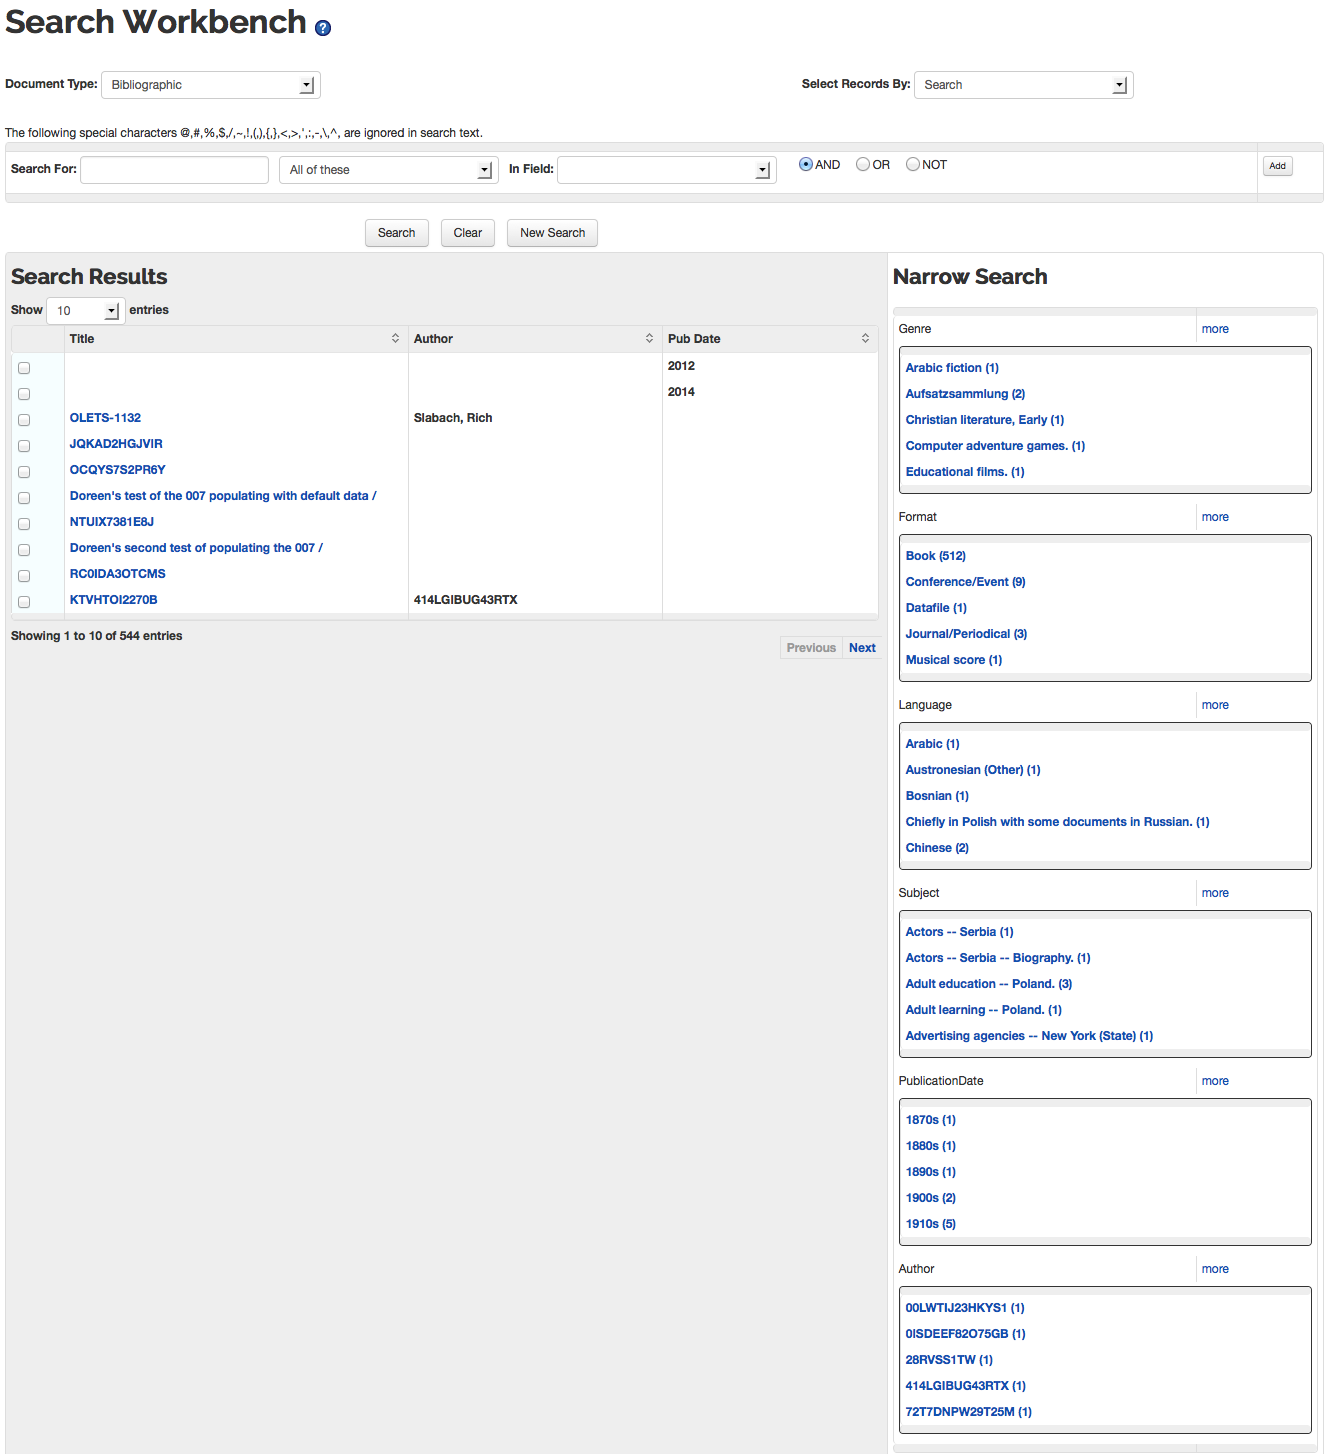
To display a single record in the search results for editing from the above example, click in the blue title entry. To open multiple records for editing, put a check in the box to the left of the titles for the records that you want to edit and click on Open Selected Records below the search results – each record will open in a separate window.
To the right of the search results, you can click on any blue facet to narrow the search results. You can click more above any facet section for additional facet options. Note that facets are presented only with a bibliographic search.
The search results will provide the title regardless of the document type selected. What other information that will display for records in the search results is locally configurable and will vary from institution-to-institution. The number of entries displayed on a screen is also locally configurable. In the example above you can adjust the number of records displayed on a single screen via a drop-down list. Note that you can see the total number of records in the search results just below the list.
At the bottom of the list on the right, you can click on Next to go to forward one screen of results or Previous to go back one screen.
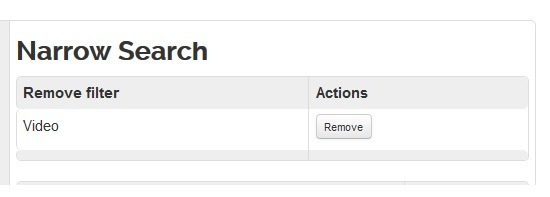
Click on any blue facet to narrow your search results. You may click more above any facet section to view additional facet options.
Click
 to remove a facet and expand your
search:
Tip
At the bottom of the search results screen, there is an “Export to XML” button that allows you to open selected records (those with a check) in XML in a window below the search results.
The search workbench supports browsing by title and by call number. You can begin browsing by selecting Browse in the “Select Records By:” drop-down list.

Then select either Title or Call Number from the “Browse by:” drop-down list. The search interface will differ for title and call number browses.
A title browse results in a view of the title index at the point where the term(s) that you enter would appear in an alphabetical index of titles in the database. When searching, it doesn’t matter what order your search terms are in, unless you are searching as a phrase. For title browsing, you need to enter your title terms in the order in which they would appear on the bibliographic record. The exception is initial articles – these should not be included in your browse terms. Do not omit non-initial articles, prepositions, etc. when browsing, as these affect browse indexing.
Enter as much of the title as you care to. If you are entering a single term, it must be the first word of the title that is not an initial article.
After selecting Title in the “Browse by:” drop-down list, you will see a very simple interface:

Enter the beginning word(s) of the title in the Title starting with: box.
Note
Enter only lower case letters. The title browse functionality does not currently work with upper case letters.
Your browse results will display.
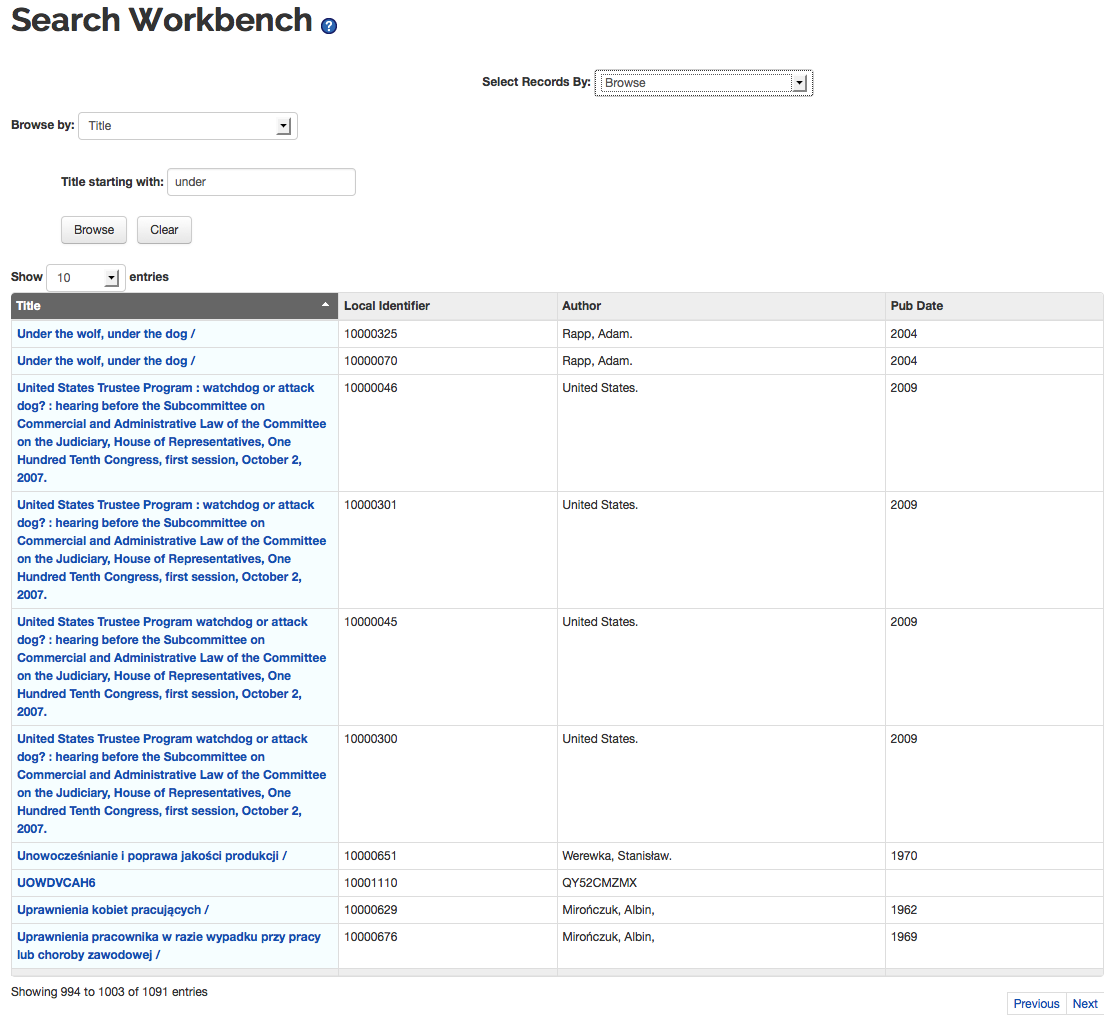
The information that appears in addition to the title is locally configurable and will vary from institution-to-institution. To edit the bibliographic record for a title in the above example, click on the title. With browse results, you cannot choose multiple records for editing with a single command. However, when you open a record for editing, it opens in a new window, so your browse results remain for selecting additional records for editing if needed.
The number of entries displayed on a screen is also locally configurable. In the example above you can adjust the number of records displayed on a single screen via a drop-down list. Note that you can see the total number of records in the search results just below the list.
At the bottom of the list on the right, you can click on Next to go to forward one screen of results or Previous to go back one screen.
Call number browsing results are also an index display. Enter as much of the call number as you want, but be sure that no elements of the call number are omitted from the string that you enter for your call number browse.
After selecting Call Number in the “Browse by:” drop-down list, you will see this interface:

Using Document Type, the user can choose to search a Holdings or Item
Using Location, the user can limit the search by the locations within their library.
Using Call Number Type, the user can select which classification scheme used by their library to search.
Enter all or part of a call number in the Call Number starting with: box and click browse to produce results.

With browse results, you cannot choose multiple records for editing with a single command. However, when you open a record for editing, it opens in a new window, so your browse results remain for selecting additional records for editing.
The information that appears in addition to the title is locally configurable and will vary from institution-to-institution. To edit the bibliographic record for a title in the example above, click on the title.
Clicking on the call number in the example above will open either a holdings record or an item record, depending on which one you selected for your browse.
The number of entries displayed on a screen is also locally configurable. In the example above you can adjust the number of records displayed on a single screen via a drop-down list. Note that you can see the total number of records in the search results just below the list.
At the bottom of the list on the right, you can click on Next to go to forward one screen of results or Previous to go back one screen.
When searching by Document Type Bibliographic, click the title to open the bibliographic record editor.
Note
For more information about record editors, see MARC Editor
When searching by Document Type EHoldings, click the title to open the record. Click edit on the E-Instance Editor to edit the eholding.
Note
For more information about the E-Instance Editors, see the E-Instance Editor
When searching by Document Type Holdings or Item, click the title to open the record. Click edit on the Instance Editor to edit the Holdings or Item.
Note
For more information about the Instance Editors, see the Instance Editor
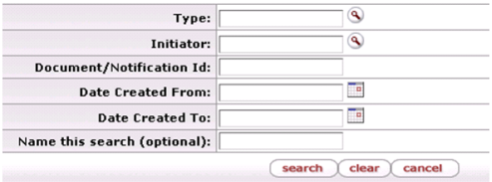
The doc search button is located in the upper left corner of the screen. Using this button, you can search for a document you want to view or work with. This button allows you to quickly search for any transactional or acquisitions document by Document type, by Selector/initiator, dates, or document identification number. Click the search button without entering any criteria to view documents created today.

Click

Enter search criteria.
Note
For explanations about search criteria fields, see Standard Data Entry, Selection, Action, and Navigation Tools and Standard Links and Icons.
Click
 .
.Click the document ID link to open the document, the Initiator ID link to retrieve a workflow user report, or the Route Log icon
 to view the workflow status.

Doc Search Criteria
|
Field |
Description |
|
Type |
Document type. Enter the document type or
select it from the Document
Type lookup |
|
Initiator |
User ID of the document initiator. Enter
the user ID or select it from the Person lookup |
|
Document/Notification ID |
Enter the numeric document ID assigned by the system. |
|
Date Created From/To |
Enter or select from the calendar |
|
Name this Search (optional) |
To save the search criteria for future use, enter a name for the search. All saved search are accessed via a list at the top of the document search screen. |
Tip
Using Wildcards (*) in the Search Criteria: The use of asterisks in the search criteria allows you to perform pattern matching. To search for documents containing a string of characters in alphanumeric fields such as Document Title, you may enter a character string in the search criteria accompanied by asterisks. For example, enter '*test' to search for a document title that ends with the word 'test'. Enter 'test*' to search for a document title that begins with the word 'test'. Enter '*test*' to search for a document title that has the word 'test' somewhere in the document title.
Note
For information about advanced features of the document search, see Advanced Document Searches.
OLE also includes several forms of Search in each of the module tabs: Deliver, Describe, Select/Acquire. Many of these are further discussed in the specific section of this Drivers Manual for each function, and each is still under development.
The following example shows the document lookup screen for monograph receiving.
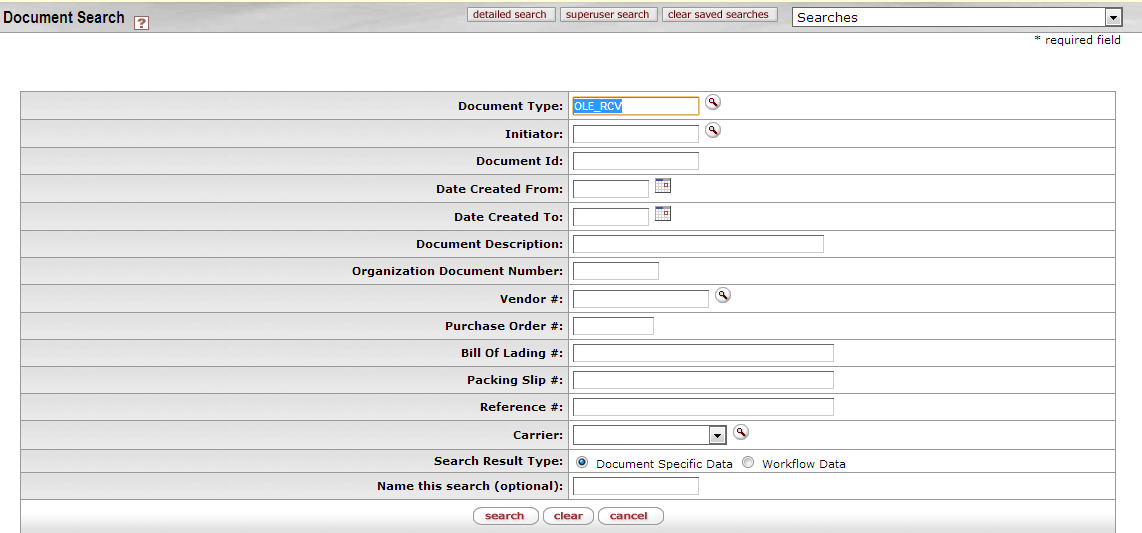
In the example above, the user selected Search from the Receiving menu group on the OLE Select/Acquire tab. This screen includes the document type OLE_RCV pre-populated in the Document Type field. It also contains other fields you may want to use as search criteria in your search for one or more specific monograph receiving documents.
Each search screen gives you options for two search results types.
Document Specific Data: In the search results, display information specific to the document(s).
Workflow Data: In the search results, display information specific to the workflow status of the document(s).

To search for specific documents, follow these basic steps:
To restrict the search to documents that meet criteria of your choice, enter search data as appropriate.
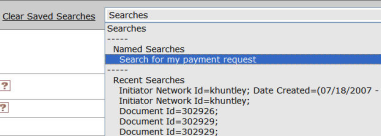
If desired, save this set of search criteria for reuse later by entering a descriptive name in the Name this search field. Some OLE searches include the option to name and save your searches, so they can be repeated later by the same user. Named searches are available for Requisition, Purchase Order, Receiving and Payment Request searches.
Note
For information about specific fields, see the help documentation for the particular type of document you are searching for in the OLE Documentation Portal.
Note
For tips about data entry, see Data Entry Tips.
Click
 .
.The system retrieves a list of items that match your search criteria.

If you gave your search criteria a name, the system also displays the name of your saved search in the Searches list at the top of the screen.
Choose from among these options.
To sort the list, click on the header you want to sort on. Click once to sort in ascending order and click again to sort in descending order.
Some cells (such as those in the Initiator column in the example above) have links to screens that display more detail. Click the link to display detail.
Some searches have the option of exporting the list. To export the entire list in .csv, spreadsheet, or .XML format, scroll to the bottom of the screen and click a link to choose from among these options

After finding the document you want, click the link for it in Document/Notification Id column. The system displays the document.
Keep these points in mind as you enter data:
You may enter data in any or all fields on a custom document search screen. You may also leave all fields blank.
After you select a document type from the any of the Select/Acquire Searches, you can easily change the search to find any other type of document without returning to the Select/Acquire tab to select a different search option. In the Document Lookup screen, simply change the code in the Type field to reflect the type of document you want to look for (for example, PO) and move your cursor out of the field. The system rebuilds the screen with the proper search criteria fields for the new document type.
Dates must be specified in mm/dd/yyyy format. You may also click the calendar icon
 and then select a date from the calendar.
 For many fields, the system provides a handy lookup tool
 that can help you retrieve a value (for example, a
customer number) you want to search on but have not memorized.
To use the lookup tool mentioned above:
Click the lookup icon
 for the field you need a value for (e.g., Customer
Number).
 The system displays a form to help you find the specific value you need:
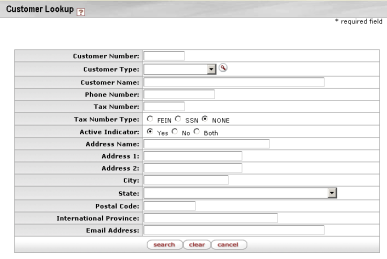
Enter identifying information (customer name, etc.) in any of the fields provided.
Click
 to retrieve a list of records that match your
entries.
When you find the record you need, click the
 link to copy the value (customer number in this
example) into your custom document search screen.
The following table indicates how to use special characters to expand or limit your searches.
Using special characters in search
| Character(s) | Function | Use With | Example (Account Field Number) |
| ! | Not equal to | Alphanumeric characters |
!1031490 Matches on all account number except 1031490 |
| && | And | All types of data |
1111500&&1123400 Matches on records that contain both of these account numbers: 1111500 1123400 |
| * | Match on any character or characters | Alphanumeric characters |
103* Matches on all account numbers that start with 103 (1030000, 1039765, etc.) |
| .. | Between (inclusive range) | Alphanumeric characters, numbers, dates |
1031490..1111500 Matches on account numbers equal to or greater than 1031490 and on account numbers less than or equal to 1111500 |
| < | Less than | Alphanumeric characters, numbers, dates |
<1031490 Matches on all account numbers less than 1031490 |
| <= | Less than or equal to | Alphanumeric characters, numbers, dates |
<=1031490 Matches on all account numbers less than or equal to 1031490 |
| > | Greater than | Alphanumeric characters |
>1031490 Matches on all account numbers greater than 1031490 |
| >= | Greater than or equal to | Alphanumeric characters, numbers, dates |
>=1031490 Matches on all account numbers greater than or equal to 1031490 |
| ? | Match on any single character | Alphanumeric characters |
103?490 Matches on all seven-digit account numbers that start with 103 and end with 490 (1030490, 1031490, etc.) |
| Or | All types of data | 1111500 |
1123400 Matches on either of these two account numbers: 1111500 1123400 |
Note
For more information about searches, see Using Doc Search to Find a Document and Advanced Document Searches.
Specifying search criteria:
Most fields will be uppercased for search.
Dates should be specified as MM/dd/yyyy.
Some fields have magnifying glass button for a sub lookup on that field.
Wildcards allowed on strings are * and % match any number of characters, while using a ? will match any one character
Logical operators allowed include && (And) as well as | (Or) to join multiple search criteria
Range operators allowed on numerics and dates are >,<,>=,<=, or ..
All operators except .. should be before date value. Operator .. should separate date values.
Result Table:
Each result field has link on header for sorting. Click once to sort ascending,
and click again to sort descending.
Some row fields have links to inquiry. The inquiry will be presented in a new window.
Click the return value link to select a row and return the key value to the previous page.
Select 'return with no value' or click the cancel button if you wish to return without returning a value.
Maintenance Links:
The 'create new' link on the upper left corner of the lookup screen will
go to a maintenance document for creating a new record for this lookup type.
For each result row the action column displays edit and copy links. The 'edit' link
will go to a maintenance document for editing the current record. The 'copy' link
will go to a new maintenance document but copy over attributes over the current record.
Export Functionality:
At the end of each result set, there are links for exporting the data to a different format.
Click 'csv' to export the data as a comma delimited file, 'spreadsheet' to export the data as a spreadsheet,
or 'xml' to export the data as xml.


