An e-doc consists of a document header and a document body. The document header in the upper right corner of the screen contains system information about the document. The document body is organized in a stack of labeled tabs that are similar to file folders. Based on the type of document, the system displays different sets of tabs. Workflow action buttons appropriate to your role are displayed at the bottom of the screen.
 |
OLE-built documents (not inherited from KFS) have several variations even though the e-document concept remains the same. The tabs do not look like file folders, the "Show/Hide" buttons do not exist but arrows to the left of the tab titles instead, the overall design looks more modern:
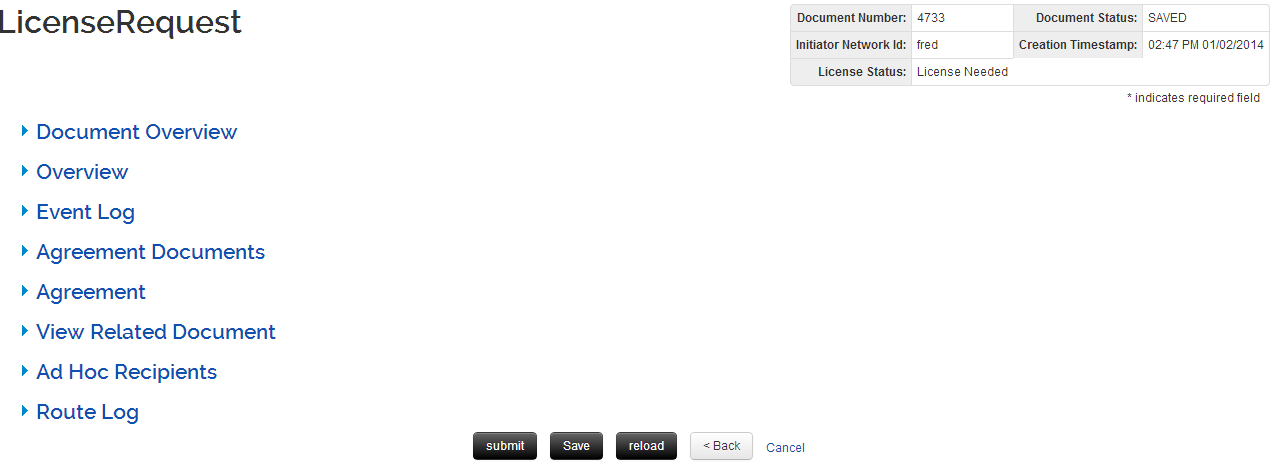 |
Additionally, you will notice that several of the OLE screens, such as the Editors and the E-Resource Record, have left pane navigation:
 |
For the Editors, the left pane navigation is used to navigate between bibliographic records, Instances and E-Instances. For the E-Resource, the left pane allows for the large amount of information to be broken down into manageable pieces.
Note
The left pane navigation on the different Editors will allow users to delete and add as well as navigate between records. For additional instructions, see Editors on the Guide to the OLE Describe Module..
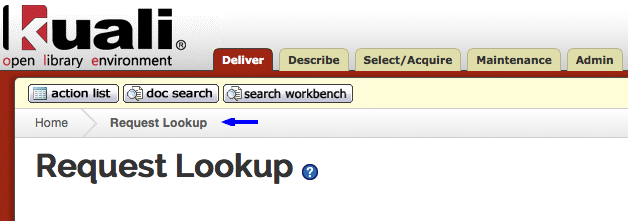
In OLE-created documents, breadcrumbs are available to assist in navigation. Click Home to return to the OLE menu.

Basic information in the document header
|
Title |
Description |
|
Document Nbr (Document Number) |
The unique number used to identify each document. OLE assigns a sequential number to each document when it is created, regardless of the type of document. |
|
Status (Document Status) |
A code that identifies the status of a document within the Workflow process. |
|
Initiator (Initiator Network ID) |
The user ID of the document initiator. |
|
Created (Creation Time Stamp) |
The time and date the document was created. |
Note
For information about status definitions, see Route Log.
Optional information in the document header
|
Title |
Description |
|
Copied from Document ID |
OLE allows users to create new documents based on previous transactions by way of a copy function. When one document is copied from another, the document number of the copied document appears here. |
|
Correct Document ID |
OLE gives you the option of reversing a fully approved transaction through the use of an error correction function. When one document is a correction of another, the document number of the document being corrected appears here. This information is displayed only when the document was created using the error correction feature in an existing document. |
Note
Some documents have information in the header unique to that e-doc. Those are addressed in the user documentation.
You may expand or collapse all tabs in a document by clicking expand all or collapse all.
Click
 to expand all of the e-doc tabs.
Click
 to collapse all of the e-doc tabs.
Click  or
or  on tabs to expand or collapse an individual tab.
Alternatively, click the arrows on other e-docs:
 |
All required fields in an e-doc are denoted with an asterisk. You cannot submit the document until all required fields contain data.
 |
Dates must be specified in mm/dd/yyyy format. Alternatively, you
may select a date by clicking the calendar  (
( in OLE built documents) and selecting from the calendar that is
subsequently displayed.
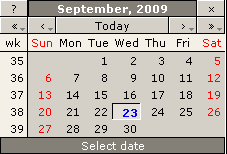
or
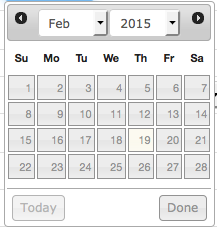
Since OLE is a web-based application, hyperlinks and icons are used for navigation. Clicking hyperlinks and icons allows you to drill down into document detail and to obtain additional information.
When you click the ![]() (or
(or ![]() ) icon by the title in the top left corner of an e-doc or
other screen, the help system will display information about and instructions
for working with the screen.
) icon by the title in the top left corner of an e-doc or
other screen, the help system will display information about and instructions
for working with the screen.
The round magnifying glass or 'lookup' icon  (or
(or  ) allows you to look up reference table information so you
avoid data entry errors.

After you click the icon, the system displays a list of valid values for you to select from or connects you to a form that allows you to search for the value you need.

To look up valid values in this form:
Enter one or more search criteria or leave all search criteria fields blank to retrieve all. To specify search criteria:
Type data into any combination, all, or none of the listed search fields. (Most search fields change letters to uppercase for the search.)
If you know the exact words or phrase, enter the text wrapped in quotes.
Use * only at the end of a word and only when you have entered a single word in the field
If desired, to enter a range of numbers or dates, use any of these range operators: >, <, >=, <=, and ..Note that the .. operator may be used only between two date values. It may not be used with a single date. All other operators are used before single dates.
Specify dates in the format mm/dd/yyyy. Using logical operators & (AND) and | (OR) with multiple search parameters.
Click
 .
.OLE displays the list of applicable values that you have requested. After the value list is displayed, you may take one of the following actions by clicking the hyperlinks labeled a and b below.
In KFS-inherited screens:

In OLE-built screens a new pop-up window appears. Lookup result lists appear like this:

(a) Click return value to select the code.
(b) Click the name of a column, or the arrows, to sort the retrieved values by that column.

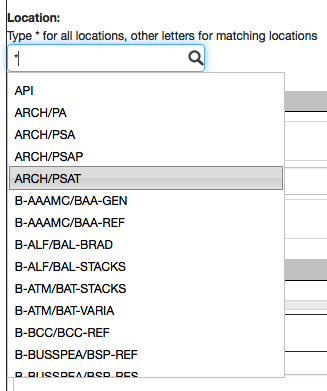
When the lookup  appears within the text box, this means it is an
autocomplete field. Begin typing your data and a dropdown will appear to
suggest data to enter. You may also type "*" (the asterisk key) to view all
options.
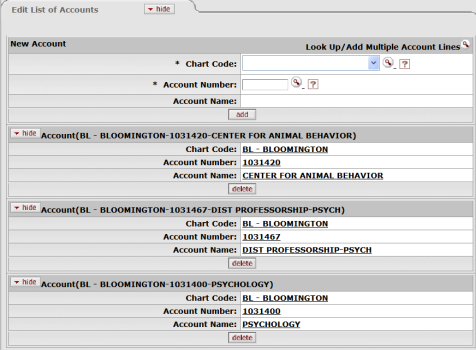
In global Chart of Account e-docs, documents requiring a list of values come
with a special multiple value lookup screen where you may select multiple values
from the search list. The Look Up / Add Multiple xxx
Lines
 (where xxx is the name of the attributes you are updating)
link is available in the applicable section of the tab where this feature is
available.

The Look Up / Add Multiple xxx Lines
 takes you to a special search screen where you are given an
opportunity to build a list of values from which you may choose one or more
values by selecting the check boxes in the rightmost column.
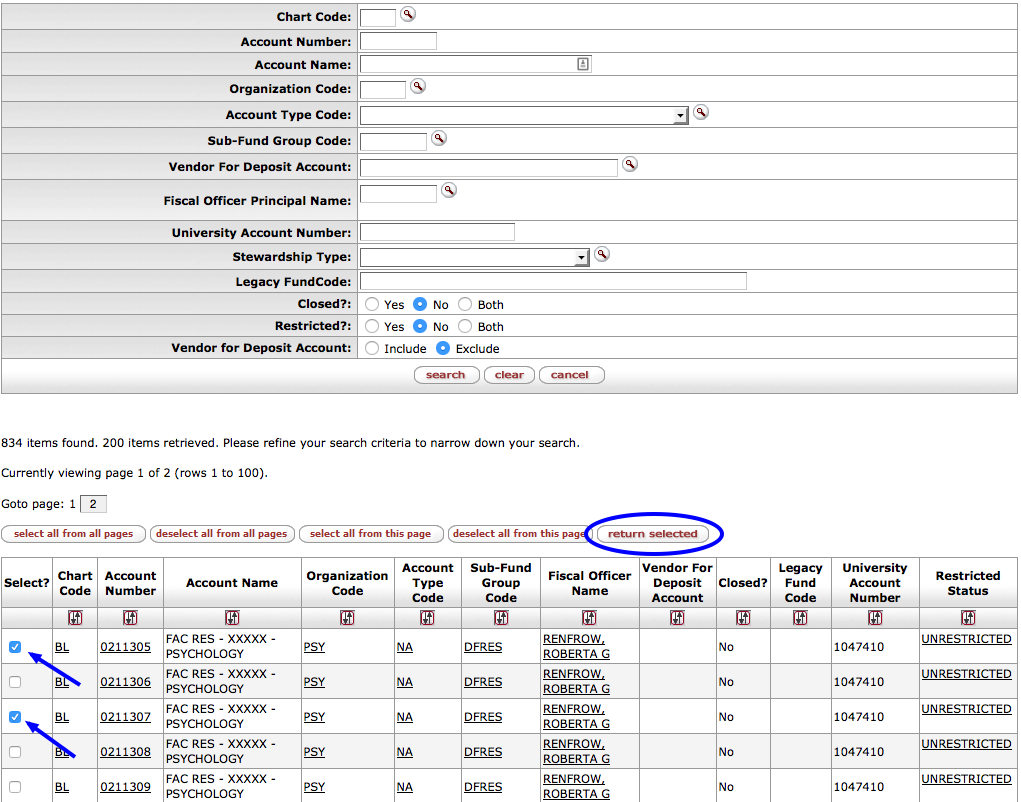
Click a select all option to select all values in the list or on the page.
Click a deselect all option to clear the check boxes for all values in the list or on the page.
Clicking  returns you to the tab you came from without populating the
tab.
In the KFS-inherited e-docs, to export the result of the table lookup to your local computer in CSV, Excel, or XML format:
Click the export option link for the format you want.

On OLE-created documents, the same options are available above the results list.

The system prompts you to click Open, Save, or Cancel.

Click one of the buttons and follow the standard prompts.
After you perform a search in KFS-inherited, financial documents, the system displays a link or icon in the list of retrieved data. You can 'drill down into' (that is, display) details for any of the linked items. Standard drill down features in OLE include the following.
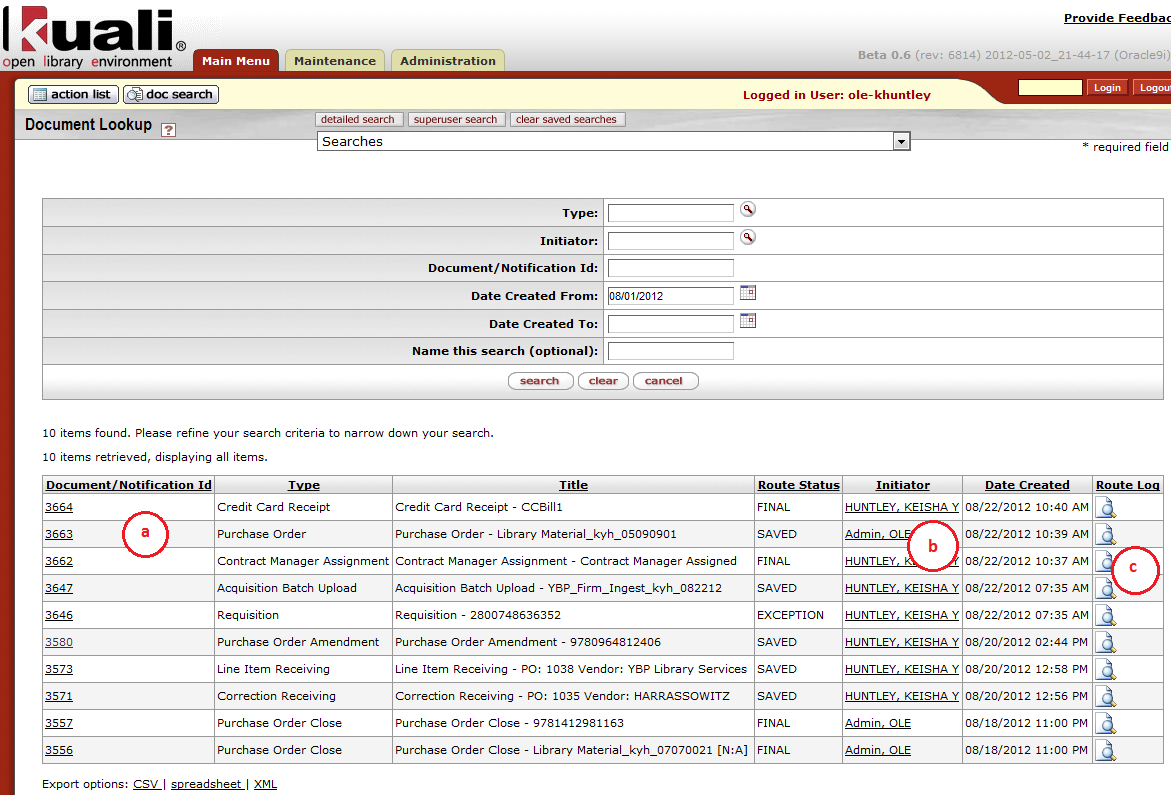 |
Document ID drill down: (a) Clicking the Document ID link retrieves the specified document so you can view or edit it.
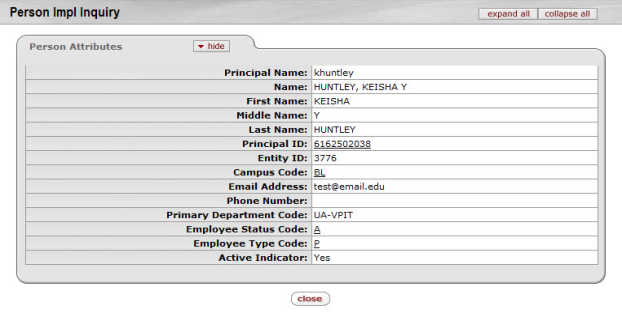
User drill down: (b) Clicking a linked user ID takes you to a Person Impl Inquiry report.
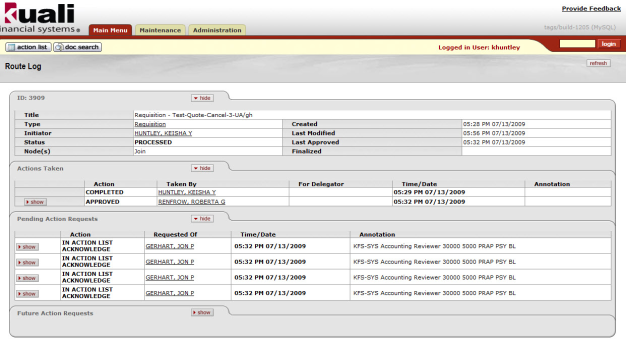
Route log lookup: (c) Clicking the Route Log icon
 takes you to the OLE Route Log for the document in
this row. The Route Log contains two tabs summarizing routing
activities. The Action Taken tab logs
prior events and the Pending Action
Requests tab logs known future events, from which you can
see current Workflow action requests.
Note
For more information, see Route Log
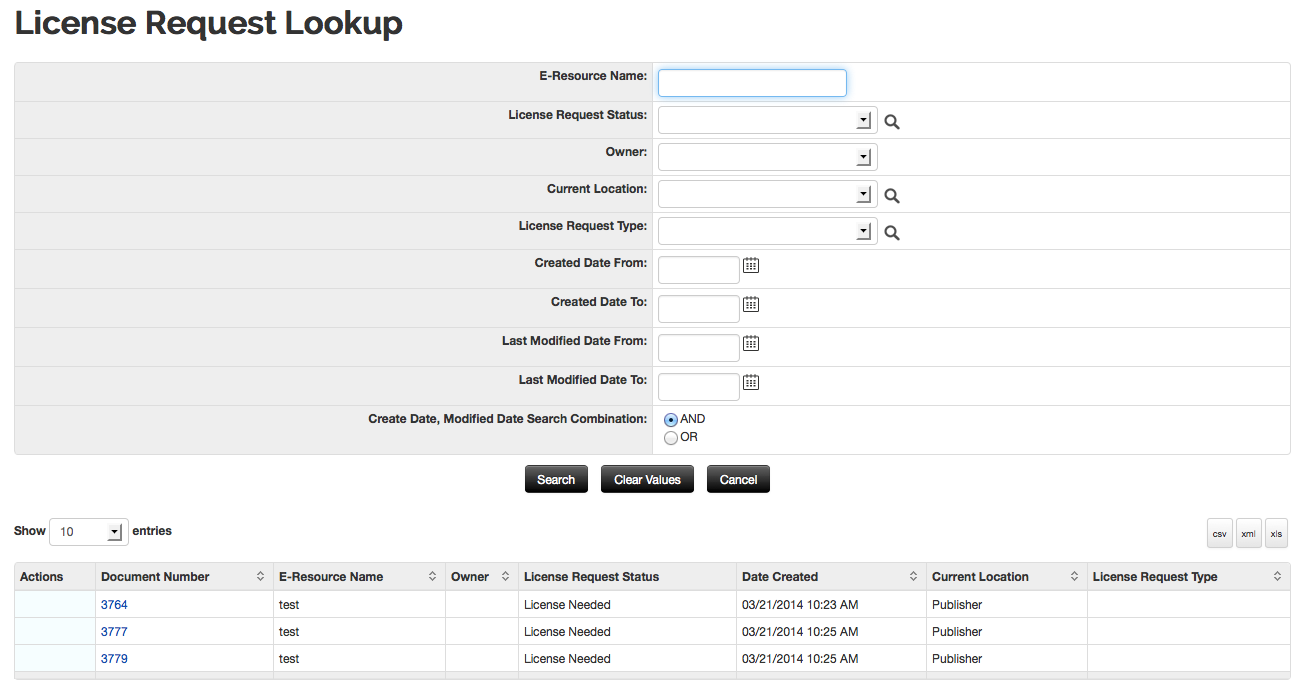
To augment library workflows, search results are not as standard in the OLE-build documents. However from the search results listed there are links in blue to drill down into.
 |


