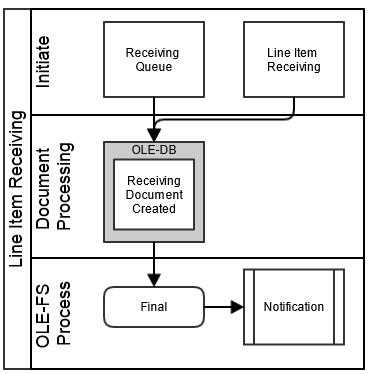
Table of Contents
- Introduction
- 1. Accessing Purchasing and Accounts Payable Functions
- 2. Batch Processes
- 3. Ordering Materials: Standard Transactional E-Docs
- 4. Paying for Materials: Standard Transational E-Docs
- 5. Receiving Materials: Standard Transactional E-docs
- 6. Fund
- 7. Acquisitions: Standard Transactional Documents
- 8. COA Attribute Maintenance E-Docs
- 9. Standard COA E-Docs
- 10. Vendor (and Document Searches)
- 11. Vendor Attribute Maintenance E-Docs
- Address Type
- Campus
- Commodity Code
- Contact Type
- Contract Manager
- Cost Source
- Ownership Type
- Ownership Type Category
- Payment Terms Type
- Phone Type
- Shipping Payment Terms
- Shipping Special Conditions
- Shipping Title
- Supplier Diversity
- Vendor Inactive Reason
- Vendor Search Alias Type
- Vendor Transmission Format
- Vendor Transmission Type
- Vendor Type
- 12. Importing Records
- 13. Purchasing/Accounts Payable Maintenance E-Docs
- Billing Address
- Carrier
- Category
- Delivery Required Date Reason
- Electronic Invoice Item Mapping
- Exception Type
- Format
- Funding Source
- Invoice Sub Type
- Invoice Type
- Item Price Source
- Item Reason Added
- Item Type
- Method of PO Transmission
- Negative Payment Request Approval Limit
- Note Type
- Organization Parameter
- Order Type
- Payment Method
- Payment Request Auto Approve Exclusions
- Purchase Order Contract Language
- Purchase Order Item Status
- Purchase Order Quote Language
- Purchase Order Quote List
- Purchase Order Quote Status
- Purchase Order Vendor Choice
- Receiving Address
- Receiving Threshold
- Recurring Payment Frequency
- Recurring Payment Type
- Request Source Type
- Requisition Source
- Sensitive Data
- Vendor Stipulation
- Licensing Requirement
- Authentication Type
- Access Location
- E-Resource Status
- Package Type
- Package Scope
- Material Type
- Access Type
- Content Type
- Payment Type
- Request Priority
- General Ledger Introduction
- GL Inquiries: Basic Information
- General Ledger Entry
- Available Balances
- Globally Protected Field
- 14. Licensing Overview
- 15. Standard Licensing E-Docs
- 16. License Maintenance Documents
- 17. Agreement Maintenance Documents
- 18. Appendix
List of Tables
This guide provides information about using Select and Acquire functions.The Select and Acquire module encompasses selection, purchasing, receiving, and payment for all library materials, both print and electronic. Full financial and budgeting structures, batch importing of vendor and bibliographic recors, and tools supporting the lifecycle of electronic recourses are incorporated in the module.
Note
To learn more about the Select and Acquire Module, see the Select and Acquire Overview on theOLE Documentation Portal.
This guide is organized to follow the layout of the Select/Acquire tab followed by the Licensing tab. Please note there is a slight difference in Select/Acquire documentation. To follow the workflow, the documentation covers Order, Paying, Receiving and then returns to addressing each submenu in columns.
Order provides access to the requisitions, purchase orders, and the order holding queue. Users initiate requisitions which become purchase orders sent to vendors.
Paying provides access to invoices and credit memos. Users are able to invoice vendors or receive money back via the credit memo.
Receiving provides access to mongraphic and serial receiving.
Fund allows users to manage library funds.
Acquisition provides access to search and edit payment requests, create general error corrections and disbursement vouchers, and search and edit E-Resources.
Chart of Accounts contains the maintenance documents associated with the chart of accounts documents.
Lookup and Maintenance provides access to the chart of accounts documents: accounts, subaccounts, organizations, objects and subobjects.
Vendor provides access to vendor records as well as to search bibliographic records and acquisition documents.
Vendor (2nd submenu) contains the maintenance documents associated with the vendor document.
Import provides access to import batch marc and vendor files and view reports of these loads.
Purchasing/Accounts Payable contains the maintenance documents associated with ordering, paying, receiving, and e-resources as well as general ledger entry and available balances lookups.
On the Licensing tab:
Licensing provides access to the license request document.
Licensing Admin contains the maintenance documents associated with license requests.
Agreement Admin contains the maintenance documents associated with agreements.
These sections are divided into subsections covering individual functions. For each function, the applicable subsection presents a breadcrumb trail showing how to access the function and information on the layout and fields on the related screen(s). As appropriate, some subsections include business rules and routing information for e-docs and/or special instructions for performing activities.
Note
In order to work efficiently in the system’s Select/Acquire and Licensing screens, you need to understand the basics of the user interface. For information and instructions on logging on and off, navigating, understanding the components of screens, and performing basic operations in the screens, see the OLE Basic Functionality and Key Concepts.
This guide as well as guides to other OLE modules are available for download from the OLE Documentation Portal.
Tip
Bookmark any page within OLE. This will allow you to easily navigate back to an interface or e-doc in one click, just log in.
The Kuali OLE Purchasing and Accounts Payable module includes several e-docs to help your institution manage its procurement processes. Kuali OLE users may initiate Requisition e-docs to request that orders be placed for goods or services. Fully approved Requisition e-docs are then processed by departmental staff and then become purchase orders (POs). Under certain conditions (specified by your institution's business rules in Kuali OLE), fully approved requisitions may become POs automatically without any additional processing.
Each PO is an official request for goods or services to a specified vendor for an agreed-upon cost. After goods are delivered or services rendered, Kuali OLE allows for the processing of vendor invoices through the Payment Request e-doc, which applies full or partial payment against a PO. Credits received from vendors may also be processed on a Credit Memo e-doc. Both payments and credit memos may then be applied to outstanding invoices when payment is due.
Purchasing and Accounts Payable e-docs are accessible from the Select/Acquire tab.
Users do not interact directly with OLE batch processes, but some users want to understand how these processes keep the data base up to date. For users who are interested, the following table summarizes the functions of the system’s Purchasing/Accounts Payable batch processes. These processes, which are run according to a predetermined schedule, not only keep your data base up to date but, in some cases, generate new e-docs as needed to make certain types of adjustments.
Note
These batch processes continue to be reviewed into the 1.0 release.
Purchasing and Accounts Payable Batch Jobs
|
Job Name |
Description |
|
approveLineItemReceivingJob |
If unordered items have been received and noted when doing line item receiving, Purchasing and Accounts Payable attempts to create a Purchase Order Amendment e-doc to adjust for the new items. If a purchase order cannot be amended for some reason (for example, if it is closed or has pending payment requests), this job rechecks each time it is run and creates the Purchase Order Amendment e-doc as soon as it is allowed to do so. |
|
autoApprovePaymentRequestsJob |
Automatically approves payment request documents with a current or past pay date. |
|
autoClosePurchaseOrdersJob |
Closes open purchase orders with no remaining encumbrance. |
|
autoCloseRecurringOrdersJob |
Looks at the end date on a recurring order (that is, a purchase order with a recurring payment type not equal to null). If this date is less than or equal to the date defined in the AUTO_CLOSE_RECURRING_PO_DATE parameter, it closes the purchase order and disencumbers any outstanding amounts. |
|
electronicInvoiceExtractJob |
Examines and validates invoices uploaded electronically by vendors. Creates Payment Request e-docs for valid invoices and creates Electronic Invoice Reject e-docs for invalid invoices. |
|
faxPendingDocumentJob |
Not yet supported by OLE; this job is a placeholder for a process used by Indiana University. (POs are queued electronically to be sent via fax, and this job runs every 15 minutes. If there is a problem with the fax device, the job fails. If the fax device is working normally, the POs are faxed.) |
|
purchasingPreDisbursementExtractJob |
Extracts all eligible and approved Payment Request and Credit Memos e-docs into the Pre-Disbursement Processor (PDP) for payment. |
|
purchasingPreDisbursementImmediatesExtractJob |
Extracts eligible and approved payment requests and credit memos flagged for immediate payment into the Pre-Disbursement Processor (PDP) for payment. |
|
receivingPaymentRequestJob |
If using receiving and if a payment request is entered that exceeds the open quantity on the purchase order, the payment request is held in "Waiting on Receiving" status. This job checks payment requests held in this status and releases them for normal routing when the purchase order has a sufficient open quantity. |
|
approveLineItemReceivingJob |
If unordered items are received when doing line item receiving, Purchasing and Accounts Payable attempts to create a Purchase Order Amendment e-doc to adjust for the new items. If the purchase order cannot be amended for some reason (for example, if it is closed or has pending payment requests), this job rechecks every time it is run and creates the Purchase Order Amendment e-doc as soon as it is allowed to do so. |
|
autoApprovePaymentRequestsJob |
Automatically approves payment request documents with a current or past pay date. |
|
autoClosePurchaseOrdersJob |
Closes open purchase orders with no remaining encumbrance. |
|
autoCloseRecurringOrdersJob |
Looks at the end date on a recurring order (that is, a purchase order with a recurring payment type not equal to null). If this date is less than or equal to the date defined in the AUTO_CLOSE_RECURRING_PO_DATE parameter, closes the Purchase Order and disencumbers any outstanding amounts. |
Table of Contents
 >
> >
>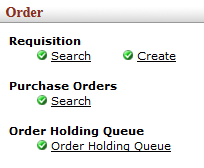
On the Select/Acquire tab, the Order submenu provides access to request and order library materials.
 >
>  >
> >
>
OLE offers a customized document search related to electronic requisitions. The search screen contains the standard search fields along with special fields that are unique to this type of e-doc.
Note
For information about performing a search for one or more requisitions, see Performing Acquisition Searches on the OLE E-Doc Fundamentals wiki page.
Note
For information about Document lookup fields that are specific to requisitions, see “Document Layout” under Requisition.
 >
> >
> >
> >
>
All orders begin in OLE as Requisitions. Requisitions or imported vendor files are processed into Approved Purchase Orders, or can be saved in support of ongoing Selection activities.
Log into OLE using one of the following IDs based on the level of permission you have selected to test drive.
Note
Note: As you open the application, OLE will automatically log in as ole-khuntley. When logging in as a new user, you do not need to first log out.
Anyone can create a requisition for routing. Users who can create a requisition, that, when all required fields are entered and business rules are satisfied, becomes an automatic/approved Purchase Order transmitted to Vendor:
| Role | Login |
|---|---|
| Super user | ole-khuntley |
| Acquisitions-AQ2 | ole-cphovis |
| Acquisitions-AQ3 | ole-cstan |
| Acquisitions-AQ4 | ole-earley |
| Acquisitions-AQ5 | ole-ejacob |
Note
Currently any authorized user of a Requisition e-Doc can process it into an Automated Purchase Order if all business rules and required fields are satisfied for firm, fixed orders. In future, the inherited routing rules and business rules will continue to be modified to prohibit Selection-staff from submitting an order (i.e., via Account codes).
The Requisition (REQS) document collects information about the desired items or services, possible vendors to fulfill the order, delivery instructions, contact information, and related accounting details. The approved Requisition document is used to generate the purchase order. Authorized users can process requisitions to Automated Purchase Orders for firm fixed orders
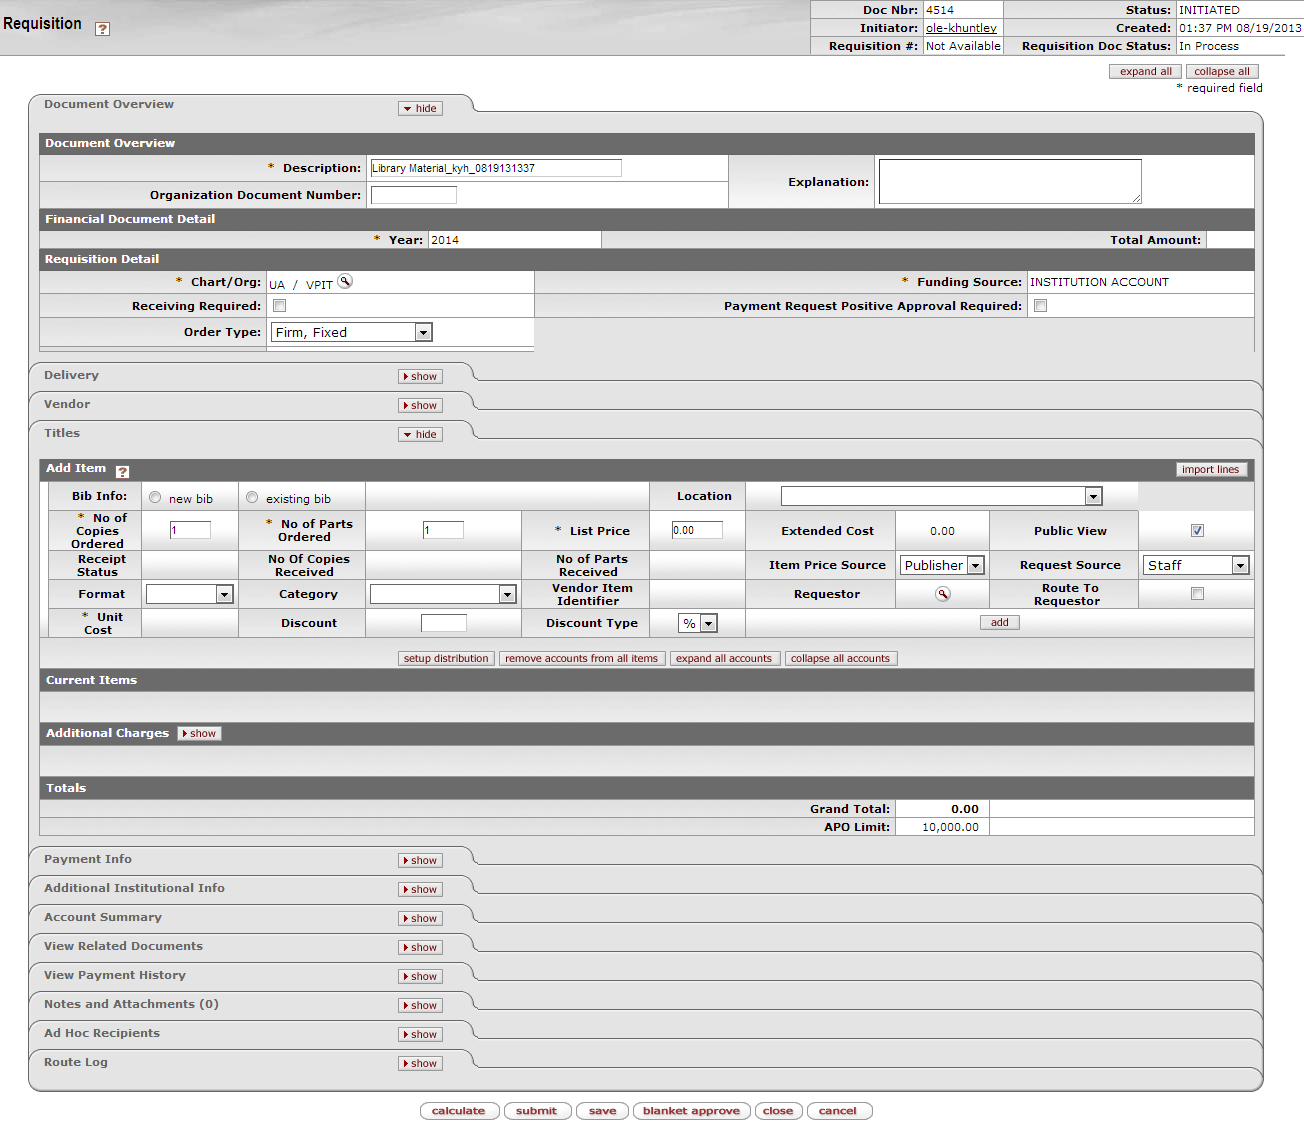
The Requisition document includes several unique tabs—Delivery, Vendor, Titles, Payment Info, Additional Institution Info, Account Summary, View Related Documents, and View Payment History.
Unlike a standard financial e-doc, there is no Accounting Lines tab, and the document header and the Document Overview tab are slightly different.
Requisition document tabs and purposes
|
Tab Name |
Purpose |
|
Document Overview |
In addition to the standard document overview information (description, explanation, and organization document number), contains the fiscal year, line item receiving requirements, order types, , funding source, and the payment request positive approval required override flag, license requirement or review flag and status. |
|
Delivery |
Contains information about the final delivery and central receiving addresses. |
|
Vendor |
Suggests a vendor or a list of vendors who might provide the goods or services being requisitioned. |
|
Titles |
Identifies what is being ordered on this requisition and establishes an accounting distribution indicating how those items should be charged. |
|
Payment Info |
Indicates the type of payment schedule required and the duration of that schedule if recurring payments are required for the items on this requisition. |
|
Additional Institutional Info |
Collects information about the organization at your institution that has requested the goods or services for this requisition as well as the internal contact information. |
|
Account Summary |
Summarizes the accounting information for all line items on the requisition. The line items that make up the summary display here. |
|
View Related Documents |
Lists all documents related to a requisition, such as the purchase order, receiving documents, payments, credit memos. |
|
View Payment History |
Lists all payment requests and credit memos related to a requisition document. |
As in other OLE documents, the header section contains basic identification and status information about the document as well as who created it. The Requisition document has two additional fields in the document header that do not appear in other OLE documents: REQ Nbr and REQ Status.
Like the other fields in the document header, these fields are completed and updated automatically by Kuali OLE.

Document header definition
|
Title |
Description |
|
Requisition # |
An identifying number assigned to this requisition. This number, which may be used for queries specific to the Purchasing/AP module of OLE, differs from the Doc Nbr, which identifies the requisition as a unique document for general OLE and Workflow queries. |
|
Requisition Status |
A status that indicates where in the Purchasing/AP process a requisition is at any given time. This is similar to the status a document receives in Workflow but is specific to the purchasing process. Examples of REQ Status might include 'Awaiting Fiscal Officer,' 'In Process,' and 'Closed'. |
Note
For information about the standard e-doc header, see Document Header on the OLE E-Docs fundamentals wiki page.
Unlike the Document Overview tab in other financial documents, a special Fiscal Year field is included in this tab on the Requisition document because, in some circumstances, users may be able to select from more than one fiscal year to which a Requisition should be applied. The tab also includes the Requisition Detail section, which identifies funding source for this requisition.

Document Overview tab definition
|
Title |
Description |
| Finanacial Document Detail | |
|
Year |
Required. The default is the current fiscal year. This field is not editable until the 'ALLOW ENCUMBER NEXT YEAR DAYS' parameter has been met. Setting the year to the next fiscal year can affect the requisition in several ways. The requisition may not become an APO if the 'ALLOW APO NEXT FY DAYS' parameter has not been met, and the funds will not be encumbered until the next fiscal year once a PO is fully approved. |
|
Total Amount |
Display-only. Displays the total amount of the requisition after fees. |
| Requisition Detail | |
|
Chart/Org |
Required. Automatically completed based on the initiator's chart/org. This
value may be changed manually via the lookup |
|
Receiving Required |
Optional. Select the check box to ignore the receiving thresholds on the approved purchase order. If the field is checked, then a Line Item Receiving document must be processed with sufficient quantities received before a payment will route to the fiscal officer. |
|
Order Type |
Identifies the type of order, possible values could be one-time, standing, subscription. System default data value is "Firm, Fixed". |
|
Funding Source |
Required. Defaults to 'Institution Account'. |
|
Payment Request Positive Approval Required |
Optional. The 'DEFAULT POS APPRVL LMT' parameter determines the dollar limit where payment requests must receive positive approval from a fiscal officer. If this field is selected, positive approval on the payment request is required regardless of the total of the payment. |
The Delivery tab contains information about where goods ordered on this requisition should be delivered. It also collects delivery contact information and any special delivery instructions. The system provides two ways for you to specify the delivery address: select the building from the building lookup or enter a different address by entering the address after selecting the Other Building option.
Note
When implementing OLE, libraries can update the Building maintenance e-Doc with their own building designations.
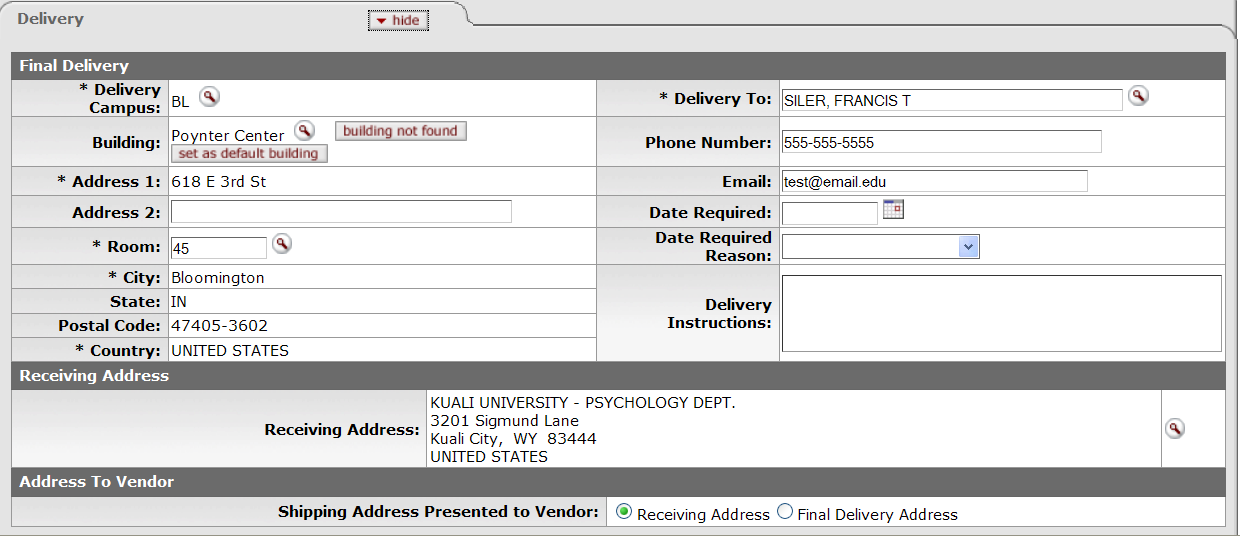
Delivery tab definition
|
Title |
Description |
|
Delivery Campus |
Required. Defaults to the appropriate campus for the user's chart/org. You
may also search for another campus from the Delivery Campus lookup |
|
Building |
Required. Search for the building to which goods should be delivered from
the building lookup |
|
Address 1 |
Required; automatically populated from data for the Building value. May be entered manually if the user selects the Building Not Found button. |
|
Address 2 |
Optional. Entered manually if an additional line of address is needed. |
|
Room |
Required. Enter the room number to which delivery should be made. |
|
City |
Required; automatically populated from data for the Building value. May be entered manually if the user selects the Building Not Found button. |
|
State |
Required; automatically populated from data for the Building value. May be entered manually if the user selects the Building Not Found button. |
|
Postal Code |
Required; automatically populated from data for the Building value. May be entered manually if the user selects the Building Not Found button. |
|
Country |
Required; Automatically populated from data for the Building value. May be entered manually if the user selects the Building Not Found button. |
|
Delivery To |
Required. Defaults to the initiator's user name. You may enter another name
or use the User lookup |
|
Phone Number |
Optional. Automatically populated from the initiator's phone number but may be changed. |
|
|
Optional. Defaults to the initiator's user e-mail address but may be changed. |
|
Date Required |
Optional. Enter a date on which delivery is required or choose the date
from the calendar |
|
Date Required Reason |
Optional. If a date required has been specified, select the appropriate date required reason from the list. |
|
Delivery Instructions |
Optional. Enter text describing any special delivery instructions for the item(s). |
|
Receiving Address |
If this field does not display, it is because the 'ENABLE RECEIVING ADDRESS
INDICATOR' parameter is set to 'N'. If it does display, the default is determined by the receiving
address that has been set up for the initiator's organization. May be changed by using the lookup |
|
Shipping Address Presented to Vendor |
Defaults to the receiving address. May be changed to the final delivery address. NOTE: If this field is read-only, it is because the 'ENABLE ADDRESS TO VENDOR SELECTION INDICATOR' parameter is set to 'No'. |
The Vendor tab includes three sections: Vendor Address, Vendor Info, and Additional Suggested Vendor Names.
In order to generate a PO through the creation of a requisition it is important to search for and select vendors of the type "Purchase Order"
OLE has built in functionality to support both foreign and domestic vendors. Using a foreign vendor will require you to take the extra step of entering the Foreign List Price (illustrated in the instructions below).
Tip
To prepopulate vendor information, enter the Vendor Alias
Name and click 
Foreign and Domestic Vendor Options
|
Vendor name |
Vendor alias name |
Foreign/domestic |
|
Aleph-Bet Books |
ABB |
Domestic |
|
D. K. Agencies (P) Ltd. |
DKA |
Foreign |
|
Otto Harrassowitz |
HARRAS |
Foreign |
|
YBP Library Services |
YBP |
Domestic |
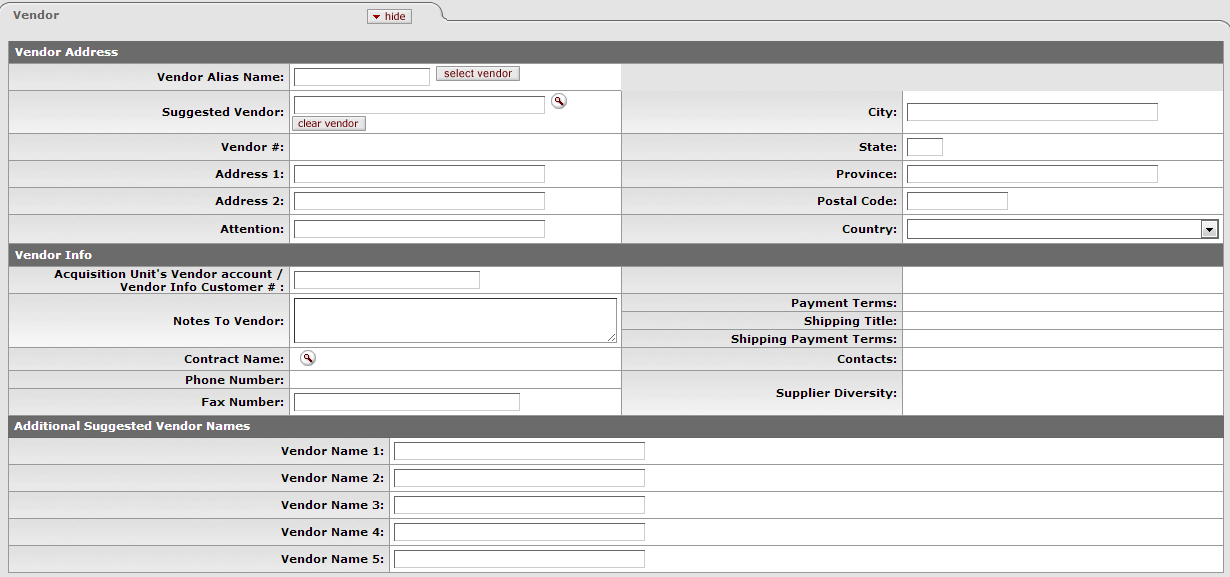
Vendor Address section definition
|
Title |
Description |
| Vendor Alias Name | If you know the vendor's
alias, enter the code in the box and click  . This will prepopulate the Vendor address and information. . This will prepopulate the Vendor address and information. |
|
Suggested Vendor |
Optional. Enter the name of a vendor that is able to fulfill this
requisition or search for it from the Vendor lookup |
|
Vendor # |
Display-only. Completed automatically when a suggested vendor is selected from the vendor table. |
|
Address 1 |
Optional. Enter the first line of the address for the suggested vendor. If
a vendor has been selected from the vendor table this field is automatically populated. If you want
to select a different vendor address than the default, choose one of the addresses entered for this
vendor from the Address lookup |
|
Address 2 |
Optional. Enter the second line of the address for the suggested vendor. If a vendor has been selected from the vendor table this field is automatically populated. |
|
Attention |
Optional. Enter the name of the person to whom the delivery is to be directed. |
|
City |
Optional. Enter the suggested vendor's city. If a vendor has been selected from the vendor table this field is automatically populated. |
|
State |
Optional. Enter the suggested vendor's state. If a vendor has been selected from the vendor table, this field is automatically populated. |
|
Province |
Optional. Enter the province if vendor is located outside of the United States. |
|
Postal Code |
Optional. Enter the selected vendor's postal code. If a vendor has been selected from the vendor table, this field is automatically populated. |
|
Country |
Optional. Enter the selected vendor's country. If a vendor has been selected from the vendor table, this field is automatically populated. |
Vendor Info section definition
|
Title |
Description |
|
Acquisition unit's vendor account/Vendor info customer # |
Optional. Enter a customer number that identifies your institution or department for this vendor's reference Used for reporting and to separate out different library branches or locations' vendor acct information that all links to the same master vendor |
|
Notes to Vendor |
Optional. Include any text notes you want the vendor to see on the PO. |
|
Contract Name |
Optional. If a contract exists with the vendor for these goods or services,
select one from the Contract lookup NoteThe contracts are campus-specific. A requisition returns results only for the campus associated with the Chart/Org found on the Additional Institutional Info tab (see below). Selecting a contract affects the APO limit, depending on how the contract has been set up for the organization. The APO limit is usually increased when a contract is selected. |
|
Phone Number |
Optional. If a vendor has been selected from the Vendor table, this field
may automatically be populated or the Phone Number lookup NoteThe lookup is simply a convenience that allows you to view the phone number. It does not provide a return value link. |
|
Fax Number |
Optional. Enter the selected vendor's fax number. If a vendor has been selected from the vendor table, this field may automatically be populated. |
|
Payment Terms |
Display-only. If a vendor has been selected from the Vendor table or a contract, this field may be populated automatically. |
|
Shipping Title |
Display-only. If a vendor has been selected from the Vendor table or a contract, this field may be populated automatically. |
|
Shipping Payment Terms |
Display-only. If a vendor has been selected from the Vendor table or a contract, this field may be populated automatically. |
|
Contacts |
Optional. If a vendor has been selected from the Vendor table or a
contract, the Contact lookup NoteThe lookup is simply a convenience that allows you to view the contacts list. It does not provide a return value link. |
|
Supplier Diversity |
Display-only. If a vendor has been selected from the Vendor table or a contract, this field may be populated automatically. |
Expand the Titles tab of the requisition to fill in information about the library resource(s) being ordered. On this tab, multiple ordered resources can be added to the requisition by filling in all of the required fields and clicking the add button.
The Titles tab includes four sections: Add Item, Current Items, Additional Charges, and Totals.
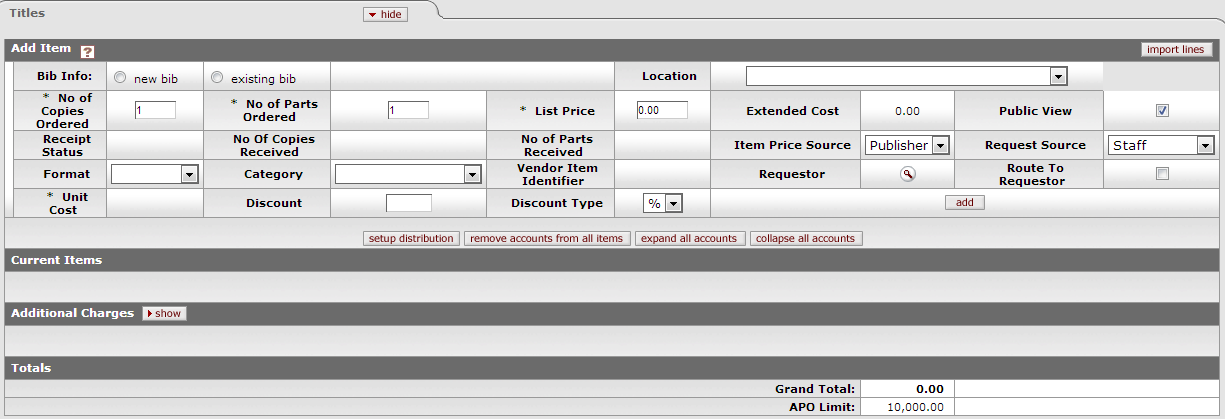
Add Item, Current Items section definition
|
Title |
Description |
|
Bib Info |
Choose the radio button to select to create new or link to an existing. Depending on your choice, a button will appear. Click Click |
|
Location |
Select the location of the item being specified on this line from the dropdown list. |
|
No of Copies Ordered |
Required. Enter the quantity of the item in this field. NoteIf ordering more than on copy, you will need to fill out the copies tab. |
|
No. of Parts Ordered |
This is the number of individual pieces that must be accounted for upon payment/receipt of a requisitioned item. |
|
List Price |
Basic price of an item before any discounts are taken. |
|
Extended Cost |
Display-only. No of Copies ordered multiplied by the list price and minus any discount. |
|
Public View |
Optional. Indicates whether or not a bibliographic description shall be exposed to users prior to purchase/receipt. Default is Yes. |
|
Currency Type |
Display only if foreign vendor is chosen. Identifies the associated vendor's currency as identified on the vendor record that is identified in the Link to Vendor/Supplier. |
|
Exchange Rate |
Display only if foreign vendor is chosen. Currency conversion rate populates from the Exchange rate and Currency Type maintenance tables. The rate will populate when user clicks action button "Calculate" on conversion tab. Optionally: when currency tab opens, currency rate may auto-populate. This may be updated up until the Requisition is approved. After that point, it may no longer be modified. |
|
Foreign List Price |
Basic foreign price of an item before any discounts are taken. |
|
Receipt Status |
Display only. Will reflect receipt status after receiving has occurred. |
|
No Of Copies Received |
Display only. The number of copies already received. This will populate as the document moves through the acquisition workflow. |
|
No Of Parts Received |
Display only. The number of parts already received. This will populate as the document moves through the acquisition workflow. |
|
Item Price Source |
Optional. Select the Price Source of the requested item from the dropdown list. |
|
Request Source |
Optional. Select the Request Source of the requested item from the dropdown list. |
|
Format |
Optional. Select the Format of the requested item from the dropdown list. |
|
Category |
Optional. Select a category for the item from the dropdown list. |
|
Vendor Item Identifier |
Display Only. Identifies a vendor item identifier if one has been provided by a vendor. |
|
Requestor |
Defaults to the selector's user name. If the Requestor is different than
the selector, you may use the Requestor lookup |
|
Route to Requestor |
Optional. Yes/No checkbox to indicate whether a requestor should be notified when the item has been purchased. System default data value is "No". |
|
Foreign Unit Cost |
Display only if foreign vendor is chosen. Calculated foreign cost per unit for the item or service on this line. Calculation is the Foreign List Price less Foreign Discount amount. |
| Unit Cost | The cost per unit. This is populated by the list price. |
|
Discount |
Discount provided by the vendor/customer number/organization combination. Automatically populated from the Vendor customer number table based on the selected vendor and customer number. Can be modified for a specific title. If the vendor record has a Vendor currency noted other than the default system currency (aka US dollar), then the Vendor discount will populate the Foreign Discount field. |
|
Discount Type |
Choose # (for Amount) or % (for Percentage). |
|
Foreign Discount |
Foreign discount provided by the vendor/customer number/organization combination when the vendor record has a Currency Type different from the system default currency. Should be automatically populated from the Vendor customer number table based on the selected vendor and customer number. This data can be changed for the specific title. Must identify the type of discount (amount or %.) If the vendor record does not have a Currency Type noted other than the default system currency (aka US dollar), then the discount should populate the Discount field. |
|
Foreign Discount Type |
Choose # (for Amount) or % (for Percentage). |
|
Actions |
Add or delete lines as appropriate. After a line has been added, it is moved to the Current Items section, where the details may be viewed or modified. |
The Additional Charges tab allows lines for predetermined charges to be included on the payment request. This tab is divided into four charge lines, each representing a different type of charge, each with its own accounting lines, and a series of options through which the amounts added in this section can be prorated to the existing line items in the Current Items sub tab. The four Additional Charges lines are Freight, Shipping and Handling, Minimum Order, and Miscellaneous or Overhead.
Additional Charges section definition
|
Title |
Description |
|
Item Type |
Display-only. Describes the type of miscellaneous item (freight, shipping and handling, etc.) being defined in this line. |
|
Description |
Required if the extended cost has been entered. Enter text describing the additional charges item line. |
|
Extended Cost |
Required. Enter the dollar amount for this item line. |
Totals section definition
|
Title |
Description |
|
Grand Total |
Display-only. This field displays a total of all item lines and miscellaneous item lines. |
|
APO Limit |
Display-only. This field displays the upper dollar limit for the creation of an automatic PO from this requisition. This dollar amount is based on a system default or, if a contract has been specified, on a contract-specific dollar amount. |
Note: If you are using a foreign vendor, you must also fill in the Foreign List Price pertaining to the item. OLE will then calculate for you the US Dollars Unit Cost.
The linked editor will populate the bibliographic information into this Requisition line item using the Title information in the linked/edited bib. If a minimum input is not filled in on the Editor, filling the “Bib Info” field on the requisition line item, then the requisition cannot be approved (later in the process). If you fail to fill in the required information in the linked editor, and attempt to approve this requisition, OLE will display the following error message: Description in Item X is a required field.
Users must complete the line item and linked bib in this sequential order. This will be fixed in future releases.
New bib:
First click
 to launch the Bib Editor in a new tab.
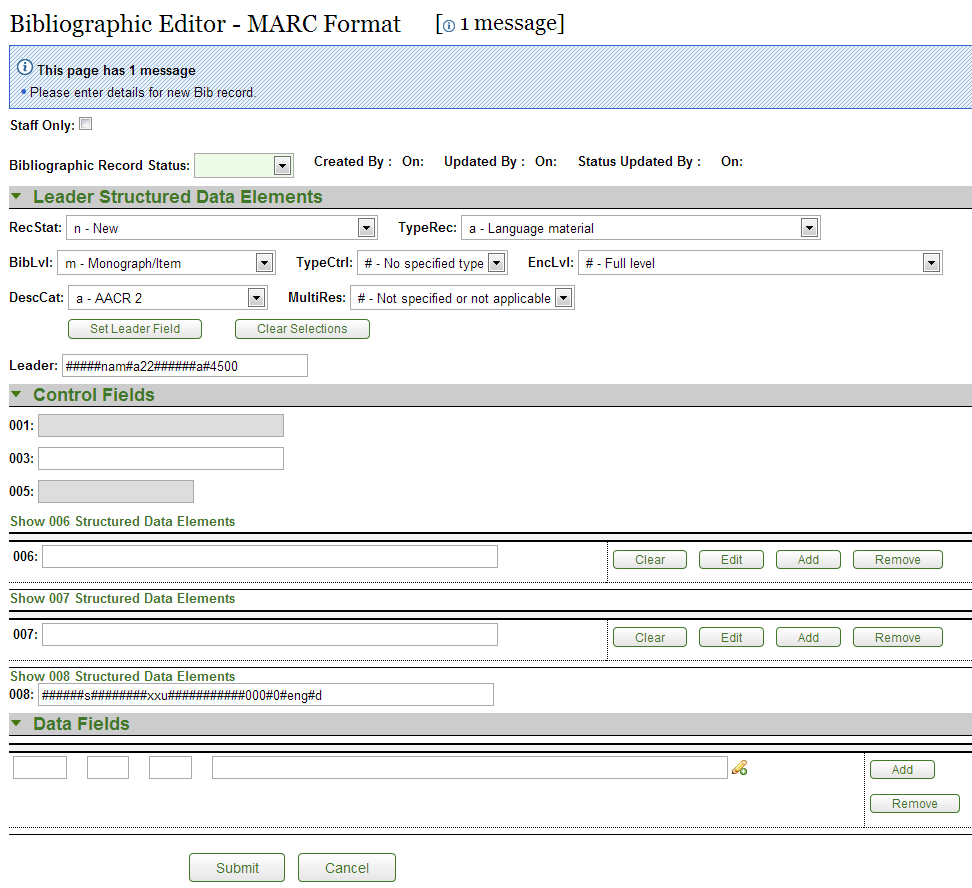
Enter at minimum a 008 and a 245.
Note
For more information about the bibliographic editor, see the OLE Guide to Describe and Manage.
Click
 .
.You will receive a confirmation message “Record successfully created”:
Return to the original browser tab and add transactional data to the line (quantity, price, category etc.).
Note
The bibliographic information will not yet appear.
Click
 to save the line. This will update and link the bibliographic document and
populate the Bib Info field.
Existing Bib:
First click
 to launch the Describe Workbench in a new
tab.
to launch the Describe Workbench in a new
tab.Search for the record you wish to link to the purchase order.

Note
For more information about the Describe Workbench, see the OLE Guide to Describe and Manage.
Select the check box next to the correct bib and click
 .
.Return to the original browser tab and add transactional data to the line (quantity, price, category etc.).
Note
The bibliographic information will not yet appear.
Click
 to save the line. This will update and link the bibliographic document and
populate the Bib Info field.
Editing existing line items:
Click the Edit button to edit the linked bibliographic description of the existing line item. The editor will open in a new tab.
Modify the record as needed.
Click
 .
.Return to the original tab.
You will not yet see your revised Bib Info from the updated bibliographic description, until you complete further actions on the overall purchasing e-Doc, such as save, submit, or blanket approve. If you are only saving your e-Doc, and wish to see Bib Info updates, you may need to save or save and reload the e-Doc AFTER making updates in the bibliographic description in order to update the Bib Info field with linked bibliographic changes - prior to submit or blanket approve.
Note
To learn more about the Editor, see the Editor section in the Guide to Describe – DocStore and Editors. This and other OLE user guides are available for download from the OLE Documentation Portal.
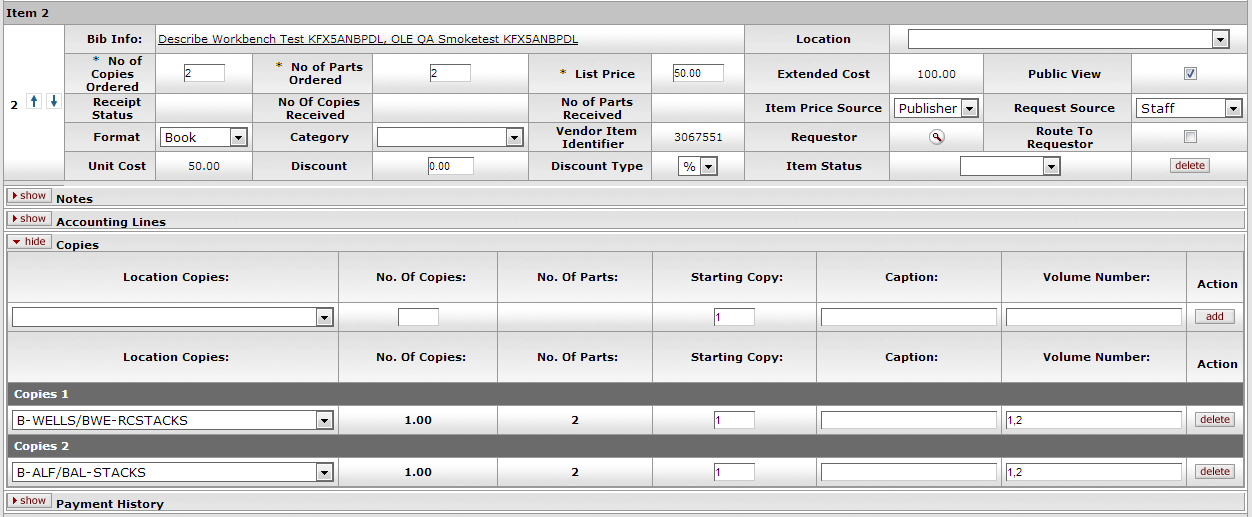
If you enter a number greater than one in No of Copies Ordered, you will be required to enter location data. This section only appears when the field entry is greater than one
In the Copies section, click the  button.

The expanded section appears:

Enter the copy information and click  .
.
Copies section definition
|
Title |
Description |
|
Location Copies |
Select the home location of the title being requested from the dropdown list. |
|
No. of Copies |
Enter the number of copies that will exist at the location selected. |
|
No. of Parts |
Display only. Once copies are added, this field is populated from the No of Parts Ordered. |
|
Starting Copy |
Enter the starting copy for the home location. |
|
Caption |
Optional. Enter a caption. |
| Volume Number |
Enter the volume number for each item. You must enter the volume numbers sequentially for each value needed, separated only by commas with no spacing (For example if 2 copies were ordered for the same location, enter "1,2"). If there is only one volume, you must enter 1. |
In the example below, there are two copies of Describe Workbench Test ordered containing two parts each. One copy will go to the location B-WELLS/BWE-RCSTACKS and one copy will go to B-ALF/BAL-STACKS.
Tip
Note the volume numbers are 1,2. Each number is separated by a comma but no spaces. OLE will also not allow non-numeric characters. If this format is not followed, you will receive an error.
If you have a number of accounts to enter, you may create a .csv file containing the information and import it into the requisition. The template available:
Purchase Requisition (REQS) account import, which uses the Account_Import.xls template
Note
For more information about the layout of these templates, see Account_Import.xls on the OLE Data Import Templates wiki page.
The procedure for accessing and using these templates is much the same as the procedure for using accounting line import templates.
Note
For information on using a template to import items or accounts, see OLE Data Import Templates wiki page.
Accounting distributions for item lines may be created individually or a single accounting distribution may be copied to all line items on the requisition. A valid account string contains a chart, an account and an object code. The account must be active and the expiration date must not have been reached. The object code must be valid. Valid object codes are not only active codes in the object code table but are also not included in the 'OBJECT CONSOLIDATION' parameter. You must ‘Add’ at least one accounting line for each item. If you do not, and attempt to approve this requisition, OLE will display the following error message:Item 1 does not contain at least one account. Adding at least one Accounting Line (with 100 in Percent) to each transactional line item will resolve this error.
To create accounting distributions for individual item lines, follow these steps.
Add the title to the requisition.
In the Accounting Lines section, click the
 button.
Complete the accounting line and indicate a percent of this item line that should be charged to this accounting line.
Note
If there is only a single accounting line for this item the percent should be 100.
Note
You may add an entry to either the Dollar $ or the Percent fields. OLE will calculate the other after you click add. You cannot add entries to both fields.
Click
 to add an accounting line.
 If the items need to be distributed to more than one accounting line, repeat steps 3 and 4.
Note
All the accounting lines should total 100 percent when you have completed their accounting line distribution. If the total percent amount for all of the account lines does not equal 100%, the system will display an error message.
Note
If the account chosen has sufficient funds checking and the threshold is reached, you may be blocked from using the account or you may receive a warning (depending on the chosen notification on the account) when the document is saved and the Fiscal Officer will be notified when the document is submitted.
Note
This process may also be followed to add accounting distribution lines for items in the Additional Charges section. Open the Accounting Linessection for that miscellaneous line item and follow steps 4 and 5 above.
Line item accounting could create a lot of repetitive data entry. For example, if there are 100 line items but only one account/object code and one commodity code is being used, OLE allows you to load the information to all the line items rather than entering the information to each line item. The steps below describe how to distribute this information.
Note
Accounts are distributed only to the line items where there are no accounts listed. This process does not replace the accounts that have been set up for individual line items.
Click
 to add the item line to the requisition.
In the Add Item section, click the
 button.
 The system opens a new Accounting Lines section.
Complete the accounting line and indicate the percent of this item line that is distributed to the items on this requisition.
Note
If there is only one accounting line for this item, the percent should be 100.
The system validates values as you enter them.
Click
 to add the accounting line.
If the items need to be distributed to more than one accounting line, repeat steps 3 and 4.
Note
All the accounting lines should total 100 percent when you have completed the distribution.
Click
 to apply this distribution to all item lines that do not already have an
accounting distribution specified.
to apply this distribution to all item lines that do not already have an
accounting distribution specified.The system displays the top of the document along with a message indicating that the accounts were successfully distributed to all items.
If line items have accounts set up and those accounts need to be modified, the individual accounting lines may be modified by following the steps for creating an accounting distribution for an individual item line as described above.
If you feel that it is more efficient to remove all the accounts, however, use the steps for creating an accounting distribution for multiple line items to recreate the accounting for the line items.
Follow these steps to remove all accounts.
Click
 .
.Click
 in response to the question 'Are you sure you want to remove the accounts from
ALL items?'
in response to the question 'Are you sure you want to remove the accounts from
ALL items?'All the accounting lines are removed.
To expand the accounting lines for all the items in the Current Items
section, click .
.
All the accounts are displayed in full detail.
Note
This is the equivalent of clicking the Accounting Lines show button for each item listed.
The Payment Info tab is used to indicate the type of payment schedule required and the duration of that schedule, if recurring payments are required for the items on this requisition.
The Payment Info tab includes two sections: Payment Info and Billing Address.

Payment Info section definition
|
Title |
Description |
|
Type of Recurring Payment |
Optional. Select the proper recurring payment schedule from the list. Examples might include 'Fixed Schedule, Fixed Amount', 'Fixed Schedule, Variable Amount' and 'Variable Schedule, Variable Amount'. |
|
Begin/End Date |
Required if Type of Recurring Payment has
been selected. Indicates the time period in which the requisition is active. Enter a date or select
the date from the calendar |
The Additional Institutional Info tab collects information about the organization at your institution that is responsible for this requisition. It also collects information on the transmission method and collects contact information.

Additional Institutional Info tab definition
|
Title |
Description |
|
Method of PO Transmission |
Required. From the list, select the PO transmission method that should be used to send the related PO to the vendor. Choices include 'Print' and 'No Print'. |
|
Cost Source |
Display-only. The cost source will always be 'estimate' unless the vendor
was selected from the Contract lookup |
|
Contact Name |
Optional. The name of the person to be contacted if there are questions
about the requisition. Enter a name in the field or search for it from the User lookup TipThe contact name may be used if the requestor should not be contacted with questions. |
|
Contact Phone |
Optional. Enter the phone number of the person specified in the Contact Name field. (Formatted: xxx-xxx-xxxx) |
|
Contact Email |
Optional. Enter the email address of the person specified in the Contact Name field. |
|
PO Total Cannot Exceed |
Optional. This field indicates a total dollar amount that the associated PO should not exceed. |
|
Requestor Name |
Required. The name of the person requesting the good or services. The
default is the initiator. This field may be changed by entering a new name or searching for it from
the user lookup |
|
Requestor Phone |
Required. Enter the phone number of the person specified in the Requestor Name field. (Formatted: xxx-xxx-xxxx) |
|
Requestor Email |
Required. Enter the email address of the person specified in the Requestor Name field. |
|
Reference (1-3) |
Optional. Provide any type of additional reference information you want to include. |
The method of Purchase Order Transmission is set by default to the preferred method in the vendor record. If the method of Purchase Order transmission is selected as No Print, an EDI file representing the purchase order resulting from this requisition will be automatically created and transferred via FTP to a test server. The Print option should be selected if the vendor does not have access to FTP and needs a printed copy of the purchased order. Several of the fields of this tab are automatically populated with information.
Tip
OLE is not persisting a telephone number for ole-khuntley's record – you will need to input a phone number if using her login (formatted: xxx-xxx-xxxx).
The Account Summary tab combines all the accounting information for the item(s) or service(s) on this requisition for easy reference.
Click  to reload the page and view all the fiscal years, accounting lines and dollar
amounts for this requisition.

The View Related Documents tab collects information about the PO payment and credits related to this document. Click the document number to open the document in a new tab.

The View Payment History tab lists all payment request(s) and credit memo(s) issued against the related purchase orders.

Payment Requests section definition
|
Title |
Description |
|
PREQ # |
Display-only. The payment request number. |
|
Invoice # |
Display-only. The invoice number. |
|
PO# |
Display-only. The purchase order number. |
|
PREQ Status |
Display-only. The payment request status. |
|
Hold |
Display-only. The value is 'true' if the payment request is on hold and 'false,' if the payment request is not on hold. |
|
Req Canc |
Display-only. The value is 'true' if the payment request has been canceled and 'false' if the payment request has not been canceled. |
|
Vendor Name |
Display-only. The vendor name. |
|
Customer # |
Display-only. The customer number. |
|
Amount |
Display-only. The payment request amount. |
|
Pay Date |
Display-only. The date to make payment on this payment request. |
|
PDP Extract Date |
Display-only. The date the payment request was requested for processing by the Pre-Disbursement Processor. |
|
Paid? |
Display-only. The value is 'true' if the payment has been disbursed and 'false' if the payment has not been disbursed. |
Credit Memos section definition
|
Title |
Description |
|
CM # |
Display-only. The credit memo number defined in OLE. |
|
Vendor CM # |
Display-only. The credit memo number defined by the vendor. |
|
PREQ # |
Display-only. The payment request number. |
|
PO # |
Display-only. The purchase order number. |
|
Credit Memo Status |
Display-only. The credit memo status. |
|
Hold |
Display-only. The value is 'true' if the credit memo in on hold and 'false' if it is not on hold. |
|
Vendor Name |
Display-only. The vendor name. |
|
Customer # |
Display-only. The customer number. |
|
Amount |
Display-only. The credit memo amount. |
|
APAD Date |
Display-only. The accounts payable approved date (the date the Accounts Payable Review group approved the credit memo). |
|
PDP Extract Date |
Display-only. The date the credit memo was requested for processing by the Pre-Disbursement Processor. |
|
Paid? |
Display-only. The value is 'true' if a payment has been disbursed to which this credit memo was applied and 'false' if it has not yet been included in a payment. |
Note
For information about Notes and Attachments, Ad Hoc Recipients, and Route Log tabs, see Standard Tabs on the OLE E-Doc Fundamentals wiki page.
Open a Requisition document from the Main Menu. By default, the Document Overview tab will be open and several of the form fields will be pre-populated with data such as Description and Year.
Tip
Input a familiar “description” for the document. This input can be used in future search.
In the future, if the Receiving Required field is selected, payment cannot be requested in OLE until the receiving process is complete. However even if you keep Receiving Required un-checked, a Receiving Threshold business rule will offer a secondary business check (i.e., maximum allowable without physical receiving).
Tip
Remember that all required fields are noted with (*) and must be completed to Submit or Blanket Approve (but not Save).
In the Accounting Line section of the requisition form, the required fields are Chart, Account Number and Object.
Suggested Data Values to use:
Chart: BL
Account Number: 2947500
Object Code: 7119
A full set of valid demo values are available in the Chart Code/Account Appendix
When these values are entered into the fields, OLE will look up and display the text value associated with each of the codes.
Warning
Caution: It is important to select the Chart code. The account number and object code look-up will not work properly if the Chart code has not been selected.
Before the requisition form can be submitted, the  button, which appears at the bottom of the screen, must be clicked.
The submit button sends the form to the next person in the workflow chain.
The save button allows you to save the requisition to come back to it later.
The blanket approve button fully approves this requisition without the need for any other approvals. The Blanket Approve button is permissions based - not all sample logins will have this option.
The close button closes this requisition. Clicking the close button will cause a prompt asking you if you would like to save the document before it is closed.
The cancel will completely delete the requisition changes, but will show a warning message first.
If during your creation of a Requisition in OLE you would like to generate a
purchase order without any further approval being required, select  for your requisition. As a result, OLE will automatically create the purchase
order. After clicking the blanket approve button, you will be
returned to the Kuali OLE Main Menu.
Note
While the PreOrder Service is available, a bug has been reported that the error "ERROR: Could not send Message" appears when users submit and requisitions are not created. This is due to be corrected for the 1.0 release.
OLE 1.0 provides a demo web form which is meant to simulate a request that would originate from an implementing Library Website. Because the OLE web form was developed for demo purposes only, the screen does not contain any validations (although it may require the input of a Requestor). The menu item for the web form is labeled PreOrder Service and can be found on the Administration tab, in the Testing Section under Testing:
 >
>  >
> >
>
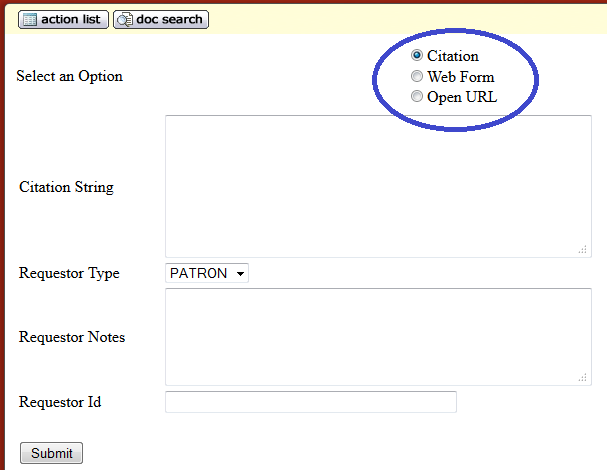
After clicking the PreOrder Service link (as described above), the web form appears. The web form allows you to make a request via Citation, Open URL or based upon item details entered in the web form depending on the option you select within the form:
Note
OLE 1.0 offers simple web form processing and simple citation parsing based on the citation example below, or other simple user/web form inputs. The open-source tools being used for more complex citations and URL resolver are still being debugged, and users may see errors for this functionality still in development.
To submit the web form via Citation, select the Citation radio button and enter your citation into the Citation String field and enter a patron ID in the Requestor Id field. In addition, optionally enter notes in the Requestor Notes field. Then, click the Submit button.
The result will be a confirmation page providing you with a document ID number:

This Document ID can then be used to view the requisition that was created. To
view the requisition, click the current default  button.
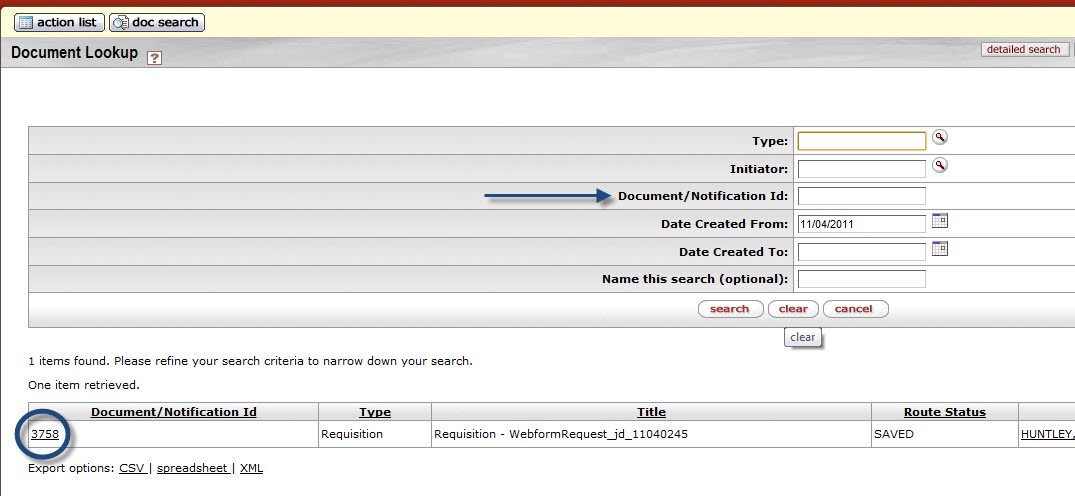
From the Document lookup page you can search for the requisition using the Document ID.
Note
For more information, see Searching OLE on the OLE E-Doc Fundamentals wiki page.
To view the requisition, click the Document/ Notification Id URL.
Note
The current default search does not allow you to search by bibliographic information. However, if you select the Acquisitions Search from the Main Menu, you can use bibliographic search terms.
Note
See the Custom Document Searches section for more information about the Acquisition Search.
This requisition is considered to be in an ‘open’ status requiring staff input and edits. At this stage staff members may conduct additional research to determine if they want to order the item.
The requisition will contain a default description –
“WebformRequest_fl_MMDDHHMM”, where "fl" are the first and last initials of the requestor name
entered on the web form, MM and DD are the Month and Day, and HH and MM are the hour and minute of
the requisition's creation. The bib info of the library resource and requestor name will be a part
of the requisition. To see additional details about the requestor entered through the web form
click the lookup icon  next to the name of the requestor:
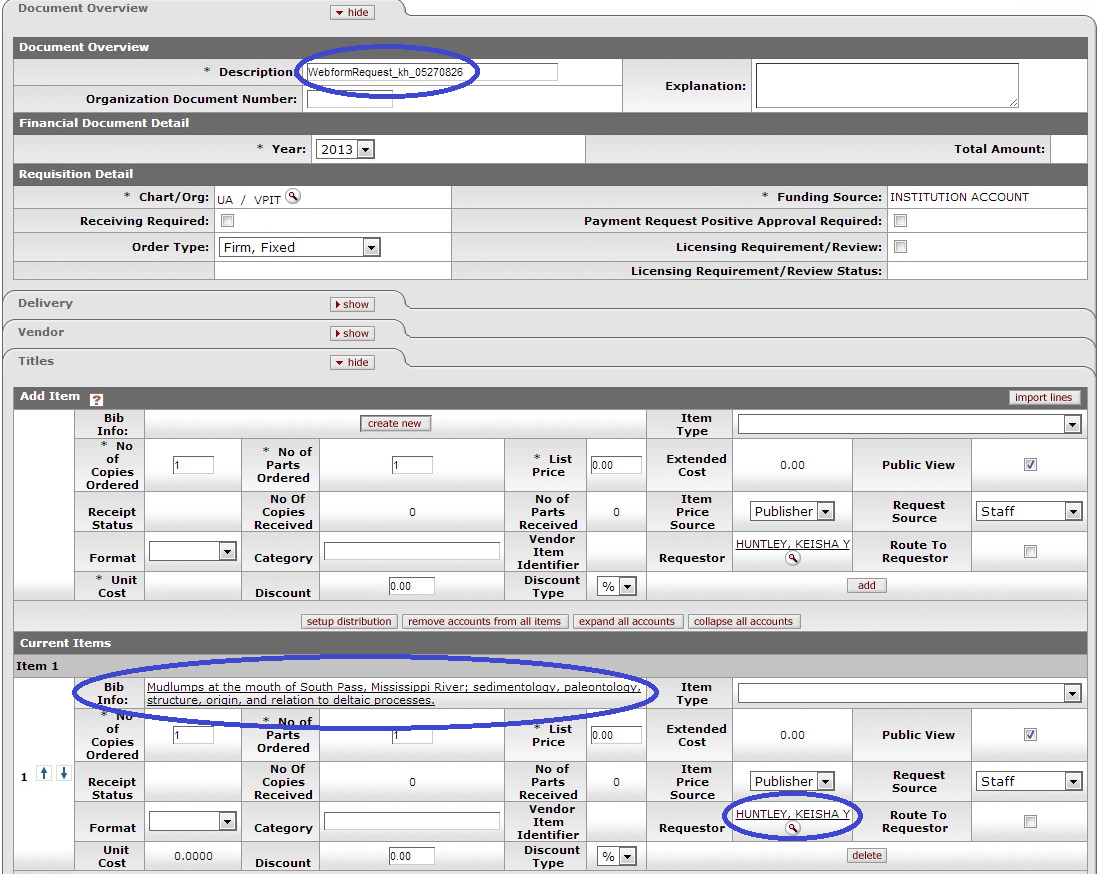
This requisition is partially filled in based on the data entered in the Web form. However, all required fields must be filled in (as described in the Manually Creating a Requisition section above) before the requisition can be approved.
Tip
Citation Sample Data:
Morgan, James P., James M. Coleman, and Sherwood M. Gagliano. 1963. Mudlumps at the mouth of South Pass, Mississippi River; sedimentology, paleontology, structure, origin, and relation to deltaic processes. Baton Rouge: Louisiana State University Press.
In addition to the other required data (such as description, delivery information, and additional details), the requisition must have at least one item on the item tab in order to be submitted to workflow for routing.
If the chart/org on the requisition does not have a content routing rule set up, the requisition routes back to the initiator of the requisition if there are no accounts entered. Otherwise, accounting lines are not required.
Account distributions must exist for all item lines on the document before it may leave the content routing stage.
The Automatic Purchase Order (APO) is automatically generated when a requisition e-Doc is fully approved and all the APO rules are met. APO rules are:
requisition total is less than the APO limit for the departmental organization (value set by Purchasing)
requisition total is greater than 0
there are no restricted items
the vendor has been selected from the vendor lookup
the vendor is not a restricted vendor
the requisition is not a recurring payment type of request
the departmental organization has not set an ' Purchase Order Total Cannot Exceed' amount
the requisition has not added alternate vendor names
the funds will be encumbered in the current fiscal year
the requisition does not contain a trade-in and discount line item
the requisition does not have a capital asset object code on any line items
An APO e-Doc can only be created under certain conditions, as specified in the business rules set up by the institution.
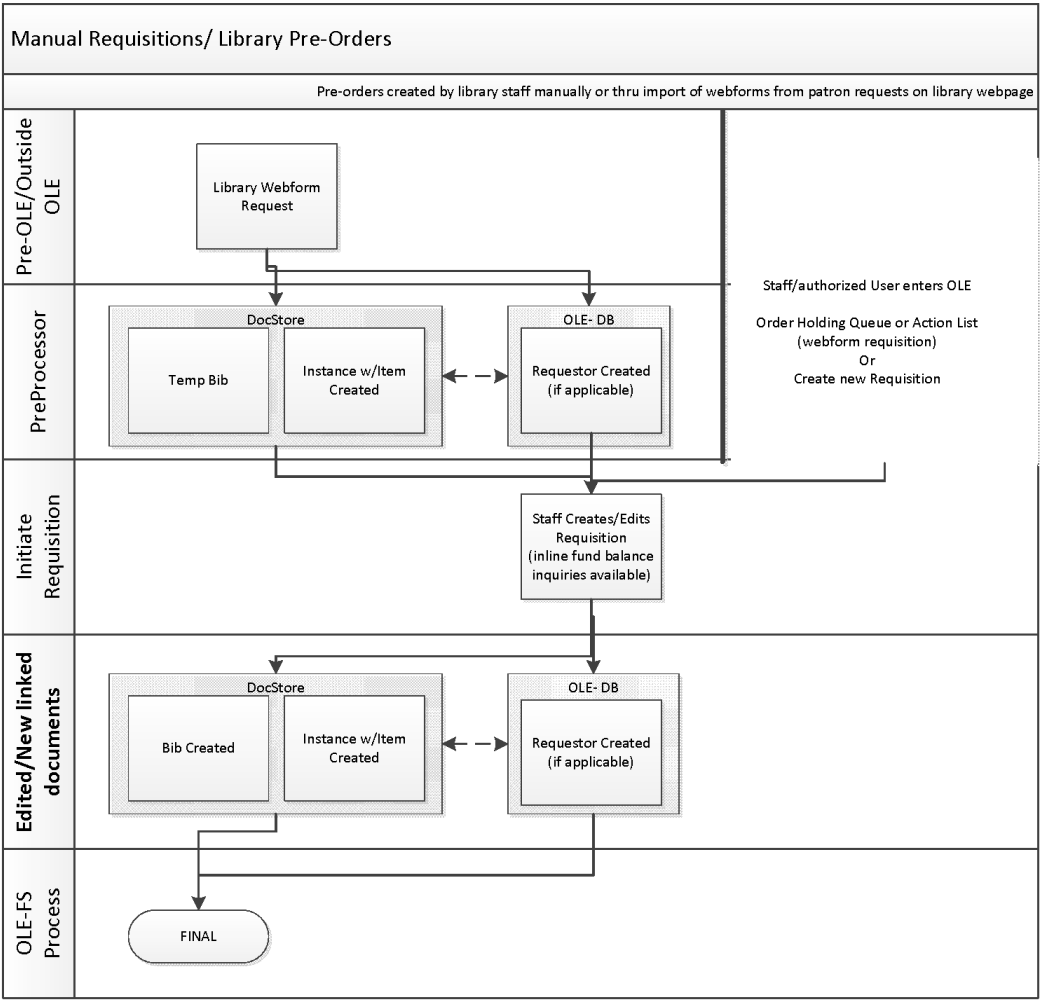
The requisition document routing includes the following special condition routing in addition to the regular account review and organization review hierarchy:
Content routingThis type of routing allows the initiator of a requisition to route an incomplete document and have it completed by another OLE user. Content routing is optional and rules are created based on the Chart and Organization values in the requisition’s Requisition Detail section of the Document Overview tab. A user who receives a document via content routing has a request type of 'Complete' for the document in his or her action list. This user may open the document, complete it and send it into normal routing. Content routing is most commonly used for the completion of accounting information.
Sub-account review The requisition allows for approvers to be defined at the sub-account level. If the requisition uses a sub-account on its accounting lines, Workflow checks to see whether there is a specified routing rule for this sub-account. Users can only approve/disapprove the document at this level. Approvers cannot change content.
Fiscal officer routing: Approvers can modify and/or add accounting lines for accounts that they own; the only other content that can be modified at this level is the Org Document Number field.
Base/org review routing: Optional route level to work groups for the accounts set-up on the document based on the requisition amount total and charts/orgs in use.
Separation of duties: This rule routes a requisition to a defined central approver if the amount of the document exceeds an institutionally defined threshold and there have been no approvers other than the document initiator. This routing ensures that requisitions above a specified dollar amount are approved by at least two users. Approvers can only approve/disapprove. Approvers cannot change requisition content.
If certain criteria are met (low dollar limit, vendor has been selected, etc.), the requisition will be fully approved and will generate an automatic purchase order (APO) and the PO will begin routing.
Based on the rules described in the Additional Workflow Details (above), an approval of a requisition can generate an Automatic Purchase Order (if vendor information was entered into the requisition). To search for an Automatic Purchase Order click the Search link under the Purchase Orders section of the Select/Acquire tab.
From the purchase order screen, you can send notifications using the send ad hoc request button. You can also void order, amend the order, indicate payment hold or proceed to directly to the receiving step by using the buttons at the bottom of the form:

Note
For more information on searching, see Searching OLE on the OLE E-Doc Fundamentals wiki page.
For information about the account review and organization review see Route Levels and Workflow Routing on the OLE Workflow Overview and Key Concepts wiki page.
If you submitted a requisition but the submission did not create a Purchase Order as expected, it may not have met all the rules for APO. To find the Requisition and correct the error, conduct a Requisitions Search.
Note
For more information about Requisition searches, see Custom Document Searches.
 >
>  >
> >
> 
OLE offers a customized document search related to purchase orders. The search screen contains the standard search fields along with special fields that are unique to this type of e-doc.
Note
For information about performing a search for one or more purchase orders, see Performing Acquisition Searches on the OLE E-Doc Fundamentals wiki page.
For information about Document lookup fields that are specific to POs, see “Document Layout” under Purchase Order.
After manually creating a requisition, the next step is to turn it into a purchase order (PO). This finalizes the purchasing decision, and transmits the request to the vendor, through whatever transmission method is defined for that vendor.
The approved Purchase Order (PO) document serves two purposes. Externally it is a legal contract with a vendor to deliver goods or services. Internally it provides the mechanism to generate documents for payments and receipt of goods. It differs from most other OLE documents in three ways:
The PO is not generated by initiating a blank document that is then completed by the initiator. Instead, purchase orders are currently created in one of several ways:
vendor import;
from a Requisition that met the APO rules (automatic purchase order)- after submitting from Requisition or Order (pre order) Holding Queue; or,
upon "exceptions" during submission of a Requisition via Acquisitions staff.
When creating the new PO, the system automatically populates it with information from the related requisition.
The document can be worked on by any purchasing staff member. An 'in process' PO can be edited by any staff member who is a member of the Purchasing Processor, OLE-Acquisitions, or OLE_Selectors roles.
A purchase order can be amended after it is approved. No other OLE document behaves in the manner. Many purchasing organizations refer to this amended PO as a 'change order'.
Note
For more information about modifying an existing PO, see Performing Other Activities on a PO.
PO documents may be retrieved via document search. From this point, the purchasing staff may finalize the details of a purchase order and transmit it via fax, electronically through EDI, or print it for mailing to the vendor.
Note
You may use the regular doc search button to retrieve a PO, but this form of search does not include PO-specific search criteria.
All the same fields from the Requisition will transfer over to the open Purchase Order, as well as additional tabs. Be sure to review and fill in all required fields – a Requisition that failed to become an Automatic Purchase Order is likely to be missing required information such as Vendor, accounting lines, prices.
Note
For more information about a PO search, see Custom Document Searches.
Log into OLE using one of the following test IDs based on the level of permission you have selected to test.
Below are users who can:
Create a requisition that, when all required fields are entered and business rules are satisfied, becomes an automatic/approved Purchase Order transmitted to Vendor
Complete data entry and approval on a submitted Requisition that did not create a Purchase Order
| Role | Login |
|---|---|
| Super user | ole-khuntley |
| Acquisitions staff | ole-fermat |
| OLE_Selector | ole-cstan |
Note
See a complete list of all available users and their permission in the section on switching users on the Navigating Through OLE wiki page.
The PO document contains several unique tabs or unique sections in tabs that appear on all OLE documents : Document Overview (contains unique sections), Delivery, Vendor, Stipulations, Titles, Payment Info, Additional Institutional Info, Quote, Account Summary, View Related Documents, and View Payment History. While some of these tabs may appear in other financial documents, the tabs in a PO document may contain additional information.
Note
For information about the standard tabs such as Document Overview, General Ledger Pending Entries, Notes and Attachments, Ad Hoc Recipients, Route Log, Capital Asset, and Accounting Lines tabs, see Standard Tabs on the OLE E-Doc Fundamentals wiki page.
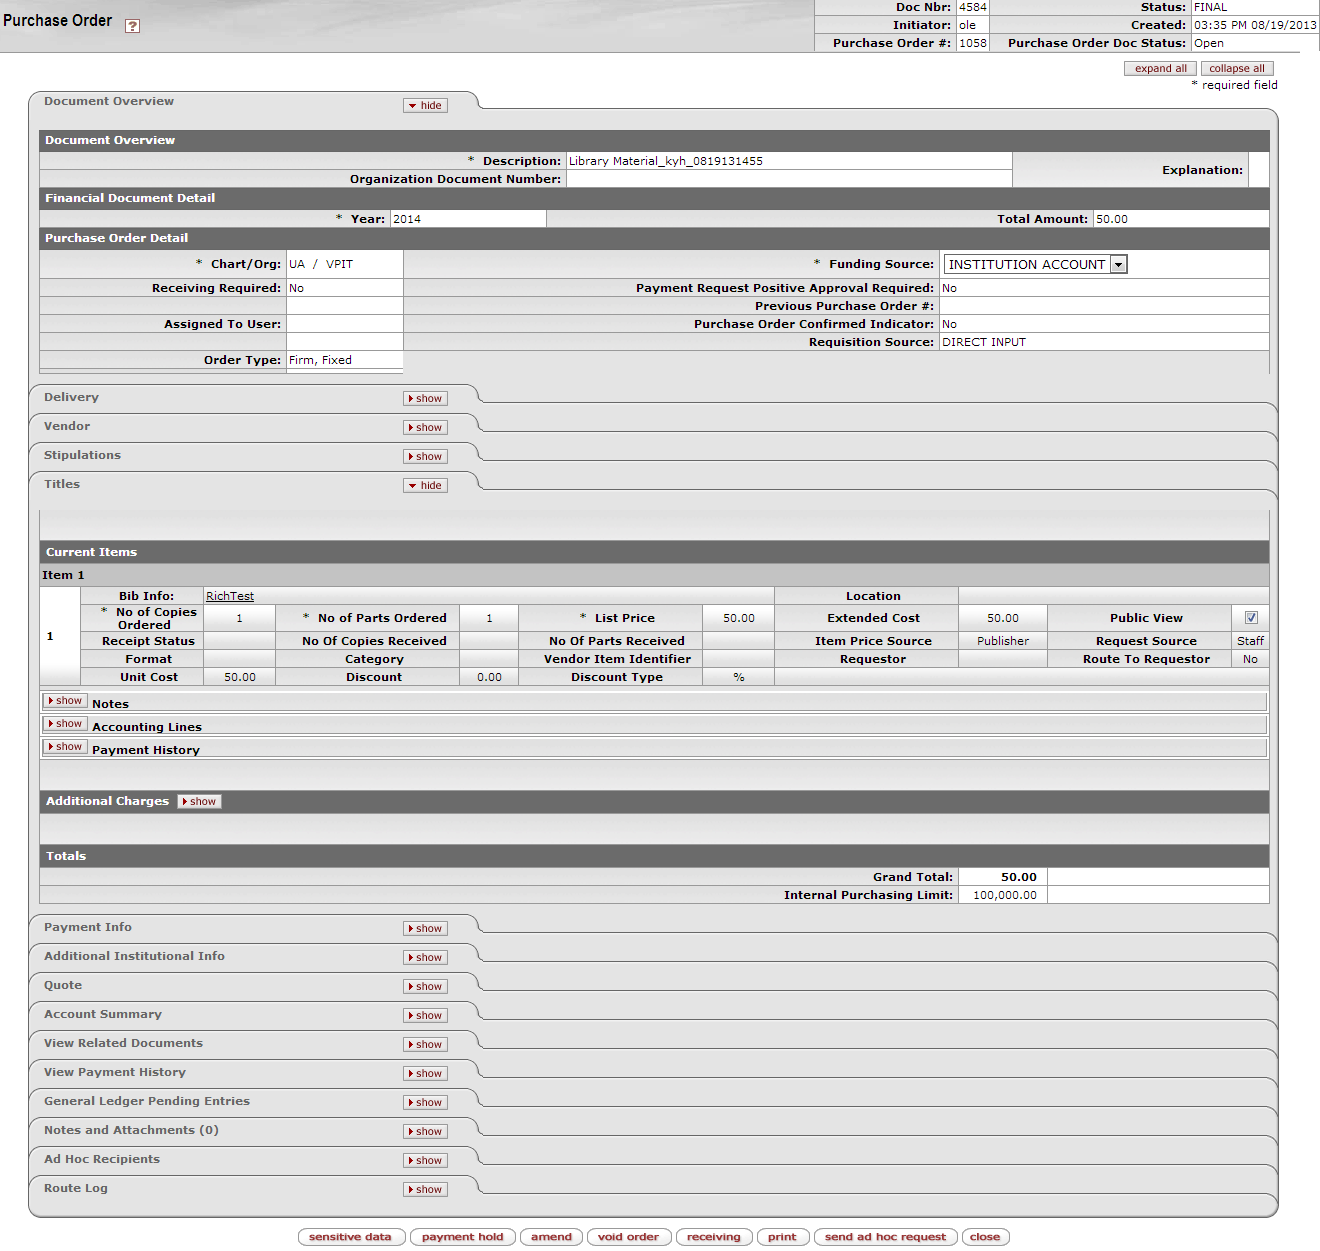
Purchase Order document tabs and purposes
|
Tab Name |
Purpose |
|
In addition to the standard document overview information (description, explanation, and organization document number), contains the fiscal year, line item receiving requirements, order type, funding source, previous purchase order number, the source of the requisition, a way to alter the status of the PO when waiting on information from a vendor or the department, and license requirement information. | |
|
Contains information about the final delivery and central receiving addresses. | |
|
Contains information about the vendor who has been selected to provide the goods or services and the reason the vendor was selected. | |
|
Allows for the entry of stipulations that the vendor filling this PO must follow. May also be used for any additional contractual information that should be added to the PO. | |
|
Identifies what is being ordered on this PO and establishes an accounting distribution indicating how these items should be charged. | |
|
Indicates the type of payment schedule required and the duration of that schedule if recurring payments are required for the items on this PO | |
|
Collects information about the organization at your institution that has requested the goods or services for this PO as well as the transmission method and internal contact information. | |
|
If a quote is initiated in the purchasing process this tab will contain the list of vendors who were invited to participate in the quote process. Each vendor's response, and ranking, along with the name of the vendor awarded the order, is displayed here. | |
|
Summarizes the accounting information for all the line items on this PO. The line items that make up the summary display here. | |
|
Lists all documents related to this PO such as the requisition, receiving documents, payments, credit memos. Also all the various PO documents that are created from the PO when the PO is amended, closed, or open. | |
|
Lists all the payment requests and credit memos related to this PO document. | |
|
Generates a display-only view of the encumbrances that have not yet posted the G/L. This tab may be empty if there are no pending entries. |
As in other OLE documents, the header section contains basic identification and status information about the PO document as well as who created it. However, the PO document has two additional fields in the document header that do not appear in other OLE documents.

These additional fields are defined below.
Document Header definition for a Purchase Order document
|
Title |
Description |
|
Purchase Order # |
An identifying number assigned to this PO. The PO number may be used for queries specific to the Purchasing/AP module of the OLE. This number differs from the Doc Nbr entry, which identifies the PO as a unique document for general OLE and Workflow queries. |
|
Purchase Order Status |
A status that indicates where the PO is in the Purchasing/AP process. This indicator is similar to the status a document receives in Workflow, but it is specific to the purchasing process. Examples of PO status include 'In Process,' 'Awaiting Purchasing Approval,' 'Out for Quote,' and 'Closed'. |
The Document Overview tab on the PO contains three sections: Document Overview, Financial Document Detail, and Purchase Order Detail.

Note
The following section definitions contain only fields that are unique to the PO document. For more information about the standard Document Overview tab, see Standard Tabs on the OLE E-Doc Fundamentals wiki page.

Document Overview section definition
|
Title |
Description |
|
Year |
Required. The default is the current fiscal year and this field isn't editable until the 'ALLOW ENCUMBER NEXT YEAR DAYS' parameter has been met. If the FY is set to the future then funds will not be encumbered until that next fiscal year. NoteThis field automatically defaults to the current fiscal year. |
|
Total Amount |
Display-only. The total PO amount. |

Purchase Order Detail section definition
|
Title |
Description |
|
Chart/Org |
Required. Automatically completed based on the requisition's
chart/organization. May be changed manually by clicking the lookup |
|
Receiving Required |
Optional. This flag can be set by a Purchasing Processor while a PO is 'in process'. If the field is checked manually, the system will not use receiving thresholds to determine whether receiving is required. If the field is checked, a line item Receiving document must be processed with sufficient quantities received before a payment will route to the fiscal officer. After the PO is approved, this value cannot be changed. |
|
Assigned to User |
Allows a user to take ownership of an in-process document. Users can then easily find documents they are working on. |
|
Order Type |
Identifies the type of order, possible values could be one-time, standing, subscription. System default data value is "Firm, Fixed". |
|
Funding Source |
Display-only. The funding source for the PO; derived from the requisition. |
|
Payment Request Positive Approval Required |
Optional. The 'DEFAULT POS APPRVL LMT' parameter determines the dollar limit at which payment requests must receive positive approval from a fiscal officer. If selected, this field overrides the parameter and requires positive approval on the payment request regardless of the total of the payment. |
|
Previous Purchase Order # |
Optional. Identifies the previous PO number associated with this purchase order. This field is typically used to identify the converted PO number from a legacy purchasing system. |
|
Purchase Order Confirmed Indicator |
Optional. Select this box to indicate that this PO is being created after the purchase has been made. This field may be used to track instances in which users did not properly create a requisition before making a purchase. In this case, the PO is being processed only to enter the transaction into OLE. |
|
Requisition Source |
Display only. Indicates whether the requisition that created this PO was input directly or created in some other way such as B2B. |
The Delivery tab contains information about where goods ordered on this PO should be delivered. It also collects delivery contact information and any special delivery instructions. The address that is transmitted to the vendor (final delivery vs. receiving address) depends on the radio button that is selected in the Address to Vendor section.

The following table explains the fields on this tab. With the exception of the last two fields listed, all fields pertain to the Final Delivery section. When the PO is initiated, all information in the tab is populated from the information in the same tab of the requisition. The fields described below apply only if the default information from the requisition needs to be updated by Purchasing.
Delivery tab definition
|
Title |
Description |
|
Delivery Campus |
Required. Defaults to the delivery campus that was selected on the
requisition. Search for another campus by clicking the lookup |
|
Building |
Required. Search for the building to which goods should be delivered from
the building lookup |
|
Address 1 |
Required (display-only); automatically populated from data in Building. May be entered manually if you clicked the building not found button. |
|
Address 2 |
Optional; Entered manually if an additional line of address is needed. |
|
Room |
Required. Enter the room number to which delivery should be made. |
|
City |
Display-only. Automatically populated from data in Building. May be entered manually if you clicked the building not found button. |
|
State |
Display-only. Automatically populated from data in Building. May be entered manually you clicked the building not found button. |
|
Postal Code |
Display-only. Automatically populated from data in Building. May be entered manually if you clicked the building not found button. |
|
Country |
Display-only. Automatically populated from data in Building. May be entered manually you clicked the building not found button. |
|
Delivery To |
Required. This entry defaults to the user's name on the requisition. The
User lookup |
|
Phone Number |
Optional. This entry defaults to the phone number from the requisition. (Formatted: xxx-xxx-xxxx) |
|
|
Optional. This entry defaults to the email address from the requisition. |
|
Date Required |
Optional. Defaults to the date required from the requisition. Change or
enter a date on which delivery is required or use the date from the calendar |
|
Date Required Reason |
Optional. If a date required has been specified, select the appropriate date required reason from the list. |
|
Delivery Instructions |
Optional. Enter text describing any special delivery instructions for the item(s). |
|
Receiving Address |
Display-only after the PO has been approved. Defaults to the central
receiving address from the requisition. May be changed by using the lookup |
|
Use Receiving Address as Shipping Address Presented to Vendor |
Required. Defaults to the indicator selected on the requisition. |
The address is completely editable before the PO is approved. Take the following steps to add an address for another building.
Click the
 button.
The delivery address fields become editable.

Enter the delivery address.
Tip
To search for a delivery address, click the search icon
 next to Building and select a building from
the lookup.
On an approved purchase order, the Vendor tab identifies the vendor that was awarded the PO. The default is the vendor selected on the requisition. Although most field entries in this tab default to the values provided on the associated requisition (REQS) document or from the vendor's default information, the entries may be modified. If a vendor was not supplied already, you must add one.
Note
With open Purchase Orders, there is an additional required field for Vendor Choice. Select one of the options from the drop down list.
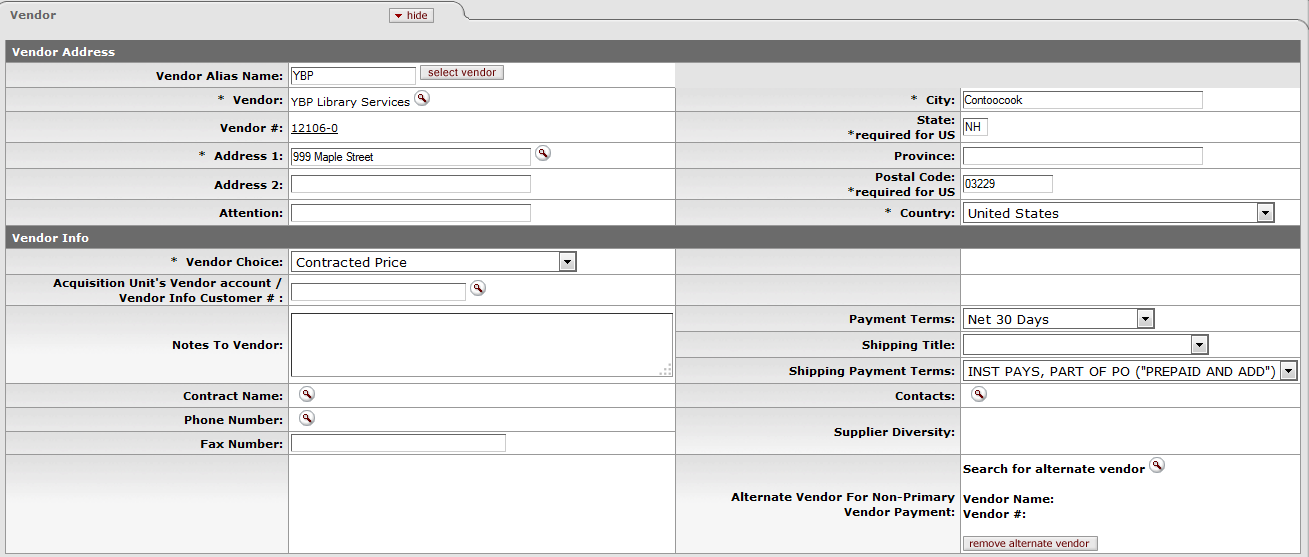
The Vendor tab includes two sections: Vendor Address and Vendor Info.
The Vendor Address section lists address information about the vendor for this purchase order.

Vendor Address section definition
|
Title |
Description |
| Vendor Alias Name | The abbreviated code, or
alias, of the vendor. Enter the code and click  to prepopulate the vendor information. to prepopulate the vendor information. |
|
Vendor |
Required and Display-only. The vendor's name is automatically updated from the Vendor record. |
|
Vendor # |
Display-only. The OLE-generated identifying number assigned to this vendor. |
|
Address 1 |
Required. The default address is the PO address defined as the default for the campus. This field is editable. |
|
Address 2 |
Optional. The default address is the PO address defined as the default for the campus. This field is editable. |
|
Attention |
Optional. If the attention line on the PO address is present this information will be populated although this field is always editable. |
|
City |
Required. Enter the city associated with this vendor address. |
|
State |
Enter the state's abbreviation. States are required for US addresses. |
|
Province |
Optional. Non-U.S. vendor addresses may include a province. Enter the province here. This field should always be used for Canadian vendors. |
|
Postal Code |
Enter the postal code for this address. Postal code may be required under certain circumstances (such as when entering a U.S. address). |
|
Country |
Required. Select a country from the Country list. |

Vendor Info section definition
|
Title |
Label |
|
Vendor Choice |
Required. Select the reason that this vendor was selected to fill this purchase order from the Vendor Choice list. |
|
Acquisition Unit's Vendor acct/Vendor Info Customer # |
Optional. Enter or look up a customer number that identifies your institution or department for this vendor's reference. |
|
Notes to Vendor |
Optional. Include any text you want the vendor to see on the PO. |
|
Contract Name |
Optional. If a contract exists with the vendor for these goods or services,
search for it from the Contact lookup |
|
Phone Number |
Optional. Enter the selected vendor's phone number. (Formatted: xxx-xxx-xxxx) |
|
Fax Number |
Optional. Enter the selected vendor's fax number. |
|
Payment Terms |
Optional. Select the payment terms from the Payment Terms list. |
|
Shipping Title |
Optional. Select the shipping title from the Shipping Title list. |
|
Shipping Payment Terms |
Optional. Select the shipping payment terms from the Shipping Payment Terms list. |
|
Contacts |
Optional. If the vendor has multiple contacts, select the appropriate contact for this PO. |
|
Supplier Diversity |
Display-only. The information appears if the selected vendor has been assigned a supplier diversity type. |
|
Alternate Vendor for Non-Primary Vendor Payment |
Optional. Used any time a purchasing needs to give accounts payable the
option to pay one vendor or another. Examples include third-party receivables or escrow accounts for
construction payments. To search for a vendor, use the lookup |
The Stipulations tab allows for the entry of stipulations for the vendor filling this PO. It may also be used for any additional contractual information that should be added to the PO.

Stipulations tab definition
|
Title |
Description |
|
Note Text |
Required. Enter text to be viewed by the vendor of this PO or search for
pre-defined text from the lookup
|
|
Actions |
Click |
The Titles tab identifies what is being ordered on the PO and establishes the accounting distribution for payments. Before the PO has been approved, you may change or add to the items and accounts that have been carried over from the requisition. You may also add additional charges or apply PO total reductions here. Make sure you have bibliographic information in the Bib Info fields and complete accounting lines.
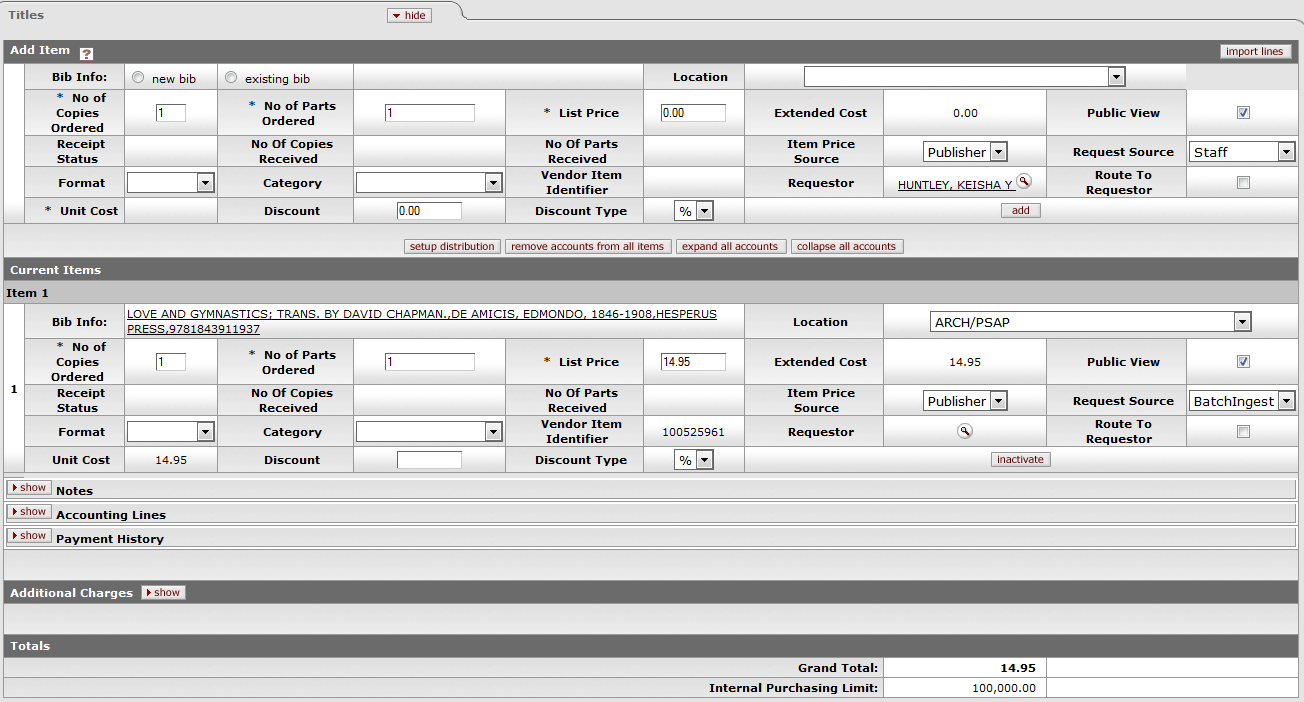
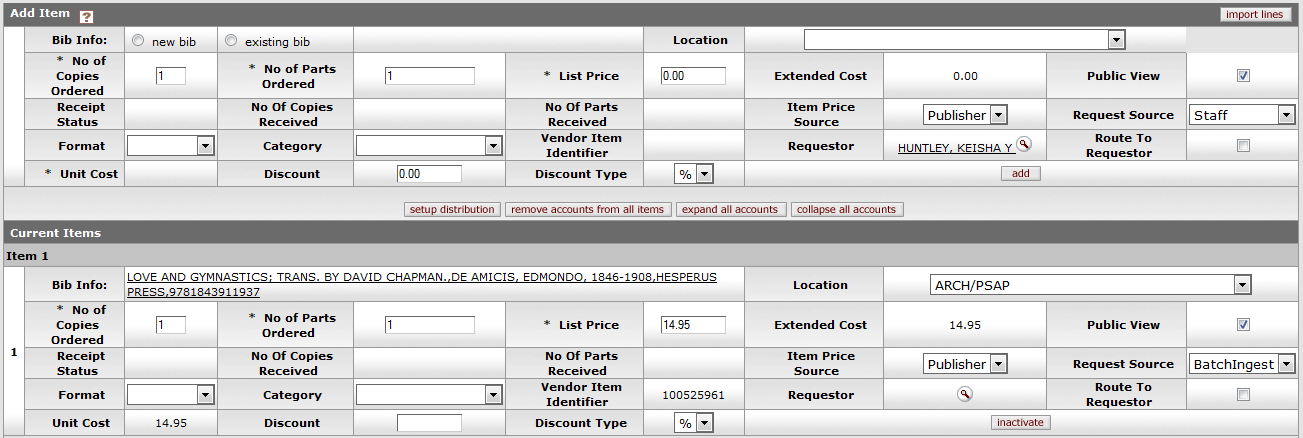
Add Item and Current Items sections contain the same fields.
Add Item and Current Items section definitions
|
Title |
Description |
|
Bib Info |
Choose In Current Items, you may click the title link to open the bibliographic editor. |
|
Location |
Select the home location for the item. |
|
No of Copies Ordered |
Required. Enter the quantity of the item in this field. |
|
No. of Parts Ordered |
This is the number of individual pieces that must be accounted for upon payment/receipt of a requisitioned item. |
|
List Price |
Basic price of an item before any discounts are taken. |
|
Extended Cost |
Display-only. No of Copies ordered multiplied by the list price minus any discount. |
|
Public View |
Optional. Indicates whether or not a bibliographic description shall be exposed to users prior to purchase/receipt. Default is Yes (checked). |
|
Currency Type |
Display only if foreign vendor is chosen. Identifies the associated vendor's currency as identified on the vendor record that is identified in the Link to Vendor/Supplier. |
|
Exchange Rate |
Display only if foreign vendor is chosen. Currency conversion rate populates from the Exchange rate and Currency Type maintenance tables. The rate will populate when user clicks action button "Calculate" on conversion tab. Optionally: when currency tab opens, currency rate may auto-populate. This may be updated up until the Requisition is approved. After that point, it may no longer be modified. |
|
Foreign List Price |
Basic foreign price of an item before any discounts are taken. |
|
Receipt Status |
Display only. Will reflect receipt status after receiving has occurred. |
|
No Of Copies Received |
Display only. The number of copies already received. This will populate as the document moves through the acquisition workflow. |
|
No Of Parts Received |
Display only. The number of parts already received. This will populate as the document moves through the acquisition workflow. |
|
Item Price Source |
Optional. Select the Price Source of the requested item from the dropdown list. |
|
Request Source |
Optional. Select the Request Source of the requested item from the dropdown list. |
|
Format |
Optional. Select the format of the requested item from the dropdown list. |
|
Category |
Optional. Select a Category of the item from the dropdown list.. |
|
Vendor Item Identifier |
Display Only. Identifies a vendor item identifier if one has been provided by a vendor. |
|
Requestor |
Defaults to the selector's user name. If the Requestor is different than
the selector, you may use the Requestor lookup |
|
Route to Requestor |
Optional. Yes/No checkbox to indicate whether a requestor should be notified when the item has been purchased. System default data value is "No". |
|
Foreign Unit Cost |
Display only if foreign vendor is chosen. Calculated foreign cost per unit for the item or service on this line. Calculation is the Foreign List Price less Foreign Discount amount. |
|
Discount |
Discount provided by the vendor/customer number/organization combination. Automatically populated from the Vendor customer number table based on the selected vendor and customer number. Can be modified for a specific title. If the vendor record has a Vendor currency noted other than the default system currency (aka US dollar), then the Vendor discount will populate the Foreign Discount field. |
|
Discount Type |
Choose # (for Amount) or % (for Percentage). |
|
Foreign Discount |
Foreign discount provided by the vendor/customer number/organization combination when the vendor record has a Currency Type different from the system default currency. Should be automatically populated from the Vendor customer number table based on the selected vendor and customer number. This data can be changed for the specific title. Must identify the type of discount (amount or %.) If the vendor record does not have a Currency Type noted other than the default system currency (aka US dollar), then the discount should populate the Discount field. |
|
Foreign Discount Type |
Choose # (for Amount) or % (for Percentage). |
|
Actions |
Add or delete lines as appropriate. After a line has been added, it is moved to the Current Items section, where the details may be viewed or modified. |
Inactivate Button: The inactivate button becomes available only when you are amending a PO. If while amending a PO you would like to deactivate a line item, click the inactivate button associated with that item.
Note
For more information about how to amend the PO, see Purchase Order Amend.
When processing an amendment to a PO, you may deactivate item lines that are no longer valid. To do so, select the Inactivate check box next to the appropriate items. When the amendment is approved, these items are no longer valid for this PO.

Click  to add a line. The system will move it to the Current
Items section.
Note
To add an item, you must follow the same procedure described in Working in the Titles Tab on the Requisition section (First add the bibliographic record, fill in the purchasing information, then click add).
Click  to delete a line.
Click  to view the additional details (notes, accounting lines, payment
history).
The Additional Charges tab allows lines for predetermined charges to be included on the payment request. This tab is divided into four charge lines, each representing a different type of charge, each with its own accounting lines, and a series of options through which the amounts added in this section can be prorated to the existing line items in the Current Items sub tab. The four Additional Charges lines are Freight, Shipping and Handling, Full Order Discount, and Trade In.
Note
The Additional Charge Trade In will be removed in a later release.

Additional Charges section definition
|
Title |
Description |
|
Item Type |
Display-only. Describes the type of miscellaneous item ('Freight' or 'Shipping and Handling') being defined in this line. |
|
Description |
Required if the extended cost has been entered. Enter a text description describing the additional charges item line. |
|
Extended Cost |
Required. Enter the dollar amount for this item line. |
|
Total Amount |
Display-only. Automatically calculated based on responses in other fields. Displays the total of the requisition after fees. |

Totals section definition
|
Title |
Description |
|
Grand Total |
Display-only. Displays a total of all current item lines and additional charges lines. |
|
Internal Purchasing Limit |
Display-only. Displays the dollar amount of the maximum purchasing limit, above which a PO will route for approval. |
Accounting distributions for item lines may be created individually, or a single accounting distribution may be copied to all line items on the requisition. A valid account string contains a chart, an account, and an object code. The account must be active and the expiration date has not expired. The object code must valid. Valid object codes are active codes in the object code table and are not included in the OBJECT CONSOLIDATION parameter.
To create accounting distributions for individual item lines, follow these steps.
Click add in the Actions column to add the item line.
In the Current Items section, click the
 button for the line to which you want to add an accounting distribution.
In the Item Accounting Lines section, click the
 button.
Complete the accounting line and indicate a percent of this item line that should be charged to this accounting line. If there is only one accounting line for this item, the percent must be 100.
Click
 to add the accounting line.
If the item needs to be distributed to more than one accounting line, repeat steps 4 and 5. The sum of all accounting lines must equal 100 percent when you finish the distribution.
Note
If the account chosen has sufficient funds checking and the threshold is reached, you may be blocked from using the account or you may receive a warning (depending on the chosen notification on the account) when the document is saved and the Fiscal Officer will be notified when the document is submitted.
Note
This process may also be followed to add accounting distribution lines for items in the Additional Charges section. Open the Accounting Line Items section for that miscellaneous line item and follow steps 4-6 above.
Line item accounting can create considerable repetitive data entry. OLE allows you to load the information to all the line items rather than entering the information to each line item separately. The steps below describe how to distribute this information. This process distributes accounts only to line items that have no accounts added. It does not replace accounts that have been set up for individual line items.
Click
 to add the item line.
In the Add Item section, click the
 button.
 The system opens a new Accounting Lines section.
Enter the accounting line and indicate the percent of this item line that is to be distributed to the items on this requisition. If there is a single accounting line for these items, the percent must be 100.
Note
The system validates values as you enter the information.
Click
 to add the accounting line.
If the items need to be distributed to more than one accounting line, repeat steps 3 and 4. The accounting lines distribution should total 100%.
Click the
 button to apply this distribution to all item lines that do not yet have an accounting
line distribution specified.
 The system displays the top of the document and the message 'The accounts were successfully distributed to all items'.
If line items have accounts set up and those accounts need to be modified, then the individual accounting lines may be modified by following the steps for creating an accounting distribution for an individual item line discussed in the previous section. However, if it is more efficient to remove all the accounts, use the steps for creating an accounting distribution for multiple line items to recreate the accounting for the line items.
Follow these steps to remove all accounts.
Click
 .
.Click
 in response to the question 'Are you sure you want to remove the accounts from
ALL items?'
in response to the question 'Are you sure you want to remove the accounts from
ALL items?'All the accounting lines are removed.
To expand the accounting lines for all the items in the Current Items section, follow these steps. (This is the equivalent of clicking the accounting lines' show button for each item listed.)
Click
 .
.All accounts are displayed in full detail.
If recurring payments are required for the items on this PO, this tab is used to indicate the type of payment schedule required and the duration of that schedule. The fields in this tab are informational only. They do not drive any other functions within OLE.

The Payment Info tab includes Payment Info and Billing Address sections.
Payment Info section definition
|
Title |
Description |
|
Type of Recurring Payment |
Optional. Select the proper recurring payment schedule from the list. Examples include 'Fixed Schedule, Fixed Amount,' 'Fixed Schedule, Variable Amount' and 'Variable Schedule, Variable Amount'. |
|
Begin/End Date |
Required if Type of Recurring Payment has
been selected. Enter dates indicating the time period during which the order is active, or search
for the dates from the calendar |
|
Recurring Payment Amount |
Optional. If a recurring payment type of 'fixed schedule' or 'fixed amount' has been selected, complete the remaining fields in this section. |
|
Amount |
Optional. Enter the dollar amount of the recurring payment. |
|
First Payment Date |
Optional. Enter the date on which the first recurring payment should be
made or search for the date from the calendar |
|
Frequency |
Optional. Select a number to indicate how often recurring payments should be made. |
|
Initial & Final Payment Amount |
Optional. Enter the amount of the initial and final payments if those amounts differ from the amount in the Amount field above. |
|
Initial & Final Payment Date |
Optional. Enter the dates on which the initial and final payments are to be
made if those dates differ from the date in the First Payment Date
field. Or search for the dates from the calendar |
The Additional Institutional Info tab collects information about the organization at your institution that is responsible for initiating this purchase. It also collects information on transmission method and contact information.

Additional Institutional Info tab definition
|
Title |
Description |
|
Method of PO Transmission |
Required. Select the transmission method. Normally this is 'Print,' but if for some reason you do not need to print a copy of the PO for the vendor, you may choose 'No Print'. |
|
Cost Source |
Required. This field indicates how the pricing on the PO was determined. Select the appropriate cost source from the list. |
|
Contact Name |
Optional. Enter the name of the person to be contacted if Purchasing (or
vendor if the order is an APO) has questions about the order or search for it from the Person lookup |
|
Contact Phone |
Optional. Enter the phone number of the person specified in the Contact Name field. (Formatted: xxx-xxx-xxxx) |
|
Contact Email |
Optional. Enter the email address of the person specified in the Contact Name field. |
|
PO Total Cannot Exceed |
Optional. This information is typically entered on the requisition and indicates to Purchasing that the order has a limited amount of resources. |
|
Requestor Name |
Required. The name of the person who requested the goods or services. This
field may be changed by entering a new name or searching for it from the Person lookup |
|
Requestor Phone |
Required. Enter the phone number of the person specified in the Requestor Name field. (Formatted: xxx-xxx-xxxx) |
|
Requestor Email |
Required. Enter the email address of the person specified in the Requestor Name field. |
|
Sensitive Data |
Display-only. This displays the currently assigned sensitive data entries created using the sensitive data button at the bottom of the document. |
Note
Quotes are remaining functionality from KFS. This will be removed in a future release.
The Account Summary tab combines all accounting information for the items on this PO for future reference.

Clicking the refresh account summary button reloads the page and adds any accounts and/or line items that the user may have just added to the PO.
The View Related Documents tab collects information about Purchasing/AP documents related to this document. For example, it displays identifying information for any associated requisition, payment requests, or credit memos.

View Related Documents tab definition
|
Title |
Description |
|
Date |
Display-only. The date the related document was created. |
|
User |
Display-only. The user who created the related document. 'Kuali System User' means the document was automatically created by the system. |
|
Note |
Display-only. The note describing the document. |
When you click the document number link, the system displays the related document in a separate window.
The View Payment History tab lists all the payment requests and credit memos that have been issued against the PO.

View Payment History – Payment Requests section definition
|
Title |
Description |
|
PREQ# |
Display-only. The payment request number. |
|
Invoice # |
Display-only. The invoice number. |
|
PO# |
Display-only. The purchase order number. |
|
PREQ Status |
Display-only. The payment request status. |
|
Hold |
Display-only. Displays 'yes' if the payment request in on hold. Displays 'no' if the payment request is not on hold. |
|
Req Canc |
Display-only. Displays 'true' if the payment request has been canceled. Displays 'false' if the payment request has not been canceled. |
|
Vendor Name |
Display-only. The vendor name. |
|
Customer # |
Display-only. The customer number. |
|
Amount |
Display-only. The payment request amount. |
|
Pay Date |
Display-only. The date to make payment on this payment request. |
|
PDP Extract Date |
Display-only. The date the payment request was requested for processing by Pre-Disbursement Processor. |
|
Paid? |
Display-only. Displays 'yes' if the payment has been disbursed. Displays 'no' if the payment has not been disbursed. |
View Payment History – Credit Memos section definition
G/L Pending Ledger entries are generated after the PO document is submitted. These entries include the encumbrances for the transaction and the appropriate offsetting entry. After the nightly batch jobs run to post the G/L entries, these pending entries no longer display here.
 .
.
General Ledger Pending Entries tab definition
|
Title |
Description |
|
Seq # |
Display-only. Assigns a number to the entry in sequential order. |
|
Fiscal Year |
Display-only. Identifies the fiscal year of the debit or credit. |
|
Chart |
Display-only. Identifies the chart to which the pending entry is assigned. |
|
Account |
Display-only. Identifies the account number to which the pending entry is assigned. |
|
Sub-Account |
Display-only. Identifies the sub-account, if one exists, to which the pending entry is assigned. |
|
Object |
Display-only. Identifies the object code of the item being ordered. |
|
Sub-Object |
Display-only. Identifies the sub-object code of the item being ordered, if one exists. |
|
Project |
Display-only. Identifies the project code, if one exists, to which the PO is assigned. |
|
Doc. Type Code |
Display-only. Identifies the document type code of the document. When working with POs, this value will almost always be PO. |
|
Balance Type |
Display-only. Identifies the different balances (actuals, budget, encumbrances, etc.) recorded in OLE to facilitate reporting and financial queries. |
|
Obj. Type |
Display-only. Categorizes object codes into general categories identifying income, expenses, assets, liabilities, fund balance or transfers. |
|
Amount |
Display-only. Indicates the amount charged to each account on the PO. |
|
D/C |
Display-only. Indicates whether the entry is a debit (D) or credit (C) to the account. |
All required fields must be completed before the PO document can be submitted for approval.
The Bib Info field on the Item tab must be completed.
The PO generates encumbrances when it reaches a workflow status of 'FINAL'. Encumbrances are created on the accounts and object codes entered in the item sections and the appropriate offset object code(s).
An APO document may be created only under certain conditions, as specified in the business rules set up by the institution. Examples of conditions that might prevent an APO from being created are:
The requisition total is greater than the APO limit.
The requisition total is not greater than zero.
The requisition contains an item that is marked as restricted.
The vendor was not selected from the vendor database.
An error occurred while retrieving the vendor from the database.
The selected vendor is marked as restricted.
The requisition has no contract selected, but a contract exists for the selected vendor.
The requisition's payment type is marked as recurring (Payment Info tab).
The 'PO Total Cannot Exceed' amount has been entered (Additional Institutional Info tab).
The requisition contains alternate vendor names.
The requisition is set to encumber during the next fiscal year (chosen from Year in the Document Overview tab) and approval is not within the APO allowed date range. The date range is determined by the 'ALLOW APO NEXT FY DAYS' parameter.
The requisition contains a full order discount.
The requisition contains accounting strings with an object level in the OLE-PURAP:PURCHASING_ACCOUNTS_PAYABLE_OBJECT_LEVELS parameter (currently set to CAP).
The PO document does the following types of routing:
Budget Office Review: If the PO is for the current fiscal year, all accounts used on the document are checked to see if any of accounts use sufficient funds checking. If the encumbrances from this order would cause these accounts to have insufficient funds, the PO document routes to the Budget Reviewer role for approval.
Document Transmission: If the document is an APO, an FYI is generated back to the initiator of the requisition document. If the document is not an APO, an FYI is generated back to the user who submitted the PO.
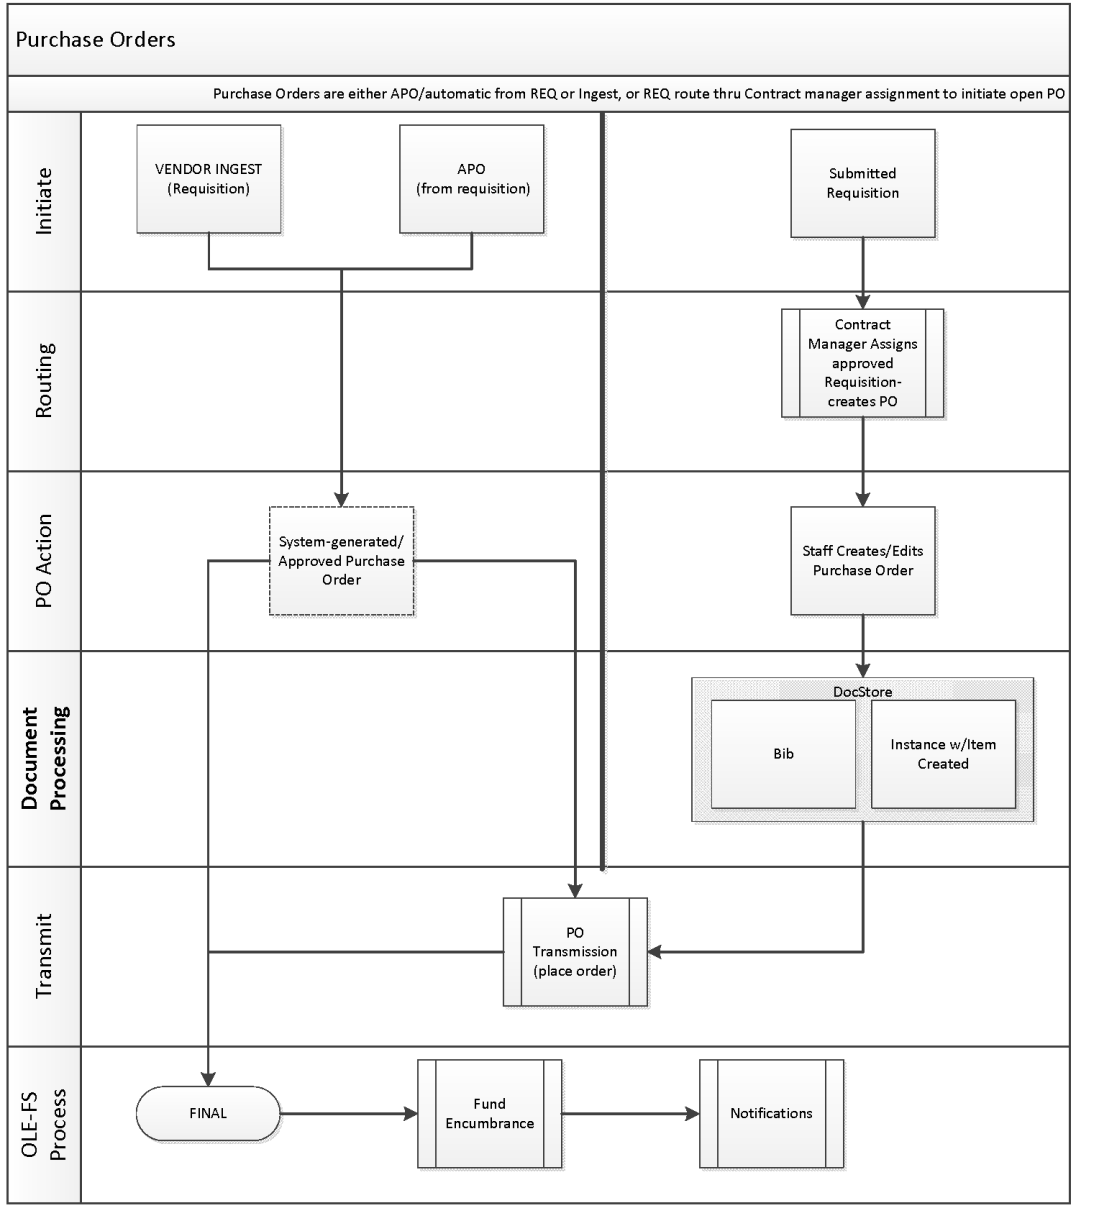
Search for 'In Process' purchase orders using the Order Holding Queue or document search and click the document ID to open it.
The system displays a PO document populated with information from the requisition.
Complete the standard tabs as necessary.
Note
For information about the standard tabs such as Document Overview, Notes and Attachments, Ad Hoc Recipients, Route Log, and Accounting Lines tabs, see Standard Tabs on the OLE E-Doc Fundamentals wiki page.
Complete the Vendor, Stipulations, Titles, Payment Info, Delivery, Additional Institutional Info and other tabs as necessary. To add information to these sections, click the amend button at the bottom of the PO.
Click
 or
or 
If all required fields have been correctly filled in, and you click on approve, the system will then approve the Purchase Order. If any required
field is blank or contains invalid data, the system places a warning note at the top of the screen,
and by the appropriate field. You will be unable to approve the purchase order until you resolve
the problem. 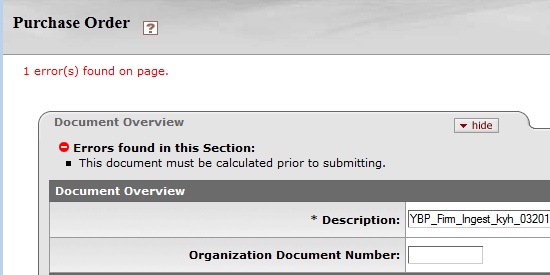
Once a Purchase Order is approved, the system:
changes the status of the Purchase Order document to Final
queues it for printing and/or transmission, by whichever method is specified
returns you to the Main Menu screen.
OLE 1.0 is currently setup to place orders as follows:
Imported vendor orders (paired EDI and MRC files): no transmission
Staff-generated manual requisitions and approved purchase orders and purchase order amendments: transmit in real-time to vendor FTP site (no staff interface currently exists for transmit confirmation reports etc.).
If transmit method of Vendor or Purchase Order is set to no print with format of FTP, or SFTP, then resulting EDIFACT order file is transmitted to OLE “mock” vendor FTP site per below.
If transmit method of Vendor or Purchase Order is print with format of Email, Fax, etc., then at completion of an approved Purchase Order, a
 button will appear on the e-Doc allowing the user to print, email, or fax a PDF
of the Purchase Order. The Purchase Order will also route to Acquisitions staff’ Action Lists as
notification to complete the action.
FTP Site (to see transmitted orders):
http://docstore.demo.ole.kuali.org/upload/Order_Records/Orders_To_Be_Processed_By_Vendor/
Sample Purchase Order Statuses:
|
Code |
Status |
|
CANC |
Cancelled |
|
CLOS |
Closed |
|
OPEN |
Open |
See all statuses in Purchase Order Status in the Appendix.
To facilitate routings and approvals, and maintain detailed audit trails, OLE has adapted the KFS versions of Purchase Orders. Not all of these may be needed in support of future library processes, but we are providing them for review.
After a PO has been initiated, authorized users may perform a variety of activities on it. With the exception of Print, each of these actions generates a new OLE document (although the PO number remains the same). The following chart summarizes each action and its corresponding document type. (The document type code for each is listed in parenthesis after the name of the associated button.) The table also indicates whether each action results in transactions to be fed to the G/L process.
The “versions” or e-Docs available are permissions-based, and dependent upon the Purchase Order status in workflows.
Note
For more information about printing a PO, see Printing a PO.
PO document types
|
Document |
Description |
|
Purchase Order Amend (POA) |
Makes changes to the existing PO. |
|
Indicates that no payments should be processed against this PO. | |
|
Changes the status of the PO back to 'Open' so payments can be made. An FYI is also sent to AP to indicate that the hold has been removed. | |
|
Purchase Order Void (POV) |
Cancels the PO and disencumbers all related items. This option is not available after a payment has been made. |
|
Purchase Order Close (POC) |
Closes out any remaining items on this PO and disencumbers any outstanding funds. |
|
Purchase Order Reopen (POR) |
Reopens the PO and re-encumbers any accounting lines that were disencumbered when the PO was originally closed. |
Note
Those with roles that are able to edit purchase orders will also be able to access and edit the above documents. This includes Acquisitions AQ2-AQ5, Accounting AQ3-AQ4, Financial AQ2-AQ5.
To access any of these options for working with a PO, follow these steps:
Search for the PO document and open it.
At the bottom of the open document, the system displays a series of specialized action buttons are displayed at the bottom, each corresponding to a different option.

Click the button for the function you want to perform.
After you submit one of the above documents, if you subsequently retrieve the original PO document, the system shows a warning in the upper left corner, indicating that there is a newer version of the PO.

Document Versioning: A single PO document can have several different OLE document numbers assigned. To correlate this information and find the most recent version of a PO, use the Purchase Order menu item in the Custom Document Searches menu group of the Main Menu screen and enter the PO number as a search criteria. In the example shown below, a user amended a PO (POA), placed the PO on hold (POH, removed the hold (PORH), and then created a PO Void (POV). The system retrieved five documents when the user searched on the PO number.

The print option allows users with the OLE-PURAP Purchasing Processor role to generate a PDF version of the document to print. The print action button becomes available for POs with the 'Pending Print' status.
Note
The print button appears on a PO only when the Method of PO Transmission is 'PRINT' on the Additional Institutional Info tab of the PO and the status of the PO is 'Pending Print'.
Note
There is no document type for the print functionality.
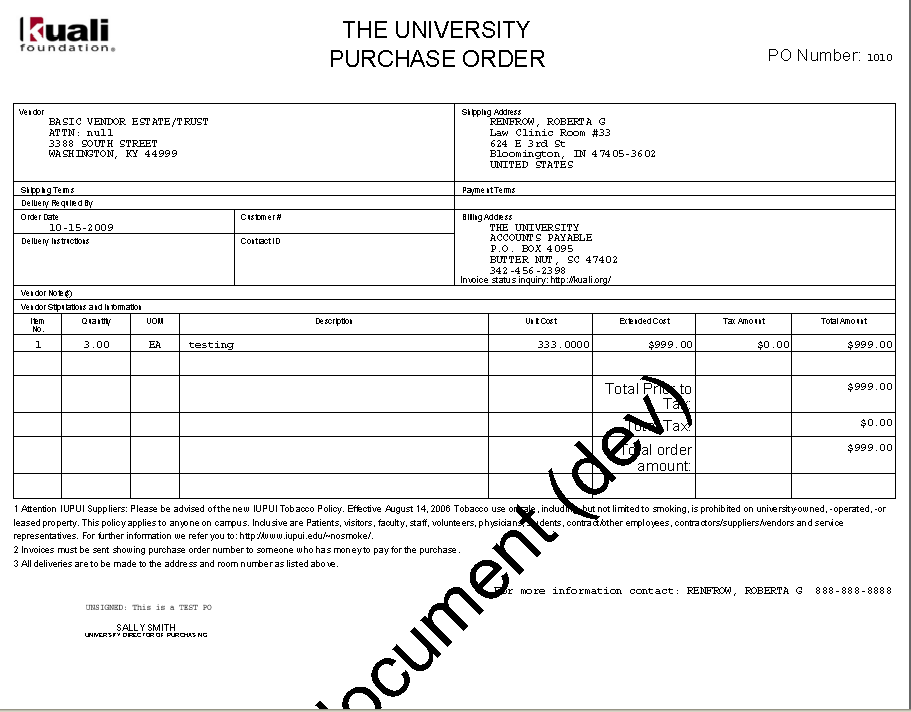
To print a PO:
Search for the PO you want to print from the PO search screen and open the PO.
Tip
You may narrow down the search by selecting “Pending Print” in the Purchase Order Status search criteria field.
Click
 to open a printable PDF version of this PO.
A separate window opens and a PDF version of the PO appears.
Close the window after taking the necessary actions, using the PDF toolbar (save, print, etc.).
OLE allows you to add or modify certain data elements on an approved Purchase Order via a Purchase Order Amendment. By so doing, the system creates a new version of the e-Doc called a Purchase Order Amendment (POA) that can be independently processed or routed. The POA then serves as the new version of the purchase order and will be transmitted to the Vendor.
Purchase Order Amendments are created:
Manually from the
 button on a Purchase Order
Automatically from the entry of Unordered line items on Receiving e-Doc
Automatically from the entry of Unordered line items on Payment Request e-Doc
When you amend a PO, the system creates a PO Amend (POA) document based on the existing PO. Enter a reason when initiating the amendment. When the amendment is submitted, the fiscal officer receives an FYI. This is his or her notification that the order has changed.
Once you supply a reason, OLE will display the Purchase Order, and allow you to change almost any field. (In OLE, accounting lines cannot be edited in the PO Amendment process, but can be changed during the payment request process, except for new lines.)
If you add titles to the Purchase Order or change prices, click the  button at the bottom of the screen.
The document layout of the POA document is identical to that of the original PO, with the addition of a notation regarding status in the Document Header. A notation also displays at the top of the PO document, such as 'Warning: There is a pending action on this Purchase Order.'
Note
For information about the fields on this document, see “Docment Layout” under Purchase Order.
The POA may be initiated only by the members of the Purchasing Processor role; Acquisition Staff 2-5; Receiving 3-4; Accounting 3-4; Financial 2-5.
The PO must be in an 'Open' status.
If there are payment requests (PREQs) or vendor credit memos (CMs) in process, the amend button is not displayed.
The system adds a note with the date the amendment was started, the person who started the amendment, the information entered on the ''confirm' page, and the previous document number.
If payment requests (PREQs) or credit memos (CMs) have been processed, the Receiving Required field cannot be changed.
The fiscal year cannot be changed
If the PO has gone through the quote process, the vendor cannot be changed
If there are unpaid payment requests (PREQs) or credit memos (CMs), the existing line items cannot be changed.
If the item invoiced amount is greater than 0, the line item cannot be deleted; it can only be deactivated.
New line items can always be added.
If modifying an existing line item, the amount cannot go below what has already been invoiced.
Inactive items are display-only.
There must be at least one active line item when the submit button is selected.
The calculate button must be pressed prior to submitting the POA if you change the list price of an item or add a new line item.
Fiscal officers receive an FYI when the amendment is completed.
During the amend process, the original PO document (before the amend button was selected) will have a document status of 'pending amendment' and the newly created document will have a status of 'change in process'. After the amendment has been submitted, the original document status changes to 'retired version' and the amendment's status changes to 'open'.
Users are not allowed to create Receiving documents, payment requests, or credit memos against a PO that has a pending amendment.
The document becomes 'FINAL' when the POA document is submitted.
The fiscal officer of an account receives an FYI.
Search for the PO you want to amend from the PO search screen. Open the PO.
Click
 to make changes to the existing PO.
 Enter a reason explaining why you are amending this PO.
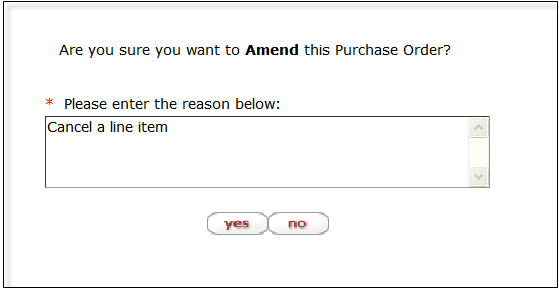
Click
 .
.The screen refreshes and a new document number (Doc Nbr) is assigned. The PO status becomes 'Pending Amendment'.

Click the
 button on the Titles tab and click the
show button on the item you want to amend.
button on the Titles tab and click the
show button on the item you want to amend.Modify the PO document.
Once you are done with your edits, and have recalculated if necessary, you can approve the amended Purchase Order using the blanket approve button at the bottom of the screen.
After you create a POA document, you may add, change, or deactivate the existing lines on the original PO.
Note
To add or change the items or accounting lines on the PO, simply add or modify them as you would on the PO document.
Note
An amended Purchase Order follows the same rules for routing as an original PO, so approving it may cause it to be routed to other staff members. Approving an amended PO does not cause it to be re-transmitted to the vendor, though.
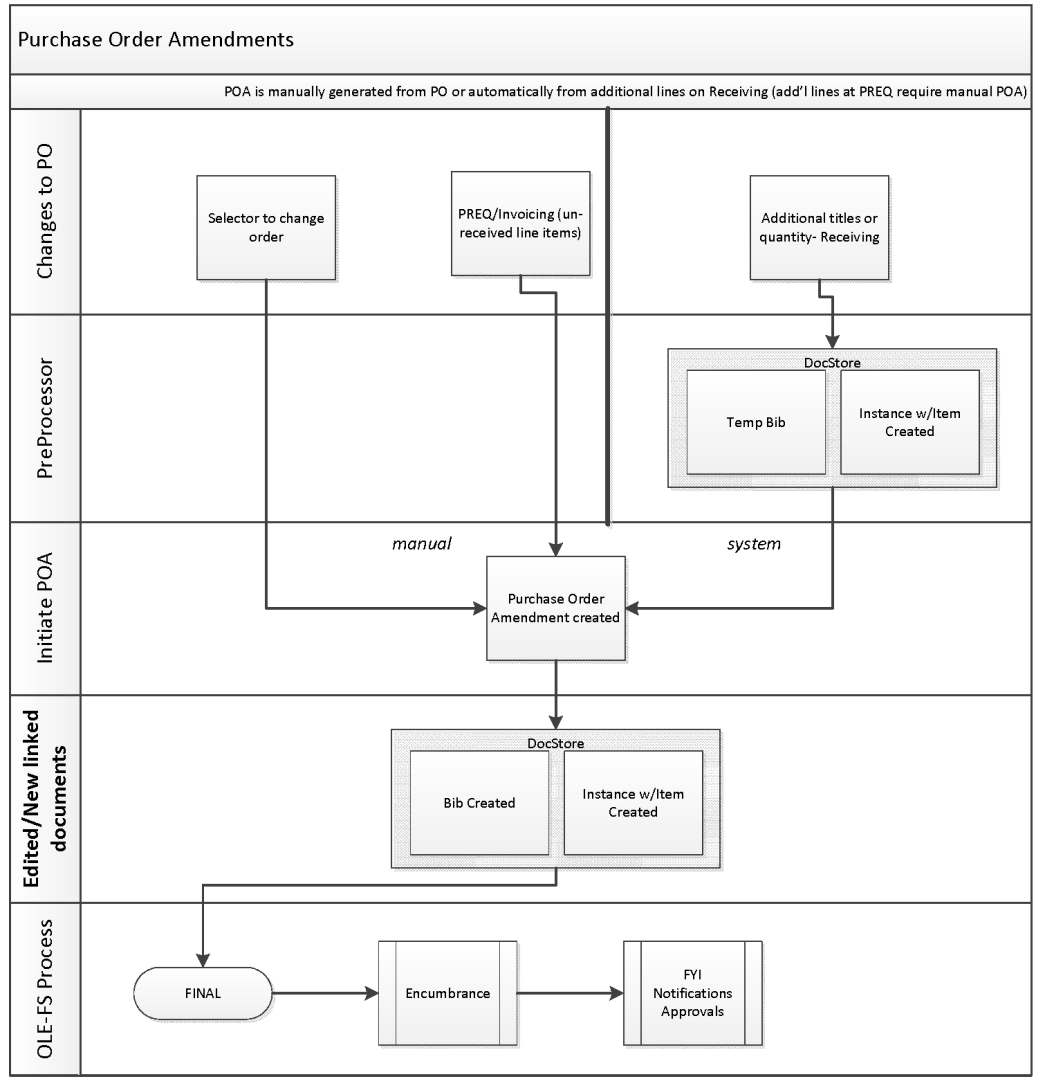
When you put a PO on hold, the system creates a PO Hold (POPH) document, changes the PO status to 'Payment Held,' and prevents any payment request documents from being initiated against the PO. You must enter a reason when initiating the payment hold.
No G/L pending entries are generated from this document.
The document layout of the POPH document is identical to that of the original PO, with the addition of a notation regarding status in the Document Header. A notation also displays at the top of the PO document, such as 'Warning: There is a pending action on this Purchase Order.'
Note
For information about the fields on this document, see “Docment Layout” under Purchase Order.
When you click the remove hold button on a purchase order, the system creates a Remove Hold (PORH) document. This document allows you to remove the hold from a PO document and allow processing of payment requests. The remove hold button is available only on the PO documents with 'Payment Hold' status. You must enter a reason when removing the payment hold.
Removing a payment hold changes the Purchase order status back to 'Open'. No G/L pending entries are generated from this document.
The document layout of the PORH document is identical to that of the original PO, with an additional notation regarding the status in the Document Header. A notation also displays at the top of the PO document, such as 'Warning: There is a pending action on this Purchase Order.'
Note
For information about the fields on this document, see “Docment Layout” under Purchase Order.
The document becomes 'FINAL' when the PORH document is submitted.
Notification may be sent to a user or role defined in the Notification Route level.
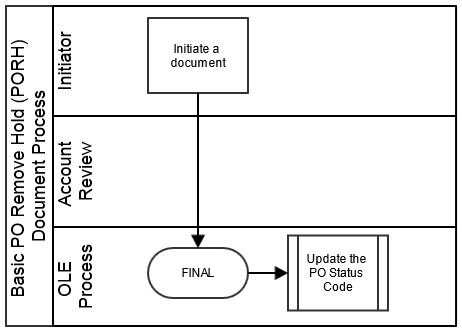
Search for a PO from the PO search screen and open the PO.
Tip
You may search for a PO with a payment held by selecting the 'Payment Hold in the Purchase Order Status option on the PO search screen.
Enter the reason for removing the payment hold.

Click
 .
.
You are back on the main menu.
If a PO has been fully approved and transmitted to the vendor and no payments have been processed, the Void Order (POV) document allows you to cancel the PO and disencumber all related items. You must enter a reason when initiating the PO void.
Note
The void order button is displayed on a PO only if no payments have been processed against it.
When a PO is voided, the system creates a PO Void (POV) document based on the existing PO. The document layout of the POV document is identical to that of the original PO, with an additional notation regarding the status in the Document Header. A notation also displays at the top of the PO document, such as 'Warning: There is a pending action on this Purchase Order.'
Note
For information about the fields on this document, see “Docment Layout” under Purchase Order.
When the POV document is successfully submitted, the General Ledger Pending Entries tab displays the transactions that will disencumber the total funds associated with this PO. This document reverses the encumbrances that were created by the purchase order.

Note
For information about the fields on this tab, see “Docment Layout” under Purchase Order.
The Close Order (POC) document closes an open PO. When you close an order, all encumbrances associated with the remaining items are disencumbered. Items already paid are unaffected. This option should be used only when there are payment requests against the PO. You must enter a reason when initiating the PO close action.
The document layout of the POC document is identical to that of the original PO, with an additional notation regarding the status in the Document Header. A notation also displays at the top of the PO document, such as 'Warning: There is a pending action on this Purchase Order.'
When the POC document is successfully submitted, the General Ledger Pending Entries tab shows the transactions to disencumber remaining encumbrances on this PO.

Note
For information about the fields on this document, see “Docment Layout” under Purchase Order.
There must be at least one outstanding payment request against to close the PO.
The POC document generates General Ledger Pending Entries to disencumber remaining encumbrances on the PO.
The Purchase Order Reopen (POR) document reopens the PO and re-encumbers any lines that were disencumbered when the PO was originally closed. You must enter a reason when initiating the PO reopen action.
Note
The open order button is available only on a closed PO.
The document layout of the POR document is identical to that of the original PO, with an additional notation regarding the status in the Document Header. A notation also displays at the top of the PO document, such as 'Warning: There is a pending action on this Purchase Order.'
When the POR document is successfully submitted, the General Ledger Pending Entries tab shows the transactions and re-encumbers the PO amount that was originally disencumbered by the POC document.

Tip
Effect on an Account by the Purchase Order Reopen Document: When a POR document is submitted, the amount re-encumbered by the document is not the same as the original PO document. In the above example, the encumbered amount by the original PO was $1,000. Then, the POC document disencumbered $900. Finally, the POR document re-encumbered the amount disencumbered by the POC document. You may see the effect on the account from the General Ledger Pending Entries inquiry screen by listing the transactions by the Reference Document Number that stores the PO number.
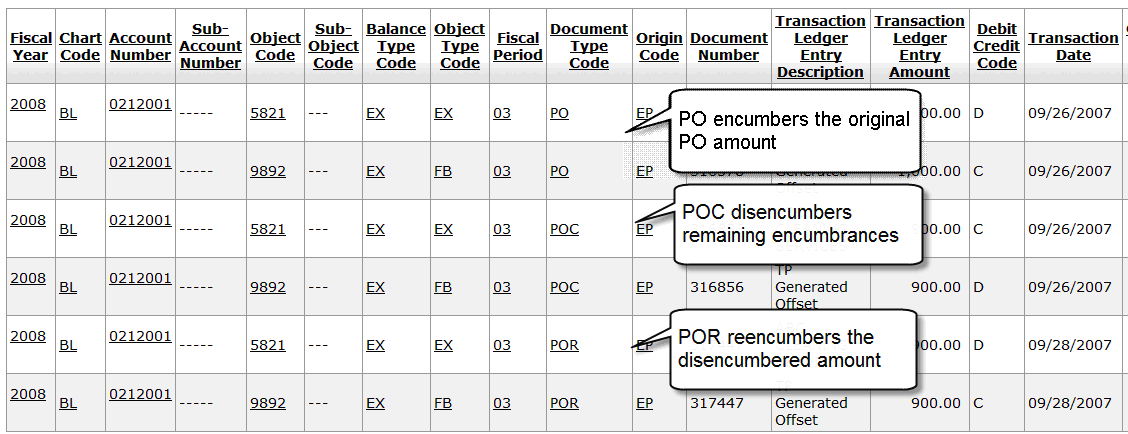
The POR may be initiated only from the closed PO.
The POR document generates General Ledger Pending Entries to re-establish encumbrance to match the amount disencumbered by the POC document.
Search for the PO that you want to reopen from the PO search and open the PO.
Click
 to reopen the PO and re-encumber any lines that were disencumbered when the PO was
originally closed.
 Enter the reason for reopening the PO.
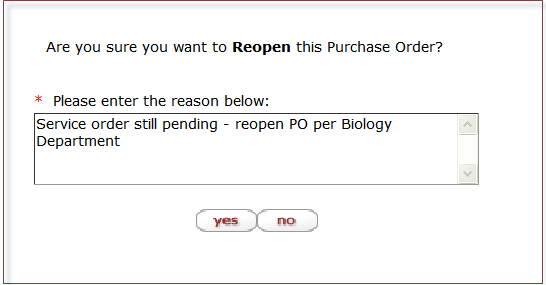
Click
 .
.The system displays this window.
Click
 .
.The system displays the OLE main menu.
 >
>  >
> >
> 
The Order Holding Queue was designed to allow users a quick search interface that allowed some global actions:
filter requisitions search - open or in process (not yet APO)
assign requisitions to other selection or acquisitions staff
use a totals tool to do simple pricing calculations on a group of selected requisitions
approve a group of requisitions into the next workflow step (subject to user permissions and requisition business rules)
cancel requisitions (or archive) that the user no longer wishes to purchase/convert to approved and transmitted purchase order (permissions based).
To view open or in-process Requisitions, click on the Order Holdings Queue link on the Main Menu.
You may select items on the left column of the search results. Continue to scroll to the bottom of the screen to assign or total:


The Order Holding Queue is simply a portal or view of open requisitions. These open requisitions will route according to requisitions business rules and workflow.
Note
For information about performing a search for one or more requisitions, see Performing Acquisition Searches on the OLE E-Doc Fundamentals wiki page.
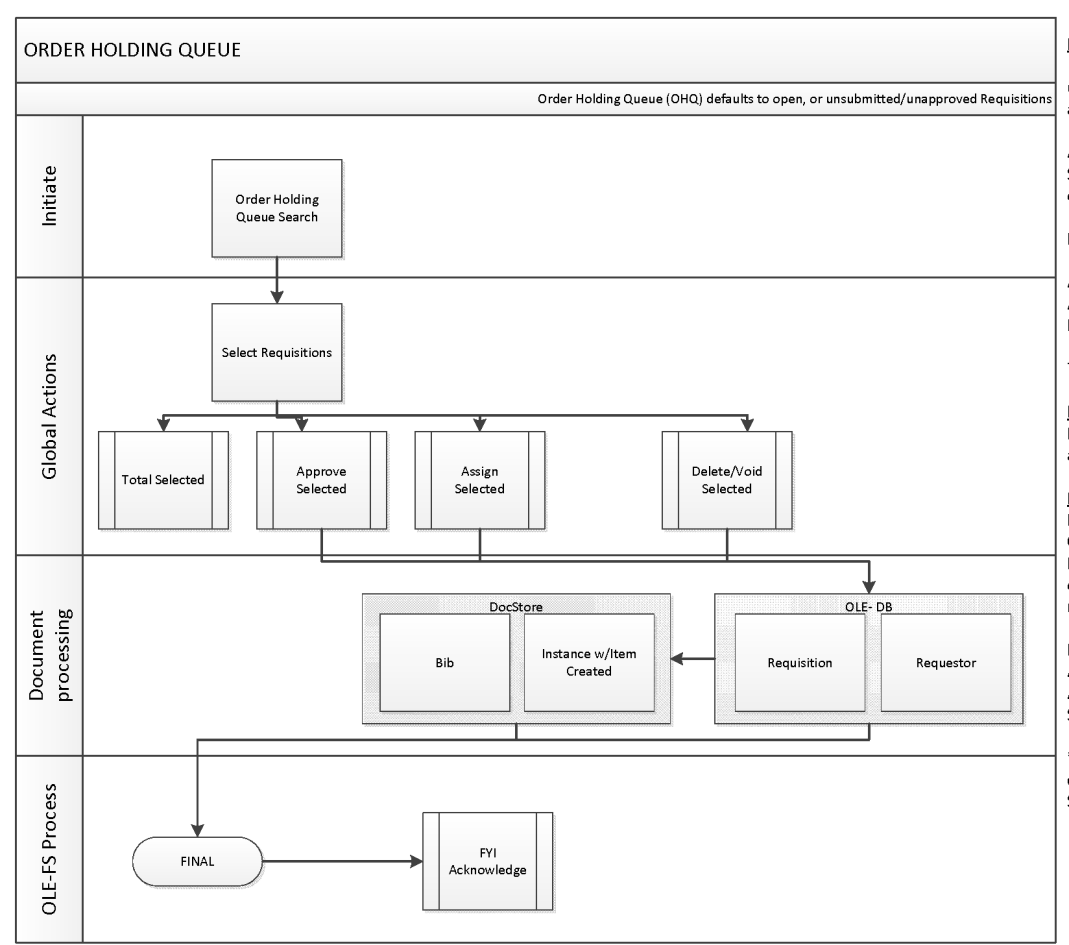
Table of Contents
 >
> >
>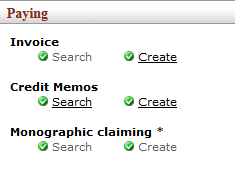
On the Select/Acquire tab, the Paying submenu provides access to invoices, credit memos and claiming e-documents.
 >
>  >
> >
> 
OLE offers a customized document search related to invoices. The search screen contains the standard search fields along with special fields that are unique to this type of e-doc.
Note
For information about performing a search for one or more payment requests, see Performing Acquisition Searches on the OLE E-Doc Fundamentals wiki page.
Note
For information about Document lookup fields that are specific to payment requests, see “Document Layout” under Invoice.
 >
> >
> >
> >
>
OLE release 1.0 uses the Invoice document to process vendor billing, whether positive (an invoice) or negative (a credit memo), or a mixture.
Invoice documents can be created three ways:
Manually, from the Select/Acquire Menu. Instructions are documented below.
By choosing “Pay” or “Receive and Pay” from the bottom of the Receiving Queue, which creates a new Invoice for the titles selected. Both these options use the Receiving Queue to create an Invoice document and populate it with chosen titles. From that point on, the document acts like any Saved invoice.
To learn more about the Receiving Queue, see Receiving Queue listed under Receiving.
By importing an EDIFACT Invoice message.
For instructions on how to do this, please see the Batch Framework section of the Guide to OLE System Administration Once created, the EDIFACT invoice acts like any other Saved invoice.
OLE 1.0 contains several roles for vendor invoicing.
To create unapproved invoicing and payment requests, please sign into OLE as:
| Role | Login |
|---|---|
| Receiving-AQ3, | ole-durbin |
| Receiving-AQ4 | ole-cstan; ole-earley |
| Accounting-AQ2, -AQ3, -AQ4 | ole-cphovis; ole-durbin; ole-earley |
| Super user | ole-khuntley (can do all) |
Note
For OLE 1.0, we have not yet coded full university financial integrations. To “stub” this functionality at present, and to simulate how general ledger, fund/account updates, and expenses might be approved and processed through the university financial system, all payment requests stop at the relevant Fiscal/Accounts staff for final routing/export/batch processing.
| Role | Login |
|---|---|
| Fiscal officer | ole-rorenfro |
| Fiscal manager | ole-jaraujo |
To make an Invoice in the Select/Acquire menu, clicks the InvoiceCreate button below the Paying submenu. This launches a blank Invoice document.
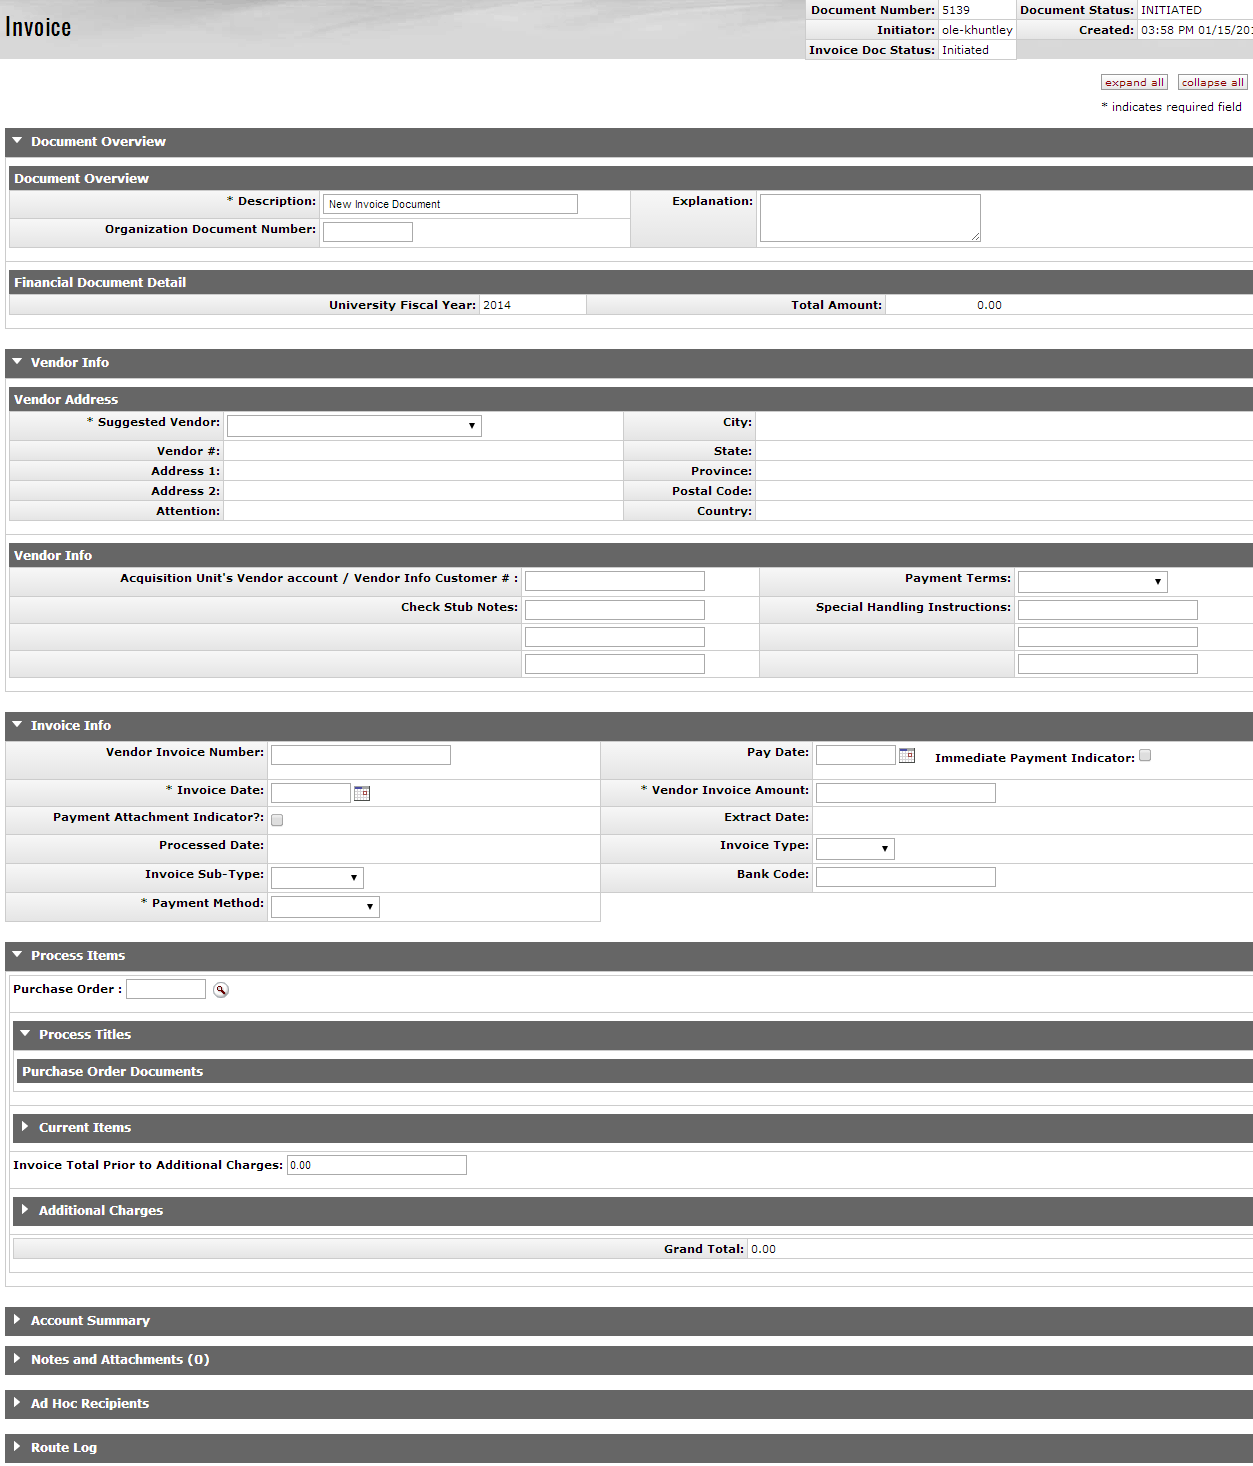
This screen includes unique Document Overview, Vendor, Invoice Info, Process Items, Account Summary tabs in addition to the standard tabs that display at the bottom of a financial transaction document.
Note
For more information about the standard tabs, see Standard Tabs on the OLE E-Docs fundamentals wiki page.

Note
For information about the standard Document Overview tab, see Standard Tabs on the OLE E-Docs fundamentals wiki page.
Financial Document Detail section definition
|
Title |
Description |
|
Year |
Display-only. The fiscal year of the purchase order referenced by the Payment Request document. |
|
Total Amount |
Display-only. The total amount of the payment request after the request has been submitted. |

The Vendor tab has two sections: Vendor Address and Vendor Info.
Vendor Address section definition
|
Title |
Description |
|
Suggested Vendor |
Select a vendor from the dropdown list, this will autopopulate the vendor address and some of the details in the vendor info tab. NoteAll POs on an invoice must use the same vendor. |
|
Vendor Number |
Display-only. Populates when the vendor is selected from the Suggested Vendor dropdown. The vendor number followed by a hyphen and the division number. |
|
Address 1 |
Display-only. Populates when the vendor is selected from the Suggested Vendor dropdown. |
|
Address 2 |
Display-only. Populates as necessary when the vendor is selected from the Suggested Vendor dropdown. |
|
Attention |
Display-only. Populates as necessary when the vendor is selected from the Suggested Vendor dropdown. |
|
City |
Display-only. Populates when the vendor is selected from the Suggested Vendor dropdown. |
|
State |
Display-only. Populates when the vendor is selected from the Suggested Vendor dropdown. |
|
Province |
Display-only. Populates as necessary when the vendor is selected from the Suggested Vendor dropdown. |
|
Postal Code |
Display-only. Populates when the vendor is selected from the Suggested Vendor dropdown. |
|
Country |
Display-only. Populates when the vendor is selected from the Suggested Vendor dropdown. |
Vendor Info section definition
|
Title |
Description |
|
Acquisition Unit's Vendor Account/ Vendor Info Customer # |
Optional. Populated from the PO. Override it by entering the customer number directly. |
|
Check Stub Notes |
Optional. These three fields are for data to be passed along to whatever system your library uses to print checks. The first field mirrors the Vendor Invoice Number field, so that the invoice number will print on the check stub. The other two fields are free-text. |
|
Payment Terms |
Populates when the vendor is selected from the Suggested Vendor dropdown. Override it by selecting a different payment term from the dropdown list. |
|
Special Handling Instructions |
Optional. Additional free-text fields for instructions. Can be passed on to your check-printing system. . |

Invoice Info tab definition
|
Title |
Description |
|
Vendor Invoice Number | The number assigned by the vendor to their invoice for credit. |
|
Invoice Date |
Required. Enter an invoice date or select it from the calendar |
|
Payment Attachment Indicator |
Optional. Select the check box if an attachment (such as a copy of the invoice) must be returned to the Vendor with this payment. |
| Processed Date | Display-only. The date at which the payment was processed. |
|
Invoice Sub Type |
Select the locally defined invoice sub type from the drop down menu. |
|
Payment Method |
Required. This may be prepopulated from the vendor record but must not be left blank. Select the method of payment from the drop down menu. |
|
Pay Date |
Defaults to the date automatically calculated by the system. If payment
terms are edited, the system repopulates this field only if it is blank. Override the automatic
entry by entering a pay date or selecting it from the calendar NotePay Date Calculations: The pay date is calculated automatically as follows. The payment terms specified are applied to the invoice date to generate a pay date. The payment terms parameters are in the Payment Terms Type table. Additionally, ten days (or another institutionally defined default number of days) are added to the current date to generate a pay date. KUALI OLE selects the later of these two dates and uses it as the default pay date for this Payment Request document. The pay date may be entered manually, but it must not be a past date. If the date is more than 60 days from the current date, the system displays a warning message. |
|
(Immediate Payment Indicator) |
Optional. Select the Immediate Pay check box if a check is needed on the same day (overrides the pay date – subject to the rules of your accounts-payable system). This indicator allows for an approved payment request to be extracted for payment during the day. |
|
Vendor Invoice Amount |
Required. The vendor total invoice amount. NoteIf the invoice carries prices in two different currencies, use the currency associated with the OLE Vendor Record for this supplier. Then use only the prices in that currency throughout the document. |
|
Extract Date |
Display-only. The date the Payment record is extracted to the Pre-Disbursement Processor. |
|
Invoice Type |
Optional. Select the type of invoice. Locally defined but sample data could include values Proforma/prepay, Regular. |
|
Bank Code |
Required. The bank code will be displayed only if the
Bank_Code_Document_Types includes 'PREQ' and Enable_Bank_Specification_Ind='Y'. The default bank is
determined by the Default_Bank_By_Document_Type parameter. You may override this value by entering
another bank code or selecting it from the Bank lookup |
This is the heart of the Invoice document, where the titles to be paid for are listed.
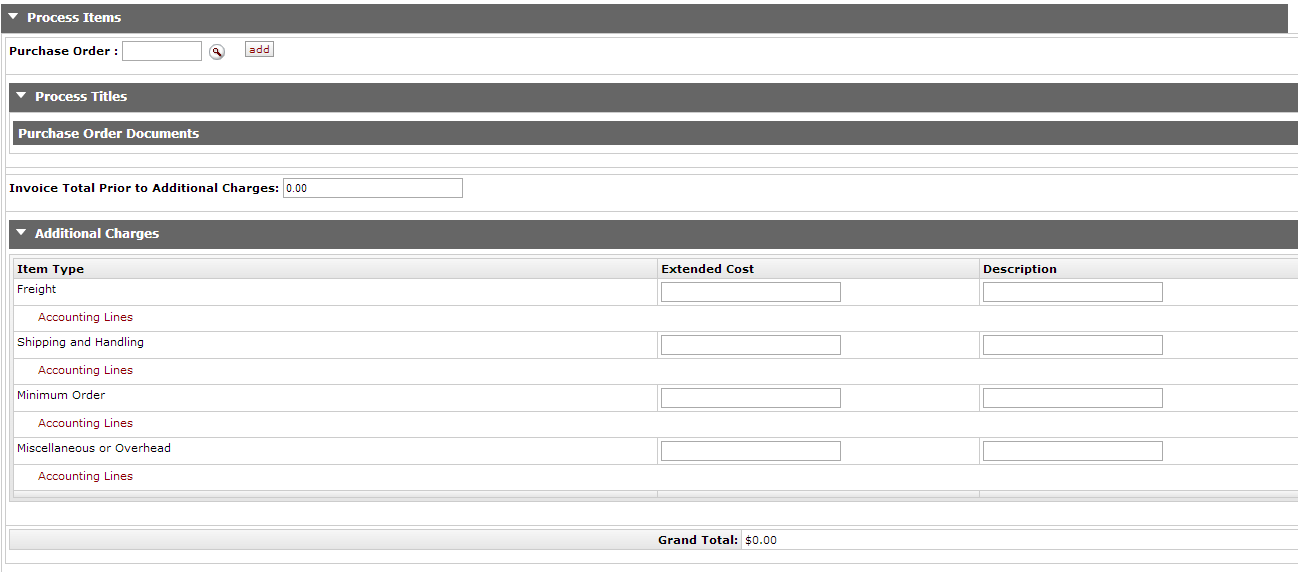
The Process Items tab includes a Purchase Order field and additional sections: Process Titles, including Purchase Order Documents, Current Items, and Additional Charges.
To attach a title to the Invoice, you can either type the Purchase Order number into the box
or search for it from the lookup  .
.
Once a purchase order has been located, the Purchase Order Documents subtab of the Process Titles tab with display all the titles on that PO. Remove titles you don’t want by un-checking the “Select Item for Invoice” box.

Purchase Order Documents subtab definition
|
Title |
Description |
|
PO # |
Displays the Purchase Order number. Click the number to open the purchase order in a new tab or window. |
|
Close PO |
If you know this is the last expected activity on this PO, you can check the box. When the Invoice is approved, OLE will automatically Close the PO. NoteWhether to Close POs after receipt and invoicing is a local decision. |
|
Action |
Click add P.O. or delete P.O. to add or remove the purchase order from the Invoice document. When you’ve made your desired edits to titles from this PO, click the add P.O. button, and the checked title(s) will be moved to the Current Items section. You can then enter your next Purchase Order number to begin working on the next title on the invoice. |
|
View related Documents |
Click the document links to open the documents in a new tab or window. |
|
Item Line # |
Display-only. The line item number representing each item. |
|
Title |
Display-only. Displays the title from the bibliographic record. Click to open the editor in a new tab or window. |
|
Copies Ordered |
Display-only. Indicates the number of copies ordered from the purchase order. |
|
Parts Ordered |
Display-only. Indicates the number of parts ordered from the purchase order. |
|
Invoiced Copies |
The number of copies listed on the invoice. |
|
Invoiced Parts |
The number of parts listed on the invoice. |
|
Invoice Price |
Defaults to the price entered on the purchase order. You may change it here to the actual invoice price. You can also edit other information, like the accounting string, if desired. NoteThe Dollar field on the Accounting line is a reflection of the Invoiced Price field on the line item. Updating the Invoice Price automatically updates the Amount. |
|
Discount |
The amount of a discount on an item. |
|
Discount Type |
Select the type of discount from the dropdown list. |
|
Unit Cost |
Display-only. The cost of the item from the purchase order. |
|
Extended Cost |
The cost of the item after the discount has been factored in. |
|
Select Item for Invoice |
Automatically checked. Unchech the box to remove the item from the Invoice. |
|
Accounting Lines |
Required. The accounting information is pulled from the purchase order but is editable. To update the Dollar field, change the amount of the Invoiced Price. |
When you’ve made your desired edits to titles from this PO, click the add P.O. button and the checked title(s) will be moved to the Current Items section. You can then enter your next Purchase Order number to begin working on the next title on the invoice.
Once a title has been moved to the Current Items section, its price and accounting string can still be changed. Additionally, you may click delete to remove the item from the Invoice.

Once you have added all the titles on your invoice, you can add other amounts on the Additional Charges tab. This tab is divided into four charge lines, each representing a different type of charge, each with its own accounting. The four Additional Charges lines are Freight, Shipping and Handling, Minimum Order, and Miscellaneous or Overhead. Each of these four lines has a ”Description” note field. This field is optional except for the Miscellaneous or Overhead section – if you enter an amount there, you must explain it in a note.

Additional Charges section definition
|
Title |
Description |
|
Item Type |
Display-only. The type of item to be charged. |
|
Extended Cost |
Enter the extended amount charged on the invoice for this additional charge item. |
|
Description |
Required for miscellaneous charges. |
You have two choices for assigning an accounting string to each type of additional charge:
You can supply an accounting string in the “Accounting Lines” subsection, or
you can have the system prorate the charge to the accounts used on the PO titles in the Current Items section. The system assumes you want to prorate the charge if you enter the charge but not an accounting string with it. The four choices for proration are:
This divides the cost among the funds used on the PO titles by the costs of those titles. This is the default option.
Example: an invoice with three titles:
Title 1:2 copies, $25.00 each, charged to chart UP / account PSYCHOL / object code 0010
Title 2: 1 copy, $30.00, charged to chart UP / account ECONOMI / object code 0020
Title 3: 1 copy, $20.00, charged to chart UP / account LITERAT / object code 0010
A Freight charge of $12 is entered with no accounting line. The system creates the following lines:
$6.00, charged to chart UP / account PSYCHOL / object code 0010
$3.60, charged to chart UP / account ECONOMI / object code 0020
$2.40, charged to chart UP / account LITERAT / object code 0010
This divides the cost among the funds used on the PO titles by the quantities being invoiced.
Example: an invoice with three titles:
Title 1:2 copies, $25.00 each, charged to chart UP / account PSYCHOL / object code 0010
Title 2: 1 copy, $30.00, charged to chart UP / account ECONOMI / object code 0020
Title 3: 1 copy, $20.00, charged to chart UP / account LITERAT / object code 0010
A Freight charge of $12 is entered with no accounting line. The system creates the following lines:
$6.00, charged to chart UP / account PSYCHOL / object code 0010
$3.00, charged to chart UP / account ECONOMI / object code 0020
$3.00, charged to chart UP / account LITERAT / object code 0010
This divides the costs among the funds used on the PO titles, but requires the operator to type in the amounts. Use this option when you need to divide the costs unevenly among the funds.
Example: an invoice with three titles:
Title 1:2 copies, $25.00 each, charged to chart UP / account PSYCHOL / object code 0010
Title 2: 1 copy, $30.00, charged to chart UP / account ECONOMI / object code 0020
Title 3: 1 copy, $20.00, charged to chart UP / account LITERAT / object code 0010
A Freight charge of $12 is entered with no accounting line. The system creates the following lines:
an accounting line for chart UP / account PSYCHOL / object code 0010, with a blank amount
an accounting line for chart UP / account ECONOMI / object code 0020, with a blank amount
an accounting line for chart UP / account LITERAT / object code 0010, with a blank amount
The Account Summary tab will summarize all accounts attached to the invoice and their respective charges after calculation. Information in the account summary is divided first by account, then by line item or additional charges line. Charges prorated to multiple accounts will be represented separately. Any changes made to accounting line items will not be updated until the Invoice has been calculated and the “Refresh Account Summary” button at the top of the tab has been clicked.
Click  to reload the page and view all the fiscal years, accounting lines and dollar
amounts for this requisition.
To create an Invoice:
Create an Invoice edoc.
Enter the suggested vendor, add additional information as necessary.
Enter the required fields and any additional information to the Invoice Info tab.
Search for a Purchase Order and modify the item as necessary. Click add P.O.
Update the accounting lines and prorate as needed.
Save or submit the Invoice.
When the Submit, Approve, or Blanket Approve buttons are clicked, OLE compares the total invoice charges (including additional charges) with the Vendor Invoice Amount entered earlier. If they do not match, a warning message appears. Clicking continue submits or approves the invoice, making the necessary ledger entries back on the individual invoice lines. (The “vendor invoice amount” is retained on the document, but nothing further is done with it.)
An Invoice can be Saved once its required fields have been filled in (see above) and at least one title has been added to the Current Titles section.
While the Invoice is in Saved status, it can be closed at any time. When reopened, the operator can continue to modify it: adding more titles, removing titles, changing prices, etc.
There are two ways to approve an invoice:
Clicking on the Submit button at the bottom of the document submits the document to the workflow your site has defined for invoices. The most common workflow is for the document to be routed to a Fiscal Officer for approval. The Fiscal Offer would then find the document listed in his/her Action List:

The Fiscal Officer would open it from there, modify it if necessary, and then Approve it by clicking the “Approve” button at the bottom of the document.
A Fiscal Officer can also choose to Disapprove an Invoice, by clicking the “Disapprove” button at the bottom of the document. This might happen if the document was created in error, or was found to be a duplicate not caught earlier in the process. Once Disapproved, the document is retained permanently in the system, but no further action can be taken on it.
OLE can allow a user to approve his/her own Invoices if desired. The user must be authorized to approve invoices, and the workflow would have to not require routing. In that circumstance, a “blanket approve” button will also appear at the bottom of the screen
Note
While this functionality is available in OLE, many sites will choose not to use it, instead requiring all invoices to be routed to another user for approval. If the workflow has been set to require a separate approver, no “blanket approve” button will appear.
An Invoice cannot be edited once it has been Approved. If a correction is made, it must be submitted via a new document (another Invoice, a Credit Memo, or a General Ledger Correction document).
Once an Invoice is approved, OLE takes several actions without further operator input:
It creates Payment Request (PREQ) documents for all positive amounts on the Invoice. One PREQ is created for each PO on the invoice
Example: if an invoice contains 4 line items with positive prices:
2 from PO 1014
1 from PO 1024
1 from PO 1065
OLE will create three PREQs when the invoice is approved.
The PREQs are usually automatically approved at the same time they are created.
It creates Credit Memo (CM) documents for all negative amounts on the Invoice. Like the PREQs, these are automatically approved.
It writes the totals from these PREQs and CMs to a particular set of tables, to enable local extraction of the data for transmission to other accounting systems
Note
OLE does not contain hard-coded functionality for this extraction, since it will vary for each institution, depending on the needs of their local systems. Instead, OLE compiles this data in one set of tables for easy extraction.
It updates balances in the General Ledger (G/L), changing the Invoice amounts from Pending expenditures to actual expenditures, and relieving encumbrances as appropriate.
 >
>  >
> >
>
OLE offers a customized document search related to credit memos. The search screen contains the standard search fields along with special fields that are unique to this type of e-doc.
Note
For information about performing a search for one or more credit memos, see Performing Acquisition Searches on the OLE E-Doc Fundamentals wiki page.
Note
For information about Document lookup fields that are specific to credit memos, see “Document Layout” under Vendor Credit Memo.
 >
> >
> >
> >
>
The Vendor Credit Memo (CM) document allows you to process vendor refunds for goods or services related to invoices processed on POs. You may process a vendor credit memo against a specific payment request, a purchase order, or a vendor ID.
Note
You must be a member of the role OLE-SELECT Accounting-AQ2, -AQ3 or -AQ4 to initiate the Vendor Credit Memo document.
Two screens are associated with this e-doc—an initiation screen with a single folder, followed by a main screen with multiple folder tabs.
When you select Vendor Credit Memo from the main menu, the system displays the Credit Memo Initiation tab.

This tab is used to specify the vendor credit memo number, date, and amount for the credit memo along with the number for a payment request, a purchase order, or a vendor in order to initiate the Vendor Credit Memo document.
Credit Memo Initiation tab definition
|
Title |
Description |
|
Credit Memo # from Vendor |
Required. Enter the number found on the vendor's credit memo. |
|
Credit Memo Date |
Required. Enter the date found on the
credit memo itself or select the date from the calendar |
|
Vendor Credit Memo Amount |
Required. Enter the net amount of the credit. |
|
Payment Request # |
Specify a payment request number in this field only if the vendor credit memo is processed against a specific payment request. See note below. |
|
Purchase Order # |
Specify a PO number in this field only if the vendor credit memo is processed against a specific PO. See note below. |
|
Vendor # |
Specify a vendor number in this field only if the vendor credit memo is general in nature (not applicable to a specific payment request or a specific PO). See note below. |
Note
An entry in one and only one of these three fields is required: Payment Request #, Purchase Order #, or Vendor #.
Click  to begin initiation of this vendor credit memo.
The Vendor Credit Memo document continues from the initiation screen to the main document screen that displays the unique Vendor, Credit Memo Info, and Process Items tabs in addition to the standard e-doc tabs.

Note
For information about the standard tabs, see Standard Tabs on the OLE E-Doc Fundamentals wiki page.
The Vendor tab allows you to modify the vendor address information via address lookup if the credit memo has been processed against a PO or a vendor. You may also add check stub notes on this tab.

This tab contains two sections, Vendor Address and Vendor Info.
Vendor Address section definition
|
Title |
Description |
|
Vendor |
Display-only. The name of the vendor. |
|
Vendor # |
Display-only. The number that uniquely identifies the particular vendor. |
|
Address 1 |
Required. The first line of the vendor's address. A change of address is
possible via lookup NoteThe lookup is not provided if a payment request number was entered in the Credit Memo Initiation tab Leave as is or search for the address from the Address lookup |
|
Address 2 |
Display-only. The second line of the vendor address. |
|
Attention |
Display-only. If the credit memo is against a payment request and the payment request had an attention line completed, the name in the attention line on the payment request populates this field. |
|
City |
Display-only. The city of the vendor's address. |
|
State |
Display-only. The state of the vendor's address. |
|
Province |
Display-only. The province of the vendor's address (foreign addresses). |
|
Postal Code |
Display-only. The postal code of the vendor's address. |
|
Country |
Display-only. The country of the vendor's address. |
Vendor Info section definition
|
Title |
Description |
|
Acquisition Unit’s Vendor account / Vendor Info Customer # |
Display-only. The ID number for the customer. The system displays this
value if a customer number exists on the referenced document. A change of customer number is
possible via lookup NoteThe lookup is not provided if a payment request number was entered in the Credit Memo Initiation tab. |
|
Check Stub Notes |
Optional. Enter text to be printed on the check stub. |
The Credit Memo Info tab displays information pertinent to the current credit memo. In the examples below, the first credit memo is against a payment request and the second is against a vendor.

Credit Memo Info tab definition
|
Title |
Description |
|
Credit Memo # from Vendor |
Display-only. The credit memo number as entered on the Credit Memo Initiation tab. |
|
Credit Memo Date |
Display-only. The credit memo date as entered on the Credit Memo Initiation tab. |
|
Vendor Credit Memo Amount |
Display-only. The amount of the credit as entered on the Credit Memo Initiation tab. This field is displayed only on an in-process Vendor Credit Memo document. After the document has been submitted, the field no longer carries forward. |
|
PO End Date |
Display-only. The end date automatically populated from PO information. |
|
PO Notes |
Display-only. 'Yes' if the PO contains notes. |
|
Extract Date |
Display-only. The date the credit record was extracted to the Pre-Disbursement Processor. |
|
Credit Type |
Corresponds to the Invoice Type on Payment Requests. Enter a value or
search from the lookup |
|
Bank Code |
Required. The bank code will be displayed only if the
Bank_Code_Document_Types includes 'CM' and Enable_Bank_Specification_Ind=‘Y.’ The default bank is
determined by the Default_Bank_By_Document_Type parameter. You may override this value by entering
another bank code or selecting it from the Bank lookup |
|
Credit Memo Type |
Display-only. Indicates whether this credit memo references a payment request, PO, or vendor. |
|
Vendor # |
Display-only. Automatically populated based on the entry in the Credit Memo Initiation tab that references either the payment request, the purchase order or the vendor number. The vendor number is followed by a hyphen and the division number. |
|
Purchase Order # |
Display-only. The referenced purchase order number or the purchase order number associated with the referenced payment request. |
|
Payment Request # |
Display-only. If processing a credit against a payment request, this field is populated based on the entry in the Credit Memo Initiation tab. |
|
AP Processed Date |
Display-only. The date the vendor credit memo was submitted by Accounts Payable. |
|
Credit Sub Type |
Corresponds to the Invoice Sub Type of the payment request. Example values
may include "regular" and "supplemental". Enter a value or search from the lookup |
|
Payment Method |
Select the method of payment from the drop down menu. |
The Process Items tab identifies the lines of a specified purchase order or payment request that this credit relates to. It also indicates the dollar amounts to be credited to individual lines and allows you to edit the accounting information associated with these lines. It also allows you to enter additional credits pertaining to items such as restocking fees or miscellaneous credits.
The tab includes two sections: Items and Additional Charges. In the example below, the credit references a purchase order.
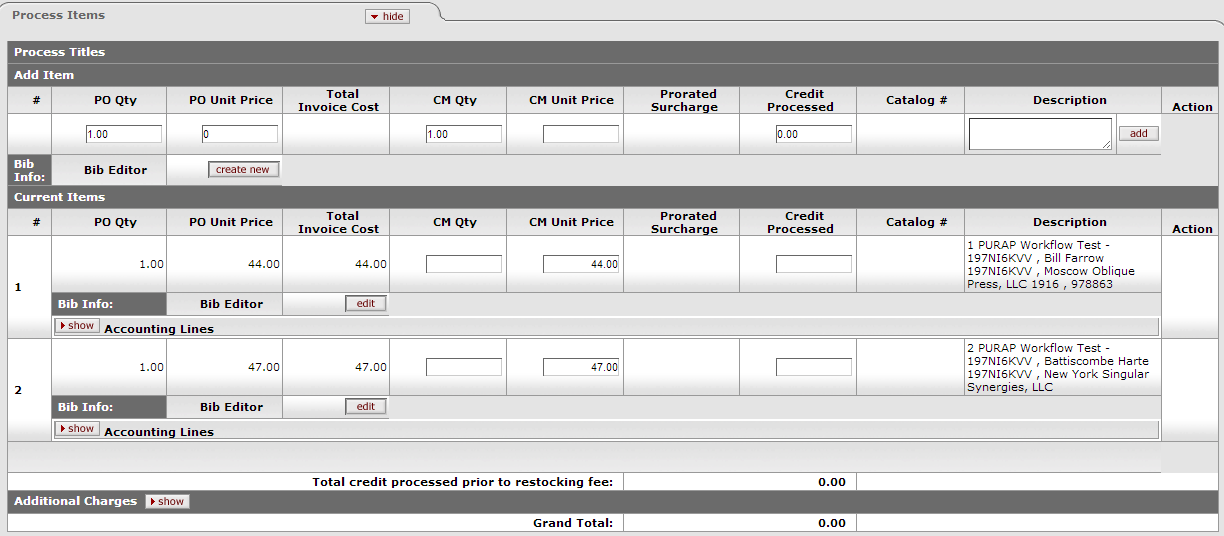
The makeup of the Items section varies based on whether the credit is being applied to a purchase order, payment request or vendor. If crediting by vendor, the Items section contains no fields. See below for the section definition when the CM is based on a vendor number or a payment request.
Process Items tab definition (credit references a purchase order)
|
Title |
Description |
|
# |
Display-only. The item line number from the PO. |
|
PO Qty |
Display-only. The quantity of items available for credit. |
|
PO Unit Price |
Display-only. The unit price copied from the PO for this line item. |
|
Total Invoice Cost |
Display-only. The total amount already invoiced and available to credit for this line item. |
|
CM Qty |
Optional. Enter the number of items for this line that are to be credited. This entry increases the Open Qty value for this line item on the PO. |
|
CM Unit Price |
Optional. The unit price for this line item to be processed as a credit. This field is automatically populated using the price from the PO, but it may be edited to match the credit memo unit price. |
|
Prorated Surcharge |
Additional charge applied to the line item based on the proportional distribution. |
|
Credit Processed |
If blank and if the credit memo quantity invoiced is populated, the system calculates the credit processed for this line item when you click the calculate button. NoteIf the field already contains a value, you must delete the value in order to populate a new value by clicking calculate. Override the amount as needed. |
|
Total Amount |
Display-only. The sum of credit processed, if applicable. |
|
Catalog # |
Display-only. The catalog number for this item on the PO. |
|
Description |
Display-only. The description for this item on the PO. |
In this next example, the credit references a payment request.
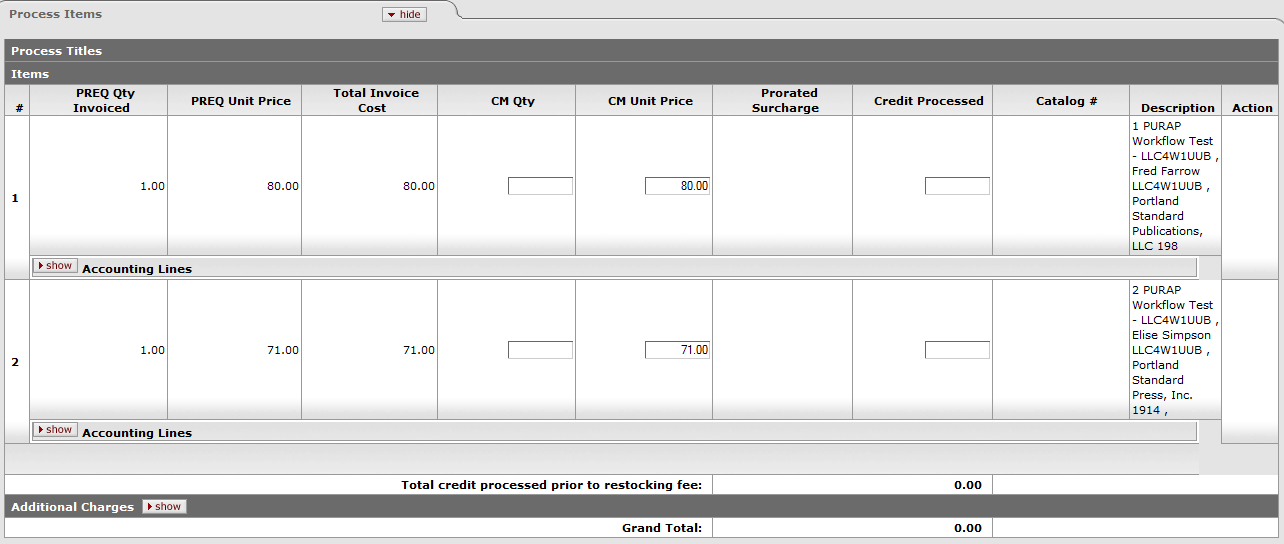
Process Items tab definition (credit references a payment request)
|
Title |
Description |
|
# |
Display-only. The item line number from the payment request. |
|
PREQ Qty Invoiced |
Display-only. The quantity of items available to be credited on the specified Payment Request document. |
|
PREQ Unit Price |
Display-only. The unit price copied from the payment request for this line item. |
|
Total Invoice Cost |
Display-only. The total amount available to be credited for this line item on the specified Payment Request document. |
|
CM Qty |
Optional. Enter the number of items for this line that are to be credited. This increases the Open Qty value for this line item on the PO. |
|
CM Unit Price |
Optional. The unit price for this line item to be processed as a credit. This field is automatically populated using the price from the payment request, but the unit price may be edited if the credit reflects a different price. |
|
Prorated Surcharge |
Additional charge applied to the line item based on the proportional distribution. |
|
Credit Processed |
If blank and if the credit memo quantity invoiced is populated, the system calculates the credit processed for this line item when you click the calculate button. NoteIf the field already contains a value, you must delete the value in order to populate a new value upon next calculate. Override the amount as needed. |
|
Total Amount |
Display-only. The sum of credit processed. |
|
Catalog # |
Display-only. The catalog number for this item on the PO. |
|
Description |
Display-only. The description for this item on the PO. |
Additional Charges section definition (credit references a payment request)
|
Title |
Description |
|
Item Type |
Display-only. The type of item to be charged. NoteAn entry of 'Less Restocking Fee' reduces the amount of any credit entered for other item types. |
|
Credit Processed |
Optional. Enter the amount that corresponds to this item type. NoteA 'Miscellaneous Credit' entry can be entered as a positive or negative amount if the parameter allows this choice. A positive amount increases the credit total. |
|
Total Amount |
Display-only. The sum of credit processed. |
|
Description |
Parameters control whether descriptions are required. |
You may also prorate the additional charges to the invoiced titles. Enter the amount of the additional charge, select to prorate by Quantity, Dollar, or Manual Prorate. If Manual prorate is selected, enter the amount you would like prorated to each title.
For a vendor credit memo referencing a vendor ID, additional charges are the only types of information displayed in the Process Items tab. Dollar amounts are not prefilled, so you must enter accounting information.
In the example below, the credit references a vendor number.

This section presents information about restocking fees and miscellaneous credits that apply to the credit memo.
Additional Charges section definition (credit references a vendor number)
|
Title |
Description |
|
Credit Processed |
The dollar amount to be applied to this vendor credit memo. |
|
Total Amount |
Display-only. The sum of credit processed, if applicable. |
|
Description |
Required by default for miscellaneous credit only. NoteThe Item_Types_Requiring_User_Entered_Description parameter controls whether the description is required or optional. |
Note
Click show/hide to display or hide item accounting lines for each line item or additional item.

The View Related Documents tab collects information about Purchasing/AP documents related to this Vendor Credit Memo document. For example, it displays identifying information and any pertinent notes for the requisition, purchase order, receiving documents, payment requests, or other vendor credit memos associated with the purchase order.

This tab lists related documents.
View Related Documents tab definition
|
Title |
Description |
|
Date |
Display-only. The date the related document was created. |
|
User |
Display-only. The user who created the related document. Entry of 'Kuali System User' means the document was automatically created by the system. |
|
Note |
Display-only. A note describing the document. |
To access one of these related documents, click its document number. The system displays the document in a separate window.
The View Payment History tab tracks payment information related to the purchase order associated with this Vendor Credit Memo document. It shows pending payment information and updates indicating when a payment was processed through the Pre-Disbursement Processor (PDP). This tab also shows any other vendor credit memos that have been processed against the related purchase order and any associated payment requests.

Payment Requests section definition
|
Title |
Description |
|
PREQ# |
Display-only. The payment request number. |
|
Invoice # |
Display-only. The invoice number. |
|
PO# |
Display-only. The purchase order number. |
|
PREQ Status |
Display-only. The payment request status. |
|
Hold |
Display-only. Displays 'yes' if the payment request in on hold. Displays 'no' if the payment request is not on hold. |
|
Req Canc |
Display-only. Displays 'yes' if the payment request has been requested to be canceled. Displays 'no' if the payment request has not been requested to be canceled or if the 'request cancel' has been removed. |
|
Vendor Name |
Display-only. The vendor name associated with this payment request. |
|
Customer # |
Display-only. The customer number associated with this payment request. |
|
Amount |
Display-only. The payment request amount. |
|
Pay Date |
Display-only. The date the payment is scheduled to extract to PDP. |
|
PDP Extract Date |
Display-only. The date the payment request was extracted to the Pre-Disbursement Processor for disbursement processing. |
|
Paid? |
Display-only. Displays 'yes' if the payment has been disbursed. Displays 'no' if the payment has not been disbursed. |
Credit Memos section definition
If the vendor number and credit memo number match those of a CM previously processed, a warning notifies you of the potential duplicate. You may override the warning and continue.
If the credit memo amount and credit memo date match those of a CM previously processed, a warning notifies you of the potential duplicate. You may override the warning and continue.
A credit memo may be processed against a payment request, a purchase order, or a vendor, but only one of the three.
A credit memo processed at the vendor level requires processing on the Miscellaneous line. Accounting must be added to the Miscellaneous line during processing
When a credit memo is processed at the level of payment request or purchase order and the purchase order has been closed, you may reopen the purchase order.
Modification of remit addresses is permitted for a credit memo referencing a PO or a vendor. The address lookup functionality is used to modify the remit address.
After being approved by AP, accounts cannot be changed on a credit memo.
The system re-encumbers amounts associated with each line item on a credit memo. The Amount encumbered follows the rules of PO encumbrance (CM Quantity x PO Unit Cost), which is similar to the payment request disencumbrance that utilizes the PO unit cost rather than the PREQ unit cost if the two unit costs are different.
Accounts encumbered are the accounts on the original PO, with the account distribution in proportion to the distribution on the PO if more than one account is involved per line item. PO open quantities are incremented by the line item quantity on a credit memo.
Credit entry: The accounts (full accounting string) on the vendor credit memo are credited in the G/L at the time of AP submit. The G/L entry is made in summary for each accounting string. (So, for example, if three line items on a CM use the same accounting string, only one expense credit entry—not three—is created in the G/L for that accounting string.)
Debit entry: Create one offset to object code 9041 for each account and sub-account combination on a CM.
After being canceled, the G/L entries of the credit memo are reversed, any encumbrance created from AP approval of the credit memo are reversed, and any PO open quantities that were incremented from the creation of the credit memo are decreased.
FYI notification on a credit memo routes to the fiscal officer or CM delegate per the account number(s) on the credit memo.
A credit memo may be canceled or placed on hold at any time prior to extraction.
When a credit memo is in 'AP-Processed' status, it is eligible to be extracted to PDP for disbursement.
The system groups all PREQs and CMs eligible for extract for disbursement as a positive payment based on vendor and processing campus.
Credit memo searches are available to all users.
The Vendor Credit Memo document is initiated by a member of the Accounting-AQ2, -AQ3, -AQ4 roles. Routing is dependent on whether an image attachment is part of an institution's configuration.
An Accounting-AQ2, -AQ3, or -AQ4 clicks the submit button to complete the processing of a Vendor Credit Memo document. The document goes into 'Awaiting AP Review' status if Require_attachment_ind='Y'. The AP Review status may be satisfied by an image attachment or in another fashion (configurable at your institution). After AP review, the document routes to the fiscal officer or fiscal officer delegate as an FYI. At the AP Review routing level, approvers are not permitted to change content on the document. They may only add notes and attachments and approve or cancel.
The document routes an FYI copy to the fiscal officer associated with each account number that appears on the vendor credit memo.
Note
The Timing of G/L Update:After a CM document has been created and submitted, it updates the G/L the next time a batch process runs. Note that this is different from most OLE docs, which do not update the G/L until the document receives all approvals. If accounting entries on the document change before it reaches 'FINAL' status, the G/L entries are updated accordingly the next time a batch process runs.

Select Vendor Credit Memo from the Purchasing/Accounts Payable submenu group on the Transactions menu group on the Main Menu tab.
Log into OLE as necessary.
The system displays a blank Vendor Credit Memo Initiation tab with a new document ID.
Complete the Credit Memo Initiation tab as follows:
a) Enter values for Credit Memo # from Vendor, Credit Memo Date, and Vendor Credit Memo Amount.
b) Enter a value for one and only one of these: Payment Request #, Purchase Order #, or Vendor #.
Click
 .
. Complete the Vendor tab as follows:
a) Verify the vendor address.
b) Add check stub notes if requested.
Review the Credit Memo Info tab and update the bank code, if necessary.
Complete the Process Items tab as follows:
a) For quantity-based line items, enter the credit memo quantity from the vendor credit.
b) For non-quantity-based line items, enter the credit processed amount using the vendor credit amount.
c) Enter a credit processed amount for additional charges, if needed. Miscellaneous charges require a description, depending on parameter setup.
Complete the standard tabs as necessary: Document Overview, Notes and Attachments, Ad Hoc Recipients, and Route Log.
Note
For information about the standard tabs, see Standard Tabs on the OLE E-Doc Fundamentals wiki page.
Click the
 button.
Click
 .
.AP reviewers approve the document if the parameter Require_attachment_ind='Y'.
Note
For more information about how to approve a document, see Workflow Action Buttons on the OLE Workflow Overview and Key Concepts wiki page.
An AP user may choose to place the credit memo on hold or remove the hold when it is no longer necessary. The hold flag prevents a vendor credit memo from being extracted and applied. When a document is taken off hold, it retains the status it had when the hold flag was set.
A credit memo in the 'AP-REVIEW' or 'COMPLETE' status may be placed on hold from the time of AP Submit until the time the credit extracts it to the Pre-Disbursement Processor.
To place a credit memo on hold, you must attach a note to the document explaining why it has been put on hold. To put a credit memo on hold:
After displaying the credit memo, click
 .
.
Enter a reason for putting the CM on hold and click
 .
.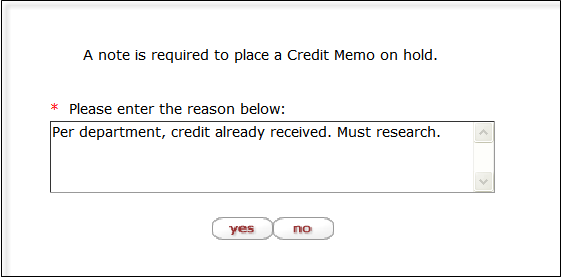
The system marks the vendor credit memo as being in 'HOLD' status. It also displays a large header on the document indicating who placed the order on hold.
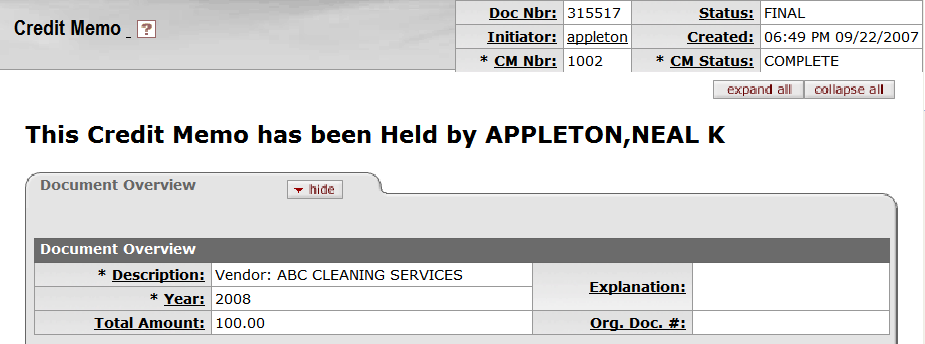
Either the person who placed the credit memo on hold or an AP supervisor may take a vendor credit memo off hold. To take a credit memo off hold:
Display the CM and click
 .
.
Enter the reason for removing the hold and click
 .
.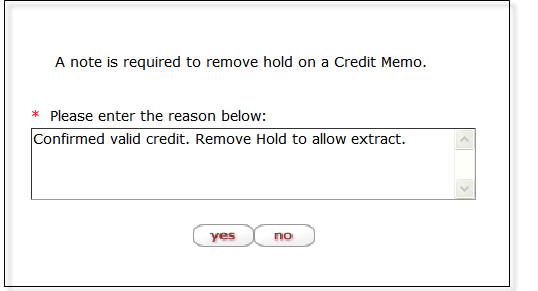
In the Notes and Attachments tab, the system displays the history of this action.

A vendor issues a $30.00 credit for two items that were returned after payment was made. An AP user creates a credit memo referencing the payment request document that issued a payment for these two items.
The initiator, a user with the role of Accounting-AQ2, -AQ3, or -AQ4, creates a new credit memo document by entering the vendor credit memo number, amount and date; and one of the following: the payment request number, the PO number, or the Vendor number. When the initiator clicks continue, the system generates the Vendor Credit Memo document. In the Process Items tab, the initiator enters the quantity being credited and clicks calculate. At this point, the document is ready for submission and routing.
Table of Contents
 >
> >
>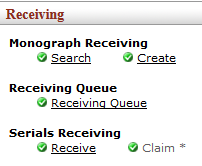
On the Select/Acquire tab, the Receiving submenu provides access to receiving e-documents.
 >
>  >
> >
> 
OLE offers a customized document search related to receiving. The search screen contains the standard search fields along with special fields that are unique to this type of e-doc.
Note
For information about performing a search for one or more receiving e-docs, see Performing Acquisition Searches on the OLE E-Doc Fundamentals wiki page.
Note
For information about Document lookup fields that are specific to receiving, see “Document Layout” under Receiving (Line Item Receiving).
 >
> >
> >
> >
>
The Line Item Receiving (RCV) document is used to acknowledge the receipt of goods or services on purchase order line items for which a quantity is given. Line item receiving is used to record the quantities of items received, damaged, returned or unordered on a purchase order.
When the purchase order routing is completed and the PO becomes fully approved, if the Receiving Required flag is not 'Yes,' the attributes of the purchase order are compared to the Receiving Thresholds table. If one of the attributes on the purchase order matches the Thresholds table, then the Receiving Required flag is set to 'Yes'. Amendments are also evaluated to determine whether the flag should be set if payment requests have not yet been processed against the purchase order.
When receiving is required, the Receiving document is processed against a purchase order to satisfy confirmation of satisfactory receipt of the goods.
Note
When receiving is satisfied, the payment request is eligible for auto approval for payment without regard to dollar amount limits. For this reason, it is important that the fiscal officer (or delegate) understand that the receiving document does not replace the fiscal officer (or delegate's) responsibility to confirm that accounts are properly charged and the proper amount is paid. The receiving document satisfies the receipt of goods only. The fiscal officer or delegate is responsible for ensuring that the amounts to be paid are correct and the correct accounts are charged.
Note
When receiving required is 'Yes', the payment request document does not route for fiscal officer approval until sufficient quantity has been documented as received.
Note
The auto approval process is designed to push payments through so that vendors are paid on time. The fiscal officer is permitted to approve all payments, not just those that require positive approval.
In order to receive an item in OLE, you need a corresponding open purchase order that has not been completely received. You should be logged in as a staff member with receiving permissions.
Anyone in the Receiving staff roles can create/complete Receiving documents via Blanket Approve permissions, with no further approvals required. In addition, these staff can create unapproved vendor invoices/payment requests.
| Role | Login |
|---|---|
| Receiving-AQ2 | ole-cphovis |
| Receiving-AQ3 | ole-durbin |
| Receiving-AQ4 | ole-cstan; ole-earley |
| Super user | ole-khuntley (can do all) |
Line Item Receiving documents may be created in several ways—by selecting the Search or Create link on the Select/Acquire menu or by viewing the purchase order and then clicking the receiving button. OLE also contains a Receiving Queue for quick, straightforward receiving.
When you first access the Line Item Receiving document, the system displays the Line Item Receiving Initiation tab. The fields on the initiation screen are used to detect duplicate entries. Initiating the Line Item Receiving document in this manner allows the system to provide feedback to you regarding potential duplicate entries.

Here you enter information to create a new Line Item Receiving document.
Line Item Receiving Initiation tab definition
|
Title |
Description |
|
Purchase Order # |
Required. Enter the PO number associated with the goods for which line item receiving is being processed. |
|
Date Received |
Required. Enter the date of the vendor's receiving document. |
|
Packing Slip # |
Enter the packing slip number if included on the receiving document. |
|
Bill of Lading # |
Enter the bill of lading number if included on the receiving document. |
|
Carrier |
Select from the list to specify the freight carrier used by the Purchasing Department. |
Click the  button to display tabs of the main Line Item Receiving document.
This main screen for the Line Item Receiving document includes unique Vendor, Titles, and Delivery tabs in addition to the standard tabs that display at the bottom of a financial transaction document.
Note
For more information about the standard tabs, see Standard Tabs on the OLE E-Docs fundamentals wiki page.
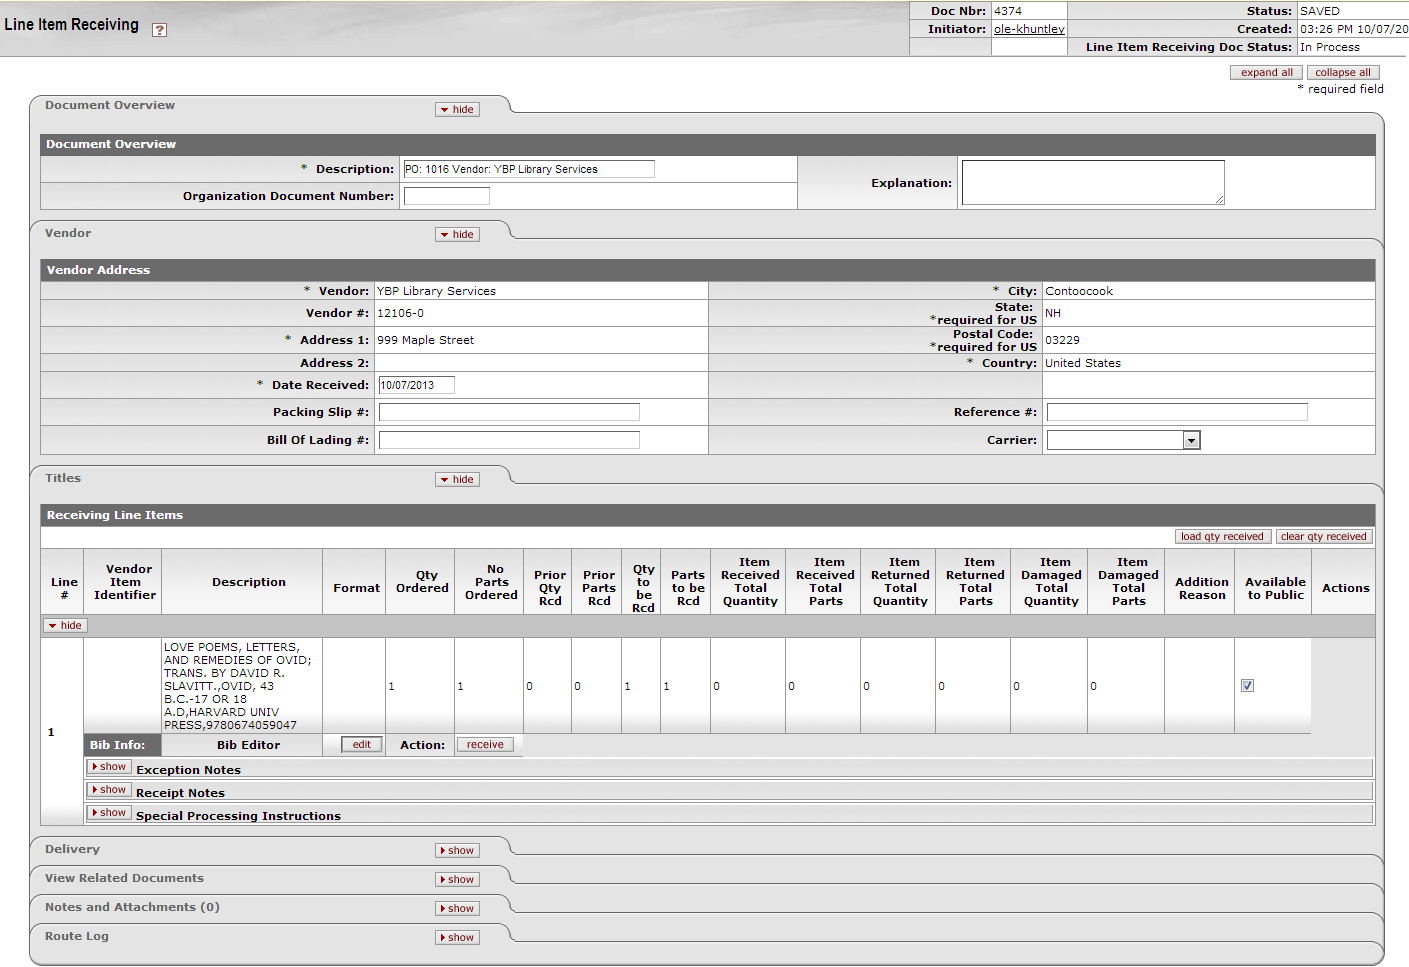
The Document Overview tab is standard except that the Description field defaults to the purchase order number and vendor's name.

Document Overview tab definition
|
Title |
Description |
|
Description |
Defaults to the purchase order number and vendor's name |
|
Org. Doc. # |
The organization document number. If the organization does not use an internal referencing system, this field is left blank. |
|
Explanation |
Allows you to include additional information about the document that does not fit into the Description field (which is limited to 40 characters). |
The Vendor tab contains vendor details related to the items being received.

Vendor tab definition
|
Title |
Description |
|
Vendor |
Display-only. The vendor name from the Purchase Order document. |
|
Vendor # |
Display-only. The OLE-generated identifying number assigned to this vendor. |
|
Address 1 |
Display-only. The first line of the address for the selected vendor. |
|
Address 2 |
Display-only. The second line of the address for the selected vendor. |
|
Date Received |
Required. Defaults from the initiation tab but can be changed. |
|
Packing Slip # |
Defaults from the Line Item Receiving Initiation tab but can be edited. |
|
Bill of Lading # |
Defaults from the Line Item Receiving Initiation tab but can be edited. |
|
City |
Display-only. The city associated with this vendor. This entry is required under certain circumstances (such as, for a U.S. address). |
|
State |
Display-only. The state associated with this vendor. |
|
Postal Code |
Display-only. The postal code for this vendor address. Postal codes are required under certain circumstances (such as, for a U.S. address). |
|
Country |
Display-only. The country associated with this vendor. |
|
Reference # |
Allows you to add additional information that will assist with document searching. |
|
Carrier |
Defaults from the Line Item Receiving Initiation tab but can be edited. |
The Titlestab displays the lines of the PO
that this receiving document relates to. On this tab the quantity received for each line item number
is recorded. If known at this time, quantity returned and quantity damaged are also recorded;
otherwise, this information can be added later by using the Receiving Correction document. Click  to receive the title, click edit to access the
Bibliographic Editor and modify the record.
Note
To receive additional titles on a PO, users must create a purchase order amendment (POA). A POA is created when a change or addition is made to an existing PO. If the existing PO is open then the PO can be amended, if the PO is closed then the PO has to be opened and then amend the PO. PO amendments allows for changes in number of copies, adding a copy for a different location or fund or for adding a new title to the existing PO. To learn more about creating a POA, see Purchase Order Amend

Titles tab definition
|
Title |
Description |
|
Line # |
Display-only. The line number on the receiving document. The line number corresponds to the line number on the purchase order. |
|
Vendor Item Identifier |
Display-only (optional for new line items) Identifies a vendor item identifier if one has been provided by a vendor. |
|
Description |
Concatenated data values from the related bibliographic description. |
|
Format |
Display-only (optional for new line items). Identifies the Format for this line item. |
|
Qty Ordered |
Display-only. Indicates the original quantity ordered from the purchase order. |
|
No. of Parts Ordered |
Display-only. Indicates the original number of individual pieces ordered from the purchase order. |
|
Prior Qty Received |
Display-only. Indicates the sum of total quantity received minus total quantity returned from all previously submitted Line Item Receiving documents. |
|
Prior Parts Rcd |
Display-only. Indicates the sum of total of parts received minus total parts returned from all previously submitted Line Item Receiving documents. |
|
Qty to be Received |
Display-only. The Quantity Ordered minus the Prior Quantity Received. |
|
Parts to be Rcd |
Display-only. The No. Parts Ordered minus the Prior Parts Received. |
|
Item Received Total Quantity |
The quantity of this item received in this shipment. NoteIf you receive additional copies of an item, you will need to fill in the Copies section. |
|
Item Received Total Parts |
The parts of this item received in this shipment. |
|
Item Returned Total Quantity |
The quantity to be returned to the vendor. |
|
Item Returned Total Parts |
The parts to be returned to the vendor. |
|
Item Damaged Total Quantity |
The quantity received that was damaged. |
|
Item Damaged Total Parts |
The part(s) received that was (were) damaged. |
|
Addition Reason |
Required. When adding items, indicates the reason this line item is being added (i.e., 'substitution' or 'not on order'). |
|
Available to the Public |
Optional. Indicates whether or not a bibliographic description shall be exposed to users prior to purchase/receipt. Default is checked for yes. |
|
Bib Info |
To modify the bibliographic record, click edit. Click receive to receive the item. |
Note
In prior versions of OLE, users could add additional line items from the Receiving Document. In 1.0, users must access the open Purchase Order and amend it to add additional items.
OLE provides three forms of receiving line item notes that are specific to receiving activities:
Exception Notes: to note damaged, unusual, or other exceptions for the line item. Future workflow rules will be tied into exception notes.
Receipt Notes: general notes for recording receipt statements on the item in hand
Special processing instructions: users cannot input these instructions during receiving, but are required to check-off, or acknowledge any special instructions transferred from the Purchase Order for this line item- this must be completed prior to submitting the document.

If there are multiple copies ordered, you will need to receive each one
individually from the Copies section. In the Copies section, click the  button.

The expanded section appears:

Copies section definition
|
Title |
Description |
|
Enumeration |
Descriptive information for the numbering scheme of the item. |
|
Location |
The home location of the title being requested. |
|
Copy Number |
Identifies the number of copies a library location has of the same item. |
|
Receipt Status |
Display only. Identifies the receiving status of the item. |
| Action | Click  to receive the item and update the receipt status. to receive the item and update the receipt status. |
The Delivery tab contains information about where goods ordered on this order should be delivered. It also displays delivery contact information and any special delivery instructions. All fields in this tab come from the purchase order's Delivery tab.

Delivery tab definition
|
Title |
Description |
|
Delivery Campus |
The campus code where the goods were delivered. |
|
Building |
The building where the goods were delivered. |
|
Address 1 |
Address line 1 where the goods were delivered. |
|
Address 2 |
Address line 2 where the goods were delivered. |
|
Room |
The room number where the goods were delivered. |
|
City |
The city where the goods were delivered. |
|
State |
The state where the goods were delivered. |
|
Postal Code |
The postal code where the goods were delivered. |
|
Country |
The country where the goods were delivered. |
|
Delivery To |
The person to whom the delivery was made. |
|
Phone Number |
The phone number of the delivery-to person. (Formatted: xxx-xxx-xxxx) |
|
|
The email address of the delivery-to person. |
|
Date Required |
The date the delivery was required. |
|
Date Required Reason |
If a date required was entered the date required reason is displayed here. |
|
Delivery Instructions |
Displays any special delivery instructions for the items. |
To receive the item in hand:
Open the Line Item Receiving edoc.
In the Titles tab, click
 under the Action column.
Once you have received all the items you want from this Purchase Order, click the
 button at the bottom of the screen. This changes the status of the Receiving
e-Doc to “Complete”, and prevents any further receiving on it.
 Tip
Tip: The blanket approve option will only appear if you are logged in as a member of the OLE_RCV or OLE-Receive-Mgr groups. Otherwise (if you are a member of OLE-Invoicing), you must click on the
 button, review the route log by opening the Route
Log tab and click
  next to Future Action Requests.
To receive a partial shipment, only receive the items that are in hand.
To return items, enter quantities in the Item Returned fields or Item Damaged fields and add an exception note. The Purchase Order will reflect the return.
To receive damaged items or exceptions, on the Titles tab of the Receiving e-document:
Open the exception notes subtab.

Select the Exception Type from the dropdown list.
Add an exception note as needed.
Click
 .
.
Receiving corrections are a version of receiving for use after receiving has been completed and approved. While authorized users may continue to initiate multiple receiving documents on a single Purchase Order (subject to quantities ordered), corrections to a single document are accomplished via Receiving Correction.
Search for and open the correct receiving document. At the bottom of the screen click correction.

A popup window will appear allowing users to enter a note. This note is required to correct the receiving document. Click yes to proceed to the Receiving screen and make modifications or unreceive items.
When the Receiving document is submitted, the No Of Copies Received and No Of Parts Received fields are updated on the purchase order with the Receipt Statusreflecting the item's Receiving status.
Notes in the Notes and Attachments tab are used to record any additional detail about damaged goods.
After the document has been submitted, a correction document needs to be processed to reduce or increase the quantity received, returned, and/or damaged if the original entered amounts are determined to be in error.
 >
>  >
>  >
>  >
> 
The Receiving Queue is intended to be a quicker way to do straightforward receiving, and offers the option to receive and pay, receive or pay without receiving.
Purchase orders with special processing instructions are filtered out of Receiving Queue searches, and must be received via the standard Line Item Receiving document. Additionally, items that have been damaged, returned, or are only part of an order must also be received through the Line Item Receiving document.
Note
For information about Line Item Receiving, see Receiving (Line Item Receiving).
To successfully complete receiving with this method you must be logged in as a member of one of the following groups:
| Role | Login |
|---|---|
| OLE_SELECT Acquisitions-AQ2 | ole-cphovis |
| OLE_SELECT Acquisitions-AQ3 | ole-cstan, ole-durbin |
| OLE_SELECT Acquisitions-AQ4 | ole-earley |
| OLE_SELECT Acquisitions-AQ5 | ole-ejacob; ole-fermat |
| OLE_RCV | ole-mshaun |
If you are not logged in as a member of OLE_RCV, the receiving document will be routed to a member of OLE_RCV for final approval.
On the Select/Acquire tab, click on the Receiving Queue link listed under the Receiving submenu.
It will bring you to this screen:

The Receiving Queue allows users to search by PO, ISXN, Title, Order type, monograph, vendor and dates.
This search filters for all Purchase Orders with Open statuses that have no Special Processing Instruction Notes that may have been entered on the original Requisition. (Special Processing Instruction Notes require acknowledgement during receiving. Titles with special processing instruction notes therefore cannot be received via the Receiving Queue.)
Note
To learn more about searching, see Searching OLE on the OLE E-Docs fundamentals wiki page.
Click  .
.
The PO search results are retrieved and the user can choose to Receive, Create Receiving, Pay, or Receive and Pay.
Note
To receive additional titles on a PO, users must create a purchase order amendment (POA). A POA is created when a change or addition is made to an existing PO. If the existing PO is open then the PO can be amended, if the PO is closed then the PO has to be opened and then amend the PO. PO amendments allows for changes in number of copies, adding a copy for a different location or fund or for adding a new title to the existing PO. To learn more about creating a POA, see Purchase Order Amend
This choice will allow the PO to be received without creating a payment or a general ledger entry. The PO document will move to complete and a Line Item Receiving document id will be available from the View Related Documents tab.
Click the check box to the left of the title(s) you want to receive, and then click the receive button at the bottom of the page:

If this action completes the receiving expected for a given Purchase Order, the system replies in the Actions tab:

This choice will allow for changes to be made to the receiving information on the line item. This will also allow you to partially receive, receive exceptions and damaged items. Once changes are made and item received then the PO moves to the status of received.
Click the check box to the left of the title you want to create a receiving document for, and then click the create receiving button at the bottom of the page:

This will bring up the Line item Receiving e-document.
Note
For information about Line Item Receiving see Receiving (Line Item Receiving)
This choice will allow open and received PO documents with no payments to be paid but not received. This option can be used for pre-payments and for expending funds. Payments are made by creating a new invoice or adding PO to an existing invoice.
Click the check box to the left of the title(s) you want to receive, and then click the pay button at the bottom of the page:

This will bring up the Add Pay and Receiving Pay screen.
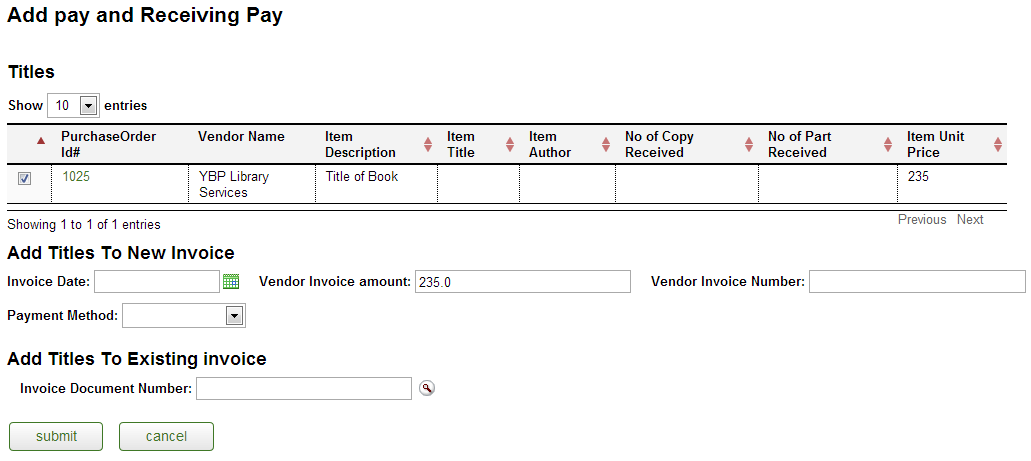
Users may choose to add titles to a new invoice or to an existing invoice.
To add titles to a new invoice, enter the Invoice Date or
search for it from the calendar icon  .
.
Check the Vendor Invoice Amount
Enter a Vendor Invoice Number, a searchable number assigned by the library.
Select the Payment Method from the dropdown list.
Click  .
.
The invoice is created. A success message is provided below the Add pay and Receiving Pay title containing the invoice document ID. Click the hyperlinked document ID to access the invoice.
To add titles to an existing invoice, enter the invoice number in the Invoice Document Number or search for it from the lookup .
.
Click  .
.
The existing invoice is updated. A success message is provided below the Add pay and Receiving Pay title containing the invoice document ID. Click the hyperlinked document ID to access the invoice.
This option will allow payment of PO documents while receiving line items.
Click the check box to the left of the title(s) you want to receive and pay for, and then click the receive and pay button at the bottom of the page:

This will bring up the Add Pay and Receiving Pay screen.
To add titles to a new invoice, enter the Invoice Date or
search for it from the calendar icon  .
.
Check the Vendor Invoice Amount
Enter a Vendor Invoice Number, a searchable number assigned by the library.
Select the Payment Method from the dropdown list.
Click  .
.
The invoice and the receiving document are created. A success message is provided below the Add pay and Receiving Pay title containing the document IDs. Click the hyperlinked document IDs to access the documents.
Note
Receiving is not complete until the document is submitted. If the process is cancelled, the items will not be received within OLE.
To add titles to an existing invoice, enter the invoice number in the Invoice Document Number or search for it from the lookup .
.
Click  .
.
The existing invoice is updated and a receiving document is created. A success message is provided below the Add pay and Receiving Pay title containing the invoice document ID. Click the hyperlinked document IDs to access the documents.
Note
Receiving is not complete until the document is submitted. If the process is cancelled, the items will not be received within OLE.
 >
>  >
>  >
>  >
>  >
> 
A Serials Receiving Record is used to receive, claim and otherwise manage individual issues of a serial or continuing resource title (in a physical format, e.g., print or microform).
Typically, for any currently-received serial or continuing resource, a library will use two records to store holdings and other information about a current subscription:
An OLE Instance Record (always linked to a Bibliographic Record and in some cases linked to a Purchase Order) with Extent of Ownership holdings statements for back issues of the title. Instance Records may also contain Item Records. Each Item Record typically represents a bound volume (or other gathering) of back issues (although Item Records may also represent individual issues). The OLE Instance Record shows the Location of all the holdings; an individual Item Record may contain its own Location if it is shelved separately. The OLE Instance Record and its linked Serials Receiving Record reflect the holdings of a single active subscription. If a serial ceases publication or the library cancels a subscription, the Serials Receiving Record can be deleted.
A Serials Receiving Record linked to the OLE Instance Record for the same subscription to record receipt of individual issues and show a Location for those issues that may differ from the Location in the OLE Instance Record.
The library’s public user interface pulls holdings and location data from both records to present a comprehensive display to end–users.
Note
The use of a Serials Receiving Record is completely optional and is not required. For example, some libraries may simply use the OLE Instance Record's Extent of Ownership statements to record holdings information and use the OLE Instance Record’s public notes field to inform users if unbound issues are shelved separately from bound volumes. Use of the Serials Receiving Record is recommended if a library continues to claim serial issues. If a library no longer has an active subscription, no Serials Receiving Record is needed; retrospective holdings is typically recorded in the OLE Instance Record's Extent of Ownership statements along with Item Records for each volume (or other gatherings) of any bound back issues.
Before proceeding with the creation of Serials Receiving Records, staff should be able to search and display both Bibliographic and Instance Records and understand their purpose and content.
Note
For more information about performing DocStore searches, see Document Store Search.
For more information about the content of Bibliographic and Instance Records, see their Editors sections in the Guide to the OLE Describe and Manage Module. This and other OLE user guides are available for download from the OLE Documentation Portal.
A Serials Receiving Record can be created from two places in OLE: (1) an OLE Instance Record or (2) the Serials Receiving Record Search interface.
 >
>  >
> 
From the Describe tab's Describe Workbench, search for the title for which you wish to create a Serials Receiving Record.
Note
For more information about the Describe Workbench, see the Describe Workbench section in Guide to the OLE Describe and Manage Module.
Click Edit to display the bibliographic record and then select the desired Instance Record, i.e., the one used (or will be used) to record retrospective holdings for this subscription.
At the bottom of the Instance Record display, click the
 button.
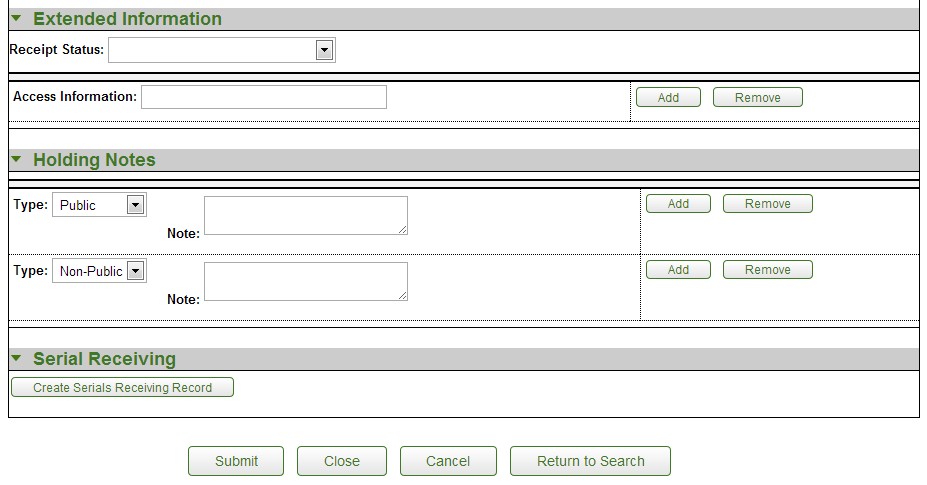
Note
There is a bug (OLE-5279) in 1.0 whereby all OLE Instance records—even those with an existing Serials Receiving Record—display a “Create Serials Receiving Record” button which should only appear for OLE Instances without a Serials Receiving Record. This will be fixed in 1.5.
From the Select/Acquire tab, under the Receiving menu, and listed below Serial Receiving, click Receive to open the Serials Receiving Record Search.
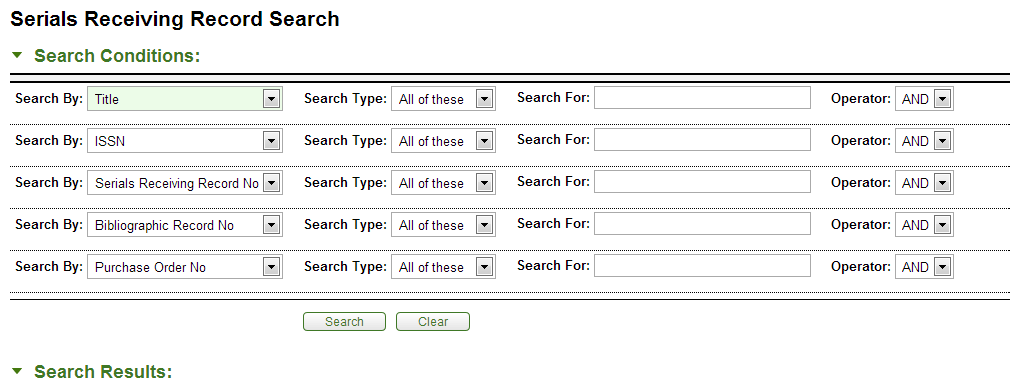
Select the search options and type in a search term. Click
 .
.From the results list, click Create to create a new Serials Receiving Record.
Whether you start with the OLE Instance Record or the Serials Receiving Record Search interface, the template that displays after clicking the Create button will be the same.
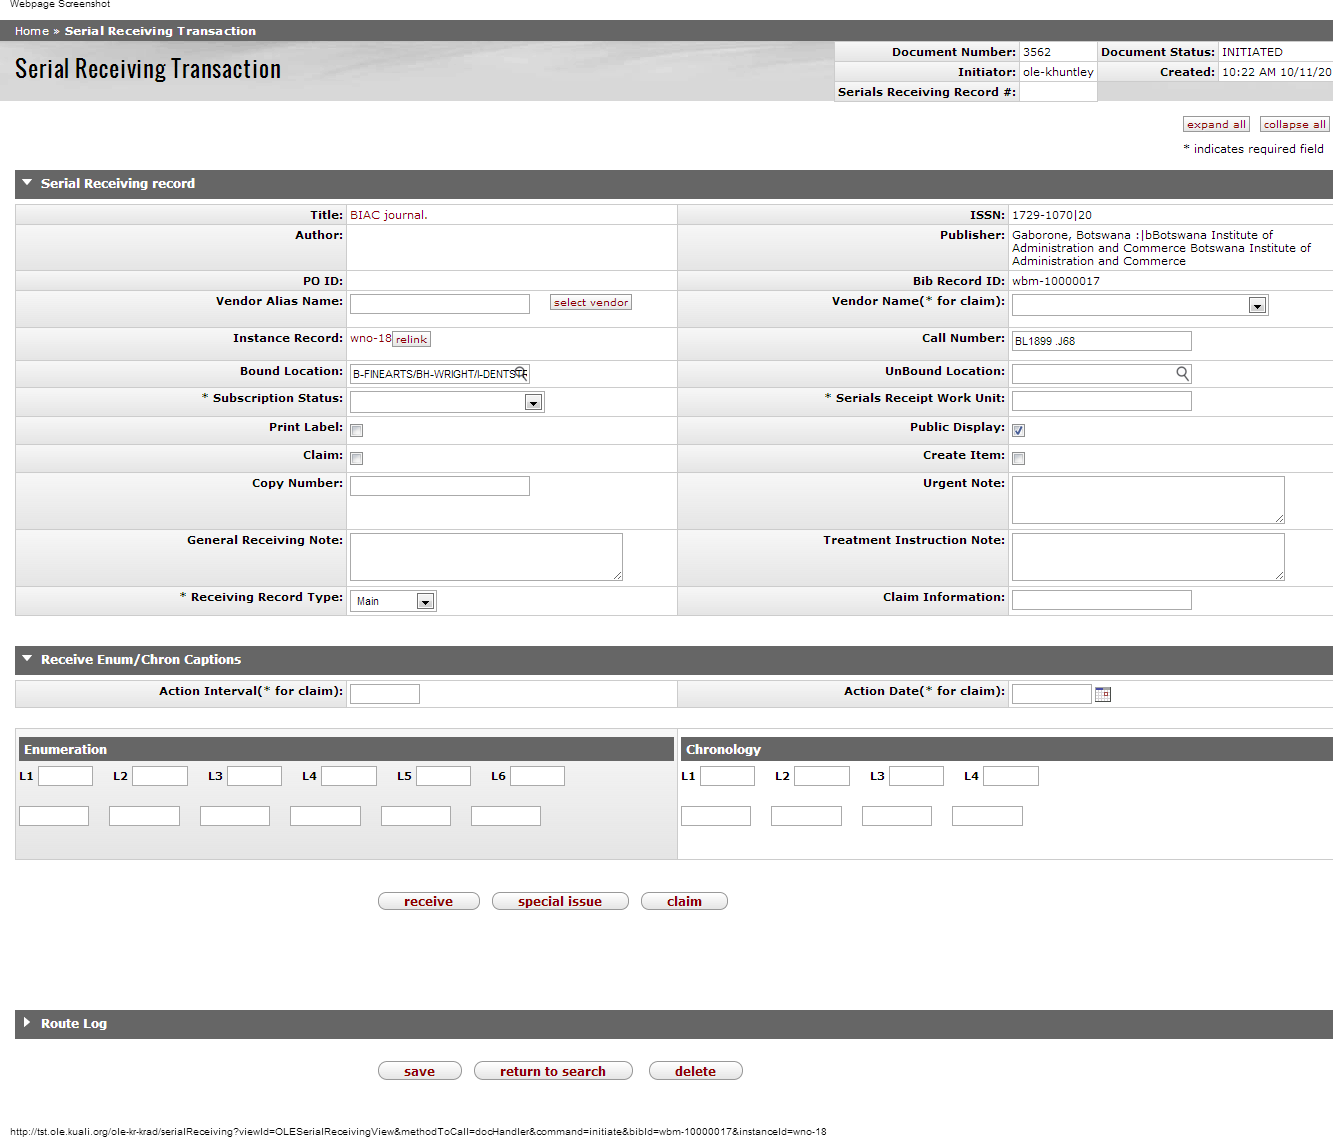
The main screen for the Serials Receiving Transaction document includes unique Serials Receiving Record, and Receive Enum/Chron Captions tabs in addition to the standard Route Log tab that display at the bottom of a document.
Note
For more information about the route log, see Route Log on the OLE Workflow Overview and Key Concepts wiki page.
The Serials Receiving record is a combination of information inherited from its linked Bibliographic, Instance, and Purchase Order Records as well as data entered by the operator when creating the record.
Note
OLE 1.0 assumes the use of MARC bibliographic records for describing serial or continuing resource titles. OLE can store records in other formats but serials receiving features cannot be applied to records in other formats in this release.
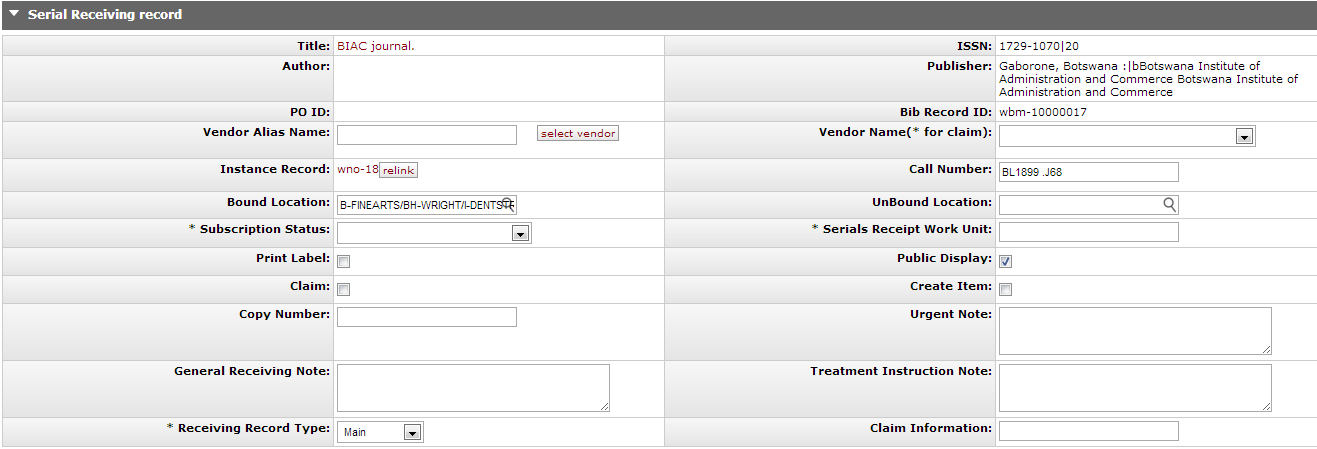
Serials Receiving Record tab definition
|
Title |
Description |
|
Title |
Display-only. The title of the work, or the MARC 245 |ab, is inherited from the Bibliographich record. Click the hyperlink to open the record in a new tab or window. |
|
Author |
Display-only. The author of the work, or the MARC 100 |a, is inherited from the Bibliographich record. Alternatively, the field is blank. NoteThere is a bug (OLE-5273) to verify that we ware using MARC 100, 110, or 111 fields. |
|
PO ID |
Display-only. The purchase order number from the Purchase Order. If a purchase order was not linked to the OLE Instance, the field is blank. |
|
Vendor Alias Name |
If the vendor is inherited from the OLE Instance, the Vendor Alias will
display. To add or change a vendor, enter the Vendor Alias and click TipEntering a vendor alias will also populate the Vendor Name field. NoteSee OLE-4858 for possible changes. |
|
Instance Record |
The local identifier of the OLE Instance record. Click the hyperlink to
open the record in a new tab or window. Click |
| Bound Location |
The Location of bound materials inherited from the OLE Instance record. Alternatively, the field is blank. This field can be edited for the public display record. |
| Subscription Status |
Select the Subscription Status from the drop down list. NoteThe Serials Receiving Record’s linked Instance Record has a field labeled Receipt Status which uses the SAME values as the Subscription Status in the Serials Receiving Record. Assigning or changing a Subscription Status does NOT affect the Receipt Status and vice versa. Whether or not it should is the subject of OLE-5288 which will not be addressed until OLE 2.0. |
| Print Label |
Check the box if you want OLE to print a label each time an issue is checked in. (Printers must be designated by operators.) |
| Claim |
Check the box if you plan to claim missing issues. If unchecked, the record will never appear on the claim alert report. NoteClaim alert reports are planned for a future release. |
| Copy Number |
The Copy Number inherited from the OLE Instance record. Alternatively, the field is blank. |
| General Receiving Note |
Optional. Free-text note field, which displays on the serials receiving record, but does not require acknowledgement by the user. This note does not display to the public user interface. |
| Receiving Record Type |
Select the Receiving Record Type from the drop down list. The default is "Main." |
| ISSN |
Display-only. The ISSN of the work, or the MARC 022 |a, is inherited from the Bibliographich record. Alternatively, the field is blank. |
| Publisher |
Display-only. The Publisher of the work, or the MARC 260 |abc, is inherited from the Bibliographich record. Alternatively, the field is blank. NoteOLE-5273 also includes adding the MARC 264 |abc field in OLE 1.5. |
| Bib Record ID |
Display-only. The Bibliographic record identifier for the work, or the MARC 001 without the prefix, is inherited from the Bibliographich record. Alternatively, the field is blank. |
| Vendor Name (*for a claim) |
Required for claims. If the vendor is inherited from the OLE Instance, the Vendor Name will display. To add or change a vendor, select a vendor from the drop down list. Selecting a vendor name will also populate the Vendor Alias field. NoteSee OLE-4858 for possible changes. |
| Call Number |
The call number inherited from the OLE Instance record. Alternatively, the field is blank. |
| Unbound Location |
The location of unbound material. Type an asterisk (*) or begin to type the location code to produce a drop down menu of Locations. |
| Serials Receipt Work Unit | This is a place holder for future development. See OLE-5251 for details. |
| Public Display |
Box is checked, indicating that the serial receiving data will be displayed to the discovery layer. Uncheck the box only if you do NOT want ANY current receipt data to display in your public user interface. |
| Create Item |
Check the box if you want to be prompted to create a new Item Record in the linked OLE Instance record each time an issue is received. |
| Urgent Note |
Optional. If text is entered in this field, it is displayed as a dialog box when the record is displayed. The box must be acknowledged before work can continue. |
| Treatment Instruction Note |
Optional. If text is entered in this field, it is presented in a dialog box after an issue has been received i.e. special processing instructions such as "Send to bindary immediately". The box must be acknowledged before the operator can continue. |
| Claim Information | Optional. A free-text note field for general information about claiming which does not require acknowledgement. |

Receive Enum/Chron Captions tab definition
|
Title |
Description |
|
Action Interval (* for claim) |
Required for claims. Enter a number of days based on the frequency of the title and local policy that can be used in calculations at the time of receiving. For example, for a quarterly, the Action Interval may be 100 days. |
|
Action Date (* for claim) |
Required for claims. A date calculated at the time of any individual issue receipt by adding the action interval to today's date. The date is recalculated for each individual receipt action, overwriting the previous action date. Action Dates can be manually modified to overwrite the previous action date. |
|
Enumeration L1-L6 |
Enter a caption for each applicable level of enumeration, e.g., L1—v.; L2—no. Put brackets ( [ ] ) around any caption that should NOT be used when displaying an issue in the public user interface. If no captions apply, leave blank. |
|
Chronology L1-L4 |
Enter a caption for each applicable level of enumeration, e.g., L1—[year]; L2—[month]. Put brackets ( [ ] ) around any caption that should NOT be used when displaying an issue in the public user interface. If no captions apply, leave blank. |
Libraries may create Serials Receiving Records for regularly published supplements and/or indexes as well as the main issues. This is entirely optional. [Libraries could, e.g., receive any supplements or indexes using the “Special Issue” option (see below).]
To create a record for another receiving record type:
Create a Serials Receiving Record for the first type you want.
Display this record and change the Receiving Record Type to the desired one.
The system will refresh the record and allow you to enter an Action Date and Enumeration/Chronology captions.
Click Save.
Note
In 1.0 there are known interface issues when creating, finding and displaying the three possible types. This issue will be reviewed in 1.5 (bug: OLE-4920).
Perform the following steps:
Use the Serials Receiving Record Search interface to find the Serials Receiving Record. Or use Describe Workbench to find the appropriate Instance Record from which to display the Serials Receiving Record.
Select the appropriate Receiving Record Type.
Make whatever changes are required. (Note: Action Date and Enumeration/Chronology are unique to each receiving record type. Other data applies to all of the types.)
Click the Save button at the bottom of the record.
Once you have created a Serials Receiving Record, you are ready to receive individual issues.
Use the Serials Receiving Record Search interface to find the Serials Receiving Record. Or use the Describe Workbench to find the appropriate OLE Instance Record from which to display the Serials Receiving Record.
Select Main, Supplement or Index as required.
If this is the first issue to be received: type in the issue data in the blank field(s) directly under each level of Enumeration/Chronology with a defined caption.
If this is a subsequent issue to be received: type over any issue data from the last received issue but leave alone any data that is the same, e.g., for a serial with volume, issue number, year and month, a subsequent issue may need only the issue number and month changed; you would leave the volume and year the same.
Click Receive.
The system supplies an Action Date once you receive an issue. The Action Date is today’s date plus the number of days in the Action Interval.
Note
In future releases, if no activity occurs in the record by the Action Date, the record will appear on a claims alert reports (provided that the Claim box is on).
Receipt Status “Received” and Receipt Date mm/dd/yyyy (i.e., today’s date) will be updated automatically. OLE also records the receipt in the Receipt History that appears below the Enumeration/Chronology information. The columns labeled “Enumeration” and “Chronology” show the issue-specific data; notice that captions in brackets ( [ ] ) do NOT appear in the Receipt History.
A Public Receipt Note can be added for any individual issue as needed in the Receipt History. This displays in the library’s public user interface.
By default, all issues are available for Public Display. Turn off as needed.
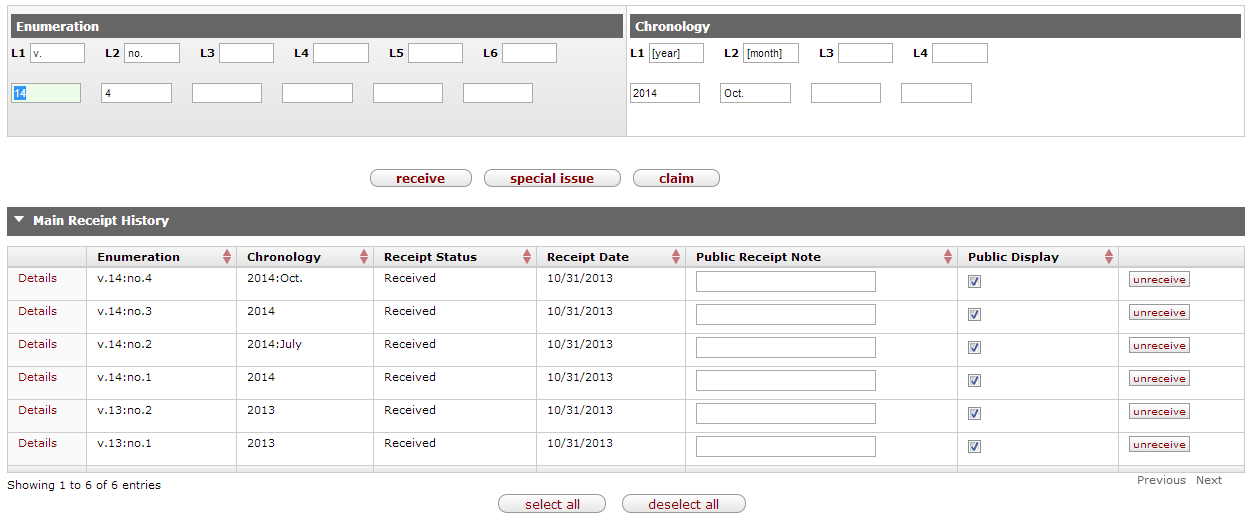
For any unexpected issue, you may record receipt by using the Special Issue feature.
Use the Serials Receiving Record Search interface to find the Serials Receiving Record. Or use the Describe Workbench to find the appropriate OLE Instance Record from which to display the Serials Receiving Record.
Click the
 button to display a special window.
Type in descriptive information in the note field.
Click the Receive button within the window.
Any receipt using the Special Issue button places the issue in the Main Receipt History as the last-received issue and any descriptive information typed into the Special Issue window is put into the Enumeration column of the resulting Receipt History. The system supplies an Action Date once you receive an issue. The Action Date is today’s date plus the number of days in the Action Interval.
Note
In future releases, if no activity occurs in the record by the Action Date, the record will appear on a claims alert report (provided that the Claim box is on).
Receipt Status “Received” and Receipt Date mm/dd/yyyy (i.e., today’s date) will be updated automatically.
By default, all issues are available for Public Display. Turn off as needed.
If a subscription for a serial or continuing resource is cancelled or the title ceases publication, libraries may wish to delete the Serials Receiving Record as no longer needed. This is not a requirement but a local decision, Serials Receiving Records could remain in OLE indefinitely.
Before deletion, libraries should verify that complete holdings data is entered in the linked OLE Instance Record’s Extent of Ownership statement(s). Any individual issues would also typically be bound or otherwise gathered and represented by an Item Record. Additionally, the library could suppress the Receipt History information from its public user interface by setting the Serials Receiving Record’s Public Display option to “no” by unchecking the Public Display box.
To delete a Serials Receiving Record, perform these steps:
Use the Serials Receiving Record Search interface to find the Serials Receiving Record. Or use Describe Workbench to find the appropriate Instance Record from which to display the Serials Receiving Record.
Click the
 button that appears at the bottom of the record.
The system responds with a message indicating that the record has been successfully submitted.
In 1.0, clicking Delete on a Serials Receiving Record sends a deletion request to a designated staff operator, one with the role of OLE-Select Operator, who can approve/disapprove the request. If approved, the Serials Receiving Record remains online but is locked and cannot be used for receiving. If disapproved, the system locks the Serials Receiving Record on which the delete request was made, but makes a second copy which can be used as before.
Note
The approval/disapproval process of deleted Serials Receiving Records continues to be investigated into 1.5.
When creating a Serials Receiving Record, required fields are marked with an asterisk ( * ). In addition, the following logic applies.
If the Claim box is checked, you must have a Vendor Name /Vendor Alias AND an Action Interval.
The system supplies an Action Date once you save the record. The Action Date is today’s date plus the number of days in the Action Interval.
Note
In a future release if no activity occurs in the record by the Action Date, the record will appear on the No Serials Receipt Activity Report (provided that the Claim box is checked).
An operator can change the Action Date by typing over the date (or clicking the calendar icon
 and selecting a date) and then clicking the Save button.
 A Serials Receiving Record is linked to an OLE Instance Record which in turn is linked to a bibliographic record of any type; an OLE Instance Record can also be linked to a Purchase Order. There is no requirement that the bibliographic record must be coded as a “serial” or “continuing resource”, etc. nor does there have to be an open Purchase Order in order to create a Serials Receiving Record.
Note
A Serials Receiving Record cannot be linked to an E-Instance Record.
An OLE Instance Record can have only one Serials Receiving Record although it can be in three parts to allow for receiving different issue types of the same serial title: Main run issues, supplement issues, and index issues. Creating Serials Receiving Records to receive supplements and indexes is completely optional. For example, a library could choose to use the "Special Issue" receipt option for anything that was not a main-run issue.
If a library has multiple subscriptions to the same title, it must create an OLE Instance Record and a Serial Receiving Record for each subscription—even if the multiple subscriptions go to the same location. There is no method for receiving two or more subscriptions on the same Serials Receiving Record.
Issues as shown in the Receipt History—along with the Unbound Location—are available to be displayed in a library’s public user interface. This data, as well as data from the linked OLE Instance Record’s Extent of Ownership statement(s), Location(s), and Item Record information, is available for display in a library’s public user interface which controls HOW the data is presented to public users.
Table of Contents
 >
> >
>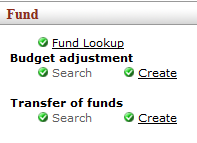
On the Select/Acquire tab, the Fund submenu provides access for users to import manage library funds.
The General Ledger (GL) contains numerous processes that ensure that OLE runs correctly. For users processing e-doc transactions, the most apparent of these processes are the generation of offsets and the posting of transactions to the balance tables. Other important General Ledger processes are less apparent to users. These processes ensure that transaction data are valid, that capitalization entries are created, and that indirect cost recovery and cost share transfers occur. OLE also offers related features such as sufficient funds checking and flexible offsets for institutions that want to utilize this functionality.
OLE will apply encumbrances and expenses to the General Ledger as a result of OLE implemented functionality for encumbrances, expenses, budget adjustments and transfers of funds. Real-time GL posting is made available, with certain GL entries updating their status through nightly “batch jobs”.
In OLE 1.0 and 1.5, we will be reconciling university financial integrations and OLE’s use of Budget vs. Actual (cash) balances.
Requisition
No GL entries for this form of “pre-order”
Purchase Order, Purchase Order Amendment, other forms of PO
A final, “approved” Purchase Order will apply an encumbrance to the General Ledger as “pending”. During nightly batch jobs, the pending entry goes to “final”. Pending GL entries will be visible on the PO’s General Ledger Pending Entries tab, and be reflected in balance inquiries when “pending” or “all” transactions included.
Sample: pending GL entry from approved PO with default (OLE Sample Data/object code 9892- RESV OUTSTANDING ORDR EXTRNL ENCUMBRNCES, Credit offset to the purchase order Debit) Offset- not yet processed through nightly batch job

Sample: PO that has processed to nightly batch job- no pending GL entries

Payment Request
As PREQ’s are payments to vendors, any PREQ created with accounting lines will post to the GL as “pending” whether it has completed workflow or not (unlike PO which must be final/approved).
PREQ will reverse the encumbrance, as noted on the e-Doc, and apply the expense immediately.
Nightly batch jobs will take approved PREQ’s to final status, and also apply liabilities to the balance sheet.
Sample, PREQ with relieved encumbrance:

Sample: General Ledger Pending entries on approved PREQ (encumbrance and initial offset from PO are reversed. Expense applied with offset to Acct Payable/liability object code 9041):

Tip
OLE is cloud-based, allowing users to have multiple browser windows open. If a user wants to query multiple Account-Objects for available balances, while having a transaction open in another window- that user could jump through multiple queries or details in one window, then just copy/paste preferred Chart, Account, Object codes into the Accounting lines of an open transactional document in another window- Requisition, Purchase Order, Payment Request, Transfer of Funds etc.
 >
> >
>
Sufficient Funds Checking is commonly used with the understanding that (a) some orders are never filled, and therefore their commitments will never become expenditures, and (b) at the end of the fiscal year, not all accounts are fully spent and there will be money left over to cover the overcommitments or overexpenditures assigned to accounts fully spent. The budget administrator must keep in mind that all accounts cannot be overcommitted or overspent and that the total expenditure for all accounts cannot be greater than the total allocation for all accounts, dependent upon fund attributes.
SFC checks would operate differently on encumbrances vs. expenditures
encumbrances would check against Free Balances (Budget - invoices (liabilities) [pending included] - expenditures [pending included] - encumbrances [pending included], occurs when encumbrances is pending (when requisition created/accts and costs assigned)
expenditures would check against Cash Balance (Budget - expenditures [pending included]) - when Payment Request created (pending).
Fund Lookup allows operators to check the account balance at the time of assigning accounts to line items on requisitions, purchase orders, payment requests, disbursement vouchers, etc. The lookup also allows operators to check balances in advance, rather than waiting until the document is submitted to find out whether the account has enough money.
Available Balance details can also be accessed from the Requisitions page by
clicking on the  button after you have added an accounting line:
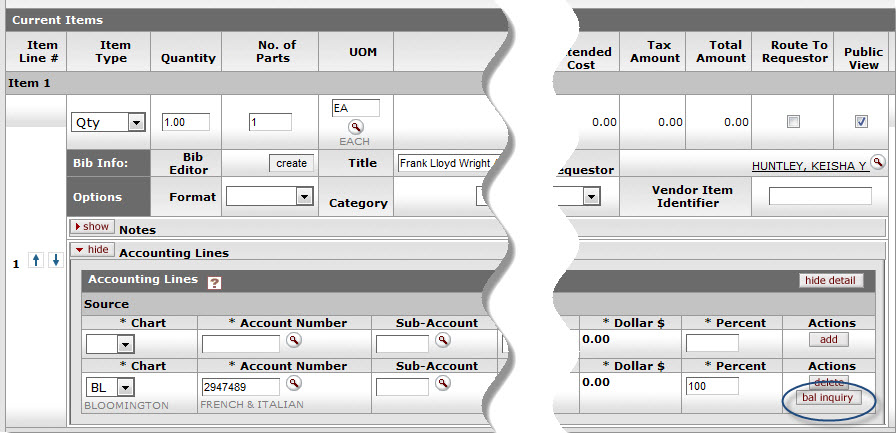
From the Balance Inquiry Report Menu, select Available Balances:
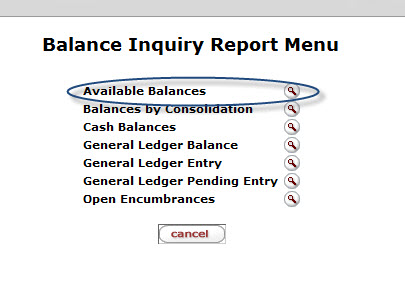
To return to the requisition, click the  button on each screen.
Fill in at least Chart Code, Account Number and Object Code. Use the
lookup  as necessary to select the criteria. The lookup criteria defaults to the
current fiscal year.
Click  .
.
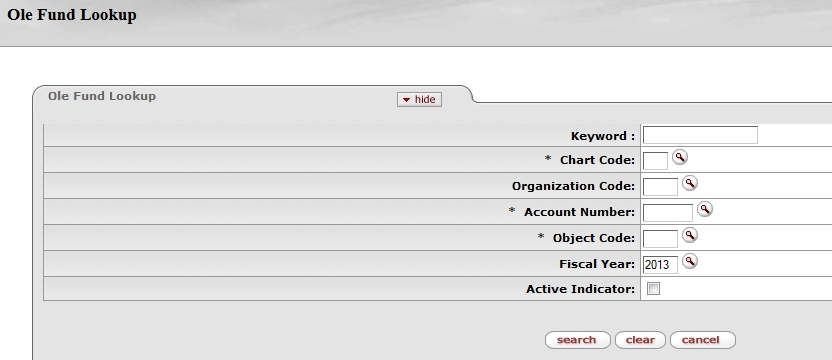
OLE uses the Offset Generation table inherited from KFS to generate appropriate offsets for transactions. This table indicates the object code used in offset generation, based on the transaction's chart, fiscal year, document type, and the balance type it affects. Offsets are generated automatically by a OLE e-doc or in 'Scrubber' during GL processing (i.e. batch jobs).
Normally, offsets are applied to the same account as the transaction that generated the offset. But OLE has a flexible offset feature that allows institutions to have offset entries applied to different accounts. This OLE feature includes two functions:
Flexible banking offset
Flexible offsets by account
Note
Offsets and full General Ledger functions in OLE will continue to be reviewed with Select & Acquire teams as we continue to build queries and budget functionality.
Document types that require a user to specify a bank account number (such as the Advance Deposit or Credit Card Receipt documents) can apply offset entries to a special account associated with this bank account number. If the ENABLE_BANK_SPECIFICATION_IND parameter is set to 'Y,' an additional set of cash entries is created to a designated accounting string (chart, account, sub-account, object code, and sub-object code) defined in the Bank document. These entries occur in addition to the normally generated cash offsets created to balance a set of transactions. In effect, they reclassify the generic cash entry to a bank-specific cash entry for reconciliation and tracking purposes. If the ENABLE_BANK_SPECIFICATION_IND parameter is set to 'N,' the normal balancing cash entries are created but the reclassification of cash to a bank-specific entry is not performed.
This option allows the user to specify the document types on which a bank code should appear. This information, which is specified in the BANK_CODE_DOCUMENT_TYPES parameter, allows you to specify bank information on additional document types that create disbursements or record revenue. A default Bank Code value should be established for each document type by using the DEFAULT_BANK_BY_DOCUMENT_TYPE parameter.
This option allows OLE to redirect offset entries for an account to another specified account. It allows OLE to accommodate tracking offsets such as cash or liabilities in central designated accounts as opposed to tracking such offset entries in every account. The Offset Account document identifies the offset account for an object code and account number combination.
If the offsets by account option is enabled within the parameter USE_FLEXIBLE_OFFSET_IND, OLE goes through a special process in e-docs and in 'Scrubber' during GL processing to determine the account that the offsets should be made to for a given transaction.
When the flexible offsets function is enabled, generation of offsets on e-docs occurs as follows:
The offset object code is defined in the Offset Definition table.
The object code and account number are searched from the Offset Account table.
If a match is found in the Offset Account table, the offset is made in the offset account defined there.
If no match is found, the offset is made in the same account on which the original transaction occurred.
Generation of offsets in 'Scrubber' when the flexible offsets function is enabled occurs as follows:
'Scrubber' looks up the document type for a transaction in the Document Type table.
'Scrubber' checks the document type of the entry against the document types defined in the parameter.
OFFSET_GENERATION_DOCUMENT_TYPES: If the document type is found in this parameter, 'Scrubber' does not generate offsets for this entry. This ensures that document types that should not generate offset entries (like journal voucher) do not have offsets generated during 'Scrubber' processing.
DOCUMENT_TYPES_REQUIRING_FLEXIBLE_OFFSET_BALANCING_ENTRIES: If the document type is found in this parameter, 'Scrubber' generates offsets even if the document type appears to be balanced. This allows 'Scrubber' to generate the proper flexible offsets for transactions that originate outside of OLE.
If you are using flexible offsets (parameter USE_FLEXIBLE_OFFSET_IND is set to 'Y'), 'Scrubber' checks the document type against those found in the parameter.
If 'Scrubber' determines in the previous steps that an offset is to be generated, it determines the transaction's offset object code using the Offset Definition table.
If you are using flexible offsets (parameter USE_FLEXIBLE_OFFSET_IND is set to 'Y'), 'Scrubber' searches for the object code and account number in the Offset Account table.
If a match is found in the Offset Account table, the offset is made in the offset account defined there. If no match is found, the offset is made in the same account on which the original transaction occurred.
 >
>  >
> >
>
OLE offers a customized document search related to budget adjustments. The search screen contains the standard search fields along with special fields that are unique to this type of e-doc.
Note
For information about performing a search for one or more requisitions, see Performing Acquisition Searches on the OLE E-Doc Fundamentals wiki page.
Note
For information about Document lookup fields that are specific to requisitions, see “Document Layout” under Requisition.
 >
> >
> >
> >
>
The Budget Adjustment (BA) document is used to record income and expense transactions not processed through other e-docs, against an existing budget. It can be used to modify a base budget, a current budget or both. It is a financial planning tool that allows an organization to adjust the current and base budget figures for a given account as circumstances may change throughout the fiscal year. It may be used to create a budget for a new account established after the beginning of a new fiscal year.
Base budgets are established during the budget construction process, and designate an ongoing fiscal commitment.
Current budgets designate budgetary authority for the current fiscal year.
A BA document is normally used to:
reallocate current budget as necessary throughout the fiscal year
transfer funds from one general fund account to another
establish budget lines in new accounts created after the fiscal year begins
make long-term adjustments to the base budget
The document allows for the establishment of monthly budgeted amounts for users that wish to maintain budget information at this level.
Note
Budget Adjustments continue to be reviewed for OLE use.
The BA document only has the standard financial transaction document tabs and does not have any unique tabs. Two field exceptions are the Year field in the Document Overview tab and the Monthly Lines section in the Accounting Lines tab, which are explained later in this section.
Note
For more information about the standard tabs, see Standard Tabs on the OLE E-Doc Fundamentals wiki page.
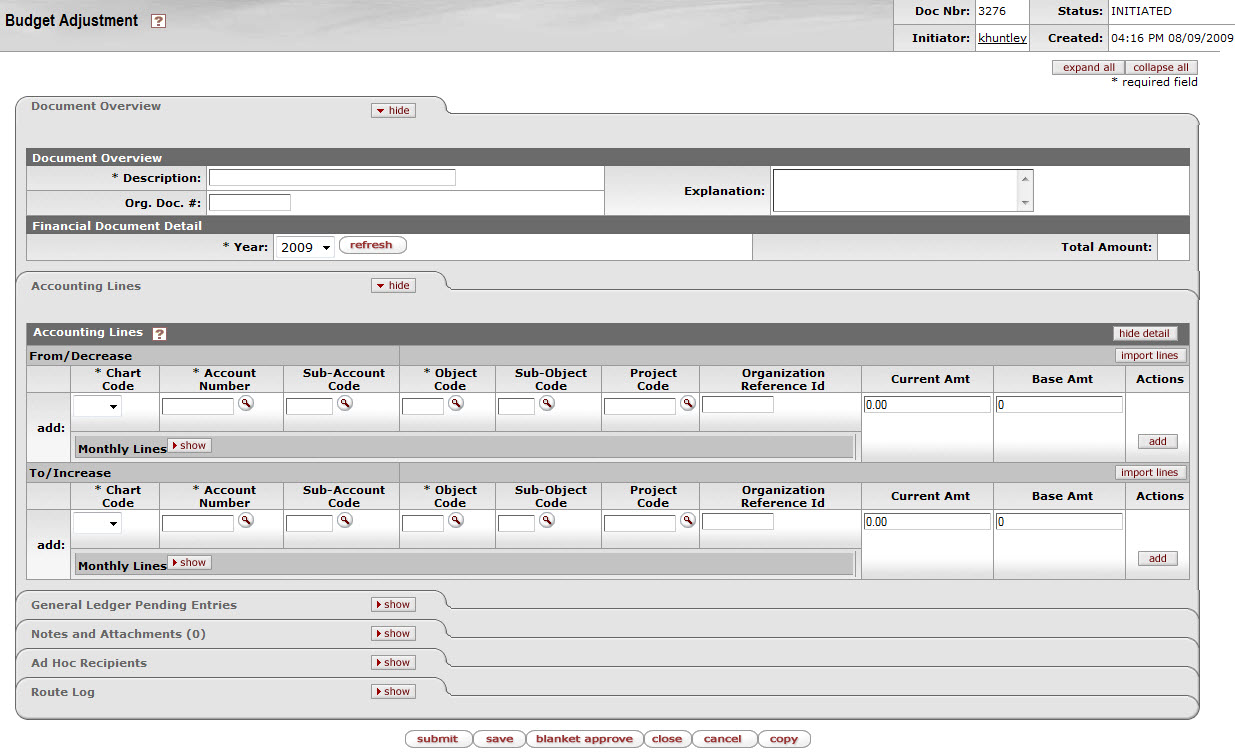
The Document Overview tab includes one unique field called Year.
BA Document Overview tab definition
|
Title |
Description | |
|
Year |
Required. Select the fiscal year this adjustment should apply to from the Fiscal Year list. Most budget adjustments are made to the current fiscal year but in some cases you may be able to choose a fiscal year that has not yet begun. | |
If you change the fiscal year, click  to make sure that all the fields on the document are available for that fiscal
year. For example, you might not be able to do base budget changes to a particular fiscal year.
Clicking refresh assures that the system disables fields that
aren't valid for that year.
The Accounting Lines tab in the BA document is also different from the other financial transaction documents in that it has the Monthly Lines section that can be expanded by clicking show.

To distribute an accounting lines current budget amount into monthly periods,
click  on the Monthly Lines section.
This opens a series of twelve monthly periods where you can specify how much of the current amount for this account line should be distributed to each month. The total of all monthly distributions must equal the total current amount for this accounting line.
Use of the From/Decrease section automatically decreases the budget associated with the account, sub-account, and object code combination entered. The current budget, base budget, or both may be affected.
Use of the To/Increase section automatically increases the budget associated with the account, sub-account, and object code combination entered. The current budget, base budget, or both may be affected.
Note
The From/Decrease and To/Increase sections do not contain totals. Increases and decreases must balance in the document with relation to object code types in order to route the document. This rule applies to the From and To sections affecting the current changed amount(s) and the From and To sections affecting the base changed amount(s).
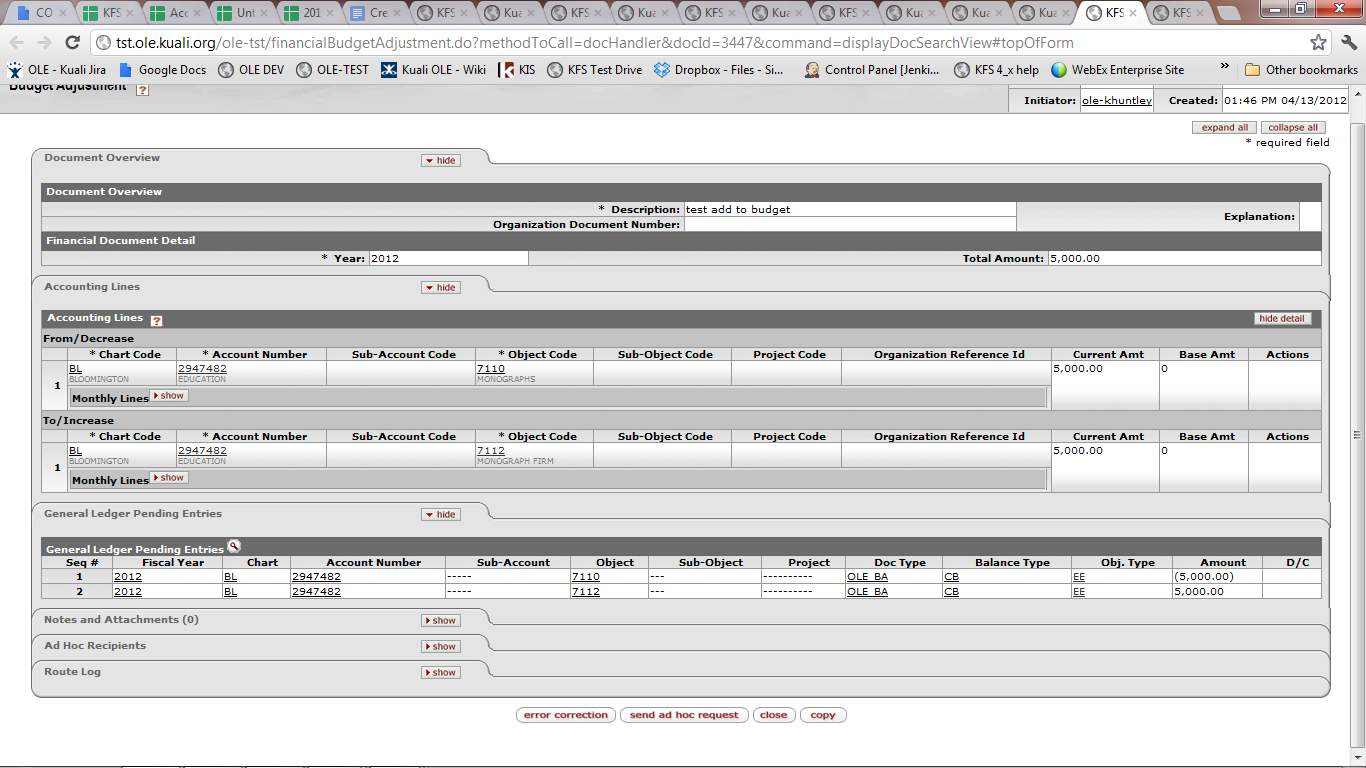
Tip
Try This Budget Setup:
Instead of typing in many accounting detail lines, users can use the BA spreadsheet template via the “Import Lines” option.
Simply fill in all accounting lines with required Chart, Account, Object, and Amounts
Import into the BA (or Transfer) documents in lieu of manual typing.
BA-YEBA Import template
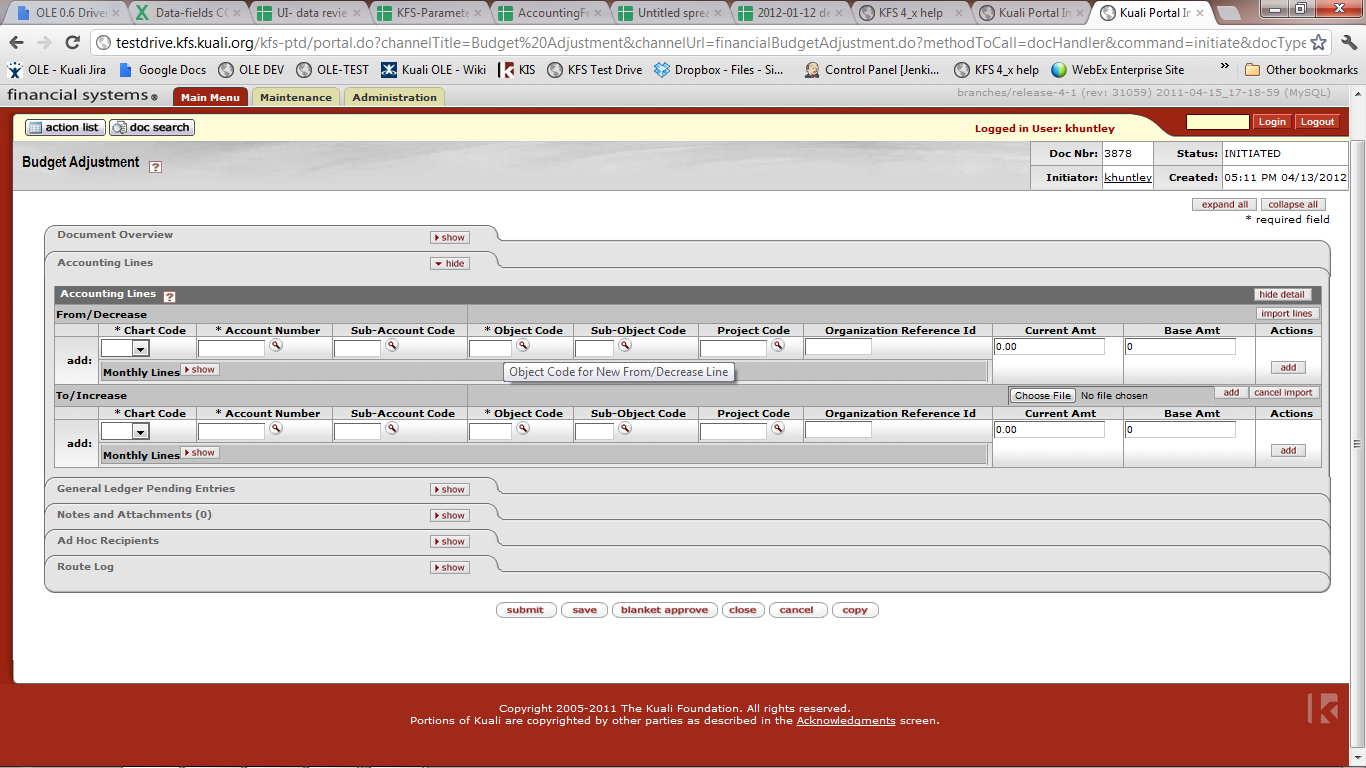
Click
 or
or  .
.Review the General Ledger Pending Entries tab.
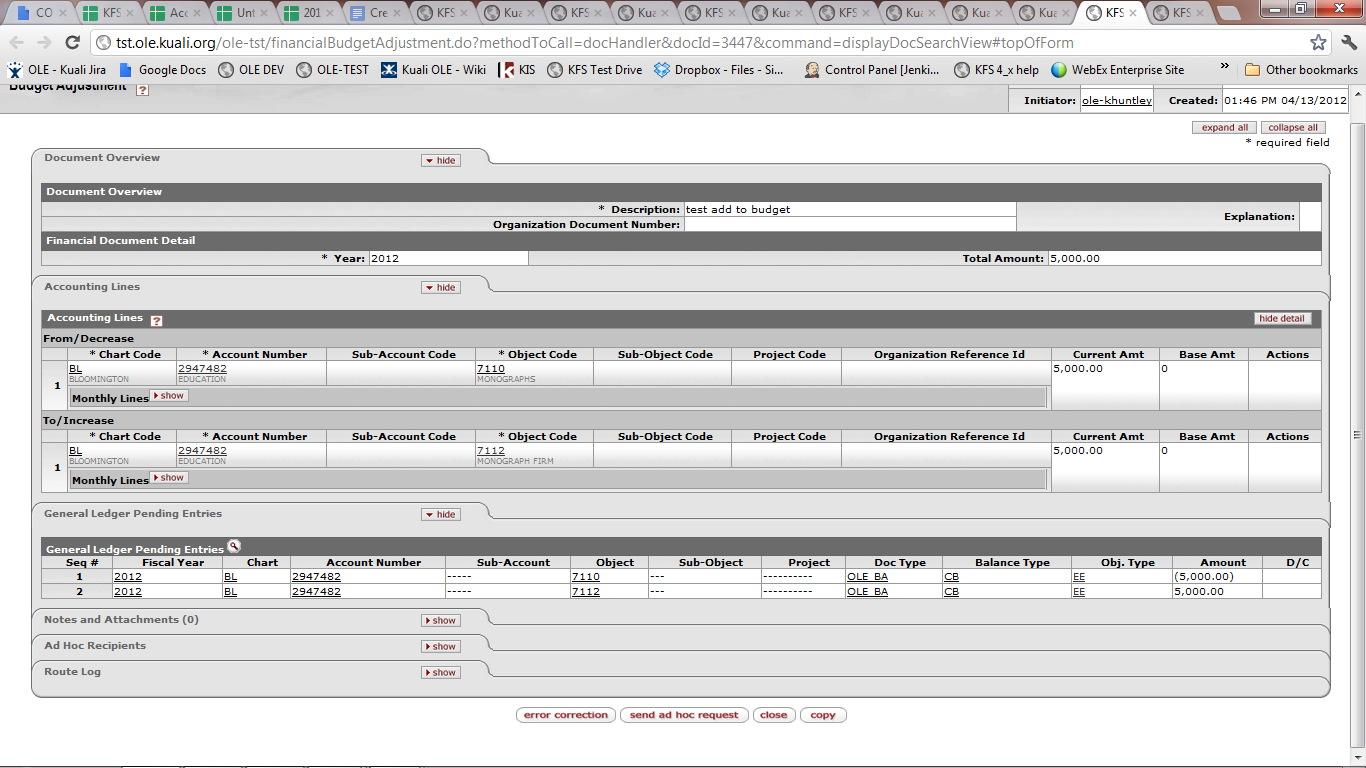
Review the Route Log tab.
The document is routed to the fiscal officer for each account used in the Accounting Lines. The Route Status shows 'ENROUTE'.
Appropriate fiscal officers and organization reviewers approve the document.
If a Budget Adjustment involves two or more accounts with different Income Stream Accounts, OLE can be configured to create an automated Transfer of Funds transaction to properly adjust cash between those Income Stream accounts. This Transfer of Funds is generated by OLE after the Budget Adjustment is approved and does not route for approval itself.
Only accounts that have the recording level attribute of 'Budget' accept budget adjustment transactions. The budget adjustment document cannot be used on a cash control (non-budgeted) account.
Negative amounts are not allowed except when using the Error Correction option.
Note
For information about the error correction, see Correcting Errors after Approval on the OLE Workflow Overview and Key Concepts wiki page.
Increases and decreases must balance in the document with relation to object code types. Increases in income may be balanced by decreases in other income lines or by increases in expenditures. Decreases in income may be balanced by increases in other income lines or by decreases in expenditures. Similar logic applies to changes in expenditures
If Base Adjustments have not been enabled for the selected Fiscal Year on the document then base changes are not allowed.
The fund group and sub-fund group attributes on an account contain an attribute (Budget Adjustment Restriction Code – BARC) for determining how budget adjustments within that group can be made. These attributes limit the mixing of accounts on the same BA documents.
BARC values for fund group are: C (Chart), O (Organization), A (Account), or F (Fund).
BARC values for sub-fund group are: C (Chart), O (Organization), A (Account), S (Sub-Fund), or N (None).
If the BARC value of the sub-fund group is none, the BARC value of the sub-fund group’s parent fund group applies to the account.
The budget adjustment applies the following rules using these values:
If an account on the BA has an effective BARC of Account, then no other account can be used on that Budget Adjustment document, i.e. all adjustments (increases/decreases) must be to the same account.
If an account on the BA has an effective BARC of Organization, then the only other accounts on that Budget Adjustment document must belong to the same Organization, i.e. allowing adjustments among accounts in the same organization.
If an account on the BA has an effective BARC of Chart, then the only other accounts on that Budget Adjustment document must belong to the same Chart, i.e. allowing adjustments across accounts belonging to different Organizations but within the same Chart.
If an account on the BA has an effective BARC of Sub-Fund, then the only accounts on that Budget Adjustment document must belong to the same Sub-Fund Group, i.e. allowing adjustments across accounts belonging to different Organizations and Charts but with the same Sub-Fund Group Code.
If an account on the BA has an effective BARC of Fund, then the only accounts on that Budget Adjustment document must belong to the same Fund Group, i.e. allowing adjustments across accounts belonging to different Organizations and Charts and Sub-Fund Groups but with the same Fund Group Code.
The use of certain balance sheet object codes and certain object sub-types may be prohibited according to your institution's business rules.
The BA document is approved as final by the initiator if the following conditions are met:
The document only adjusts a single account
The document only adjusts current budget amount
The Initiator is the fiscal officer for the account
The total decrease amount is not greater than the current budget balance for the object code being decreased
If previous conditions are not met, the document continues with standard financial document routing, based on the account numbers used on the document as follows:
The fiscal officer for each account must approve.
Organization review routing occurs for the organization that owns each account.
Sub-fund routing occurs based on the sub-fund of each account.
The document status becomes 'FINAL' when the required approvals are obtained and the transaction is posted to the G/L during the next G/L batch process.
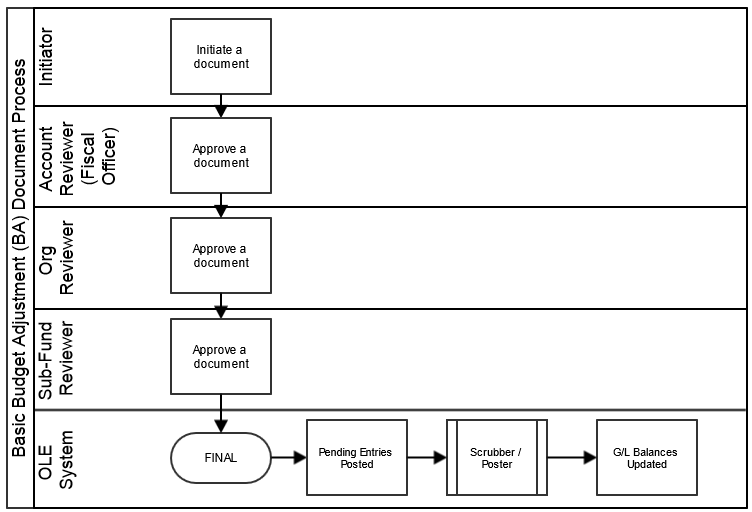
Select Budget Adjustment from the Financial Transactions menu.
A blank BA document with a new document ID appears.
Complete the standard tabs.
Note
For information about the standard tabs such as Document Overview, Notes and Attachments, Ad Hoc Recipients, Route Log, and Accounting Lines tabs, see Standard Tabs on the OLE E-Doc Fundamentals wiki page.
Click
 .
.The document is routed to the fiscal officers of the accounts as well as any approvers in the Organizational Review hierarchy.
Review the General Ledger Pending Entries tab.
Review the Route Log tab.
Note
For information about the Route Log tab, see Route Log on the OLE Workflow Overview and Key Concepts wiki page.
Appropriate fiscal officers and organization reviewers approve the document.
Note
For more information about how to approve a document, see Workflow Action Buttons on the OLE Workflow Overview and Key Concepts wiki page.
 >
>  >
> >
>
OLE offers a customized document search related to transfer of funds. The search screen contains the standard search fields along with special fields that are unique to this type of e-doc.
Note
For information about performing a search for one or more requisitions, see Performing Acquisition Searches on the OLE E-Doc Fundamentals wiki page.
Note
For information about Document lookup fields that are specific to requisitions, see “Document Layout” under Requisition.
 >
> >
> >
> >
>
Cash: In Libraries, we often think of cash/actuals as a summary of available balances, however in OLE/KFS, we have the options to manage both sides of accounting- expenses/liabilities and Cash. While General Ledger and Transfer of Funds functions are noted here, we may/may not use Transfer of Funds or other GL correction documents inherited from KFS in adoptable OLE 1.0. The reason for this is simple (and complex): Libraries don’t really operate from ‘cash’ but from budgets, as the university financial systems manage the actuals/cash and report back to libraries.
In OLE 1.0 and 1.5, we will be reconciling university financial integrations and OLE’s use of Budget vs. Actual (cash) balances.
The Transfer of Funds (TF) document is used to transfer funds (cash) between accounts. The TF could be used to cover an overdraft, reimburse an account for an expense, or to fulfill a funding commitment.
The TF document has only the standard financial transaction document tabs and does not have any unique tabs of its own.
Note
For information about the standard tabs such as Document Overview, Notes and Attachments, Ad Hoc Recipients, Route Log, and Accounting Lines tabs, see Standard Tabs on the OLE E-Doc Fundamentals wiki page.
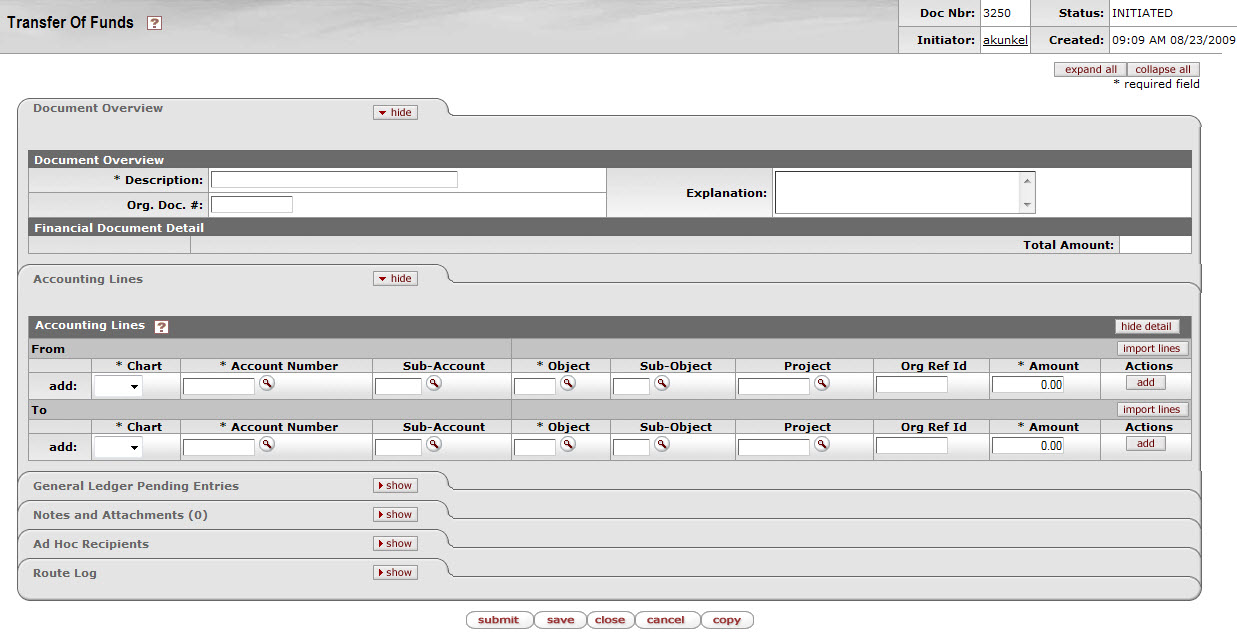
There must be at least one accounting line in the From section and one accounting line in the To section.
The total in the From section must equal the total in the To section in the Accounting Lines tab.
$0 accounting line amounts are not allowed.
Negative amounts are not allowed (unless it is an Error Correction TF).
OLE automatically generates cash object code offset entries as defined by the information entered into the document.
Object codes representing assets, liabilities, and fund balances (as indicated by the object code's object consolidation) may not be used.
The Object code restrictions are as follows.
Restricted object type code in the Transfer of Funds document
|
Object Type Codes |
Description |
Restrictions |
|
ES |
Expense Not Expenditure |
Unallowable |
|
IC |
Income Not Cash |
Unallowable |
The object sub-types used must be sub-types of mandatory transfers and non-mandatory transfers.
From accounting lines with an object sub-type of mandatory transfer must balance with To accounting lines with an object sub-type of 'Mandatory Transfer'.
From accounting lines with an object sub-type of non-mandatory Transfer must balance with To accounting lines with an object sub-type of 'Non-Mandatory Transfer'.
The document routes based on the account numbers used on the document as follows:
The fiscal officer for each account must approve.
Organization review routing occurs for the organization that owns each account.
Sub-fund routing occurs based on the sub-fund of each account.
The document status becomes 'FINAL' when the required approvals are obtained and the transaction is posted to the G/L during the next G/L batch process.
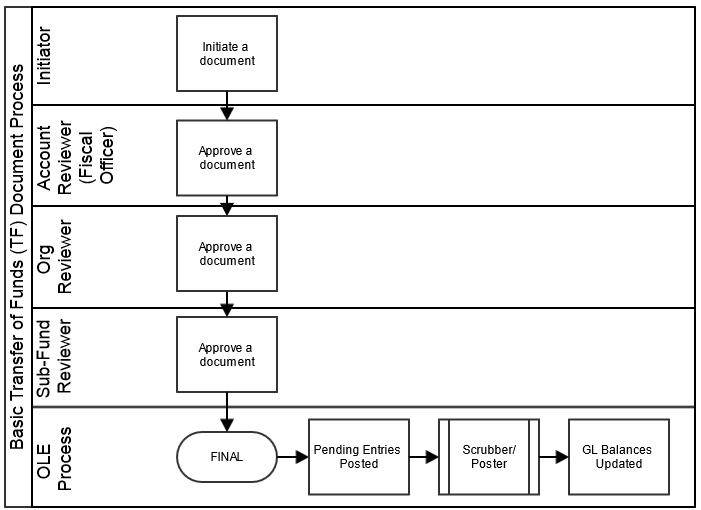
Select Transfer of Funds from the Financial Processing submenu group in the Transactions submenu on the Main Menu tab.
A blank TF document with a new document ID appears.
Complete the standard tabs.
All accounting lines in the To section generate credits and all accounting lines in the From section generate debits.
Note
For information about the standard tabs such as Document Overview, Notes and Attachments, Ad Hoc Recipients, Route Log, and Accounting Lines tabs, see Standard Tabs on the OLE E-Doc Fundamentals wiki page.
Use sample Accounts & Objects in the Appendix, such as moving $$ from Account 2947496 to 2947490 (note: using Non-Mandatory Object Sub-Type, TN, with specialized Object Codes for Transfer In and Transfer Out)
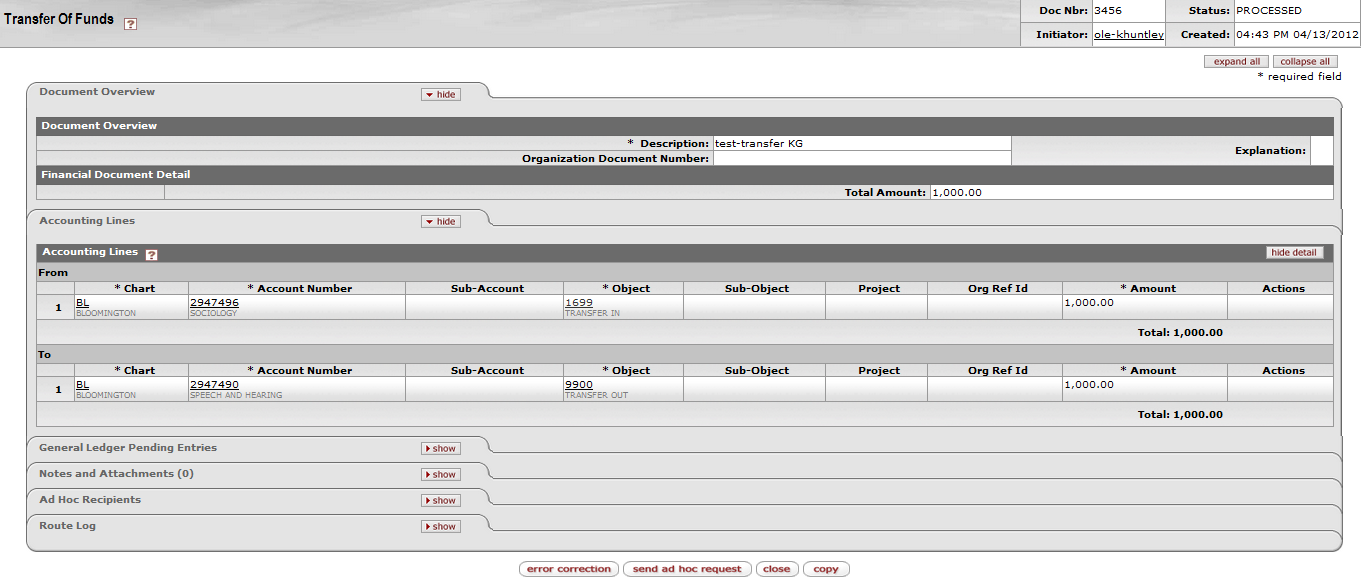
Or from Accounts 2947486 to 2948482 (both of object code 7112 Monographs, with object sub-type of TN-Non Mandatory Transfer)
Click
 .
.Review the General Ledger Pending Entries tab.
The pending entries include the offset generation to cash or fund balance object codes.
Review the Route Log tab.
The document is routed to the fiscal officer for each account used in the Accounting Lines. The Route Status shows 'ENROUTE'.
Note
For more information about the Route Log, see For information about the Route Log tab, see Route Log on the OLE Workflow Overview and Key Concepts wiki page.
Appropriate fiscal officers and organization reviewers approve the document.
Note
For more information about how to approve a document, see Workflow Action Buttons on the OLE Workflow Overview and Key Concepts wiki page.
Table of Contents
 >
> >
>
On the Select/Acquire tab, the Acquisition submenu provides access for users to search and edit payment requests, create general error corrections and disbursement vouchers, and search and edit E-Resources.
 >
>  >
> 
OLE offers a customized document search related to payment requests. The search screen contains the standard search fields along with special fields that are unique to this type of e-doc.
Note
For information about performing a search for one or more payment requests, see Performing Acquisition Searches on the OLE E-Doc Fundamentals wiki page.
Note
For information about Document lookup fields that are specific to payment requests, see “Document Layout” under Payment Request.
 >
> >
> >
>
Note
In order for users to submit the Payment Request document, the ENABLE_BANK_SPECIFICATION_IND parameter must be set to Y and the DEFAULT_BANK_BY_DOCUMENT_TYPE parameter must be completed. Even if your institution is not planning to use the Bank Offset feature in Kuali OLE, the DEFAULT_BANK_BY_DOCUMENT_TYPE parameter must be completed if your users plan to use the Payment Request document. Bank offsets will not be created if the Bank Offset feature has not been configured.
The Payment Request (PREQ) document is created in response to receiving an invoice for goods or services requested from a vendor on a PO. The system provides two ways of creating a payment request:
One is automated through the electronic invoicing process. This will be reviewed for 1.0.
The other approach is to complete the Payment Request document manually using the screen described in this section.
OLE breaks down vendor invoicing permissions into several roles.To create unapproved invoicing and payment requests, please sign into OLE as:
| Role | Login |
|---|---|
| Receiving-AQ3 | ole-durbin |
| Receiving-AQ4 | ole-cstan |
| Accounting-AQ2, -AQ3, -AQ4 | ole-cphovis, ole-earley, ole-ejacob |
| Super user | ole-khuntley (can do all) |
Note
For OLE 1.0, we have not yet coded full university financial integrations. To “stub” this functionality at present, and to simulate how general ledger, fund/account updates, and expenses might be approved and processed through the university financial system, all payment requests stop at the relevant Fiscal/Accounts staff for final routing/export/batch processing.
| Role | Login |
|---|---|
| Fiscal officer | ole-rorenfro |
| Fiscal manager | ole-jaraujo |
Before initiating a payment request, you’ll need to know the purchase order number for the title(s) on your invoice. This can be found by doing an Acquisitions Search or a Purchase Order Search.
Note
To learn more about searching, see Searching OLE on the OLE E-Docs fundamentals wiki page.
Once you have the Purchase Ordernumber in hand for the title on your invoice, you can begin the payment process.
Tip
Be sure you have the Purchase Order number and not the system-generated document-identifier to initiate Payment Requests.
Two screens are associated with the Payment Request document—an 'initiation' screen with a single tab followed by a 'main' screen with multiple tabs.
When you select Payment Request from the Main Menu tab, the system displays a screen containing the Payment Request Initiation tab.

This tab allows you to specify details about the invoice and the PO to which it applies.
Payment Request Initiation tab definition
|
Title |
Description |
|
Purchase Order Number |
Required. Enter the PO number to which the invoice applies. |
|
Invoice Date |
Required. Enter the invoice date from the vendor invoice or select the date
from the calendar |
|
Special Handling Instructions |
Optional. Enter text into any of the special handling fields to indicate a special check delivery requirement for the payment. |
|
Invoice Number |
Required. Enter the identifying invoice number from the vendor invoice. |
|
Vendor Invoice Amount |
Required if the vendor is not foreign. Enter the net dollar amount of the invoice to be processed. |
|
Foreign Vendor Invoice Amount |
Required if the Vendor is foreign. Enter the net amount of the invoice to be processed. |
Click  to initiate this payment request. The system displays the main screen for the
Payment Request document. It imports some information like vendor, line item details, accounting
information, etc. from the relevant Purchase Order
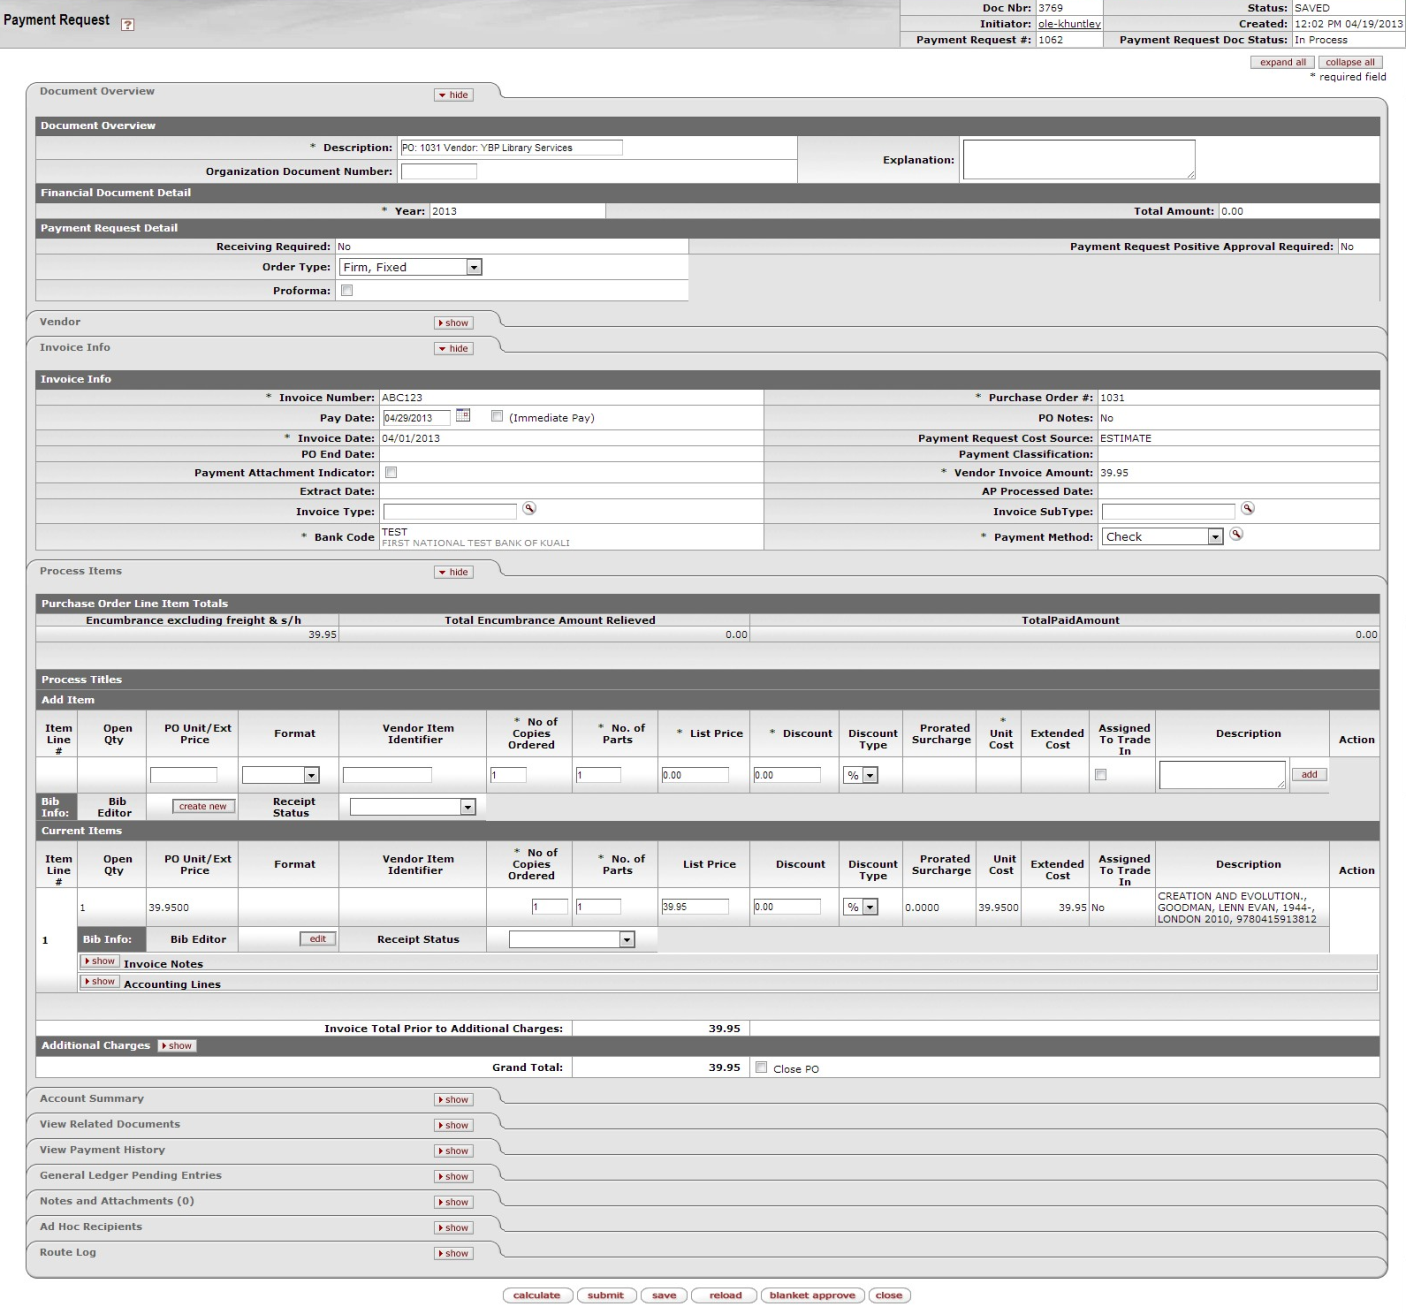
This screen includes unique Document Overview, Vendor, Invoice Info, Process Items, Account Summary, View Related Documents, and View Payment History tabs in addition to the standard tabs that display at the bottom of a financial transaction document.
Note
For more information about the standard tabs, see Standard Tabs on the OLE E-Docs fundamentals wiki page.
The Document Overview tab for the Payment Request document is different from the standard Document Overview tab. The Description field defaults to the purchase order number and the vendor name.
On the Payment Request document, this tab is made up of three sections—Document Overview, Financial Document Detail, and Payment Request Detail. The Document Overview section is the same as the standard Document Overview tab.

Note
For information about the standard Document Overview tab, see Standard Tabs on the OLE E-Docs fundamentals wiki page.
Financial Document Detail section definition
|
Title |
Description |
|
Year |
Display-only. The fiscal year of the purchase order referenced by the Payment Request document. |
|
Total Amount |
Display-only. The total amount of the payment request after the request has been submitted. |
Payment Request Detail section definition
|
Title |
Description |
|
Receiving Required |
Display-only. An indicator showing whether receiving is required. |
|
Order type |
Identifies the type of order, possible values could be one-time, standing, subscription. System default data value is "Firm, Fixed". |
|
Proforma |
Identifies whether the invoice is pre-paid. Check the box to indicate yes. This will override business rules requiring receiving before the payment request is approved and override payment terms associated with the vendor and set the invoice to “immediate pay” regardless of the invoice date. |
|
Payment Request Positive Approval Required |
Display-only. An indicator showing whether positive approval is required. |
The Vendor tab contains information about the vendor associated with the PO and allows you to modify vendor address information.

The Vendor tab has two sections: Vendor Address and Vendor Info.
Vendor Address section definition
|
Title |
Description |
|
Vendor |
Display-only. The name of the vendor is automatically populated based on information in the purchase order. |
|
Vendor Number |
Display-only. The vendor number followed by a hyphen and the division number. |
|
Address 1 |
Required. The default remit-to address is ordinarily populated from the
Vendor document. The purchase order address will display here instead if there is not a remit-to
address in the Vendor record. Override the default by entering a different address in this field or
by searching for it from the Address lookup |
|
Address 2 |
Optional. Override the default or leave it as is. |
|
Attention |
Optional. Override the default or leave it as is. |
|
City |
Required. Override the default or leave it as is. |
|
State |
Required for U.S. addresses. Override the default by selecting the state from the State list or leave it as is. |
|
Province |
Optional. Override the default or leave it as is. |
|
Postal Code |
Required for U.S. addresses. Override the default or leave it as is. |
|
Country |
Required. Override the default by selecting a country from the Country list or leave it as is. |
Vendor Info section definition
|
Title |
Description |
|
Acquisition Unit's Vendor Account/ Vendor Info Customer # |
Optional. Populated from the PO. Override it by entering the customer
number directly or searching for it from the vendor lookup |
|
Check Stub Notes |
Optional. Enter text to be printed on the check stub. This three line field allows for special notes to be printed on the check stub for the payment. Please note that entering a value into this field will force the system to create a physical check rather than an ACH transfer. |
|
Special Handling Instructions |
Optional. Enter the handling instructions to be printed on the check. These handling instructions relate to the delivery of the check to the vendor. Please note that entering a value into this field will force the system to create a physical check rather than an ACH transfer. |
|
Payment Terms |
Optional. Populated from the PO. Override it by selecting the payment terms from the Payment Terms list. |
|
Shipping Title |
Display-only. This entry indicates when the items associated with a PO become the property of the ordering institution. |
|
Shipping Payment Terms |
Optional. Populated from the PO; identifies the entity that pays for shipping (the vendor or the institution). Override the entry by selecting the terms from the Shipping Payment Terms list. |
The Invoice Info tab provides a means for display and modification of invoice information.

Invoice Info tab definition
|
Title |
Description |
|
Invoice Number |
Display-only. Populated from the Payment Request Initiation tab. |
|
Pay Date |
Defaults to the date automatically calculated by the system. If payment
terms are edited, the system repopulates this field only if it is blank. Override the automatic
entry by entering a pay date or selecting it from the calendar NotePay Date Calculations: The pay date is calculated automatically as follows. The payment terms specified are applied to the invoice date to generate a pay date. The payment terms parameters are in the Payment Terms Type table. Additionally, ten days (or another institutionally defined default number of days) are added to the current date to generate a pay date. KUALI OLE selects the later of these two dates and uses it as the default pay date for this Payment Request document. The pay date may be entered manually, but it must not be a past date. If the date is more than 60 days from the current date, the system displays a warning message. |
|
(Immediate Pay) |
Optional. Select the Immediate Pay check box if a check is needed on the same day (overrides the pay date – subject to the rules of your accounts-payable system). This indicator allows for an approved payment request to be extracted for payment during the day. |
|
Invoice Date |
Display-only. Populated from the Payment Request Initiation tab. |
|
PO End Date |
Display-only. The purchase order end date, if any, is automatically populated from the PO. |
|
Payment Attachment Indicator |
Optional. Select the check box if an attachment (such as a copy of the invoice) must be returned to the Vendor with this payment. |
|
Extract Date |
Display-only. The date the Payment record is extracted to the Pre-Disbursement Processor. |
|
Invoice Type |
Optional. Select the type of invoice. Sample data values are Proforma/prepay, Regular. |
|
Bank Code |
Required. The bank code will be displayed only if the
Bank_Code_Document_Types includes 'PREQ' and Enable_Bank_Specification_Ind='Y'. The default bank is
determined by the Default_Bank_By_Document_Type parameter. You may override this value by entering
another bank code or selecting it from the Bank lookup |
|
Purchase Order Number |
Display-only. The PO number associated with this invoice. This is the PO number used on the initiation screen. |
|
PO Notes |
Display-only. If notes have been added to the PO, this field contains the value 'Yes'. |
|
Payment Request Cost Source |
Display-only. Automatically populated from the PO if it exists. |
|
Payment Classification |
Display-only. Not currently used. In Kuali OLE the field will always be null. In a future enhancement, when wire transfer and foreign drafts are processed on Payment Request documents, this field will be populated. |
|
Vendor Invoice Amount |
Display-only. The vendor total invoice amount as entered on the Payment Request Initiation tab. This field is displayed only on an 'In Process' PREQ document. When the document is submitted, the system no longer carries the field and the value forward. |
|
Foreign Vendor Invoice Amount |
Display-only. The foreign vendor total invoice amount as entered on the Payment Request Initiation tab. This field is displayed only on an 'In Process' PREQ document. When the document is submitted, the system no longer carries the field and the value forward. |
|
AP Processed Date |
Display-only. The date the PREQ was submitted by an Accounts Payable processor. |
|
Invoice Sub Type |
Optional. Enter the subtype of invoice or select it from the Invoice Sub Type lookup |
|
Payment Method |
Select the method of payment from the drop down menu. |
The Process Itemstab indicates the lines of the PO that this invoice relates to and the dollar amounts to be paid on this payment request. If a price was listed on the purchase order, that price is automatically supplied in the Unit Cost field. The tab also provides a means to edit accounting information associated with these lines and allows for the entry of additional invoiced items such as freight or shipping and handling. You should change the supplied price to the amount listed on your invoice, and supply the number of copies being invoiced.
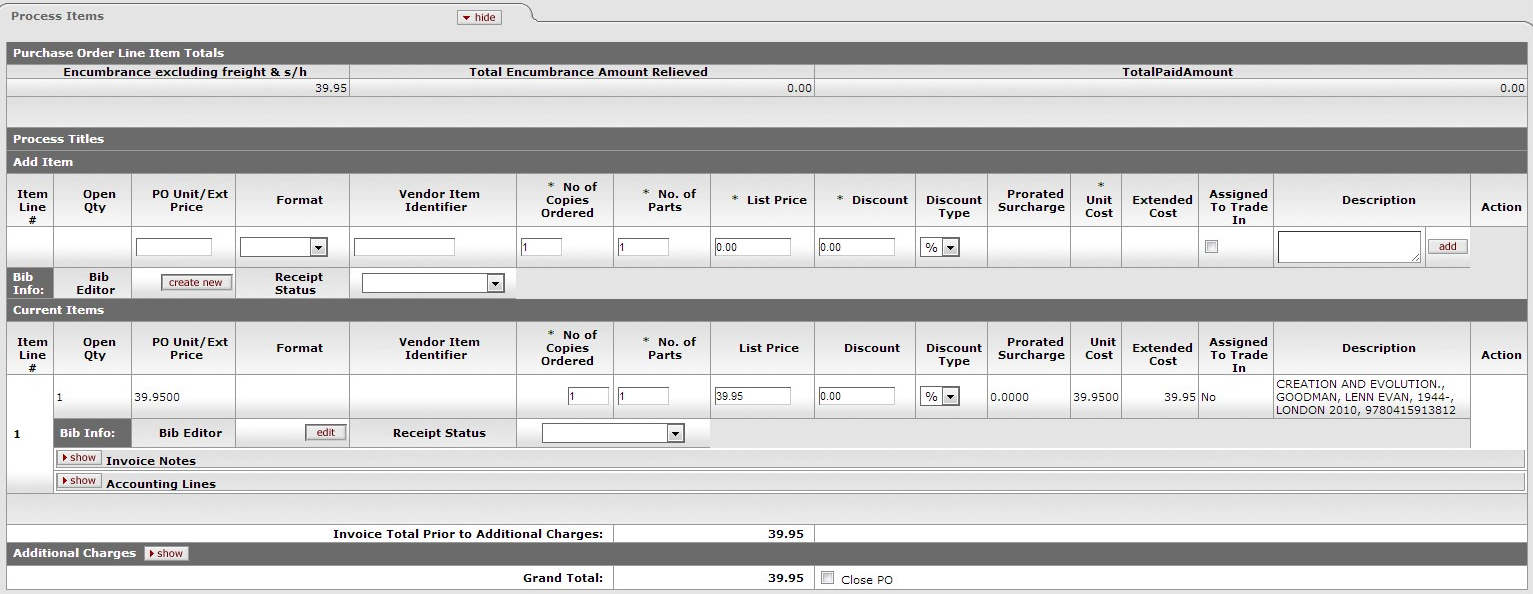
The Process Items tab includes three sections: Purchase Order Line Item Totals, Process Titles, and Additional Charges.
Purchase Order Line Item Totals section definition
|
Title |
Description |
|
Encumbrance excluding freight & s/h |
Display-only. The total dollar amount encumbered for this PO excluding freight, shipping and handling. |
|
Total Encumbrance Amount Relieved |
Display-only. The total dollar amount of the encumbrance that has thus far been relieved from this PO, excluding any additional charges processing. |
|
Total Paid Amount |
Display-only. The dollar amount total for line item payments excluding freight, shipping and handling, discount and miscellaneous payments made thus far against this purchase order. The difference in amounts between Total Encumbered Amount Relieved and Total Paid Amount is the difference between the PO unit cost and the payment request unit cost. |
Items section definition
|
Title |
Description |
|
Item Line # |
Display-only. The actual Item line number from this PO. |
|
Open Qty |
Display-only. The quantity of items that have yet to be invoiced for this line item. |
|
PO Unit/Ext Price |
Display-only. The cost per unit from the PO for this line item. |
|
Format |
Display-only. Identifies the Format for this line item. |
|
Vendor Item Identifier |
Display –only. Identifies a vendor item identifier if one has been provided by a vendor. |
|
No of Copies Ordered |
Required. Enter the number of copies of a title being invoiced. This entry reduces the open number of parts for this line item on the PO. |
|
No. of Parts |
Required. Enter the parts of items being invoiced for this line. This entry reduces the open number of parts for this line item on the PO. |
|
List Price |
Basic price of an item before any discounts are taken. |
|
Discount |
Discount provided by the vendor/customer number/organization combination. Automatically populated from the Vendor customer number table based on the selected vendor and customer number. Can be modified for a specific title. If the vendor record has a Vendor currency noted other than the default system currency (aka US dollar), then the Vendor discount will populate the Foreign Discount field. |
|
Discount Type |
Choose # (for Amount) or % (for Percentage). |
|
Prorate Surcharge |
Additional charge applied to the line item based on the proportional distribution |
|
Unit Cost |
Optional The unit price for this line item as it appears on the invoice. This field is automatically populated using the price from the PO, but it may be changed if the invoice reflects a different price. |
|
Extended Cost |
If this field is blank and if the No of Copies Ordered is populated, the system calculates the extended cost for this line item when you click the calculate button. NoteIf the field already contains a value, you must delete the value in order to populate a new value by clicking calculate. Override the amount as needed. |
|
Assigned To Trade In |
Display-only. This 'Yes/No' indicator is based on the PO. |
|
Description |
Display-only. The title of the item, retrieved from the PO. |
|
Currency Type |
Display only. Identifies the associated vendor's currency as identified on the vendor record that is identified in the Link to Vendor/Supplier |
|
Foreign List Price |
Basic foreign price of an item before any discounts are taken. |
|
Foreign Discount |
Foreign discount provided by the vendor/customer number/organization combination when the vendor record has a Currency Type different from the system default currency. Should be automatically populated from the Vendor customer number table based on the selected vendor and customer number (PUR_VNDR_CUST_NBR_T: VNDR_CUST_NBR). This data can be changed for the specific title. Must identify the type of discount (amount or %.) If the vendor record does not have a Currency Type noted other than the default system currency (aka US dollar), then the discount should populate the Discount field. |
|
Foreign Discount Type |
Choose # (for Amount) or % (for Percentage). |
|
Foreign Discount Amt |
Foreign Discount Amount is a calculated value in the foreign currency |
|
Foreign Unit Cost |
Calculated foreign cost per unit for the item or service on this line. Calculation is the Foreign List Price less Foreign Discount amount. |
|
Exchange Rate |
Currency conversion rate populates from the Currency rate column in the Currency Type maintenance table (which is populated each night into system as Batch from bank files). The rate will populate when user clicks action button "Calculate" on conversion tab. Optionally: when currency tab opens, currency rate may auto-populate. This may be updated up until the Requisition is approved. After that point, it may no longer be modified. |
|
Bib Info |
If new item is invoiced, must be entered via the Bib Editor and a PO Amendment |
|
Receipt Status |
Select the status from the dropdown menu. |
|
Invoice Total Prior to Additional Charges |
Display-only. The calculated sum of the Total Amount fields of all the line items. |
On a new, unsubmitted payment request, the Process Titles subsection of the Process Items tab will have two divisions. One line will be headed by the label “Add Item”, and the next will be headed by the label “Current Items”. The “Current Items” section may feature multiple lines, divided by item number, each with its own “Invoice Notes” and “Accounting Lines” sub tab. Both the line items and their accounting lines are automatically carried over from the purchase order preceding the current payment request.
It is possible to add additional titles or other miscellaneous line items which are listed on the invoice, even if they were not originally on the purchase order:
Users must complete the line item and linked bib in this sequential order. This will be fixed in future releases.
New line items:
First click
 to launch the bib editor and input your
data
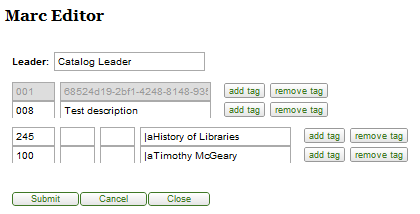
Note
For more information about the Bibliographic Editor, see Editors in the Guide to Describe – DocStore and Editors. This and other OLE user guides are available for download from the OLE Documentation Portal.
Add transactional data to the line (quantity, price, category etc.).
After both are complete, click on
 to save the line. This should update and link the bib and Description.
 Then depending on the document, finish with rest of edits, add accounting lines, calculate, save etc.
After the add button is clicked, the Bibliographic information will show up in the Process Titles section. To add accounting information to each of the items you have added, click the
 button next to Accounting Lines:
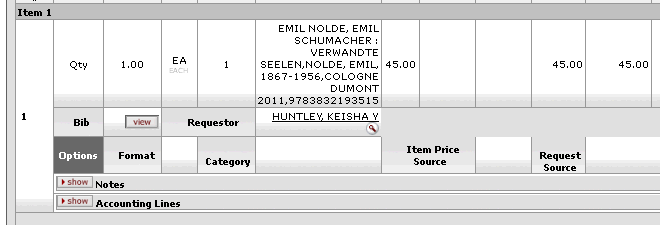
Click on the  button to edit the linked bib of the existing line item. When completed, you
will be returned to your working purchasing document.
Note
You will not yet see your revised Description from the updated bib, until you complete further actions on the overall purchasing document, such as save, submit, or blanket approve. If you are only saving your doc, and wish to see Description updates, you may need to save or save & reload the e-Doc AFTER making updates in the bib- in order to update its description with linked bib changes-- prior to submit or blanket approve
Above creates a Purchase Order Amendment (POA) document, with the new title added. The POA document is then routed according to the routing rules established in your system for POA approvals.
Note
Routing the Purchase Order Amendment from “unordered” line item during Payment Request is automatic from authorized receiving staff. The resulting POA must be edited by Acquisitions staff or managers, and Submitted. Please note a bug fix to complete the approval process. Ole-khuntley can be used to complete the related Purchase Order Amendment and approve it.
Invoice Notes and Accounting lines, for fund accounting, are hidden beneath the
Items section; they can be shown by clicking the  button next to each:
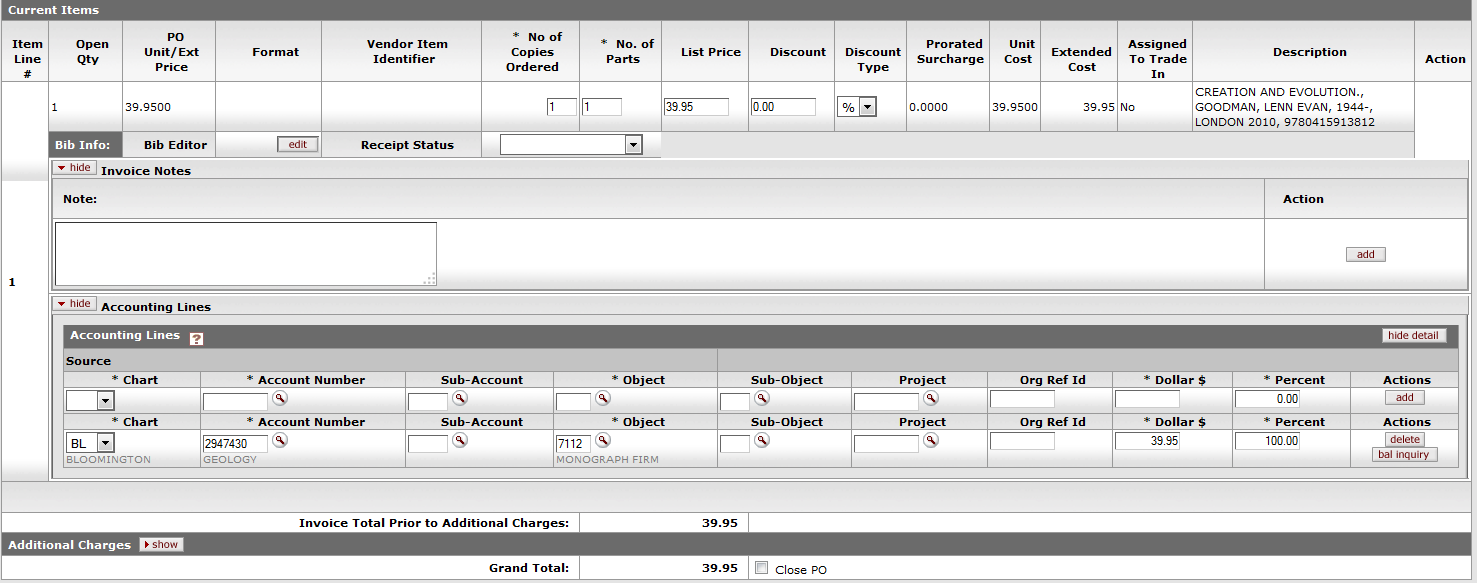
Invoice Notes section definition
|
Title |
Description |
|
Note |
Optional. Free text note to include additional information about the invoiced item. |
Accounting Lines section definition
|
Title |
Description |
|
Chart |
Required. Select the chart code from the Chart list. |
|
Account Number |
Required. Enter the account number or search for it from the Account lookup |
|
Sub-Account |
Optional. Enter the sub-account number or search for it from the Sub-Account lookup |
|
Object |
Required. Enter the object code or search for it from the Object Code lookup |
|
Sub-Object |
Optional. Enter the sub-object code or search for it from the Sub-Object lookup |
|
Project |
Optional. Enter the project code or search for it from the Project lookup |
|
Org Ref Id |
Optional. Enter the appropriate data for the transactions. |
|
Dollar $ |
Display only. Calculated total dollar amount that will be applied to the Line Account. |
|
Percent |
Indicates the Percentage that will be applied to the Line Account. System default data value 100%. |
|
Actions |
Add or delete lines as appropriate. |
Accounting lines are carried over from the purchase order related to the payment
request. A new accounting line will be followed by an  action button, and existing accounting lines will be followed by both a
  action button and a
  action button.
Tip
If the account chosen has sufficient funds checking and the threshold is reached, you may be blocked from using the account or you may receive a warning (depending on the chosen notification on the account) when the document is saved and the Fiscal Officer will be notified when the document is submitted.
Charges can be shared among multiple funds by percentage. A blank line for adding an additional fund appears for each title, above the line/s already added:

The Additional Charges tab allows lines for predetermined charges to be included on the payment request. This tab is divided into four charge lines, each representing a different type of charge, each with its own accounting lines, and a series of options through which the amounts added in this section can be prorated to the existing line items in the Current Items sub tab. The four Additional Charges lines are Freight, Shipping and Handling, Minimum Order, and Miscellaneous or Overhead.
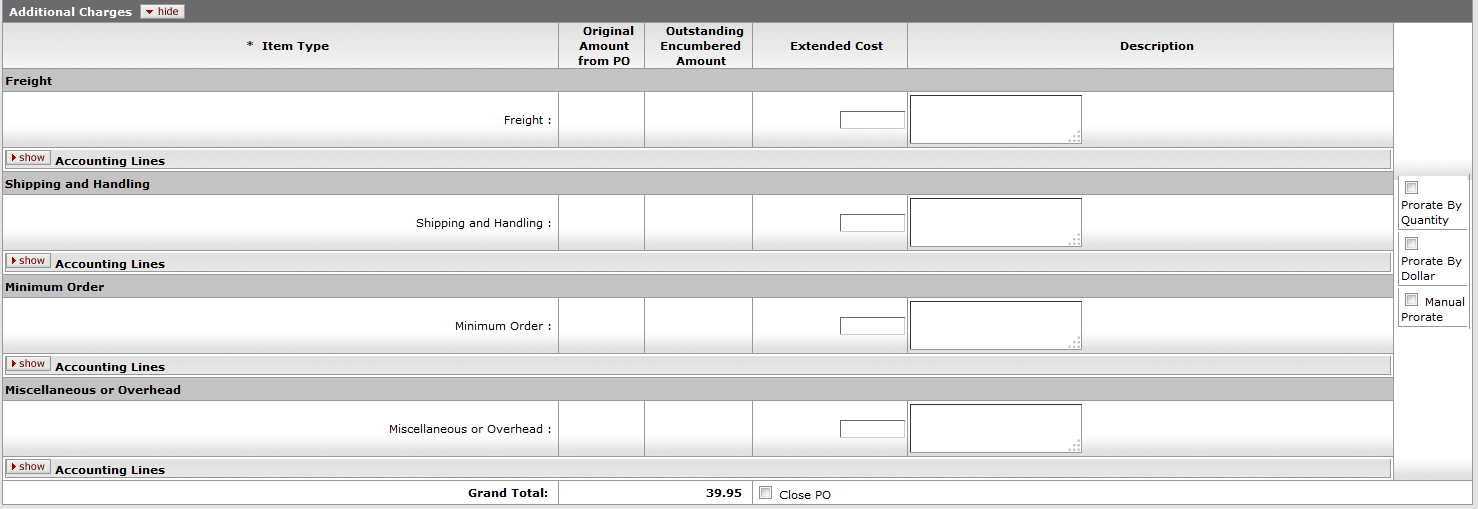
Each line contains these fields:
Additional Charges section definition
|
Title |
Description |
|
Item Type |
Display-only. The type of item to be charged. |
|
Original Amount from PO |
Display-only. The total extended amount of the additional charges for the item type on this PO. |
|
Outstanding Encumbered Amount |
Display-only. The outstanding encumbrance amount of the additional charges for the item type on this PO. |
|
Foreign Currency Extended Cost |
Displays the extended amount charged on the invoice for this additional charge item. |
|
Currency Type |
Display only. Identifies the associated vendor's currency as identified on the vendor record that is identified in the Link to Vendor/Supplier |
|
Exchange Rate |
Currency conversion rate populates from the Currency rate column in the Currency Type maintenance table (which is populated each night into system as Batch from bank files). The rate will populate when user clicks action button "Calculate" on conversion tab. Optionally: when currency tab opens, currency rate may auto-populate. This may be updated up until the Requisition is approved. After that point, it may no longer be modified. |
|
Extended Cost |
Displays the extended amount charged on the invoice for this additional charge item. |
|
Description |
Required for miscellaneous charges. A description is optional for freight charges, shipping and handling, and minimum order charges. NoteThe ITEM_TYPES_REQUIRING_USER_ENTERED_ DESCRIPTION parameter controls whether the description is required or optional. |
Additionally, each charge has an accounting line below it, so you can assign charges to your preferred fund:

If you choose, you may also prorate the additional charges to the invoiced titles.
Enter the amount of the additional charge, select to prorate by Quantity, Dollar, or Manual Prorate. If Manual prorate is selected, enter the amount you would like prorated to each title.
The Account Summary tab will summarize all accounts attached to the payment request and their respective charges after calculation. Information in the account summary is divided first by account, then by line item or additional charges line. Charges prorated to multiple accounts will be represented separately. Any changes made to accounting line items will not be updated until the PREQ has been calculated and the “Refresh Account Summary” button at the top of the tab has been clicked.
Click  to reload the page and view all the fiscal years, accounting lines and dollar
amounts for this requisition.
The View Related Documents tab collects information about Purchasing/AP documents related to this document. For example, it displays identifying information and any pertinent notes for associated requisitions, the purchase order, receiving documents, other payment requests for this PO, and credit memos. Within each document type the documents are listed in order, with the most recent first.

The View Payment History tab tracks payment information related to the purchase order associated with this Payment Request document. It shows pending payment information and is updated automatically to show when a payment has been processed through the Pre-Disbursement Processor (PDP). This tab also shows any credit memos that have been processed against the related purchase order, including detail with an associated payment request referenced by the credit memo.

Payment Requests section definition
|
Title |
Description |
|
PREQ Number |
Display-only. The payment request number. |
|
Invoice Number |
Display-only. The invoice number associated with this payment request. |
|
PO Number |
Display-only. The PO number associated with this payment request. |
|
PREQ Status |
Display-only. The status of the payment request. |
|
Hold |
Display-only. Displays 'yes' if the payment request in on hold. Displays 'no' if the payment request is not on hold. |
|
Request Cancel |
Display-only. Displays 'yes' if the payment request has been requested canceled. Displays 'no' if the payment request has not been canceled or if 'request cancel' has been removed. |
|
Vendor Name |
Display-only. The vendor name associated with this payment request. |
|
Customer Number |
Display-only. The customer number associated with this payment request. |
|
Amount |
Display-only. The dollar amount associated with this payment request. |
|
Pay Date |
Display-only. The date the payment is scheduled to extract to the Pre-Disbursement Processor. |
|
PDP Extract |
Display-only. The date the payment request was extracted to the Pre-Disbursement Processor for disbursement processing. |
|
Paid? |
Display-only. Displays 'yes' if the payment has been disbursed. Displays 'no' if the payment has not been disbursed. |
Payment History tab, Credit Memos section definition
Partial payment/short-pay is allowed. Multiple payments against a PO or PO line item are allowed.
Every payment request must be processed against a specific open PO document. This PO must be specified when the payment request is initiated.
Note
Under review for 1.0: Many to one Purchase Order to Invoice.
If the vendor number and invoice number match values previously processed, a warning notifies the initiator of the potential duplicate. Even so, the system allows the initiator to override the warning and continue.
If the invoice amount and invoice date match values previously processed for this vendor, a warning notifies the initiator of the potential duplicate. Even so, the system allows the initiator to override the warning and continue.
Insufficient funds in the assigned budget will stop a payment from processing.
Pay Date may not be a past date. If the pay date is more than 60 days in the future, a warning is received.
Discounts applied from payment terms do not apply to freight or shipping and handling charges.
Additional charges items that were not specifically funded on the purchase order are allocated to accounting lines in proportion to the item amounts on the purchase order if no allocation noted, else:
OLE offers prorating as form of incorporating additional charges within each line item unit cost.
The calculate button must be pressed prior to submitting the payment request.
Accounts Payable can close the PO during the processing of an invoice if the invoice will complete the order.
The following G/L entries are created when the payment request is submitted.
Debit entry: The expense accounts (full accounting string) on the payment request are debited in the G/L when the initiator submits the document. The G/L entry is made in summary for each accounting string. Consequently, if three line items on a payment request use the same accounting string, only one debit (not three) is created in the G/L for that accounting string.)
Credit entry: One offset to object code 9041 is created for each account/sub-account combination on a payment request.
During fiscal officer approval routing of the PREQ, the fiscal officer/PREQ delegate may edit the accounts/sub-account/object codes and amounts. The existing account string is reversed. The new account string debits the expense and credits object code 9041, the liability offset.
After being canceled, the G/L entries are reversed, any disencumbrance created from AP submission of the payment request is reversed, and the PO open quantities that were decremented from the creation of the payment request are increased. Only authorized users may cancel a Payment Request document.
Only authorized users may modify a payment request's pay date, attachment flag, special handling instructions, immediate pay flag, and check stub notes. This action may be taken at any point following AP submit and preceding extract to PDP.
Payment request searches are available to all users.
A payment request that is Hold = 'yes' or is Request Cancel = 'yes' does not continue through workflow routing and cannot be paid until the hold or request cancel is removed.
If payment requests total less than the threshold established by the institution and do not have any accounts requiring positive approval, they may be automatically approved.
Tip
Sites not wishing to use this functionality can circumvent it by setting a very low threshold (as low as $0.01 to effectively turn the feature off).
After being extracted, a payment request cannot be put on hold.
A payment request is extracted for payment if the following conditions are met:
The PREQ is department-approved or auto-approved.
The Pay Date is today or a prior date or 'immediate pay' is indicated and the payment has departmental approval.
The payment is not Hold = 'yes'.
If the payment request includes accounts that are excluded from auto-approval, it must be department-approved.
An AP Processor selects the submit button to complete the processing of a payment request document. The document routes to 'Awaiting AP Review' status if Require_attachment_ind='Y'. The AP Review status may be satisfied by an image attachment or in another fashion (configurable at your institution). After AP review, the document routes for fiscal officer or fiscal officer delegate approval. At the AP Review routing level, approvers cannot change content on the document. They may only add notes/attachments and approve or cancel.
In addition to normal account review and organization review, the Payment Request document includes the following special condition routing:
Sub-Account Manager: An optional role that allows users to receive workflow action requests for documents that involve a specific account number and sub-account number. The role name is Sub-Account Reviewer. Approvers at this level may only approve, request cancel, and hold the document. They cannot change content.
Chart Approval: An optional role that allows users to receive workflow action requests for documents of a specified type that contain accounts belonging to a specified chart and organization (including the organization hierarchy) and within a certain dollar amount or involving a specified override code. The role name is Accounting Reviewer. Approvers at this level may only approve, request cancel, and hold the document. They cannot change content.
Unlike other KUALI OLE documents, G/L entries for this document are created prior to final approval. Upon document submission to Workflow, disencumbrance entries and actual charges are generated, written to the G/L pending entry table, and posted in the nightly G/L batch cycle. If fiscal officers change accounting strings or redistribute the charges within their accounts, G/L entries are generated to reverse the original actual entries and recreate them (encumbrances are not altered) and these entries are written to the GL Pending table for posting in the next batch cycle.
Upon document submission, PO line item details (open quantity, amount paid, etc.) are adjusted to reflect materials/services that have been paid.
Upon document submission, the 'ap-approved' timestamp will be updated.
If the department completes all of the approvals through Workflow, the payment request status is updated to 'Dept-Approved' during post-processing. If the document is automatically approved through the batch auto-approve script, its status is updated to 'Auto-Approved'.
Canceling a payment request that has already received some level of approval will result in reversing G/L entries (encumbrances and actuals) and reversing updates to the PO line items affected (open quantity, amount paid, etc.).
Once a payment request has been approved, an audit-trail entry is added to the request’s Route Log.
The Timing of G/L Update: After a Payment Request document has been created and submitted, it updates the G/L the next time a batch process runs. Note that this timing is different from that of most KUALI OLE docs, which do not update the G/L until the document receives all approvals. If accounting entries on the document change before it reaches 'Final' status, the G/L entries is updated accordingly the next time a batch process runs.
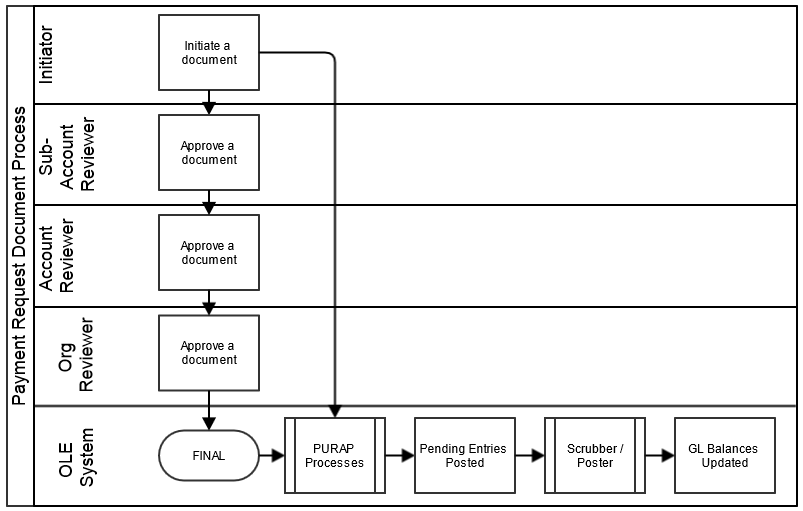
Select Payment Request from the Purchasing/Accounts Payable submenu group in the Acquisitions submenu on the Main Menu tab.
The system displays a blank Payment Request Initiation tab with a new document ID.
Enter the purchase order number, invoice number, invoice date, and vendor invoice amount on the Payment Request Initiation tab.
Click
 .
. Complete the Vendor tab.
a) Verify that the address on invoice is the same as the one on the Vendor file.
b) Enter the Acquisition Unit's Vendor Account/ Vendor Info Customer #as needed.
c) Modify payment terms as needed.
d) Add check stub notes or special handling instructions if requested.
Complete the Invoice Info tab.
a) Select Immediate Pay if applicable.
b) Select Payment Attachment Indicator, if applicable.
c) Clear the pay date if the payment terms have been modified and the system-calculated pay date is desired.
Complete the Process Items tab:
a) In the Process Titles section, enter the number of copies and parts.
b) In the Additional Charges section enter an extended cost amount if needed. Miscellaneous charges require a description.
Complete the common tabs as necessary: Document Overview, Notes and Attachments, Ad Hoc Recipients, and Route Log.
Note
For more information about the standard tabs, see Standard Tabs on the OLE E-Docs fundamentals wiki page.
An authorized user can opt to Close PO at the completion of the Payment Request, via a checkbox by the document total charges:

Alternatively, Purchase Orders can be closed via action buttons at the bottom of Purchase Order once payments have been completed. Accounts Payable staff has the Close PO flag for non-recurring purchase orders available while processing the payment request
Click
 . (OLE will expect you to calculate an invoice before you submit or save it.)
Click
 . Submit or approve the payment request, depending on your OLE permissions and the workflow at your
institution. Submitting a payment request uses the OLE internal routing mechanism to route it to
the designated approving officer at your institution.
 Appropriate Sub-Account, fiscal officers, and organization reviewers approve the document.
Approving a payment request is only available to authorized users. (In OLE 0.6, you can log in as user ole-abeal to have approval capabilities). An approved payment request will trigger the system to transmit data to another designated system, like a university’s accounts-payable system. This will be in future releases.
Note
For more information about how to approve a document, see Workflow Action Buttons in the OLE Workflow Overview and Key Concepts wiki page.
An AP user or an approver who receives a payment request for approval may choose to put the payment request on hold or remove a hold from the payment request.
To place a payment request on hold, you must attach a note to the document explaining the reason it has been put on hold. The payment request is then marked as Hold = 'Yes'. 'Hold' is an indicator; the document's status does not change.
The hold flag prevents a payment request from being extracted and paid. A payment request may be put on hold any time between submit and the time it is extracted to the Pre-Disbursement Processor. When a document is taken off hold, it retains the status it had when the hold flag was turned on.

Click the
 button.
 In the field displayed, enter a reason for putting the payment on hold.
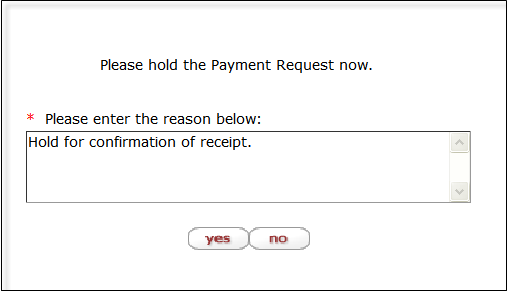
Click
 to put the payment request on hold.
The payment request is marked Hold='yes' and a large header appears at the document indicating who placed the order on hold.

Either the person who placed a payment request on hold or an AP supervisor may take a payment request off hold. This user must provide a reason for taking the payment request off hold.
Open the document and click the
 button.
In the window displayed, provide a reason for taking the payment request off hold.
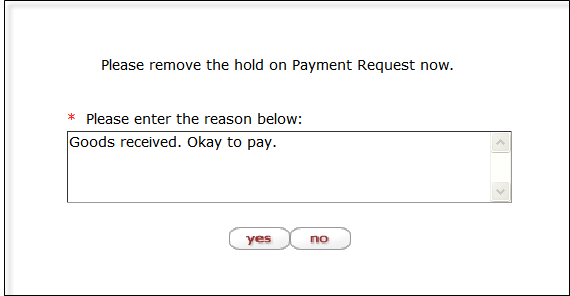
Click
 to take the payment request off hold.
The Account Payable Processor who receives a payment request may choose to request cancellation of the payment request or may remove the request cancellation of the payment request.
An approver who receives the payment request may choose to request that it be canceled. After a request cancel has been made, the payment request cannot be routed or paid until the cancel request is removed.
A request cancel may be made any time after the payment request has begun routing for approval and before it has received fiscal officer approval. After a request cancel has been made, the actual cancellation is performed by Accounts Payable.
Tip
After a payment request has received fiscal officer approval, it may still be canceled by Accounts Payable until it is extracted to the Pre-Disbursement Processor.
To request cancellation:
Open the document and click the
 button.
In the window displayed, provide a reason for canceling the request.
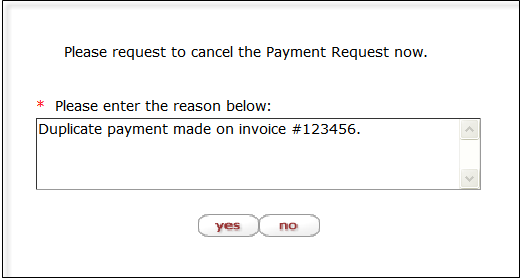
Click
 to cancel the payment request.
The document provides an informational message stating who has requested cancel of the document.

Only the AP supervisor or the approver who originally requested cancellation may remove the cancellation request.
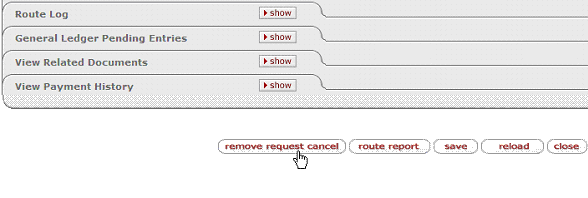
Your institution may use an automated approval function for payment request documents. For payment requests that qualify for auto-approval, the system automatically enters 'Processed' status on the pay date. Any user who normally would have received the document for approval instead receives an acknowledgement copy of the document in his or her action list.
Tip
Specific accounts may be excluded from auto-approval by adding them to the Auto Approve Exclude administration table. If one account on a PREQ document is excluded from auto-approval, the entire document is excluded.
A payment request is eligible for auto-approval if:
The total invoice amount is less than the auto-approve threshold designated by your institution.
All accounts on the Payment Request document allow for auto-approval.
The payment is not on hold.
The payment is not on request cancel.
Cash: In Libraries, we often think of cash/actuals as a summary of available balances, however in OLE/KFS, we have the options to manage both sides of accounting- expenses/liabilities and Cash. While General Ledger and Transfer of Funds functions are noted here, we may/may not use Transfer of Funds or other GL correction documents inherited from KFS in adoptable OLE 1.0. The reason for this is simple (and complex): Libraries don’t really operate from ‘cash’ but from budgets, as the university financial systems manage the actuals/cash and report back to libraries.
In OLE 1.0 and 1.5, we will be reconciling university financial integrations and OLE’s use of Budget vs. Actual (cash) balances.
As an option, the General Error Correction (GEC) document is used to correct inappropriate or erroneous accounting string data for General Ledger entries generated from other financial transactions.
By consistently referring to the details of each transaction being corrected, the GEC preserves and maintains the audit trail. Fiscal officers and support staff, department and responsibility center are typical users of the GEC.
The GEC document only has the standard financial transaction document tabs and does not have any unique tabs of its own
Note
For information about the standard tabs such as Document Overview, Notes and Attachments, Ad Hoc Recipients, Route Log, and Accounting Lines tabs, see Standard Tabs on the OLE E-Doc Fundamentals wiki page.

Note
The Year-End General Correction (YEGE) document is available only during the fiscal year-end close.
Debits must equal credits.
OLE automatically generates cash offset entries as defined by the information entered into the document.
The following object sub-types are prohibited on this document:
Restricted object sub type in the GEC document
|
Sub-Type |
Description |
Restrictions |
|
BU |
Budget Only Object Codes |
Use Budget Adjustments (BA) document. |
|
CA |
Cash |
Use Journal Voucher (JV) document. |
|
FB |
Fund Balance |
Use Journal Voucher (JV) document. |
|
FR |
Fringe Benefits |
Use Benefits Expense Transfer document. |
|
HW |
Hourly Wages |
Use Salary Expense Transfer document. |
|
LD |
Loss on Disposal of Assets |
Use CAMS Documents. |
|
MT |
Mandatory Transfers |
Use Transfer of Funds (TF) document. |
|
OP |
Other Provisions |
Use Auxiliary Voucher (AV) document. |
|
SA |
Salaries and Wages |
Use Salary Expense Transfer document. |
|
TF |
Transfer of Funds |
Use Transfer of Funds (TF) document. |
|
TN |
Transfer - Generic |
Use Transfer of Funds (TF) document. |
|
WO |
Write-Off Expense |
Use Distribution of Income/Expense (DI) document. |
Fiscal Officers for all accounts must approve the GEC document. Additional approvals may be established within the institution's review hierarchy or set up through Ad Hoc routing. The document status becomes 'FINAL' when the required approvals are obtained and the transaction is posted to the G/L during the next G/L batch process.
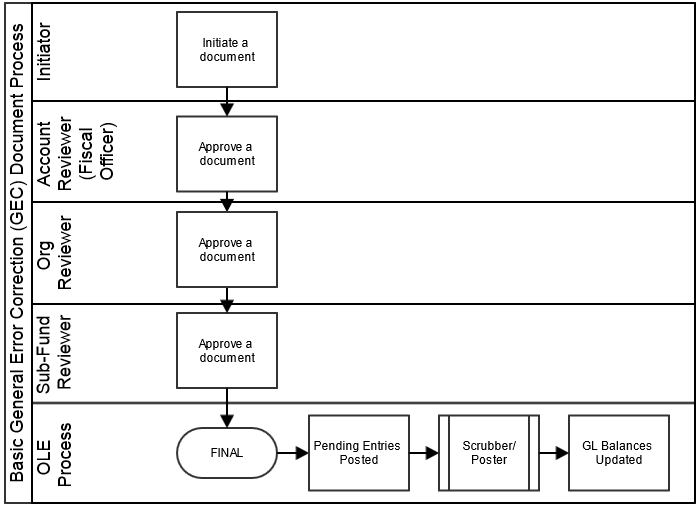
Select General Error Correction from the Financial Processing submenu group in the Transactions submenu on the Main Menu tab.
A blank GEC document with a new document ID appears.
Complete the standard tabs.
The Accounting Lines tab of the GEC document varies slightly from other types of financial transaction documents:
The Ref Number is a required field on the GEC document. This field identifies the reference number of the document being corrected.
The Line Desc box is optional and can be used to enter a description specific to that line of the GEC. If left blank, the description from the Document Overview tab passes to the G/L for that line of the transaction.
The Ref Origin Code is a required field. This code identifies the system that created the transaction being corrected.
Note
For information about the standard tabs such as Document Overview, Notes and Attachments, Ad Hoc Recipients, Route Log, and Accounting Lines, see Standard Tabs on the OLE E-Doc Fundamentals wiki page.
Click
 .
.Review the General Ledger Pending Entries tab.
This document automatically generates cash offset entries to cash or fund balance object codes.
Review the Route Log tab.
The document is routed to the fiscal officer for each account used in the Accounting Lines. The Route Status shows 'ENROUTE'.
Note
For information about the Route Log tab, see Route Log on the OLE Workflow Overview and Key Concepts wiki page.
Appropriate fiscal officers and organization reviewers approve the document.
Note
For more information about how to approve a document, see Workflow Action Buttons on the OLE Workflow Overview and Key Concepts wiki page.
Supplies were charged to an incorrect account. Use the From section to move the expense (credit expense) from the incorrect account and the To section to charge expense to the correct account (debit expense). The correct expense is debited and the incorrect expense is credited. The GEC document allows users to easily make corrections to documents previously submitted and approved.
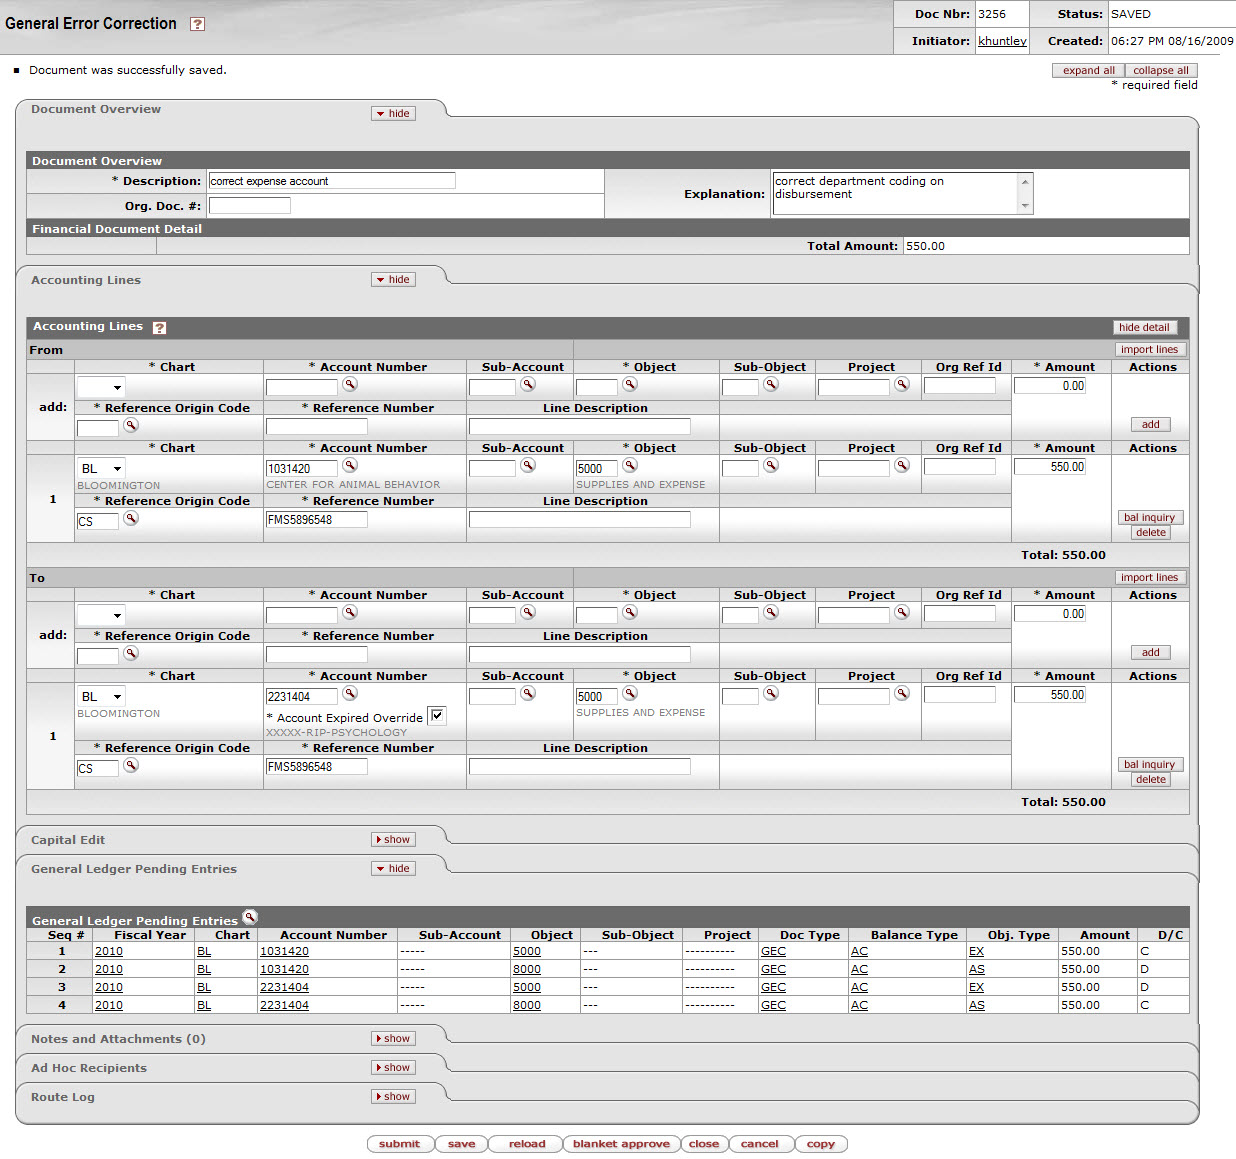
 >
> >
> >
>
Note
In order for users to submit the Disbursement Voucher document, the ENABLE_BANK_SPECIFICATION_IND parameter must be set to Y and the DEFAULT_BANK_BY_DOCUMENT_TYPE parameter must be completed. Even if your institution is not planning to use the Bank Offset feature in OLE, the DEFAULT_BANK_BY_DOCUMENT_TYPE parameter must be completed if your users plan to use the Disbursement Voucher document. Bank offsets will not be created if the Bank Offset feature has not been configured.
The Disbursement Voucher (DV) document can be used to issue payments to vendors using clearing/deposit accounts. The DV can be used for recording the Advance Deposits or Prepayments to vendors, when titles or POs are unknown.
The disbursement voucher may be used in situations in which a payment is not processed through another procurement method, such as purchase order or procurement card.
A disbursement voucher requires more information than most financial documents. Each disbursement voucher must include the following information:
Who is to be paid (the 'Payee')
Why the payee is being paid (the 'Payment Reason')
How much the payee is to be paid and how the payment is to be made (the 'Amount' and 'Payment Method')
Where any supporting documentation is stored (the 'Documentation Location')
Whether any forms or documents need to be physically sent with the payment (the 'Check Enclosure')
All information on the Contact tab.
Users must also keep the following points in mind about DVs:
Some payment reasons may require that additional information be entered.
Note
Disbursement Vouchers have been modified from the original KFS and continue to be reviewed for OLE use.
The DV document has several unique tabs—Payment Information, Contact Information, Special Handling, Foreign Draft, and Pre-Disbursement Processor Status—in addition to the standard financial transaction tabs.
Note
For more information about the standard tabs, see Standard Tabs on the OLE E-Doc Fundamentals wiki page.
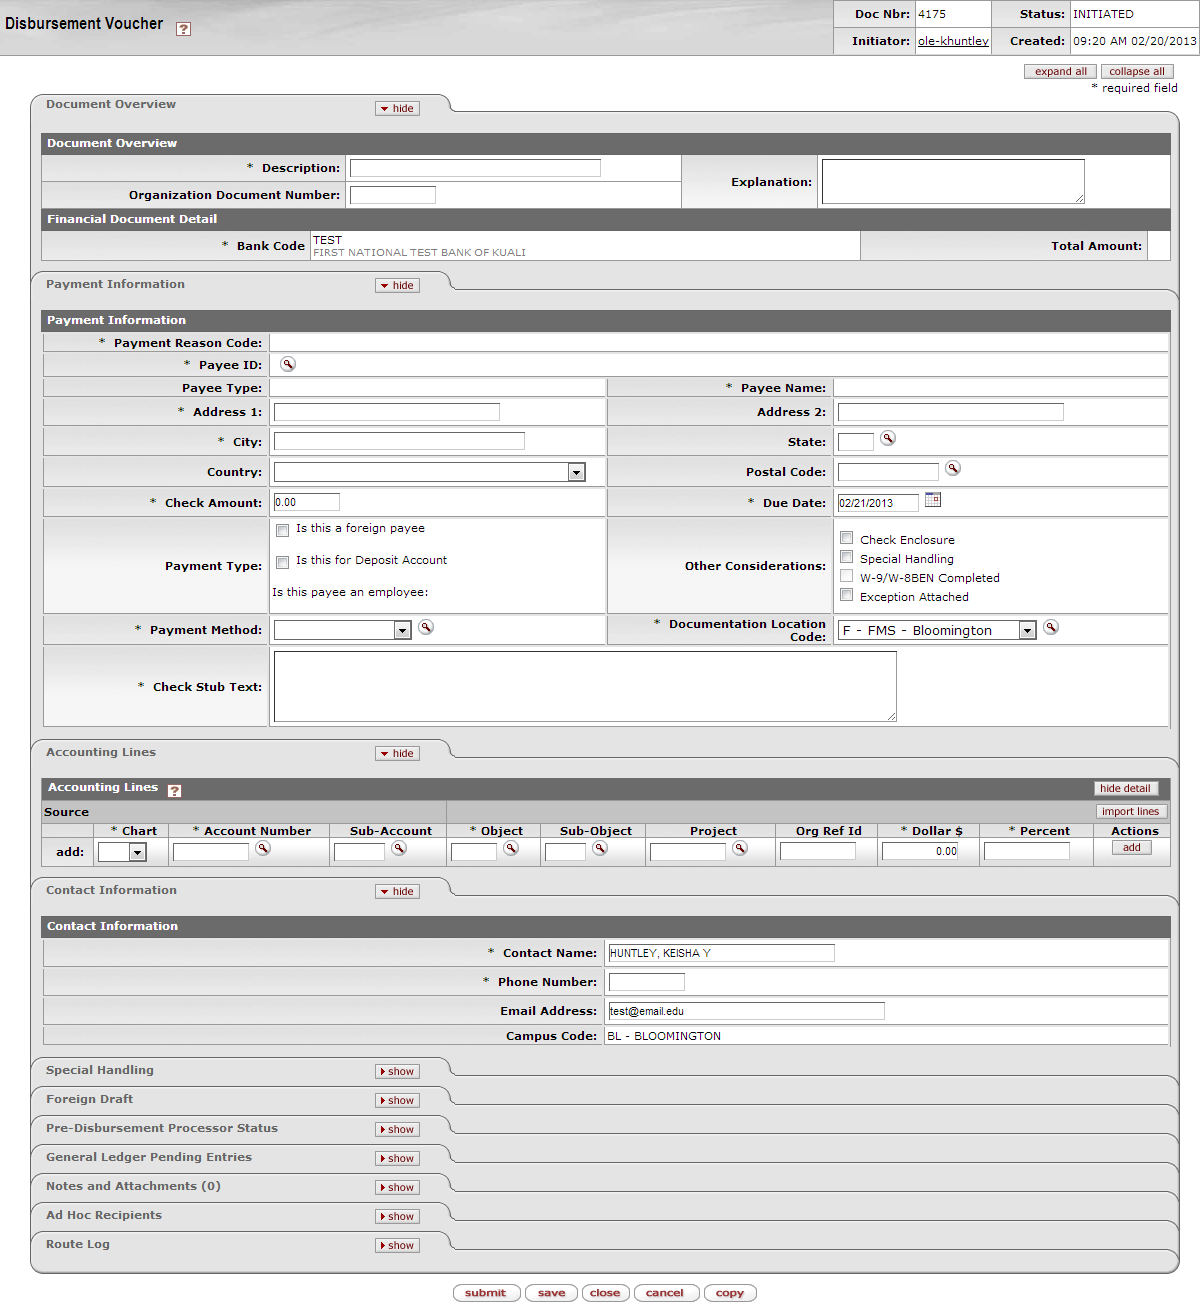
In addition to the Document Overview and Accounting Lines tabs, two DV-specific tabs, Payment Information and Contact Information, are always required.
The Payment Information tab contains information regarding the payee, payment reason, payment method, documentation location, and attachments.
The Contact Information tab contains information relating to the initiator and contains the text to be included on the check stub.
Other tabs may be required based on the selections made in the Payment Information tab.
The Payment Information tab contains important information such as the payment reason, amount, payment method, attachments, and documentation location. This section must be completed for every DV document.
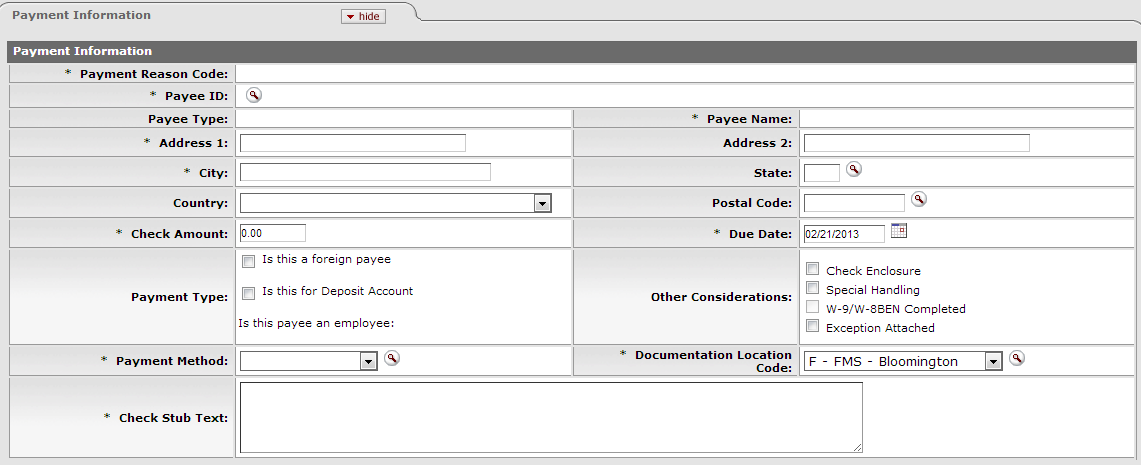
Payment Information tab definition
|
Title |
Description |
|
Payment Reason Code |
Required. Display-only. This code identifies the reason for the
disbursement and determines any restrictions the payment is subject to. After you select the payee
ID from the Payee lookup |
|
Payee ID |
Required. Retrieve the payee ID from the Payee
Lookup |
|
Payee Type |
Display-only. After you select the payee ID from the Payee lookup |
|
Name |
Display-only. After you select the payee ID from the Payee lookup |
|
Address 1 |
Required. The first line of address to which the check should be mailed. The system fills in this information automatically but you may change it. |
|
Address 2 |
Optional. Enter the second line of the address to which the check should be mailed. |
|
City |
Required. Enter the city to which the check should be mailed. |
|
State |
Required for US. Enter the state to which the check should be mailed. |
|
Country |
Optional. Select the payee's country from the Country list. |
|
Postal Code |
Required for US. Enter the postal code to which the check should be mailed. |
|
Check Amount |
Required. Enter the total amount of the disbursement for this document. |
|
Due Date |
Required. Enter the date or select it from the calendar |
|
Payment Type |
Optional. Display-only. The payment types are determined by the payee selected for the DV. These values apply only to DV payees, which are established through the use of the Payee Type document. Each Payment Type attribute from the Payee Type record that is evaluated when the DV is submitted may have an impact on the ability to process a particular payment on a DV, and how it routes for approval. Is this a foreign payee? If the payee is a nonresident alien, select 'Yes'. Employee Paid Outside of Payroll? If the Payee record is an Employee record or a Vendor record with the same tax identification number as an Employee record, then this is set to 'Yes'. Your institution may wish to perform specialized review on these transactions to make sure they should not be processed through your regular payroll process. |
|
Other Consideration |
Optional. Select these check boxes as necessary to reflect special circumstances or special requests that are needed for the payment: Check Enclosure: Refers to any documents related to the DV document that must accompany the check when it is mailed to the payee. Selecting the check box properly indicates that there is a form or other attachment that must accompany the check. Special Handling: Indicates that the payment should be mailed to a person other than the payee. For example, a check needs to be returned to the document initiator so it can be express mailed or picked up by the payee. When selected, a message asking you to add a note explaining the need for special handling is displayed. W9/W-8BEN Completed: Indicates if the payee has a W-9 (or W-8BEN for nonresident aliens) on file. For nonemployees this is generally completed as part of processing of the Payee document. Exception Attached: Indicates that you are requesting an exception to policy on this DV document. For instance, your institution may require that all disbursement vouchers have supporting documentation, but in this case you do not have such documentation. When this option is selected, a message prompting you to add a note of explanation is displayed. |
|
Payment Method |
Required. Select the method in which the payment should be made from the Payment Method list. Foreign Draft: This selection indicates that the payment is to be made in a foreign currency. When you select Foreign Draft as the payment method you are prompted to complete the Foreign Draft tab. In this section, you indicate whether the DV is stated in foreign currency or US dollars, and what currency the payment is to be made in. For example, the DV could be stated in Euros and paid in Euros, or the DV could be stated in US Dollars converted to Euros for payment. Wire Transfer: This selection indicates you wish to have the disbursement wired to the recipient. To do so you are required to provide additional banking information on the Wire Transfer tab. Some institutions may charge a fee to the initiating department for processing a wire transfer. Wire transfers may be made in US Dollars or foreign currency, similar to Foreign Drafts as described above. |
|
Documentation Location Code |
Required. Select the unique code for the location where the documentation
is to be kept from the Documentation Location Code list or lookup This indicates where supporting documentation should be sent, as well as who is responsible for maintaining the documentation. Supporting documentation refers to documents or backup submitted with the disbursement voucher (receipts, invoices, letters, memos) that detail what was purchased, the cost, the name of the vendor and the date of the transaction. Initiating Organization: Indicates that your department plans to retain the documentation. When you select this location you may receive a message with additional instructions based on your institution's procedures and documentation retention policies. No Documentation: Indicates that you have no supporting documentation for this transaction. If selected, you are required to attach a note in the Notes and Attachments tab of the document explaining why. |
|
Check Stub Text |
Required. Enter the information regarding the payment itself, intended for the payee. This commonly includes what the payment is for (invoice number, for example) or other information to assist the payee in identifying the source and reason for the payment. |
Note
For more information about the Payment Reason Code, see Payment Reasons.
Note
Notes regarding Documentation Location: Restrictions may be in place, which require you to send your documentation to a particular location. Your institution may have other specific requirements based on Payment Reason or other attributes of the transaction. Specific locations can be customized and may vary from institution to institution.
The payee ID is required on the Payment Information tab. This identifies the person or business the disbursement is paid to. Payees must exist in the system in order to be selected on the disbursement voucher. OLE uses the Vendor table and the Customer Profiles setup in Pre-Disbursement Processor module for reference. If the payee already exists in the system, you can identify it by searching for it by using the Payee lookup.
Several OLE parameters exist to control which types of payees can be selected for a given payment reason. After clicking search, the restrictions for the selected payment reason are displayed at the top of the lookup.
Click the magnifying glass  next to Payee ID.
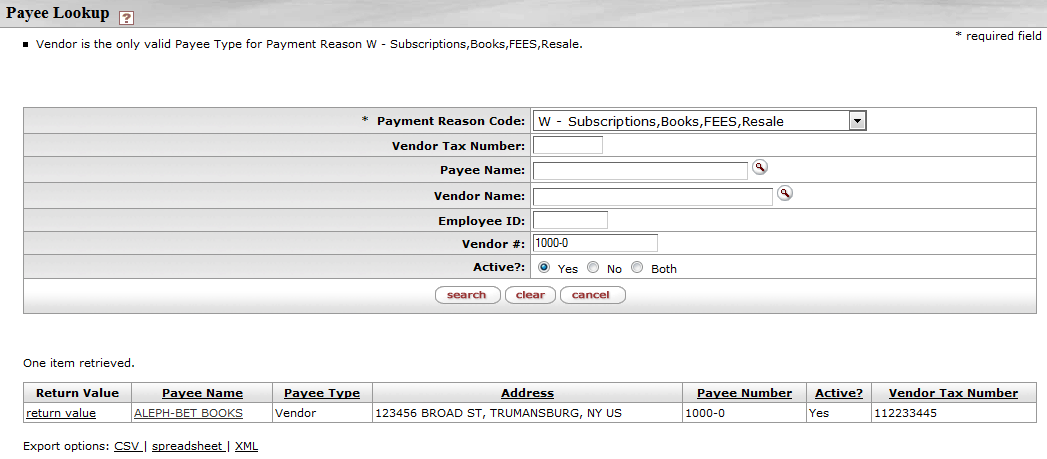
Payee Lookup search criteria
|
Title |
Description | |
|
Payment Reason Code |
Required. Select a payment reason from the list. | |
|
Vendor Tax Number |
Optional. Enter the Tax Number associated with the payee. | |
|
Payee Name |
Optional. Enter the name of the payee as established in OLE or search for
it from the lookup | |
|
Vendor Name |
Optional. Enter the name of the vendor as it appears in the Vendor table or
search for it from the lookup | |
|
Employee ID |
Optional. Enter the unique ID assigned to Employees in the Person table. The value may come from your HR system. | |
|
Vendor # |
Optional. Enter the Vendor Number as it appears in the Vendor table. | |
|
Active ? |
Optional. Select the Yes, No, or Both options. You may search for payees with any status, but payments cannot be made to inactive payees. | |
Tip
Because OLE continues to develop Deposit Account functionality and some of the KFS data still exists within the system, using the Payee Lookup can be confusing. Select a Payment Reason Code, enter a library-associated Vendor #, and click search.
Note
For information about lookup, see Field Lookup on the OLE E-Doc Fundamentals wiki page.
The Contact Information tab contains information that is intended to be printed on the check. When the DV document is first initiated, the Contact Name and the Campus Code default to those of the initiator's.

The Contact for a DV is typically the initiator, thus the contact information is typically the name, phone, and email address of the initiator.
Contact Information tab definition
|
Title |
Description |
|
Contact Name |
Required. This field is pre-filled with the name of the document initiator but may be edited. |
|
Phone |
Required. Enter the contact person's phone number (including area code) |
|
Email Address |
Required. Enter the contact person's email address |
|
Campus Code |
Display-only. The code of the campus associated with the document's initiator, derived from the user's profile. |
Note
The information in this tab is included on the check stub and is seen by the payee when they receive the check. If you want to include information that only other OLE users can view, add a note or attachment to the document instead. For more information about the Notes and Attachments tab, see Notes and Attachments Tab on the OLE E-Doc Fundamentals wiki page.
The Special Handling tab is used only when a check is to be sent to someone other than the payee. If the payee has requested the payment be mailed to them, but at a different address, simply change the address in the Payee tab. To request Special Handling for the payment, select the Special Handling check box in the Payment Information tab and complete the fields on this tab.

Special Handling tab definition
|
Title |
Description |
|
Special Handling Name |
Required. Enter the name of the person or entity where the check should be mailed. |
|
Special Handling Address 1 |
Required. Enter the first line of address where the check should be mailed. |
|
Special Handling Address 2 |
Optional. Enter the second line of address where the check should be mailed. |
|
Special Handling City |
Optional. Enter the city where the check should be mailed. |
|
Special Handling State |
Optional. Enter the state where the check should be mailed. |
|
Special Handling Postal Code |
Optional. Enter the postal code where the check should be mailed. |
|
Special Handling Country |
Optional. Select the payee's country from the Country list. |
When you select Foreign Draft as the payment method you are prompted to complete the Foreign Draft tab as seen below:
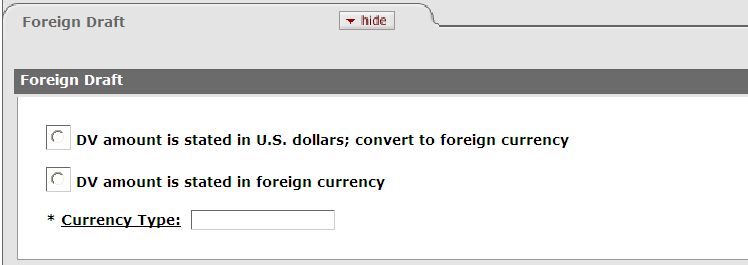
Foreign Draft tab definition
|
Title |
Description |
|
DV amount is stated in U.S. dollars; convert to foreign currency |
Optional. Select this option if the DV amount is stated in U.S. Dollars and needs to be converted to a foreign currency. |
|
DV amount is stated in foreign currency |
Optional. Select this option if the DV amount is stated in a foreign currency. |
|
Currency Type |
Required. Enter the type of currency for the payment. |
The Pre-Disbursement Processor Status tab displays information from the Pre-Disbursement Processor (PDP) so you can track the payment status and the status date.

Pre-Disbursement Processor Status tab definition
|
Title |
Description |
|
Pre-Disbursement Processor Status |
Display-only. Displays the payment processing status from the Pre-Disbursement Processor (PDP). |
|
PDP Extract Date |
Display-only. The date when the disbursement voucher was extracted for payment processing by the PDP. |
|
PDP Paid Date |
Display-only. The date when the payment was disbursed by PDP. |
|
PDP Cancellation Date |
Display-only. The date when the payment was canceled within PDP. |
If you have attachments or supporting documentation that needs to go to another university location you can print a cover sheet to accompany them. This cover sheet contains identifying information about the DV as well as an address field indicating where these materials should be sent.
To print a cover sheet, click the Print Disbursement
Voucher Cover Sheet link  which becomes available in the upper middle area of the document after you
successfully submit the document.

The cover sheet opens as a PDF document. Print the document, send it along with any attachments or supporting documentation and send it to the address shown on the cover sheet.
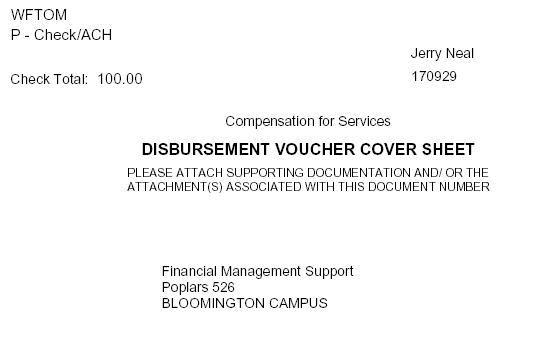
DV Payee cannot be the same as the initiator.
DV Payee must be active.
Check amount cannot be negative.
There must be at least one accounting line.
Account lines total must not be negative. Total of accounting lines must match the Check Total field.
DVs with Account-Funds designated as Clearing/Deposit or other Payment method to denote deposit, must be routed for approval- no automatic approvals.
Only a Disbursement Voucher, Credit Memo, Distribution of Income & Expense, or General Error Correction may use Accounts of “Fund Group, Sub-Fund Group” – Clearing or Deposit. These forms of accounts will be restricted for use with prepayments. REQ, PO (versions), PREQ are prohibited from using this Account Type.
The object codes associated with the following object types or object levels are prohibited:
Object type restrictions for DV documents
|
Object Type |
Description |
Restrictions |
|
CH |
Cash Not Income |
Unallowable |
|
ES |
Expense Not Expenditure |
Unallowable |
|
FB |
Fund Balance |
Unallowable |
|
IC |
Income Not Cash |
Unallowable |
Object Level Restrictions for DV Documents
|
Object Level |
Description |
Restrictions |
|
BASE |
Assessments Expenditures |
Unallowable |
|
BASR |
Assessments Revenue |
Unallowable |
|
BASS |
Budget Assets |
Unallowable |
|
BCAS |
Beginning Cash |
Unallowable |
|
BCOM |
Budget Compensation |
Unallowable |
|
BFRE |
Budget-Fee Remission |
Unallowable |
|
BGEX |
Budget-General Expense |
Unallowable |
|
BLIA |
Budget-Liability |
Unallowable |
|
BORE |
Budget-Other Revenue |
Unallowable |
|
CRIN |
Cost Recoveries-Income |
Unallowable |
|
FUBL |
Fund Balance |
Unallowable |
|
HRCO |
Hourly Compensation |
Unallowable |
|
ICOR |
Indirect Cost Recovery Income |
Unallowable |
Object Sub Type Restrictions for DV Documents
|
Object Sub Type |
Description |
Unallowable |
|
BU |
Budget Only Object Codes |
Unallowable |
Institutions may create their own restrictions for object codes and payee type based on payment reasons.
When processing a DV document, users must indicate a payment reason by selecting a Payment Reason Code from the Payment Reason list in the Payment Information tab. The payment reason identifies the nature of the disbursement and determines what restrictions the disbursement is subject to.
Choosing a payment reason may restrict the other choices you can make on the document. For example, most payment reasons only allow certain object codes and some restrict whether the person being paid can be an employee or nonemployee.
The current payment reasons for using a disbursement voucher are explained below as typical examples:
Payment Reason Code
|
Code |
Title |
Description |
|
E |
Compensation for Services |
Used to make payments for services such as artist fees and honoraria payments. |
|
L |
Payments for Contractual Agreements |
Used to make payments required under a contractual agreement. |
|
F |
Refund/Repayment to Individual or Agency |
Used to make payment for returned goods sold, or refunds for services rendered. This reason can also include repayment to agencies for contract and grant funding. It is possible to debit an income object code with this payment reason. |
|
B |
Reimbursement for Out of Pocket Expense |
Used to reimburse individuals for out-of-pocket expenses on behalf of the departmental business operations due to an emergency or a situation where the regular procurement procedures cannot be followed |
|
K |
Revolving Fund Reimbursement |
Revolving funds are a kind of cash account from which funds can be borrowed when cash on hand is needed for disbursements. Revolving funds are established as special types of payees that can be repaid using a DV document. |
|
W |
Subscriptions, Books, Fees, and Resale |
Used for any payment covering a renewal or subscription to a newspaper, magazine or to cover membership fees to a professional organization. This reason is also used by some departments, such as bookstores, to purchase books intended to be resold. |
|
G |
Utilities, Freight, or Postage |
Can be used to pay utility bills, postage, or shipping and freight costs. |
The DV document must route through a series of approvals before the disbursement is actually made based on the rules set up by the institution. Due to its unique nature, the DV document has some special routing issues which are explained below:
The DV document first routes to the fiscal officer for each account in the Accounting Lines tab.
After it has been approved by all required fiscal officers, the document routes, as specified by the institution's rule, to the organization review routing level.
After the document has been approved by all organizational approvers, the DV document goes through any special routing as required by business rules surrounding the attributes of the transaction and the payee.
The document status becomes 'FINAL' when the required approvals are obtained and the transaction is processed by the institution defined process, which might include the Pre-Disbursement Processor.
Note
Pre-Disbursement Processing is still under review for OLE and not available for 1.0.
DV special condition routing
|
Condition |
Special Routing |
|
Payee is an employee paid outside of payroll (Payee tab) |
OLE-SYS Tax Manager role |
|
Payee requires backup withholding (determined by the presence of backup withholding dates on the Vendor record) |
OLE-SYS Tax Manager role |
|
Initiator's Campus |
Final approval by members of OLE-FP Disbursement Manager role for the appropriate campus. Campus is based on the campus associated with the initiator's OLE-SYS User role |
|
Payment Method (Payment Information tab) is Wire Transfer |
OLE-FP Disbursement Method Reviewer role members associated with Payment Method 'W'. |
|
Payment Method is Foreign Draft |
OLE-FP Disbursement Method Reviewer role members associated with Payment Method 'F'. |
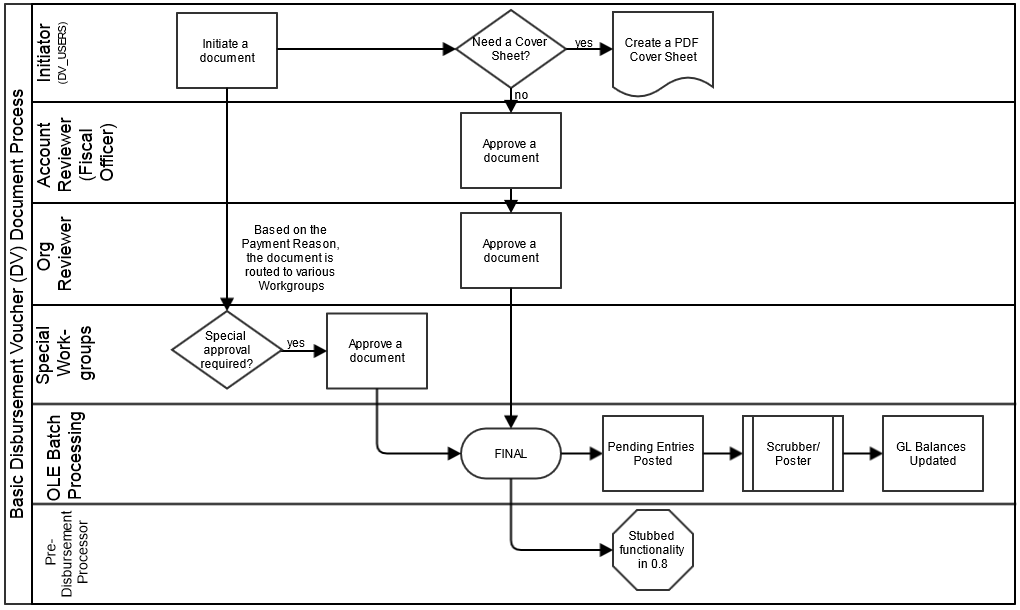
Select Disbursement Voucher from the Financial Transactions submenu.
Log into OLE as necessary.
A blank Disbursement Voucher document with a new document ID appears.
Complete the Payment Information tab.
If you wish to permanently change a nonemployee's address information, process a Vendor document to change the default address stored in OLE.
Note
For information about the Vendor document, see below.
Complete the Payment Information tab.
Complete the Accounting Lines tab.
Indicate what accounts and object codes are to be debited when making this disbursement.
Complete the Contact Information tab, and remaining DV-specific tabs as required.
Click
 .
.Print a cover sheet, if necessary.
Appropriate fiscal officers and organization reviewers approve the document.
Note
For more information about how to approve a document, see Workflow Action Buttons on the OLE Workflow Overview and Key Concepts wiki page.
 >
> >
>  >
> 
While OLE has adopted functionality from the Kuali Financial System for acquiring print materials that includes placing orders, receiving orders, claiming orders, and paying for orders, acquiring electronic materials and tracking their lifecycle has required additional interfaces and electronic documents.
In 1.0, initial development includes the E-Resource Record and its associated maintenance documents. The E-Resource Record provides a place to store and view information about an electronic resource acquisition, including the title(s) involved and the content provider. Within the OLE user interface, the E-Resource Record presents a single, unified view of all information related to acquisition of an individual electronic resource or group of electronic resources, including titles, payment, licensing, administrative, and contact information.
E-resource acquisition requires the collection and storage of lifecycle management data that is not part of the requisition or purchase order and lacks a home in most current systems. Long-term management of e-resources also requires the ability to view or link to related data from one coherent “place.” There is no eDoc that currently meets these needs. Therefore, we are defining a new type of record to handle e-resources.
Future releases will include a platform record to support electronic resource administration, full GOKb integration, workflow tools to support initial activation of access to electronic resources, alerts to help track the workflows, and enhanced abilities to create purchase orders that accurately link expenditures to electronic resources.
On the Select/Acquire tab, the Acquisitions submenu allows users to create, search, and maintain E-Resource records.
An E-Resource Record is a tool for collecting and storing lifecycle management data for electronic resources , including the title(s) involved, acquisitions and licensing information, and workflow status . In the 1.0 release, the E-Resource Record is the new starting point for OLE's licensing workflow. In later releases, users will also be able to kick off trial workflows from this document.
Note
The E-Resource Record will continue to be developed and modified in future releases.
Because of the quantity of metadata that the E-Resource holds, the record contains a left-pane navigation bar.
The navigation bar includes:
Table 7.1. E-Resource Navigation Descriptions
| Tab Name | Description |
|---|---|
| Main | Dispays the primary data elements and includes tabs for acquisitions, selection and access. |
| Instances | Users can manage the relationship between the E-Resource Record and OLE Instances and/or OLE E-Instances. In future releases, users will be able to import and manage data from GOKb |
| Purchase Orders | Displays and links to any purchase orders associated with an E-instance / Instance related to this E-Resource in 1.0. Also included at the top of the purchase order list is the sum of all payments for all purchase order line items linked to that E-Resource per fiscal year. |
| Invoices | Displays any invoices for any purchase orders associated with this E-Resource (see above). |
| Licenses | Displays license information from any License Requests an E-Resource Record is linked to. Users may also start a new License Request from this tab. |
| Event Log | Allows staff to store correspondence between libraries and publishers, vendors, etc. as well as notes about external activities. Some system-generated events are added automatically. |
Tip
Click save when you have completed your work in one tab before moving on to the next. Prepopulated fields will be filled and you will not risk losing anything.
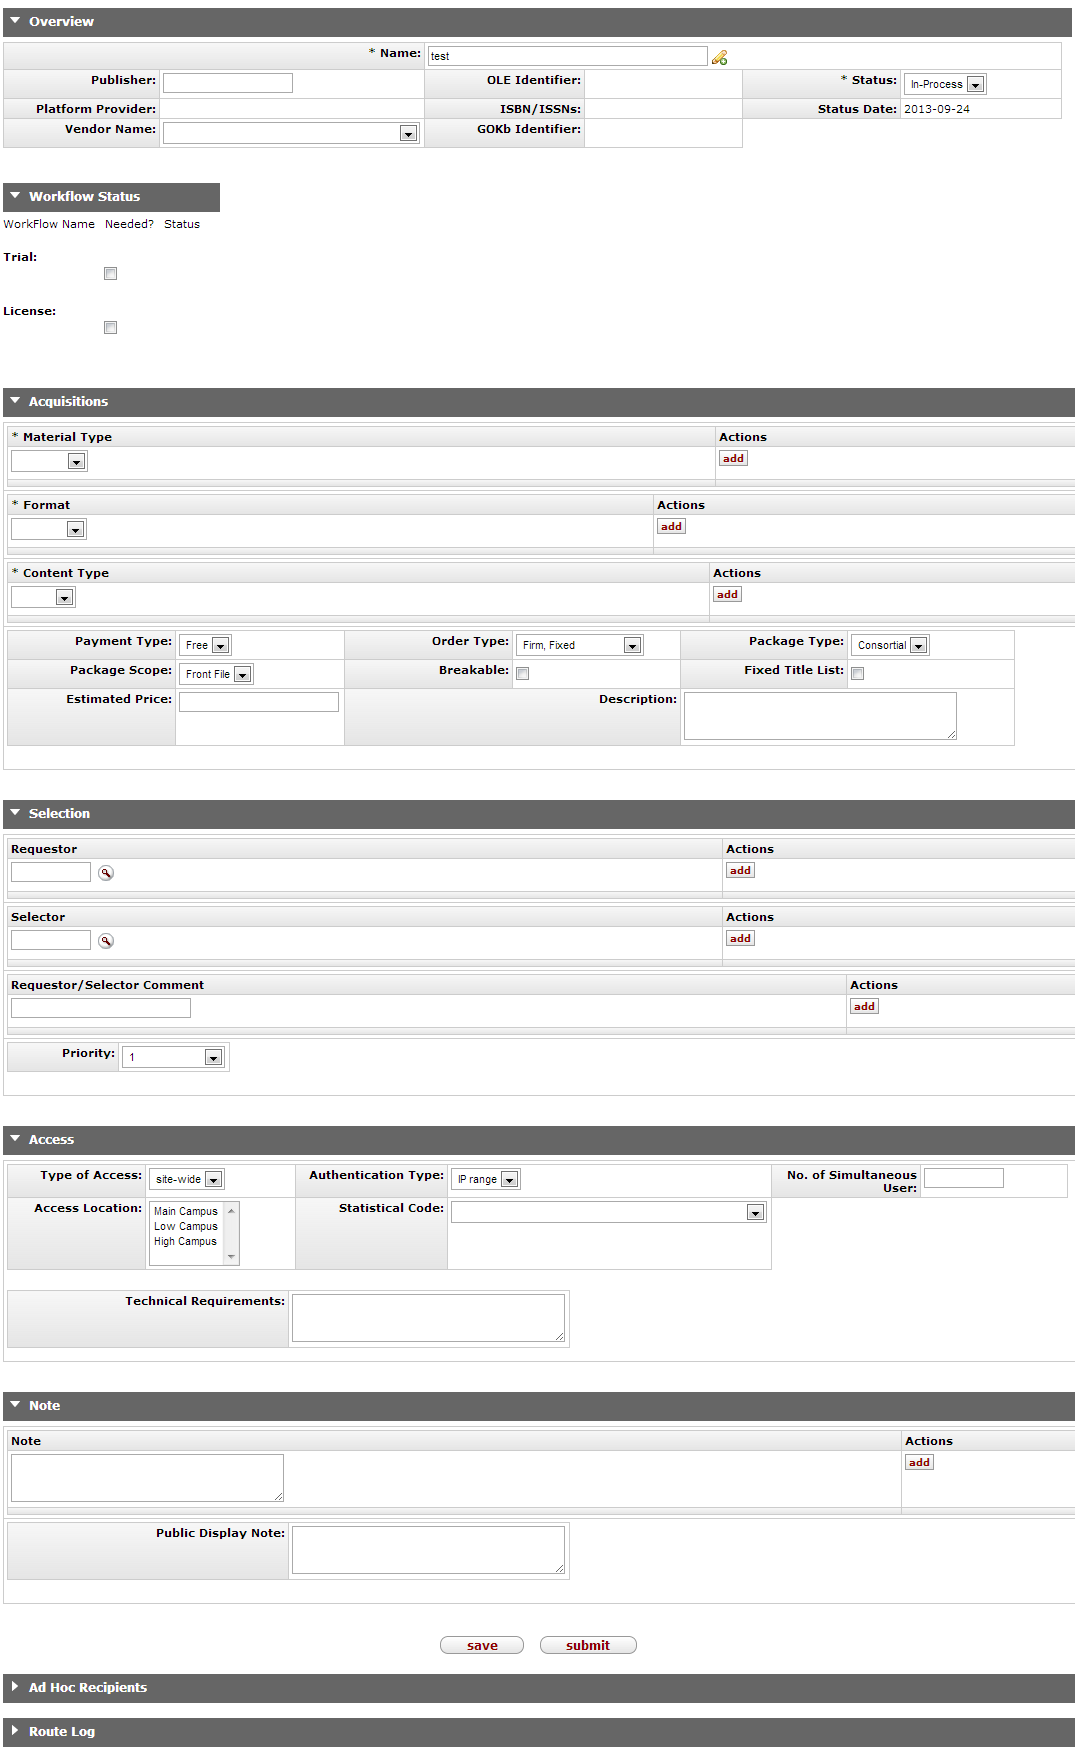
The E-Resource Record Main menu includes the Overview, Acquisitions, Selection, and Access tabs, in addition to the standard tabs.
Note
For information about the standard tabs, seeStandard Tabs on the OLE E-Doc Fundamentals wiki page.
The E-Resource Record Main menu contains a custom tab called the Overview that contains basic information about the E-Resource. The name of the E-Resource, Publisher, Platform and Vendor information as well as identifying information are noted here.

Overview Tab Definitions
|
Title |
Description |
|
Name |
Required. The name of the E-Resource. Used also for searching. |
|
Publisher |
Record the name of the publisher of the E-Resource. In a future release, this will be linked to an Organization record. |
|
Platform Provider |
Display-only. The platform provider for the E-Resource. This is display only because it is based on the Platform(s) used by the E-instance(s) that are associated with this E-Resource. |
|
Vendor Name |
The name of the vendor. This is linked to a Vendor record in OLE. |
|
OLE Identifier |
Display only. Identifies the E-Resource within OLE. |
| ISBN/ISSNs |
Display only. If the E-Resource Record has only one title, the subfield $a of the first ISBN/ISSN number from the record will display here. |
| GOKb Identifier |
Display only. In a future release, for E-Resources imported from GOKb, this field will display the link to the GOKb interface. |
| Status |
Current status of the E-Resource Record. |
| Status Date |
Display only. Date at which the status was last updated. |
The Workflow Status tab is used in the 1.0 release to display the status of a License Request created from the E-Resource, In future releases, it will also display the status of a linked trial, purchase, or access/activation.
The checkbox in the Needed? column is used to indicate whether a trial or license negotiation will be needed to acquire this electronic resource. It is for informational purposes only.
The Acquisitions tab is used to document information about the nature of the resource being acquired and some of the purchasing information.
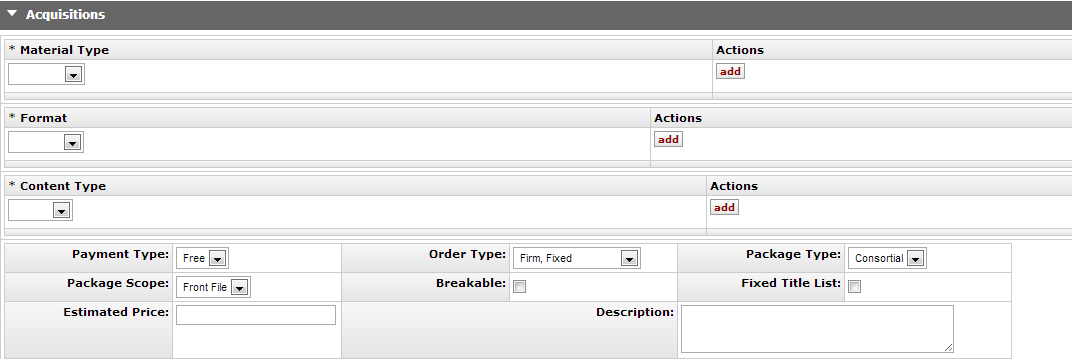
Acquisitions Tab Definitions
|
Title |
Description |
|
Material Type |
Required. Defines the type(s) of material (i.e. journal, database) for
reporting and managing different types of E-Resources. Select the Material Type from the dropdown
and click |
| Format |
Required. Defines the format(s) of the e-resource (i.e. electronic, print)
for reporting and management. Select the format from the dropdown and click |
|
Content Type |
Required. Defines the type(s) of content included in the E-Resource (i.e.
text, images) for reporting and management. Select the Content Type from the dropdown and click |
|
Payment Type |
Type of payment for the E-Resource. Examples may include free, paid, includes print, etc.. |
|
Package Scope |
Scope of the E-Resource. For example, front file or back file. In a future release, this will be imported from GOKb. |
|
Estimated Price |
The estimated price of the E-Resource used for reference. Once the Purchase Order exists, the estimated price will reflect the official price. |
| Order Type | Indicates the type of order, for example subscription or standing. In a future release, this will be used to populate Purchase Orders created for this E-Resource. |
| Breakable |
Indicates whether individual titles that are part of the E-Resource can be cancelled. |
| Package Type |
Indicates the type of the package in GOKb. For example, locally negotiated or consortial package. In a future release, this will be imported from GOKb. |
| Fixed Title List |
Indicates whether an E-Resource is static (fixed) or has titles added/removed over time (not fixed). |
| Description |
Text field to allow staff to describe the E-Resource being purchased. |
The Selection tab gives information about who has requested the E-Resource.

Selection Tab Definitions
|
Title |
Description |
|
Requestor |
The patron requesting the E-Resource. Enter a valid patron or search for
them from the lookup |
|
Selector |
The librarian requesting the E-Resource. Enter a valid OLE user or search
for them from the lookup |
|
Requestor/Selector Comment |
Enter any patron or staff notes about the request and click |
|
Priority |
Select a value from the dropdown to assign a priority value to the request for purchase. |
The Access tab describes the type of access and requirements for the E-Resource.

Access Tab Definitions
|
Title |
Description |
|
Type of Access |
Select the type of access available for the E-Resource from the dropdown. For example, site-wide or limited access. |
|
Access Location |
Select all of the locations that have access to the E-Resource from the list. Press shift+click or shift+arrow keys to select multiple options. |
|
Authentication Type |
Select the type of authentication needed to access the E-Resource from the dropdown. For example, IP range or Shibboleth |
| Statistical Code | Select the Statistical Code from the dropdown list. This is a custom local field to be used for reporting. |
|
No. of Simultaneous Users |
Enter the number of simultaneous users allowed to have access the E-Resource at the same time, if there is a limit. |
|
Technical Requirements |
Enter additional notes about technical restrictions/requirements. |
The Note tab allows staff to record multiple special notes
about the E-Resource. For example breaches or computer usage requirements. After typing the note,
click  to add a note in the Note subtab.
In the Public Display Note field, staff may record a note that should be displayed to all public users for all titles in the E-Resource.

From the Instances menu staff can view and update the OLE Instances linked to the E-Resource. In a later release, staff will also be able to manage the relationship between the E-Resource Record and data imported from GOKb.

The Overview tab maintains the same information as the Main Menu's Overview tab.
Note
See the Main Menu Overview tab to review the Overview tab.
Users may set Default Coverage dates all E-instances that
are associated with the E-Resource by clicking  . A Coverage window will open. Enter the
coverage information and click
  .
.

Users may set Default Perpetual Access dates for All
E-instances that are associated with the E-Resource by clicking  . A Perpetual Access window will open. Enter
the perpetual access dates and click
  .
.

In this section, staff may also link a pre-existing OLE Instance/E-Instance to this E-Resource or create a new OLE Instance/E-Instance that is linked to this E-Resource.
Click the
 button.
A pop-up box with three options will appear.
Choose from the options: Link to an existing instance, Create a new Instance for an existing bib, or Create a new bib and Instance.

Select Link to existing Instance to link a pre-existing OLE Instance.
The EResource Workbench will open in a new tab, allowing you to search for the desired bibliographic record.

Select the checkbox next to the desired title. This will give you the option to specify whether you are linking to an Instance (Holdings) or E-instance (E-Holdings).

Then select the appropriate instance you would like to link to the E-Resource and click Link to EResource.

Click save on the E-Resource Instances menu page.
Instances will appear in the Instance Details tab (see below).
Select Create OLE Instance (existing bib) to link to a new E-instance for an existing bibliographic record.
The EResource Workbench will open in a new tab, allowing you to search for the desired bibliographic record (see above).
Select the Create new EInstance link to the right of the desired bib record.
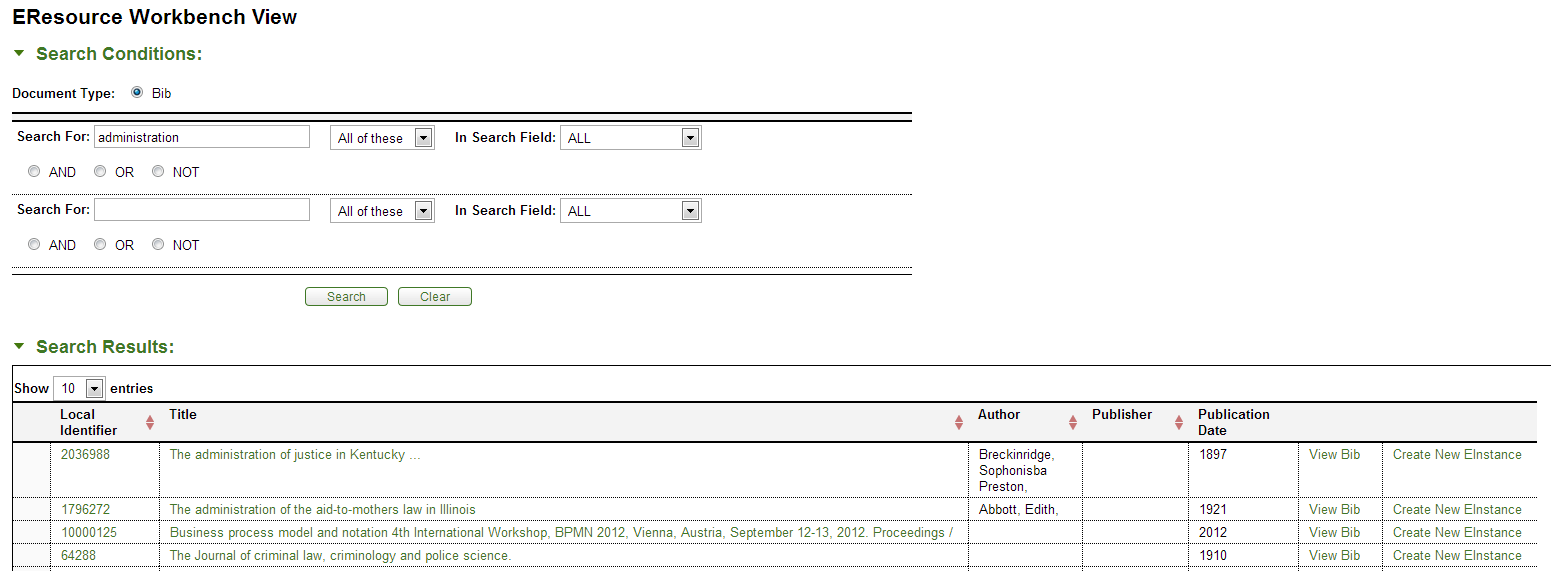
This will open the Editor to a blank new E-Instance record. Fill out the details and click Save.
Note
For more information about the Bibliographic Editor, see the relevant section in the OLE Guide to Describe. .
Return to the E-Resource Instances menu page and click Save.
Instances will appear in the Instance Details tab (see below).
Select Create New Instance (new bib) to link to a complete new bibliographic record with new instance.
This will open the Bib Editor. Create a new bibliographic record.
Note
For more information about the Bibliographic Editor, see the relevant section in the OLE Guide to Describe. .
Add a new E-instance to the bibliographic record if desired and click Save. Otherwise, populate the automatically created Instance and Item record for the title and click Save.
Return to the E-Resource Instances menu page and click Save.
Instances will appear in the Instance Details tab (see below).
Tip
Important : As of 1.0, you MUST click “save” on the Instances menu of the E-Resource before the link to an Instance or E-instance is actually saved.
The Instance Details tab shows a table listed of all instance (print or electronic) that have been linked to this E-Resource. Multiple instance from a single bib can be linked to the same E-Resource. To unlink a specific instance, simply click the Remove button next to it.

From the Purchase Orders menu, staff are able to view and access any Purchase Orders for any Instances or E-Instances that are linked to the E-Resource. In future releases, users will also be able to see any Purchase Orders created for the E-Resource itself.

The Overview tab maintains the same information as the Main menu's Overview tab.
Note
See the Main Overview tab to review the Overview tab.
The PO Details tab displays the PO information.
Note
To learn more about creating Purchase Orders, see above.
From the Invoices menu, staff can view Invoices for any Purchase Orders related to this E-Resource.
Note
In 1.0, linkages are not occuring between the Invoice document and the E-Resource Record. This functionality will be available in the 1.5 release.
From the Licenses menu staff can view and create licenses to link to the E-Resource.

The Overview tab maintains the same information as the Main menu's Overview tab.
Note
See the Main Overview tab to review the Overview tab.
Below the Overview tab, staff may start a new license request. Click the  button to create the License Request document. This will create an entry for
the license in the Licenses tab below. It is possible to create multiple License Requests for a
single E-Resource.
Note
For more on working with License Request documents, see below
Once a License Request has been started, its summary information will appear in this tab. As of 1.0, this includes Status of the License Request, Last Modified Date, License Request Title, and information about any Attachments. Click on the DocumentId to open and view or edit the License Request.

The Status for the first created open License Request will also display in the Workflows tab of the Main Menu for the E-Resource.
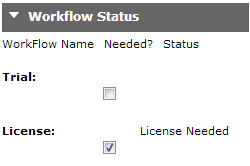
Note
This is a bug. In future releases, the status will display the most recently created open License Request.
The Event Log menu is available to store the correspondence between librarians and publishers, vendors, and others. Libraries may also use the Event Log to record an audit trail of changes made to the E-Resource Record or events that took place outside of OLE.
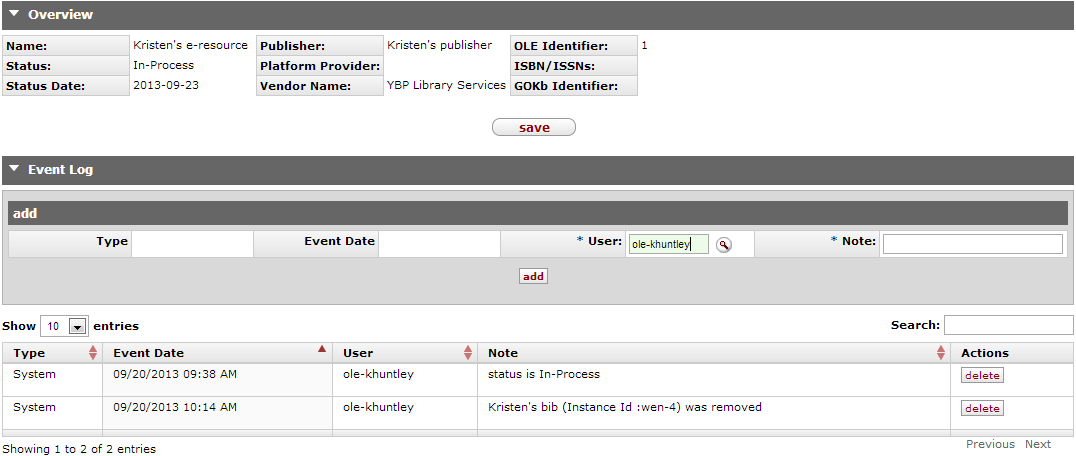
The Overview tab maintains the same information as the Main menu's Overview tab.
Note
See the Main Overview tab to review the Overview tab.
The Event Log tab captures certain types of
automated entries for E-Resources, such as a change in status. Users can also manually add entries
to capture external communications, notes, or to summarize any actions external to OLE (such as with
Vendor/Provider, University Legal, University Purchasing, etc.). You may add an event by filling out
the required fields and clicking  . Users with appropriate permissions may also delete an entry from the Event
Log by clicking
Many events can be recorded in the event log. You may display 10, 25, 50, or 100 entries at one time. Additionally, you may search for events from the search bar.

Event Log tab Definitions
|
Title |
Description |
|
Type |
System generated. The event type value will be ‘system’ when the request is initiated, 'user' if a line was added manually by user; 'file' if an Agreement doc was added; 'agreement' if a linked Agreement document was edited or added; 'location' if a location change occurred; 'status' if a license status change occurred. |
|
Event Date |
System generated. Logs the date for the event log line item. |
|
User | Required. Logs the user id of
the person associated with the event log change. Defaults to current user but can be modified by
entering a name or searching from the lookup  |
| Note | Required; may be manually added or system generated. Users may input information to provide audit trail information. System also records what events have occurred. |
Select E-Resource from the Select/Acquire Menu.
To create the E-Resource, fill in data in the required fields: Name, Status, Material Type, Content Type and Format.
Enter additional information and click
 .
.From this point the E-Resource acquisition process is non-linear. Four different workflows may be set in motion in any sequence. Each of these workflows can be started from a related menu page on the E-Resource; the status of the related workflows are intended to display in the Workflows tab of the Main menu of the E-Resource.
Trials (in a future release)
Licensing
Note
For more on creating license requests and their workflows, see below
Purchasing through a Requisition and Purchase Order (in a future release)
Activating patron access (in a future release)
In addition, the E-Resource Record has its own locally configurable workflow. As the E-Resource Record is passed through each approval in the local workflow, the document is editable for staff with appropriate permissions to add or modify as necessary.
To start the local workflow for the E-Resource, click
 . The document will route to the Action List of the first user or group in the
local workflow.
. The document will route to the Action List of the first user or group in the
local workflow.Once that workflow step has been completed, the appropriate user will click
 to move the document to the next approver.
E-Resource must have required fields specified in Data Requirements worksheet in order to be saved.
A License Request will be linked to an E-Resource, not a Requisition (this is a change from 0.8).
An Instance or E-Instance may only be linked to one E-Resource.
As part of workflow, E-Resource Records remain in the Action List of the “owning group” until passed to the next owning group, a locally defined sequence. Whenever an E-Resource’s workflow has been completed by the last defined owning group it no longer appears in any group’s Action List.
The E-Resource document is initiated by a member of OLE-SELECT Collection Management, OLE_E-Resource, OLE_Head, OLE_Acquisitions-select, or OLE_Selector roles. Once the E-Resource is submitted to the workflow, it will route for approval:
First to a member of the OLE_Acquisitions-select.
Next to a member of the OLE_Cataloger.
 >
> >
>  >
> 
OLE offers a customized document search for E-Resources. Once you have opened the E-Resource Search, perform a search to find the record you wish to modify.
Note
For information about Search By fields that are specific to E-Resources, see the E-Resource's “Document Layout” .

You may select your desired search fields using the Search by drop-down and enter search term(s) in the Search Criteria boxes. Searches across multiple fields can be combined using Boolean operators as needed. You may also filter by dates and statuses using the box on the right side of the screen. Search results appear below the Search boxes. The Add Search Criteria button can be used if you need to use more than 3 search criteria.
Note
As of 1.0, the search is performing a begins with search. You may use the ‘*’ character as a wildcard before and / or after any search term(s) you enter. See OLE E-Doc Fundamentals - Using Special Characters in search on the wiki.
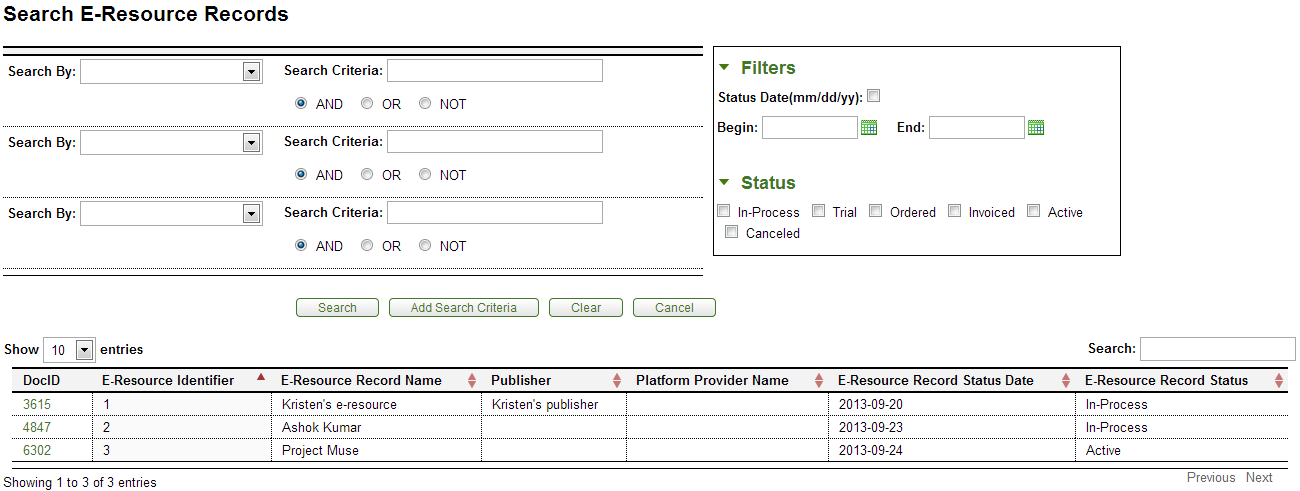
Results will be sorted by E-Resource Record Name. You may display 10, 25, 50, or 100 E-Resource Record entries at one time. Additionally, you may further refine your search from the search bar above the results.
Click a Doc ID to open the E-Resource record.
Table of Contents
 >
>  >
> 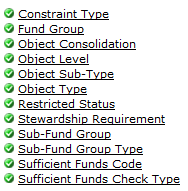
On the Select/Acquire menu tab, the Chart of Accounts submenu provides access to numerous maintenance documents for your institution's charts.
 >
>  >
>  >
>  >
> 
The Constraint Type identifies the type of constraint for sufficient fund checking on the Account e-document, i.e. “over” or “under”.
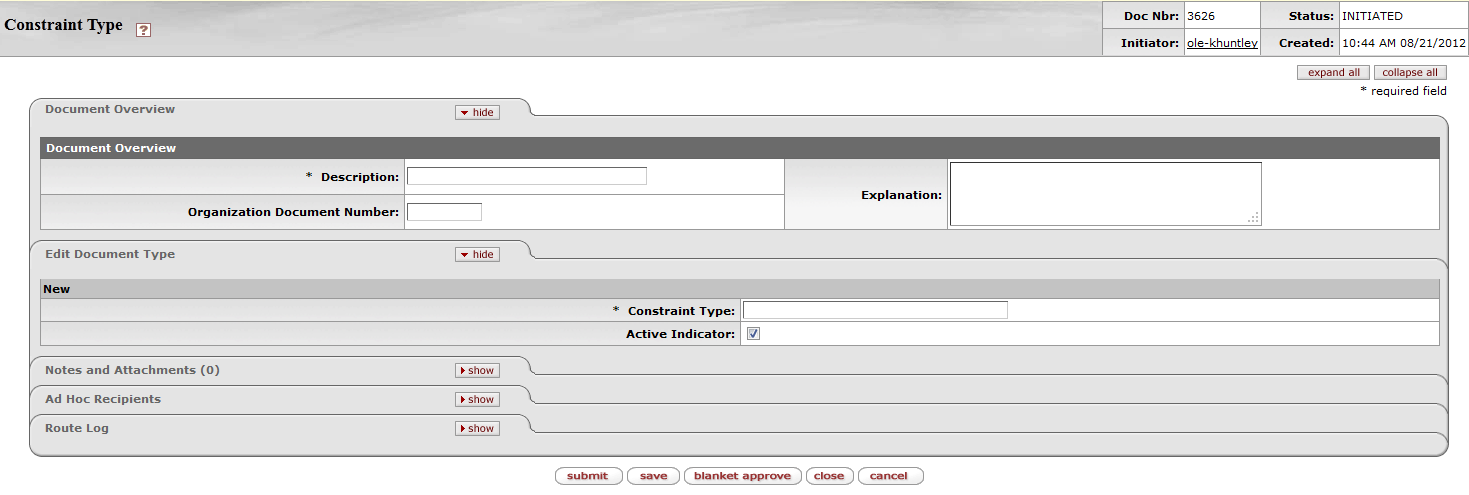
The Constraint document includes the Edit Document Type tab. The system automatically enters data into both the Old and New sections. Selected data fields are available for editing.
Edit Document Type tab definition
|
Title |
Description |
|
Constraint Type |
Identifies the type of constraint, i.e. “over” or “under” |
|
Active Indicator |
Indicates whether this constraint type is active or inactive. Remove the check mark to deactivate a code. |
 >
>  >
>  >
>  >
> 
The Fund Group document is used to define the broadest category of funds and is used for reporting and business rules. Examples of fund groups include General Funds and Contracts and Grants Funds. Although fund group is the broadest category of funds, it is an attribute of a narrower group: sub-fund. For example, accounts have an assigned sub-fund and from that sub-fund a fund group is retrieved.
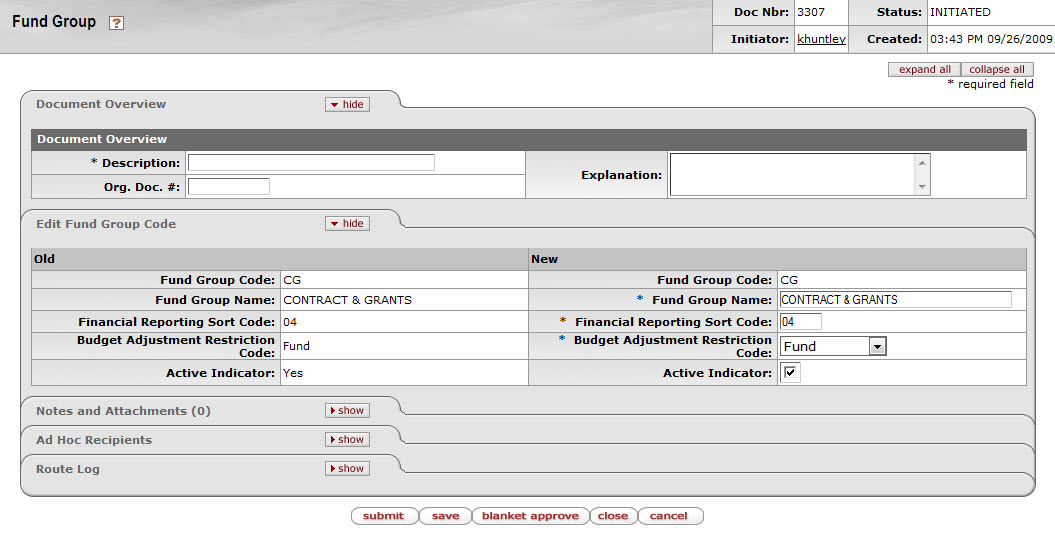
The Fund Group document includes the Edit Fund Group Code tab. The system automatically enters data into both the Old and New sections. Selected data fields are available for editing.
Edit Fund Group tab definition
|
Title |
Description |
|
Fund Group Code |
The code to uniquely identify a specific fund group. |
|
Fund Group Name |
Required. The descriptive label of this specific fund group. |
|
Financial Reporting Sort Code |
Required. The code to place fund groups in a particular sequence on reports |
|
Budget Adjustment Restriction Code |
Required. The code to define the level at which business rules on the
budget adjustment document are checked. Existing budget adjustment restriction code may be retrieved
from the lookup F = Fund C = Chart O = Organization A = Account |
|
Active Indicator |
Indicates whether this fund group code is active or inactive. Remove the check mark to deactivate a fund group code. |
 >
>  >
>  >
>  >
> 
The Object Consolidation document defines a general category of object codes for reporting. One object consolidation includes the object codes belonging to one or more object levels.
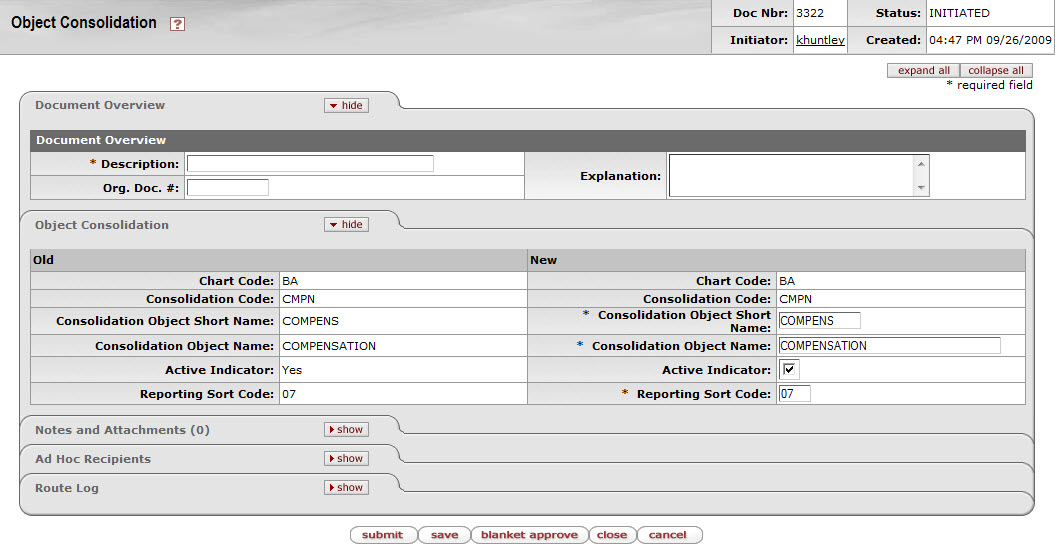
The Object Consolidation document includes the Edit Object Consolidation tab. The system automatically enters data into both the Old and New sections. Selected data fields are available for editing.
Object Consolidation tab definition
|
Title |
Description |
|
Chart Code |
The chart code for the associated object consolidation. |
|
Consolidation Code |
A consolidation code associated with object codes assigned to a particular reporting group of object levels. |
|
Consolidation Object Short Name |
Required. An abbreviated name used in reporting where space is limited. |
|
Consolidation Object Name |
Required. A descriptive label of this specific object consolidation group. |
|
Active Indicator |
Indicates whether this object consolidation code is active or inactive. Remove the check mark to deactivate. |
|
Reporting Sort Code |
Required. The code that determines the default sort sequence on reports. |
 >
>  >
>  >
>  >
> 
The Object Level document is used to maintain an attribute of the object code that is used to group similar object codes into categories for reporting.
The Object Level document includes the Edit Object Level tab. The system automatically enters data into both the Old and New sections. Selected data fields are available for editing.
Edit Object Level tab definition
|
Title |
Description |
|
Chart Code |
The chart code for the associated object level |
|
Level Code |
The code assigned to a particular reporting level of object codes. |
|
Object Level Name |
Required. A descriptive label for this specific object level. |
|
Object Level |
Required. An abbreviated name for this level to be used in reporting where space is limited. |
|
Consolidation Code |
Required. The consolidation object code associated with this object level
code. Existing consolidation codes may be retrieved from the lookup |
|
Active Indicator |
Indicates whether this object level code is active or inactive. Remove the check mark to deactivate this code. |
|
Report Sort Code |
Required. The code that determines the default sort sequence on reports. |
 >
>  >
>  >
>  >
> 
The Object Sub-Type document is used to further refine object type. Object sub-type can be used for reporting and in some instances for the establishment of business rules on e-docs (for example, a document might restrict the use of object codes belonging to a certain object sub-type).
The Object Sub-Type document includes the Edit Object Sub-Type tab. The system automatically enters data into both the Old and New sections. Selected data fields are available for editing.
Edit Object Sub Type tab definition
|
Title |
Description |
|
Object Sub-Type Code |
The code assigned to a particular subdivision of an object type. |
|
Object Sub-Type Name |
Required. A descriptive label for this specific object sub-type. |
|
Active Indicator |
Indicates whether this object sub type code is active or inactive. Remove the check mark to deactivate this code. |
 >
>  >
>  >
>  >
> 
The Object Type document defines the general use of an object code; such as income, asset, expense, or liability.
Tip
When you are configuring the object types, it is important to cross-reference the Object Type table, the System Options table and the OBJECT_TYPES parameters in the Parameter table.
The Object Type document includes the Edit Object Type tab. The system automatically enters data into both the Old and New sections. Selected data fields are available for editing.
Edit Object Type tab definition
|
Title |
Description |
|
Object Type Code |
The code assigned to a particular object type. |
|
Object Type Name |
Required. A descriptive label for this object type code. |
|
Object Type Debit Credit Code |
Required. The default accounting balance type of debit or credit for the object code that is retrieved from the list. |
|
ICR Selection Indicator |
The box is checked when the transactions with the object type are eligible for automated indirect cost calculation. |
|
Fund Balance Indicator |
The box is checked when the object type code is used in the fund balance. |
|
Reporting Sort Code |
Required. The code that determines the default sort sequence of object types on certain reports. |
|
Basic Accounting Category Code |
Required. The basic accounting category code that groups object type codes
for use in reporting and business processes throughout the system. Existing basic accounting
category codes may be retrieved from the list or the lookup |
|
Active Indicator |
Indicates whether this object type code is active or inactive. Remove the check mark to deactivate this code. |
 >
>  >
>  >
>  >
> 
The Restricted Status document is used to define whether the funds within an account are restricted, unrestricted, temporarily restricted or not applicable. Some OLE business rules refer to Restricted Status records when determining the validity of an e-doc transaction.
The Restricted Status document includes the Edit Restricted Status tab. The system automatically enters data into both the Old and New sections. Selected data fields are available for editing.
Edit Restricted Status tab definition
|
Title |
Description |
|
Restricted Status Code |
The unique code that identifies a particular restricted status. |
|
Restricted Status Name |
Required. The descriptive name for this restricted status code. |
|
Active Indicator |
Indicates whether this restricted status code is active or inactive. Remove the check mark to deactivate this restrictive status code. |
 >
>  >
>  >
>  >
> 
The Stewardship Requirement document is used to indicate the type of stewardship on an account e-document, for example some stewardship requirements are bookplates, annual reports for donors or departments.
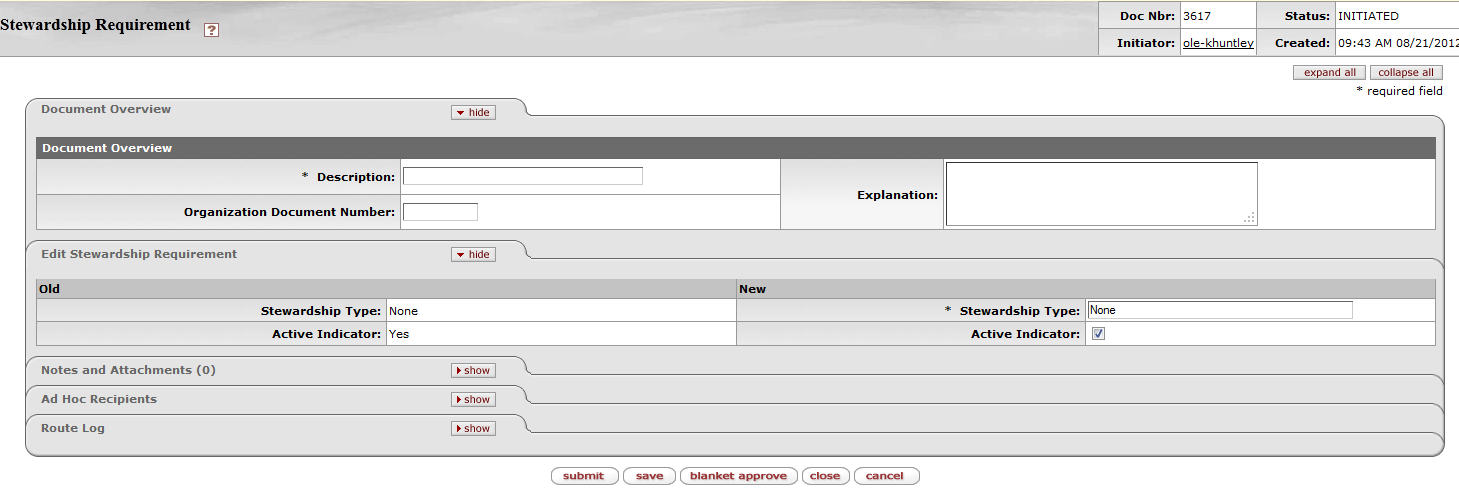
The Stewardship Requirement document includes the Edit Stewardship Requirement tab. The system automatically enters data into both the Old and New sections. Selected data fields are available for editing.
Edit Stewardship Type tab definition
|
Title |
Description |
|
Stewardship Type |
Identifies the type of stewardship, i.e., none, plating, reporting |
|
Active Indicator |
Indicates whether this sub fund group type code is active or inactive. Remove the check mark to deactivate this code. |
 >
>  >
>  >
>  >
> 
The Sub-Fund Group document defines the type, purpose or source of funds that are found in that account. Sub-fund group may be used for reporting purposes and for business rules on OLE e-docs.
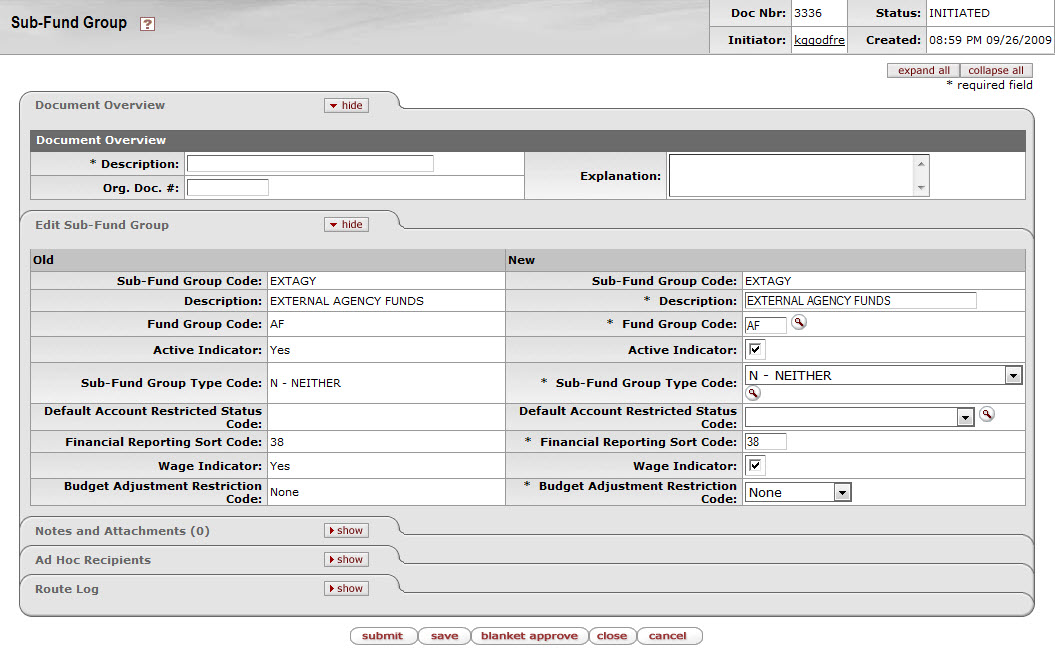
The Sub-Fund Group document includes the Edit Sub-Fund Group tab. The system automatically enters data into both the Old and New sections. Selected data fields are available for editing.
Edit Sub-Fund Group tab definition
|
Title |
Description |
|
Sub-Fund Group Code |
The unique code that identifies a particular sub-fund group. |
|
Description |
Required. The descriptive name for this sub-fund group code. |
|
Fund Group Code |
Required. The larger fund group to which the sub-fund group is associated.
Existing fund group codes may be retrieved from the lookup |
|
Active Indicator |
Indicates whether this sub fund group code is active or inactive. Remove the check mark to deactivate this code. |
|
Sub Fund Group Type Code |
Required. A code that identifies the sub-fund group type. Existing types
may be retrieved from the list or from the lookup |
|
Default Account Restricted Status Code |
A unique code that identifies a particular restricted status for the
default account. Existing restricted status codes may be retrieved from the list or from the lookup |
|
Financial Reporting Sort Code |
Required. A code that designates the default sort sequence on reports. |
|
Wage Indicator |
The box checked when the sub-fund group is one that is expected to pay compensation expenses. |
|
Budget Adjustment Restriction Code |
Required. The code that determines at what level OLE checks for restrictions when an account of the sub-fund group is used on a Budget Adjustment e-doc from the budget adjustment restriction code list. Values retrievable from the list include: N = None S = Sub-Fund C = Chart O = Organization A = Account |
 >
>  >
>  >
>  >
> 
The Sub-Fund Group Type document defines further categorization of sub-funds. Common sub-fund group types include 'Auxiliary,' 'Internal Service Organization,' or 'Neither.
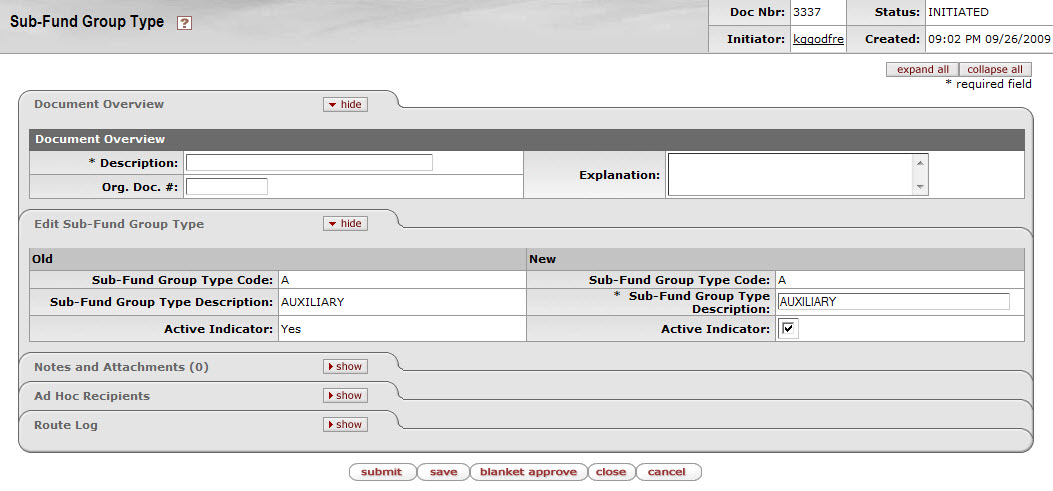
The Sub-Fund Group Type document includes the Edit Sub-Fund Group Type tab. The system automatically enters data into both the Old and New sections. Selected data fields are available for editing.
Edit Sub Fund Group Type tab definition
|
Title |
Description |
|
Sub-Fund Group Type Code |
A unique code that identifies the sub-fund group type. |
|
Sub-Fund Group Type Description |
Required. The descriptive name for this sub-fund group type code. |
|
Active Indicator |
Indicates whether this sub fund group type code is active or inactive. Remove the check mark to deactivate this code. |
 >
>  >
>  >
>  >
> 
The Sufficient Funds Code document defines the codes that indicate what level the account is checked for sufficient funds in the transaction processing environment. The values are pre-determined within the system. The name of the code may be edited or the code may be deactivated.
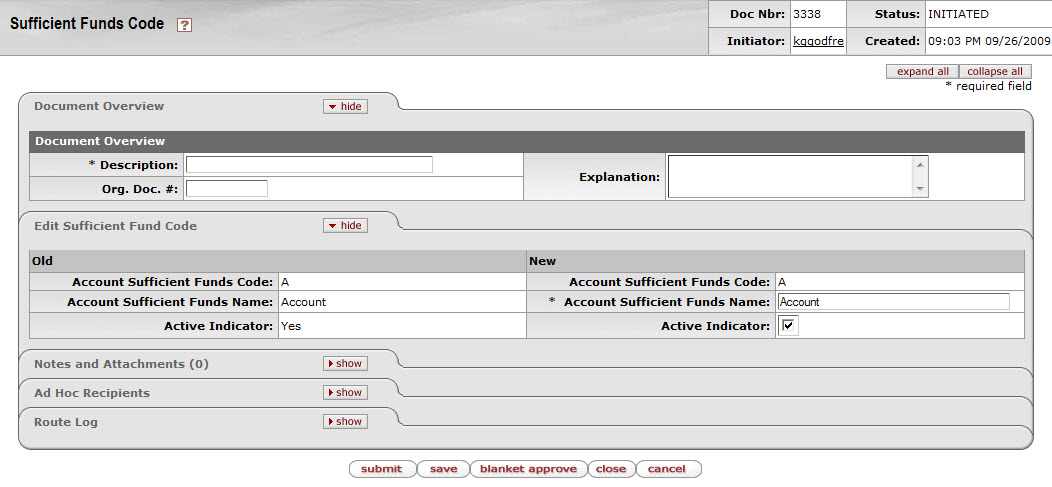
The Sufficient Funds Code document includes the Edit Sufficient Funds Code tab. The system automatically enters data into both the Old and New sections. Selected data fields are available for editing.
Edit Sufficient Funds Code tab definition
|
Title |
Description |
|
Account Sufficient Funds Code |
Display-only. A unique code that indicates what level the account is going to be checked for sufficient funds in the transaction processing environment. The values defined by the system are: A = Account C = Consolidation H = Cash L = Level N = No Checking O = Object Code |
|
Account Sufficient Funds Name |
Required. The descriptive name for the account sufficient funds code. |
|
Active Indicator |
Indicates whether this sufficient funds code is active or inactive. Remove the check mark to deactivate this code. |
 >
>  >
>  >
>  >
> 
The Sufficient Funds Check Type is used to define the type of sufficient fund check performed on the Account e-document.
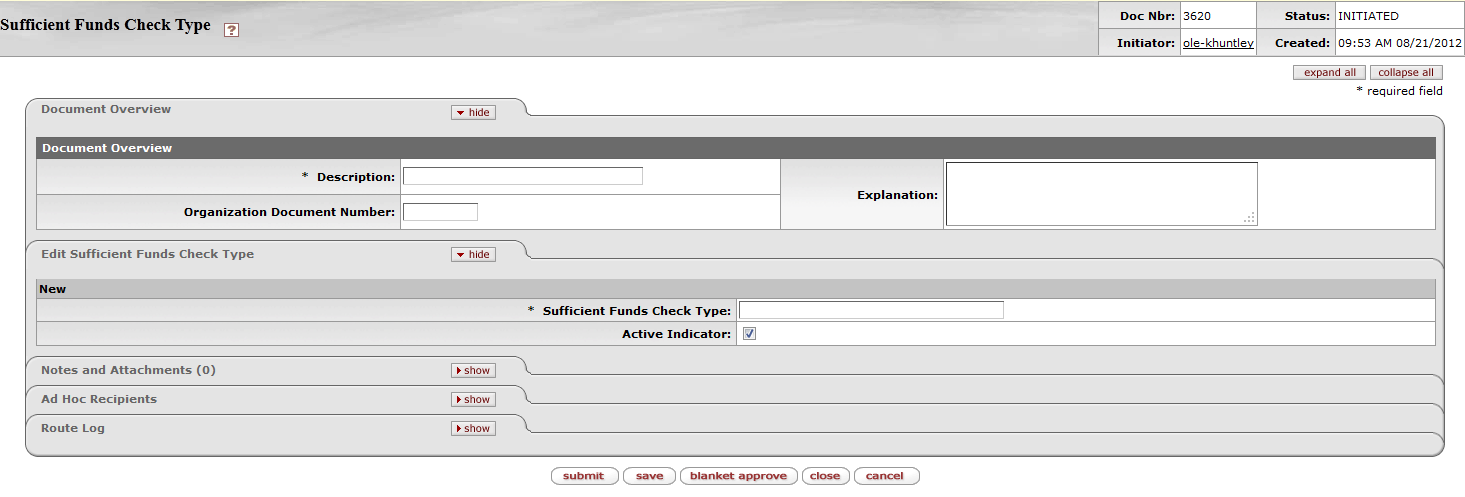
The Sufficient Funds Check Type document includes the Edit Sufficient Funds Check Type tab. The system automatically enters data into both the Old and New sections. Selected data fields are available for editing.
Edit Sufficient Funds Check Type tab definition
|
Title |
Description |
|
Sufficient Funds Check Type |
Identifies the type of fund to check, i.e., “account”, “object”, “cash” |
|
Active Indicator |
Indicates whether this sufficient funds code is active or inactive. Remove the check mark to deactivate this code. |
Table of Contents
 >
>  >
>  >
> 
The Lookup and Maintenance submenu on the Select/Acquire tab offers access to several Chart of Accounts e-docs that allow users to update reference tables that provide key structure for the tracking and storage of financial data.
Kuali OLE relies on a variety of Chart of Accounts (COA) tables to function. These tables define the attributes and values used by the system to validate transactions. They also control the often complex relationships between elements in the Chart of Accounts that must be leveraged for internal and external reporting. For example, tables store basic information such as the sub-fund groups to which new accounts may be assigned and the calendar month that correlates to the first month of your institution's fiscal year. This type of flexibility is one of the features that make OLE a highly configurable application.
A note on language:
|
OLE/KFS Calls it: |
Libraries more often call it (or it equates to): |
|
Account |
Fund |
|
Object Code |
Material type and/or order type and/or subject |
|
Organization code |
school, program, division, |
|
Budget at Account-Object Code |
Allocations |
This section presents information and instructions for viewing records in the COA tables and using e-docs to maintain these tables.
Note
OLE also delivers a feature to add extension tables if your institution wants or needs to record additional Chart of Accounts attributes that are not part of the base system. OLE extended attributes may be free text fields or may have an associated reference table to supply valid values. The data dictionary can be configured by your technical staff in the following manner:
An extended attribute displays on the associated e-doc
An extended attribute can be made required or optional
An extended attribute can be available as search criteria and/or in the search results in a lookup.
For more information about extended attributes, see Extended Attributes on the OLE Maintenance E-Doc Fundamentals wiki page
Library Subject Matter Experts (SME’s) worked with the Core Team to examine and modify all existing structures in Kuali Financial Systems to accommodate library financial needs, structures, and attributes for OLE. The OLE Financial module continues to be investigated through the 1.0 release.
Libraries must set up a parent (university) chart, organization, object code and account first. This must be done by directly inserting the data into the database and not from the OLE user interface.
See:
OLE Demonstration Library - Chart of Accounts and GL on the wiki for a demonstration of how KFS sets up budgets and Charts of Accounts as well as a Configuration Workbook template that is used to assist KFS users in their set up.
Appendix- Initializing Chart of Accounts in OLE (requires KIS credentials, see Getting Started with OLE)
This additional document is a work-in-progress guide to library implementations of the Chart of Accounts. It provides guidelines and key definitions of the structures and attributes libraries will need to setup to start using our OLE fund and budget structures. It will continue to be posted on Google Docs and updated over time as we append functions for final university payments, Fiscal Year Rollover and university financial integrations.
In the OLE Test and Demo environments, OLE users are welcome to begin creating a new Chart, Organizations, and CoA structures to test a setup, but are encouraged to default to the OLE “IU-University Chart” as the parent of any new structures (primary object codes defined).
Chart of Accounts (COA) is the set of controlling tables that define financial information, such as the codes and coding structures within OLE, including attributes like Accounts, Organizations, and Object Codes. The COA module exists primarily to support and validate entries into the General Ledger (G/L).OLE is leveraging the coding, processing and structures of the KFS Chart of Accounts, which includes:
Fiscal Year, Accounting Period
Charts
Account, Fund Group, Sub-Fund Group, Account Global; Account Delegate
New: Sufficient Funds checking
Sub-Account, Financial Reporting Code
Object Codes, Object Global, Sub-Objects, Sub-Object Global, Object Level/Consolidation
Organizations, Responsibility Center, Organization Review
Project Codes
Chart of Accounts Maintenance Documents (Attributes/Controlled Value Lists)
A Chart is the primary or parent structure, to which 1:N (Many) Organizations belong. Accounts and Object belong to a single Chart. Budgets are then applied to combined Account-Object structures. Accounts may have sub-accounts, and Object may have sub-objects for further division and reporting.
In OLE Library sample Chart, Organization, Account, Object and Budget (using Chart “BL”):
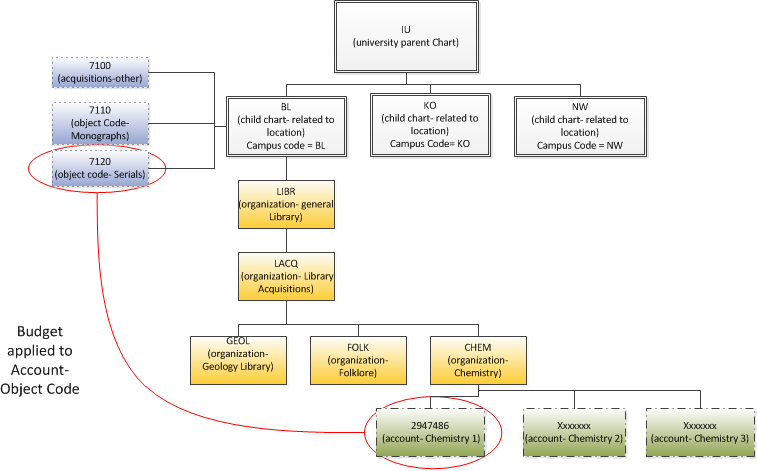
Some COA documents (Account, Object Code, and Sub-Object Code) allow you to assign identical values to multiple 'objects' on a single document known as a global document.
To initiate a global document, select the desired document from the Chart of Accounts menu group on the Lookup and Maintenance submenu on the Main Menu tab and enter the appropriate data.
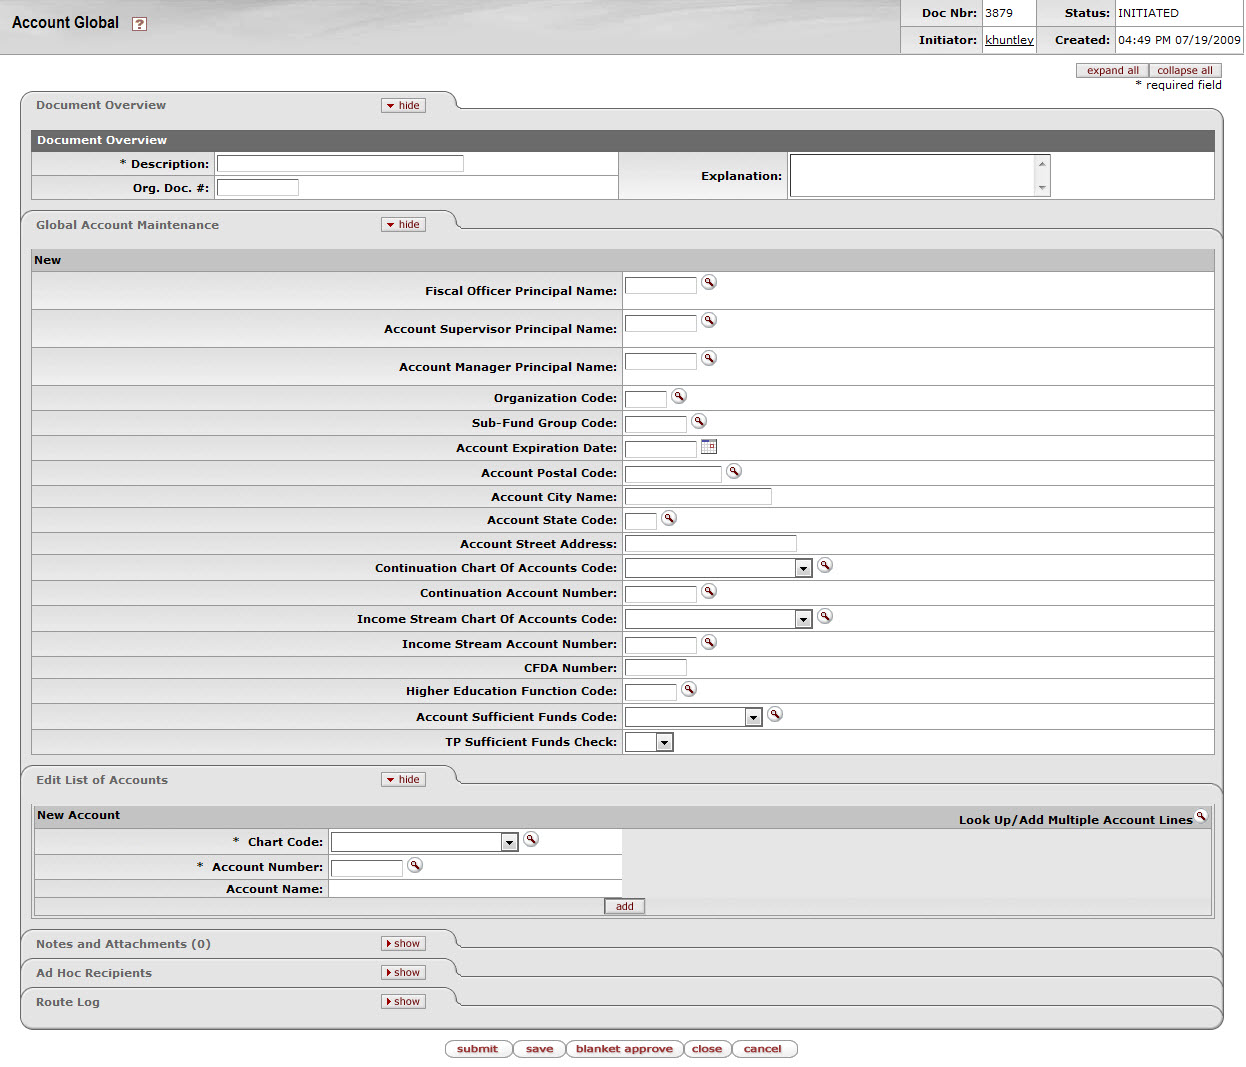
Note
For more information about a specific global document, see the subsection for that e-doc.
The global documents include the Edit List of
xxx (where xxx is an attribute name) tab which allows you to add the attributes you want
to modify. This can be done by looking up attributes to include on your document and using the
Look Up / Add Multiple xxx lookup  or by adding the values manually one at a time. At least one item must be
selected on the Edit List of xxx tab.
Note
For more information about a specific global document, see the subsection for that e-doc.
Note
It is important to note that all global documents do not behave in exactly the same way. For accounts and organization reversion, the global document can only update accounts and organization reversion rules. For object and sub-object codes, the global document allows you to create new and update codes. The Account Delegate Global document is unique in that it deactivates all existing delegation for accounts on the document and replaces it with the delegation on the document.
 >
> >
>  >
> >
> >
>
The Account document is used to create new accounts or to edit or copy existing accounts. An account is used to identify a pool of funds assigned to a specific university organizational entity for a specific purpose. Accounts are the fundamental building blocks of Kuali Financial Transactions. Financial Transactions are always associated with one or more accounts. Accounts and Objects are assigned budgets, and provide the financial framework for budgeting, balance inquiries, and encumbering funds for Purchase Orders, or paying vendors via Payment Requests.
An account has many different attributes associated with it that often determine how OLE allows you to use that account in transactions. It also has attributes associated with it that aid in reporting or drive special processes, such as indirect cost calculation.
The Account document comes with a global document option where you may make certain changes to a group of accounts at once. . Key attributes for OLE Accounts are: Stewardship Requirement, Legacy Fund Code, Fund Group & Sub-Fund group. Each can be used in the future for queries, extracts and reporting as additional “sorts”. The feature of the Account Global document is explained in the section following the Account document.
The Account document has six account specific tabs: Account Maintenance, Account Responsibility, Guidelines and Purpose, Account Description, Stewardship Requirements, and Legacy Fund Codes tabs which group related attributes together.
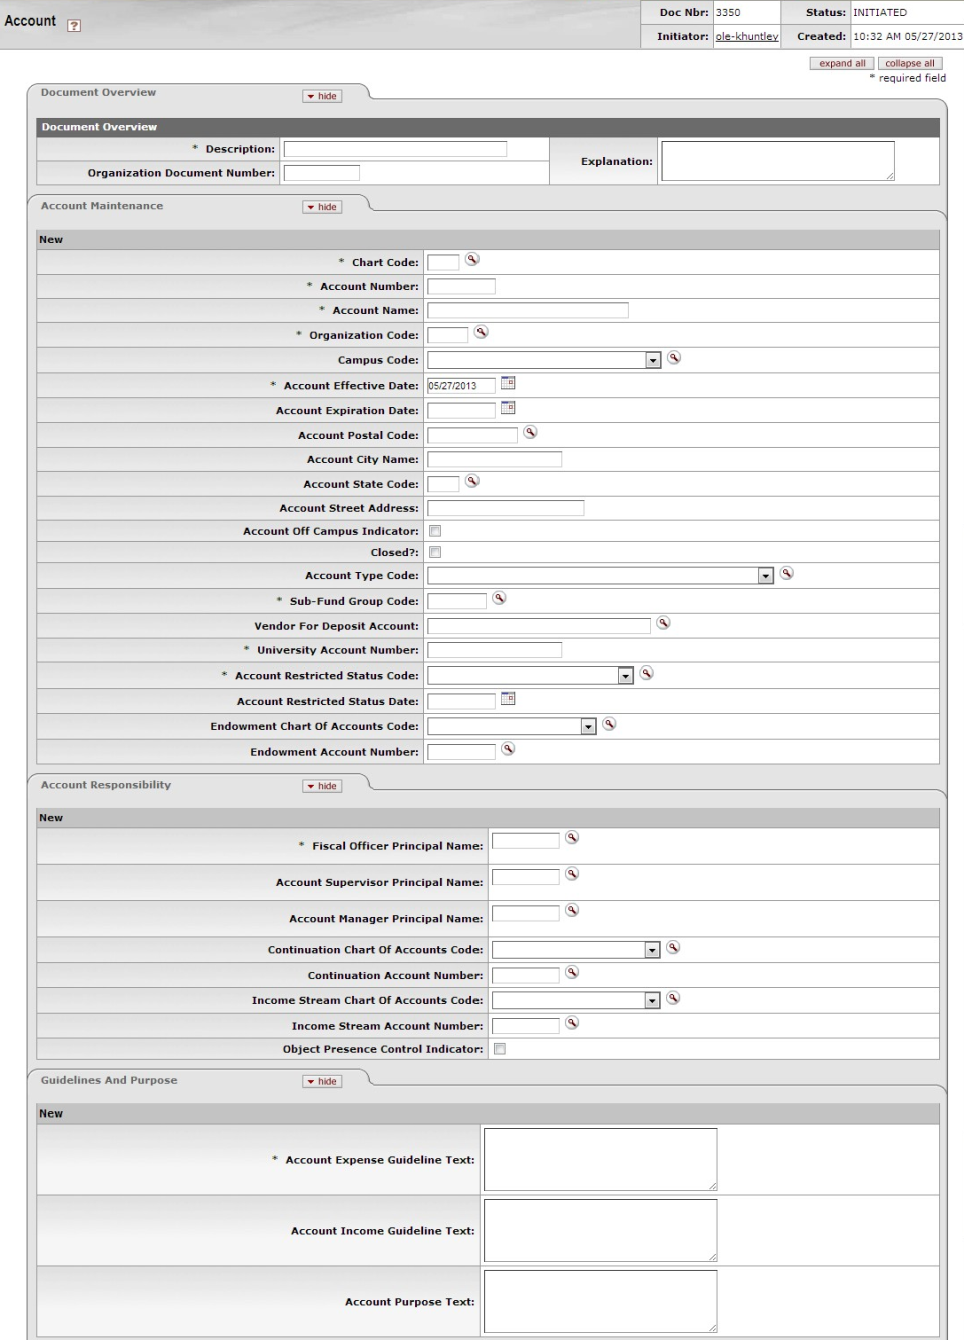 |
The fields on this tab define the various account attributes which are used in the application of business rules for transactions using the account, reporting options, approval routing, etc.
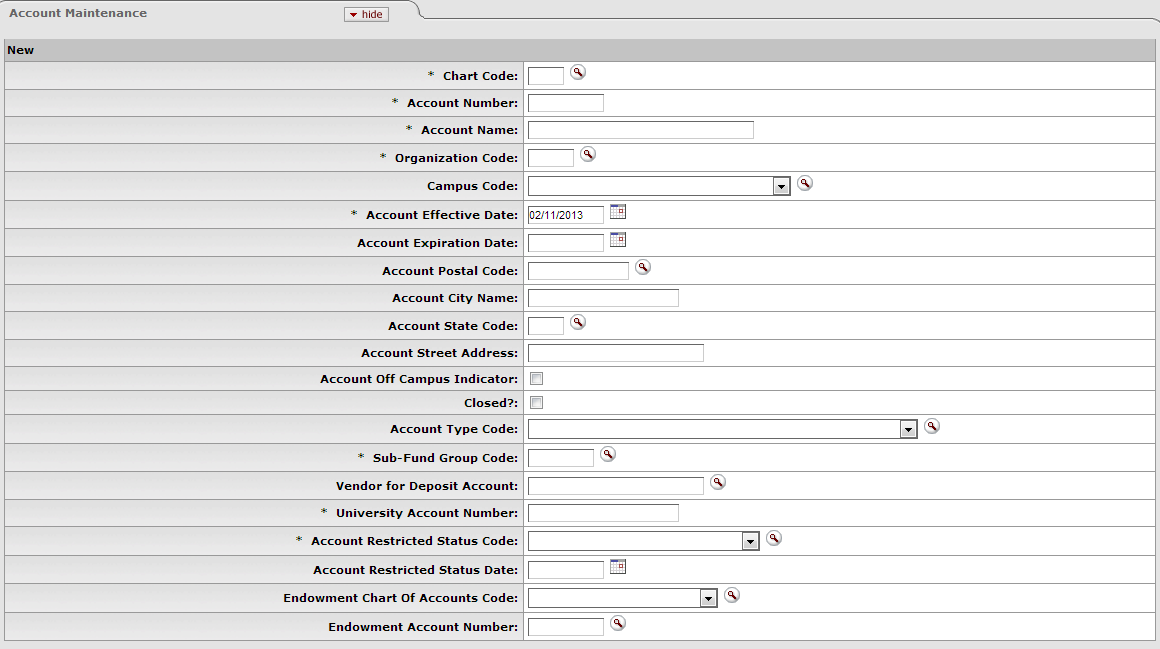
Account Maintenance tab definition
|
Title |
Description |
|
Chart Code |
Required. Enter the code or search for it from the Chart lookup |
|
Account Number |
Required. Enter the unique number to identify a pool of funds assigned to a specific institution entity for a specific function. NoteYou may restrict the account prefix by the use of the parameter. For example, you may configure to reject account numbers beginning with '3' or with '00. Identifier for a pool of funds assigned to a specific university entity for a specific function. |
|
Account Name |
Required. Enter the familiar title of a specific account |
|
Organization Code |
Required. Enter the number for the owner of the account, or search for it
from the Organization lookup |
|
Campus Code |
Required. Select the physical campus on which the account is located from
the Campus list, or search for it from the lookup Represents the physical location of the account. |
|
Account Effective Date |
Required. Enter the date when the account became effective. NoteAn account may be used on financial transactions before its effective date. |
|
Account Expiration Date |
Optional. Enter the date when the account expires. Business rules on transactions may prevent the use of expired accounts, or provide warnings when an expired account is being used. Must be equal to or greater than the current date and cannot be before the Account Effective Date. If it is not blank, the continuation Chart of Accounts code and continuation account number are required. |
|
Account Postal Code |
Required. Enter the postal code assigned by the US Postal Service for the
city where the account is managed, or search for it from the Postal Code
lookup |
|
Account City Name |
Required. Enter the city where the account is managed. |
|
Account State Code |
Required. Enter the code for the state where the account is managed, or
search for it from the State lookup |
|
Account Street Address |
Required. Enter the street address where the account is managed. |
|
Account Off Campus Indicator |
Optional. Select the check box if the account activities occur off-campus; clear the check box if they do not. |
|
Closed? |
Optional. Select the check box if the account is closed; clear the check box if it is open. Closing an account is more permanent than expiring - no transactions can use a closed account and a closed account can only be re-opened by a system supervisor. |
|
Account Type Code |
Required. Select from the Account Type
list or search for it from the lookup A code that categorizes or groups accounts for reporting purposes. |
|
Sub-Fund Group Code |
Required. Enter the code which relates an account to a fund, or search for
it from the Sub-Fund Group lookup A designation of an account specific to fund accounting. |
|
Vendor for Deposit Account |
Enter the vendor associated with the Deposit Account, or search for it from the
Vendor lookup |
|
University Account # |
University Account Number associated with the Library Account. Ensures financial data is matched correctly to the University Account in the enterprise-wide financial system. |
|
Account Restricted Status Code |
Required. Select the account restricted status code from the Account Restricted Status list. This code indicates whether funds in the account are: T = Temporarily restricted R = Restricted U = Unrestricted If it is 'T,' then an account restricted status date is required. If the sub-fund associated with the account has a restricted status code, then that number pre-fills the field, in which case it is not editable. If the code on the sub-fund is blank, the Restricted Status Code field on the Account document must be completed. |
|
Account Restricted Status Date |
Optional. Enter the date if the accounts restricted status code above is 'T.' This date signifies when the funds are targeted to become unrestricted. If the Account Restricted Status Code is T (Temporarily Restricted), then this field becomes required and the date signifies when the funds are targeted to become unrestricted. |
|
Endowment Chart of Accounts Code |
Optional. Select the Chart of Account code from the Chart list for the account designated to receive income generated from an endowment account or for the guarantee account for an underwrite for Contracts and Grants accounts. |
|
Endowment Account Number |
Optional. Enter the account designated to receive income generated from an
endowment account or the guarantee account for an underwrite for Contracts and Grants accounts, or
search for it from the Account lookup |
The fields on this tab define the individuals responsible for the account as well as continuation account information and Sufficient Funds parameters.

Account Responsibility tab definition
|
Title |
Description |
|
Fiscal Officer Principle Name |
Required. Enter the name of the fiscal officer, or search for it from the
lookup The Fiscal Officer is a person who is trained and hired for the purpose of providing fiscal, policy, and internal control management of all funds in a unit. They are responsible for ensuring that processes and related controls have been established to achieve the mission and objectives of their organization(s). |
|
Account Supervisor Principle Name |
Optional. Enter the name of the account supervisor, or search for it from
the lookup The Account Supervisor will be the leader of the organization in which the account resides. In an academic unit this would probably be the Dean, in an administrative unit it would be the Vice President. |
|
Account Manager Principle Name |
Optional. Enter the name of the account manager, or search for it from the
lookup The Account Manager is the person who through their actions, their position, or the budgeting process of the Dean or Vice President has direct responsibility for how funds are spent and managed. Examples would be a principal investigator who received a grant or contract, an academic person who received internal research funds from the Dean, or a Director of a non-academic department. |
|
Continuation Chart of Accounts Code |
Optional unless the account has an expiration date, in which case it is
required. Enter the chart code for the continuation account, or search for it from the Chart lookup |
|
Continuation Account Number |
Optional unless the account has an expiration date, in which case it is
required. Enter the account that accepts transactions which are being processed on the account after
the account expiration date, or search for it from the Account
lookup |
|
Income Stream Chart of Accounts Code |
Optional. Select the Chart of Accounts for the income stream account from
the Chart list, or search for it from the Chart lookup |
|
Income Stream Account Number |
Optional. Enter the account which has been designated to receive any offset
entries from the account in order to balance responsibility center activity from the Account list or search for it from the lookup The account designated to receive general fund income as part of the budget process for institutional funds, or the account designated to receive income from the sponsoring agency on contract and grant funds. When Budget Adjustments that involve accounts with different income stream accounts are made, OLE can be configured to create an automated Transfer of Funds transaction to properly adjust cash between those income stream accounts. |
|
Object Presence Control Indicator |
Optional. Select the check box to indicate that the account uses object presence control. Clear the check box if it does not. Object presence control requires that an object code be budgeted for the account before it can be used on an actual or encumbrance transaction. If checked, requires that an Object Code be budgeted for the account before it can be used on an actual or encumbrance transaction. |
The fields in the Guidelines and Purpose tab collect text description that provide details relating to the type of expenses that should be charged to the account, the source of its income, and the account's overall purpose.

Guidelines and Purpose tab definition
|
Title |
Description | |
|
Account Expense Guideline Text |
Required unless the account expiration date is before the current date. Enter the text describing the type of expenditures that take place in the account. It should also explicitly state those expenditures that are unallowable in the account. | |
|
Account Income Guideline Text |
Required unless the account expiration date is before the current date. Enter the text describing the types of income (source of funds) that take place in the account. It should also explicitly state those revenues that are unallowable in the account. | |
|
Account Purpose Text |
Required. Enter the text describing the overall purpose of the account and the function it supports. | |
The Account Description tab contains optional information relating to the physical location of the account.

Account Description tab definition
|
Title |
Description |
|
Campus Description |
Optional. Enter additional campus description if desired on the account. |
|
Organization Description |
Optional. Enter additional organization description if desired on the account. |
|
Responsibility Center Description |
Optional. Enter responsibility center description if desired on the account. |
Stewardship Requirements have been added as metadata to be used in future
workflows and routing (think: book plating, donors, etc.) This tab is repeatable- do not forget to
use the  button to commit new Stewardship Requirements to the Account.

Account Stewardship Requirements tab description
|
Title |
Description |
|
Stewardship Type |
Identify the type of stewardship. |
|
Stewardship Note |
Note related to the stewardship requirement. |
Legacy Fund Codes are added to assist libraries with migrating from legacy
systems and combined fund code strings (which had fiscal year, account, and object information).
This tab is repeatable- do not forget to use the  button to commit new Legacy Fund Codes to the Account.

Legacy Fund Codes tab description
|
Title |
Description |
|
Legacy Fund Code |
Uniquely identifies legacy systems’ fund codes |
|
Legacy Fund Code Note |
Note related to the legacy fund code |
Sufficient funds checking is an option that can be used to stop the processing of e-doc transactions when an account does not have a balance large enough to cover expense transactions.
Sufficient funds checking can be established on an account-by-account basis. If the Transaction Process Sufficient Funds Check option on an account is checked and the Account Sufficient Funds Code is set to a value other than 'N' (no checking), then the account is checked for sufficient funds by OLE.
Sufficient Fund Check (SFC) operates differently on encumbrances vs. expenditures:
Encumbrances check against Free Balances (Budget - invoices (liabilities) [pending included] - expenditures [pending included] - encumbrances [pending included], occurs when encumbrances is pending (when requisition created/accts and costs assigned)
Expenditures check against Cash Balance (Budget - expenditures [pending included]) - when Payment Request created (pending).
The sufficientFundsAccountUpdateJob, which can be scheduled or run on demand, evaluates the pending ledger entries to determine whether or not they affect sufficient funds.
Note
For more information about how to run this batch job, see Schedule in the OLE Guide to System Administration Functions. This and other OLE user guides are available for download from OLE Documentation Portal.

Sufficient Funds Check tab description
|
Title |
Description |
|
Account Sufficient Funds Code |
Required. Select the code that indicates what level the account is going to be checked for sufficient funds in the transaction processing environment from the Account Sufficient Funds list. The choices are: A = Account C = Consolidation L = Level O = Object Code H = Cash N = No Checking |
|
Transaction Processing Sufficient Funds Check |
Optional. Select the check box if sufficient funds check should be performed on the account. |
|
Encumbrance / Expense Method |
Identifies the type of encumbrance or expense, i.e., "over" or "under". |
|
Encumber / Expense Constraint Type |
Coded selection choice of # (for Amount) or % (for Percentage). |
|
Encumbrance Amount |
Enter a value to be checked when encumbering the account on purchase orders. |
|
Expense Amount |
Enter a value to be checked when paying the account on payment requests. |
|
Notification Type |
When the sufficient fund amount has been reached, you may select what will occur:
|
The Employee Type for the Financial-AQ4, Financial-AQ5, Accounting-AQ4 Fiscal Officer, Account Supervisor, and Account Manager must be 'P (Professional)' and the Employee Status must be 'A (Active).
The following rules apply to closing an account:
You must select an account active indicator: closed.
Account expiration date must be the current date or earlier
A continuation account number must be provided.
Only fully-approved Accounts (like other OLE documents) will display in Account Lookup inquiries or future Available balance inquiries.
The account must meet all the following criteria:
expires on or before the current date
has no budget balance
has no pending ledger entries
has no open encumbrances
has no asset, liability, or fund balances other than the fund balance object code defined for this account's chart and the process of closing income and expense into fund balance must take the fund balance to zero.
Only a system supervisor user can reopen a closed account.
The document routes to the fiscal officer for the account indicated on the document. If the document edits an existing account and includes a change to the value of the Fiscal Officer field, the document routes first to the current fiscal officer and then to the newly designated fiscal officer.
The document routes to the Org Reviewer based on the organization assigned to the account.
The document routes to the Chart Manager based on the chart assigned to the account.
Accounts route to the University Chart Manager for final approval.
As an OLE User, the Account Supervisor receives an FYI copy of the document.
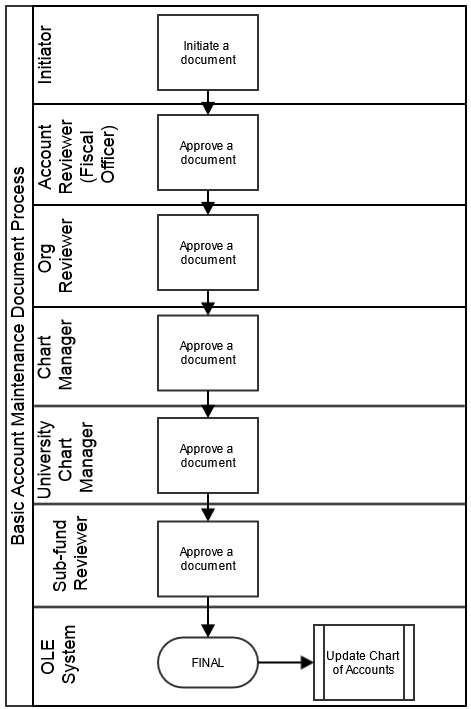
 >
> >
>  >
> >
>
Note
For general information about accessing and working with global documents, see Global COA E-Docs.
The Account Global document is used to assign identical attributes to multiple accounts on a single document. This could be used at initial implementations, or when needing to apply attributes for future reporting and extract. The same rules and options apply to Account Global documents as to Account e-docs, but with some restrictions on fields, and more routing/workflow.
The Account Global document contains the Global Account Maintenance screen and Edit List of Accounts tab.
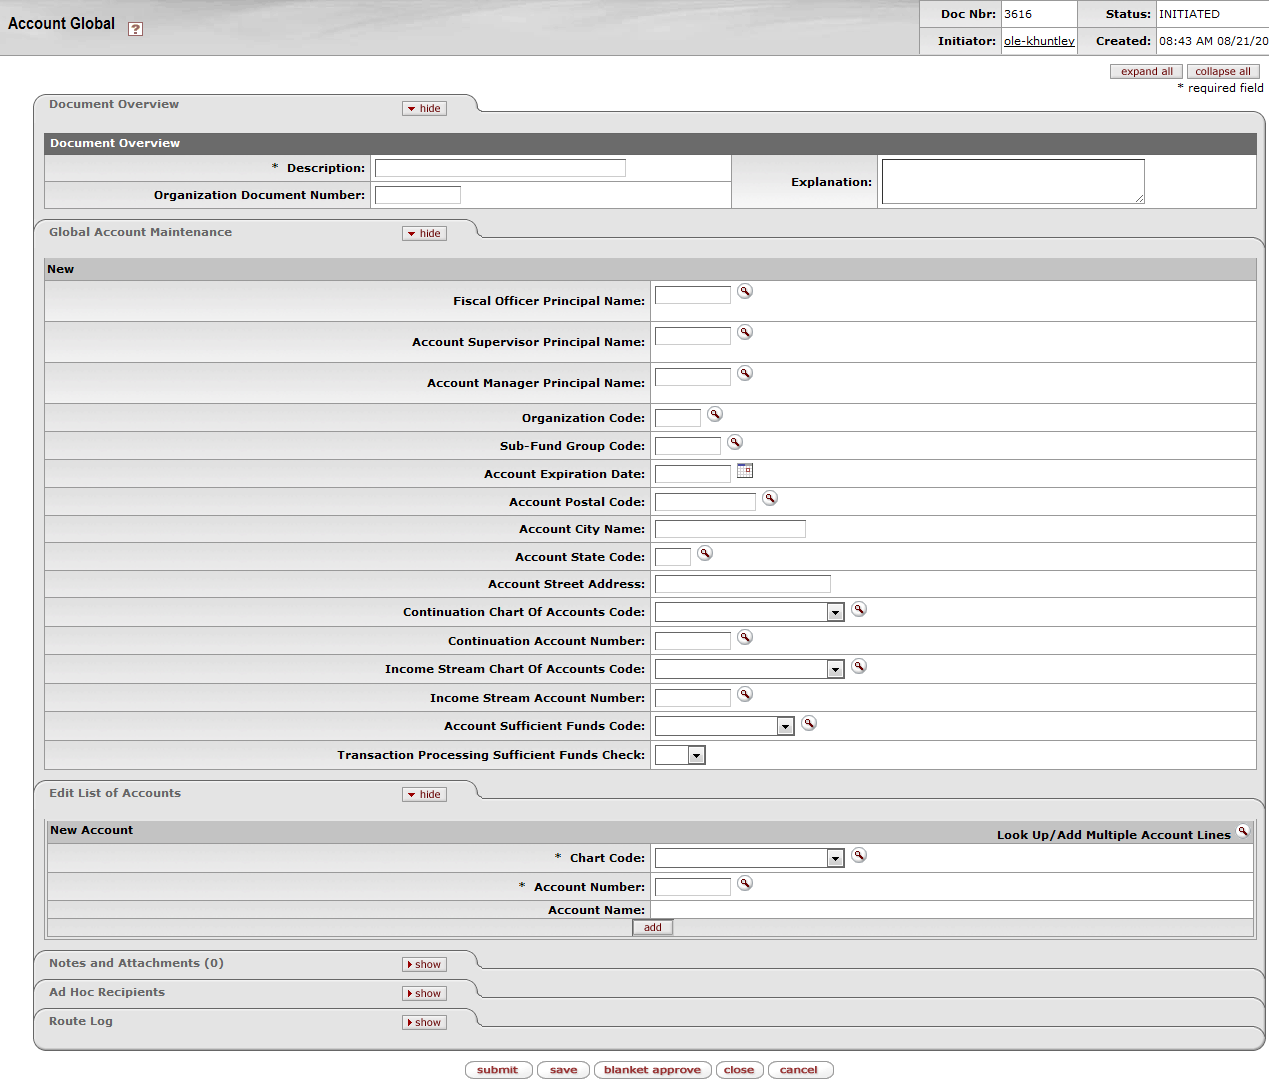
The Global Account Maintenance tab works the same as the Edit Account Maintenance tab of the Account document except that it contains only the fields that can be modified from this tab. There are no required fields in this tab. Instead, you only need to complete the fields that you want to update on the selected accounts. If an account attribute is to remain as is, leave that field blank.

Note
For more information about how to complete the Global Account Maintenance tab, see Account.
There are two ways to populate the accounts that you want to update globally
in the Edit List of Accounts tab. One is by manually entering or
selecting one object code at a time from the normal Account lookup  , the other is by using a special multiple value lookup called the Look Up / Add Multiple Account Lines
  to return multiple values.
Note
For more information about the two types of lookup, see Field Lookup and Multiple Value Lookup on the OLE E-Doc Fundamentals wiki page.
The Account Global document is subject to the same business rules as the Account document. In addition, at least one account must be selected on the Edit List of Accounts tab.
Note
For the information about the Account document business rules, see Account.
The Account Global document routes to the Chart Manager for every chart represented in the accounts being modified, and then to the University Chart Manager.
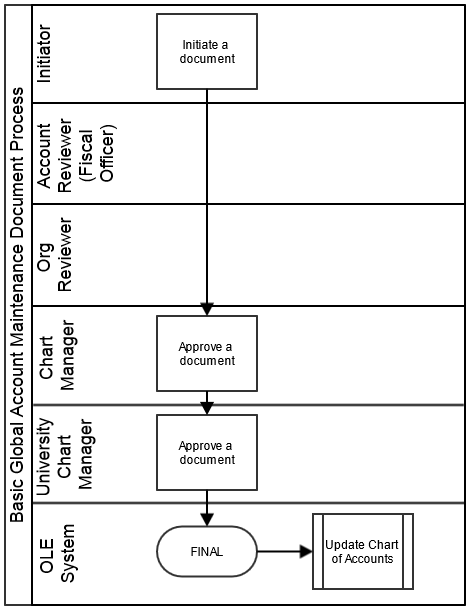
Complete the Global Account Maintenance tab.
To add multiple accounts to the Edit List of Accounts tab, click the Look Up / Add Multiple Account Lines lookup
 .
.Enter the desired search criteria to search for the accounts you want to include and click
 .
.After the result is returned, select check boxes to make your account selection and click
 .
.The selected accounts are returned to the Edit List of Accounts tab.
Click
 .
.
Complete the Global Account Maintenance tab.
To add one account at a time, enter the values or use the Account lookup
 .
.Enter the desired search criteria to search for the accounts you want to include and then click
 .
.Note
For information about how to retrieve a document, see Using Doc Search to Find a Document on the OLE E-Doc Fundamentals wiki page.
Click
 to add the account to the list.
 >
> >
> >
> >
> >
>
The Object Code document is used to establish new object codes or to copy or edit existing object codes. Object codes are a four character codes that represent all income, expense, asset, liability and fund balance classifications that are assigned to transactions and help identify the nature of the transaction. Examples of object codes might include travel expenditures, student fee income, accounts receivable, and invoices payable. Object codes are specific to a chart and a fiscal year and contain several attributes throughout OLE for financial reporting at the detail and consolidated levels.
Use of Object Codes in OLE sample data is based on typical reporting or budgeting requirements- monograph, serial, electronic.
All Object Codes must Report to an Object code, have an Object Type Code, Level Code, and Object Sub-Type Code. In OLE, we are using “EE” Object code to represent “Expenditure not Expense”. The Object Level code is used to maintain an attribute of the object code that is used to group similar object codes into categories for reporting. Object sub-types are used in financial rules and OLE Parameters to limit how and where an object code may be used (types of transactions, etc.).
The Object Code document comes with a global document option where you can create a group of new object codes or update the existing object codes all at once.
Note
For more information about the global document see Object Code Global.
From the Lookup screen, enter any search criteria, such as Fiscal Year= 2012, Chart= BL, and Object Code = 71* to view existing sample Library Object codes, to edit or copy them, or create new.
The Object Code document includes the Edit Object Code tab.

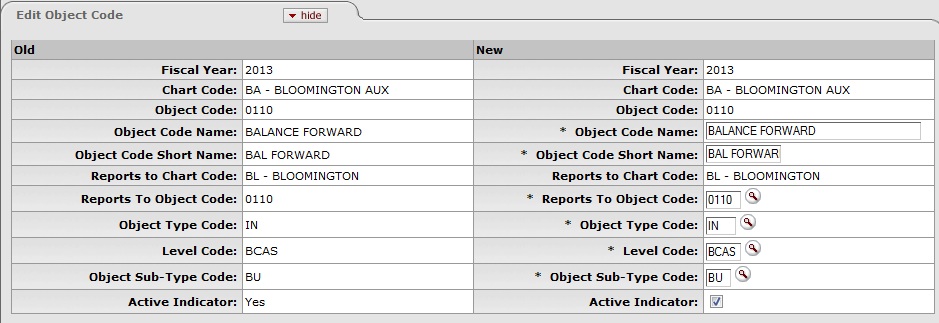
Edit Object Code tab definition
|
Title |
Description |
|
Fiscal Year |
Required. Enter the fiscal year of the object code or search for it from
the Fiscal Year lookup NoteOLE is set up so the Object Code table is based on fiscal year therefore each year can have a different set of object codes. |
|
Chart Code |
Required. From the Chart list select the
chart to which the object code belongs, or search for it from the lookup |
|
Object Code |
Required. Enter the code to identify the object code which must be unique within the chart and fiscal year to which it belongs. |
|
Object Code Name |
Required. Enter the long descriptive name of the object code which appears on the Accounting Lines tab in financial documents as well as in searches and reports. |
|
Object Code Short Name |
Required. Enter the shortened version of the object code name for use in reporting where space is limited. |
|
Reports to Chart Code |
Display-only. The value automatically defaults to the Reports to Chart of Accounts Code value associated with the Reports to Object Code's Chart Code value once it is entered. |
|
Reports to Object Code |
Required. Enter the object code that the object code reports to in the next
higher chart, or search for it from the Object Code lookup |
|
Object Type Code |
Required. Enter the code or search for it from the Object Type lookup |
|
Level Code |
Required. Enter the code or search for it from the Level lookup |
|
Object Sub-Type Code |
Required. Enter the code or search for it from the Object Sub-Type lookup |
|
Active Indicator |
Optional. Select the check box if the object code is active and can be used on financial documents. Clear the check box if it is inactive. |
If the Reports to Chart Code value is not the highest chart level, the reports to object code, fiscal year, and chart code combination must exist in the Object Code Table.
If the Reports to Chart Code value is at the highest level, then the object code must report to itself as an additional rule.
Note
Institutional Reporting: OLE provides for various fields available for institutional reporting. You can, for example, define a top level chart that consolidates activity for reporting purpose. After the top level chart is defined, the Statement of Net Assets and Statement of Revenues, Expenses and Changes in Net Assets can be designed, using 'Reports To' chart and object code and the sub-totals by the object code levels and consolidations on the top chart. Or, you may design responsibility center reports using the organization roll-up of accounts. For more information about the capabilities of the organization within the Chart of Accounts, refer to Organization.
 >
> >
> >
> >
>
Note
For general information about accessing and working with global documents, see Global COA E-Docs.
The object code global document is used to assign identical attributes to the same object code across multiple charts on a single document. The document can be initiated only by members of the OLE-SELECT Accounting-AQ4 role.
The Object Code Global document has two unique tabs: Global Object Code Maintenance and Edit Multiple Year and Chart tabs.
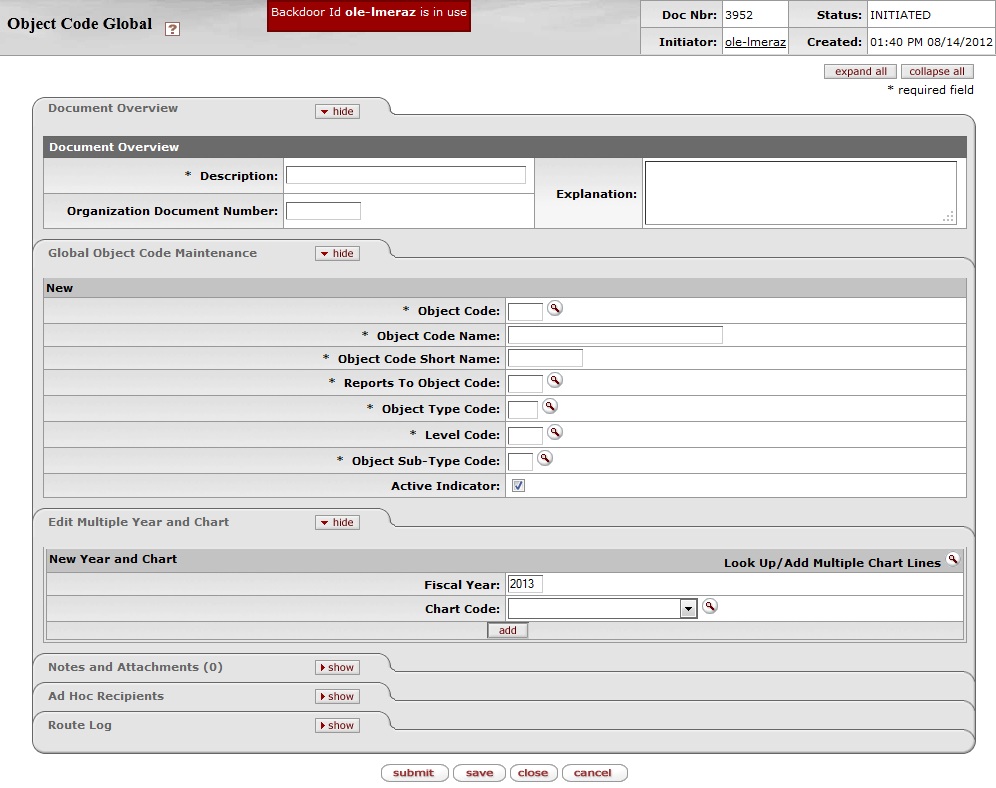
The Global Object Code Maintenance tab works the same as the Edit Object Code tab of the Object Code document and it contains all the attributes that are not specific to a year or chart that can be modified on this document. The required fields on the Global Object Code document are the same as on the Object Code document. Global object can both create new and update existing records. If you are changing certain attributes using this document and the other attributes are to remain as is, leave the field blank.

Note
For more information about how to complete the Global Object Code Maintenance tab, see Object Code.
There are two ways to populate the object codes that you want to update
globally in the Edit Multiple Year and Chart tab. One is by
manually entering or selecting one object code at a time from the normal Object Code lookup  , the other is by using a special multiple value lookup called the Look Up / Add Multiple Object Code Lines
 to return multiple values.

The Global Object Code document is subject to the same business rules as the Object Code document. In addition, at least one account must be selected on the Edit Multiple Year and Chart tab.
Only members of the OLE-SELECT Accounting-AQ4 role may initiate the document.
The Global Object Code document routes to the Chart Manager for every Chart represented in the accounts being modified, and then to the University Chart Manager.
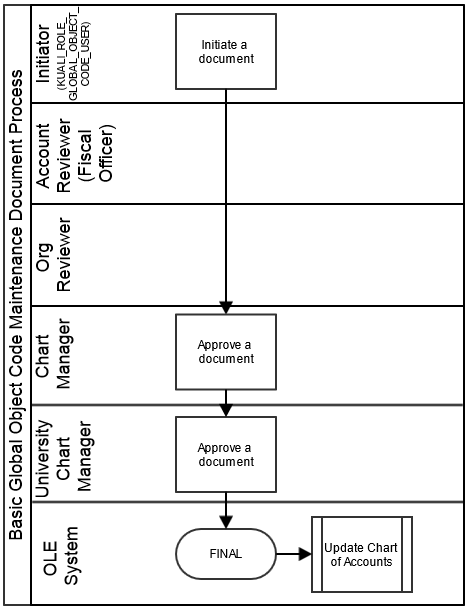
Complete the Global Object Code document. To add multiple object codes to the Edit Multiple Year and Chart tab, click the Look Up / Add Multiple Object Code Lines lookup
 .
.Enter the desired search criteria to search for the object codes you want to include and click
 .
.After the result is returned, select check boxes to make your object code selection and click
 .
.Click
 .
.
Complete the Global Object Code document. To add one object code at a time, enter the values or use the Object Code lookup
 .
.Search for an object code and click the
 link associated with the object code you want to select.
Note
For information about field lookup and multiple value lookup, see Field Lookup and Multiple Value Lookup on the OLE E-Doc Fundamentals wiki page.
Click
 to add the object code to the list.
Click
 .
.
 >
> >
> >
> >
> >
>
The Organization document defines the entities representing units at many different levels within the institution (for example, a department, responsibility center, campus). Organizations inside OLE can be used to denote Fiscal responsibility, and may be fiscal or physical organizations. There can be related organizations in a hierarchy under a single Chart. Accounts and objects belong to a single chart or organization. Organizations could be a specific library building, a department that has a budget, or by subject, depending on how adopting libraries wish to use Organizations for identifying structures, and then later use Object Codes for reporting on “like” materials or allocations.
The document collects important identifying information about an Organization and defines its place in the organization hierarchy. Organization is an important part of the Chart of Accounts and the organization hierarchy is frequently leveraged by OLE for use in Workflow and reporting.
Organizations are required in setting up accounts and objects
See list in Appendix of related library sample Organizations, such as LACQ- Library Acquisitions, or SOC- Sociology (each of these has related CoA structures and budgets), or create new.
To edit or copy an existing Organization, simply click on that option. Please do NOT change “Chart” code on existing library sample organizations, but users can edit miscellaneous OLE sample organizations not listed in this document.
The Organization document includes the Edit Organization Code tab.
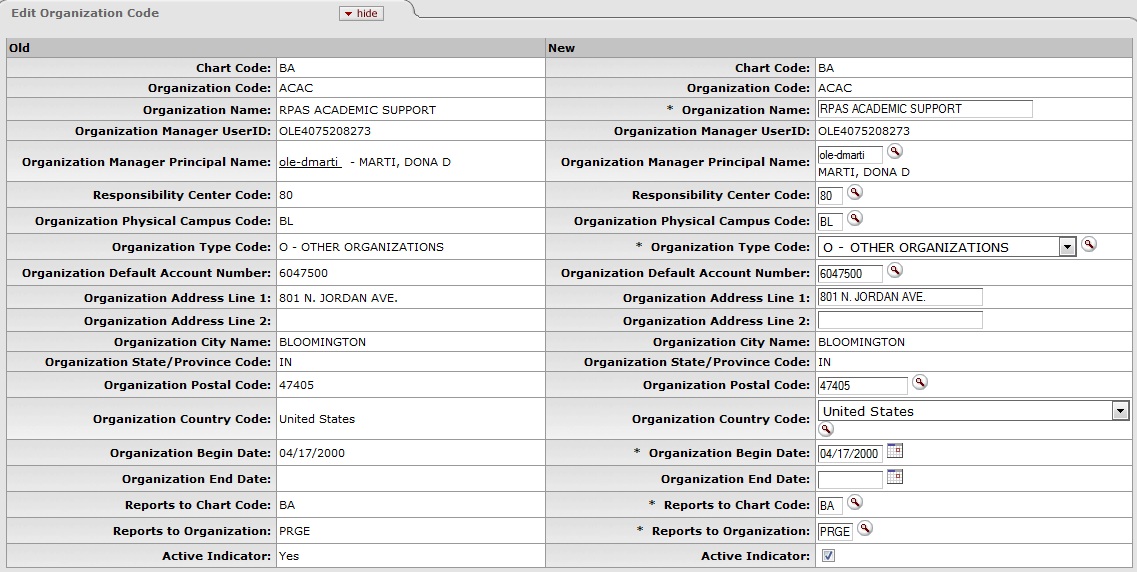
Edit Organization tab definition
|
Title |
Description |
|
Chart Code |
Required. Enter the chart code to which the organization belongs, or search
for it from the Chart lookup |
|
Organization Code |
Required. Enter the code to identify the organization. It must be unique within the chart to which it belongs. |
|
Organization Name |
Required. Enter the long descriptive name of the organization. |
|
Organization Manager |
Required. Enter the user ID of the manager responsible for the organization
or search for it from the UserID lookup |
|
Responsibility Center Code |
Required. Enter the responsibility center code to which the organization
belongs or search for it from the Responsibility Center lookup |
|
Organization Physical Campus Code |
Required. Enter the campus code which represents the physical location of
the organization, or search for it from the Campus lookup |
|
Organization Type |
Required. Select the type of organization from the Organization Type list or search for it from the lookup |
|
Organization Default Account Number |
Required. Enter the primary account used for any account reference for an
organization, or search for it from the Account lookup |
|
Organization Address 1 |
Required. Enter the street address where correspondence can be sent to the organization. |
|
Organization Address 2 |
Optional. Enter the second line of the street address where correspondence can be sent to the organization. |
|
Organization City Name |
Display-only. Displays the city where correspondence can be sent to the organization. |
|
Organization State/Province Code |
Display-only. Displays the state where correspondence can be sent to the organization. |
|
Organization Postal Code |
Required. Enter the zip code assigned by the US Postal Service which
relates to the city where the organization is located, or search for it from the Postal Code lookup |
|
Organization Country Code |
Required. Enter the country where correspondence can be sent to the
organization, or search for it from the Country lookup |
|
Organization Begin Date |
Required. Enter the date when the organization began operations as a new unit. For a new organization this defaults to today's date. |
|
Organization End Date |
Optional. Enter the date when the organization was dissolved. |
|
Reports to Chart |
Required. Enter the chart code associated with the organization to which
the organization reports in the hierarchy, or search for it from the Chart
lookup |
|
Reports to Organization |
Required. Enter the code designating the organization within the hierarchy
to which the organization reports, or search for it from the Organization
lookup |
|
Active Indicator |
Optional. Select the check box if the organization code is active and can be used on OLE documents. Clear the check box if it is inactive. |
Chart must be set up in advance
When creating a new organization with the organization type code ('C: Campus' or 'U: University'), the default account number is not required, since an organization is required to create an account.
The organization cannot report to itself unless it has an organization type code of 'U.
Reports to Chart and Organization must follow a path that ends at the known root chart and organization represented by the organization with a type of 'U.
When creating a new organization the Organization Begin Date must be greater than or equal to today's date.
When creating a new organization the document may not be blanket approved, except by the OLE-SYS Manager.
An organization cannot be inactive while there are active accounts or active organizations that report to it.
If an organization is made inactive, the Organization End Date is required.
 >
> >
> >
> >
> >
>
The Sub-Account document is used to define an optional part of the accounting string that allows tracking of financial activity within a particular account at a finer level of detail. Instead of associating budget, actuals and encumbrances with an account, you can specify a sub-account within that account to apply these entries. Sub-accounts are often used to help track expenses when several different activities may be funded by the same account. Sub-accounts can also be related to each other, across accounts, via Financial Reporting codes.
For example, a large organization may have money in a general account that is used by several different areas of that organization. The organization might segregate the budgets for each of the areas into Sub-accounts such as 'Marketing,' 'Research,' and 'Recruitment. When expenses are applied to the account they can be applied to the sub-account level, allowing direct comparisons between the budget and the actual income and expenditures of these smaller categories. Because all of the activity is still within a single account, it is still easy to report on the finances of the overall account.
Sub-accounts take on most of the attributes of the account to which it reports, including Fiscal Officer, account supervisor, fund group, and function code.
Sub-accounts allow you to take advantage of the Financial Reporting Code. This is an optional sub-account attribute that can be defined by a particular organization and retrieved from the OLE via decision support queries.
The Sub-Account document includes the Edit Sub-Account Code, and Edit Financial Reporting Code tabs.
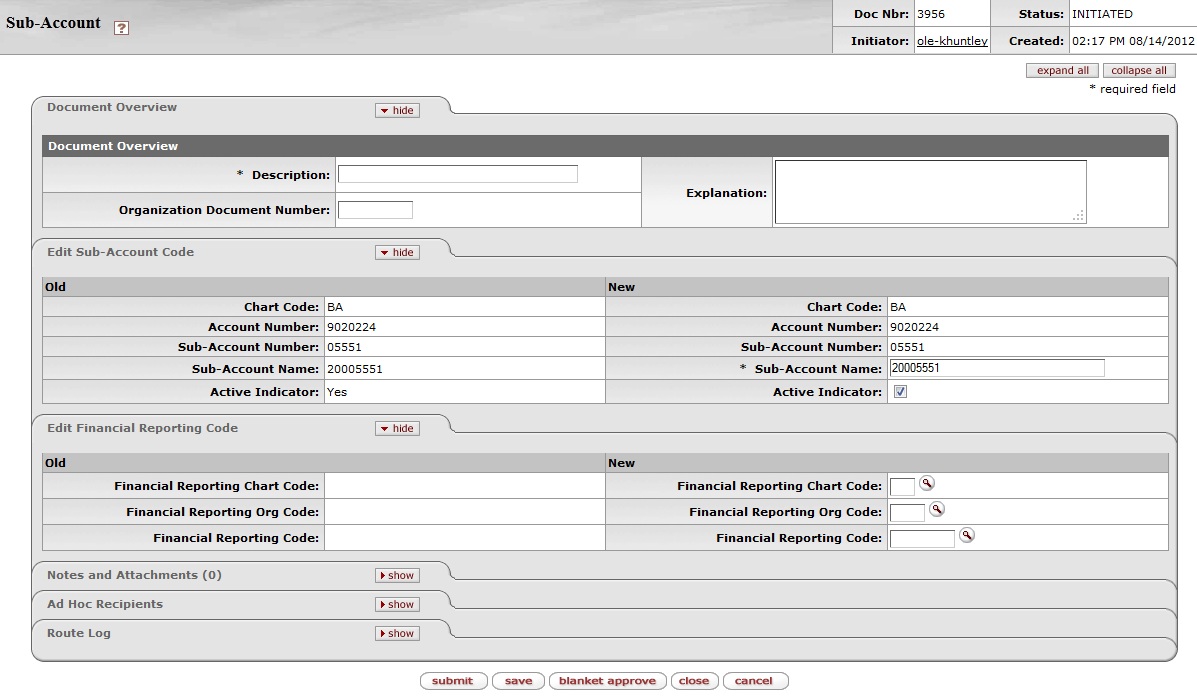
If you are not establishing a Cost Share sub-account or using the Financial Reporting Code, the Edit Sub-Account Code and the Document Overview tabs are the only required tabs on the document.

Edit Sub-Account Code tab definition
|
Title |
Description |
|
Chart Code |
Required. Enter the chart code associated with the account associated with
the sub-account, or search for it from the UserID lookup |
|
Account Number |
Required. Enter the account number on which you want to create the
sub-account or search for it from the Account lookup |
|
Sub-Account Number |
Required. Enter the code to define the sub-account. This is the code to be entered in the sub-account field of the Accounting Lines tab of financial documents. |
|
Sub-Account Name |
Required. Enter the long descriptive name. This name appears on the Accounting Lines tab in financial documents as well as in searches and reports. |
|
Active Indicator |
Optional. Select the check box if the sub-account is active. Clear the check box if it is inactive. |
This Financial Reporting Code tab is optional but can be used to associate this sub-account with a Financial Reporting Code. The associated reporting code could then be retrieved via decision support tools.

Edit Financial Reporting Code tab definition
|
Title |
Description |
|
Financial Reporting Chart Code |
Optional. Enter the chart code associated with the organization that owns
the assigned financial reporting code, or search for it from the Chart
lookup |
|
Financial Reporting Org Code |
Optional. Enter the code for the organization that owns the assigned
financial reporting code, or search for it from the Org Code lookup |
|
Financial Reporting Code |
Optional. Enter the reporting code assigned to the Sub-Account, or search
for it from the Financial Reporting Code lookup |
Takes on most of the attributes of the account to which it reports – fiscal officer, account supervisor; fund group and function code
If sub-account type code is 'CS,' then the fields Cost Sharing Chart of Accounts Code and Cost Sharing Account Number in the Edit CG Cost Sharing tab are required.
If sub-account type code is 'EX' and the Account associated with the Sub-Account is a Contracts and Grants account, then all fields in the Edit CG ICR tab are required.
If any field in the Financial Reporting Code tab is completed, all fields become required.
 >
> >
> >
> >
> >
>
The Sub-Object document is used to define an optional part of the accounting string that allows you to create finer distinctions within a particular object code on an account.
Sub-object codes are specific to an account and a fiscal year and take on most of the attributes of the object code to which they report, including object code type and sub-type.
The Sub-Object Code document contains the Edit Sub Object Code tab.
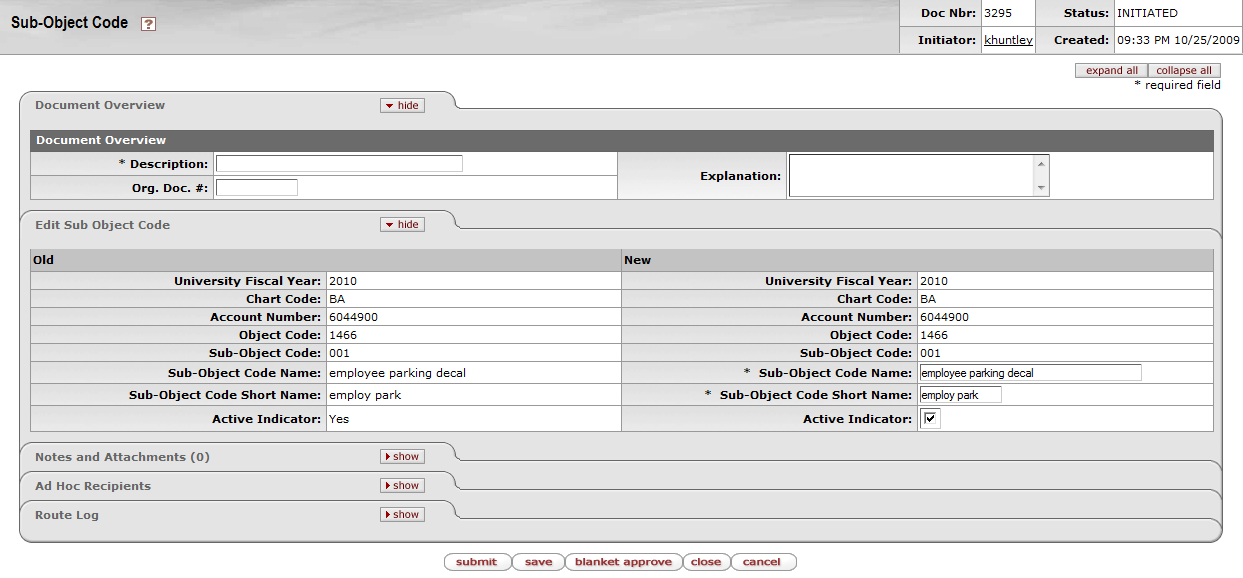

Edit Sub Object Code tab definition
|
Title |
Description |
|
Fiscal Year |
Required. Enter the fiscal year when you want to use the sub-object code,
or search for it from the Fiscal Year lookup |
|
Chart Code |
Required. Enter the chart code to which the sub-object code belongs, or
select it from the Chart lookup |
|
Account Number |
Required. Enter the account number on which you want to use the sub-object
code, or select it from the Account lookup |
|
Object Code |
Required. Enter the object code to which the sub-object code belongs, or
select it from the Object Code lookup |
|
Sub-Object Code |
Required. Enter the code to define the sub-object. This is the code that should be entered in the sub-object field of the Accounting Lines tab on financial transaction documents. |
|
Sub-Object Code Name |
Required. Enter the long descriptive name of the sub-object code. This name appears on the Accounting Lines tab in financial transaction documents as well as in searches and reports. |
|
Sub-Object Code Short Name |
Required. Enter the shortened version of the sub-object code name used in reporting where space is limited. |
|
Active Indicator |
Optional. Select the check box if the sub-object code is active. Clear the check box if it is inactive. |
The object code associated with the sub-object code must be active.
Expired accounts are allowed, however, if the account is expired OLE offers to replace it with the continuation account.
 >
> >
> >
> >
>
Note
For general information about accessing and working with global documents, see Global COA E-Docs.
The Sub-Object Code Global document is used to assign identical attributes to multiple sub-object codes on a single document.
The Sub-Object Code Global document has three unique tabs: Edit Global Sub Object Code, Edit Object Codes, and Edit Accounts. These tabs contain all of the modifiable sub-object code attributes that are not specific to object codes and account numbers.
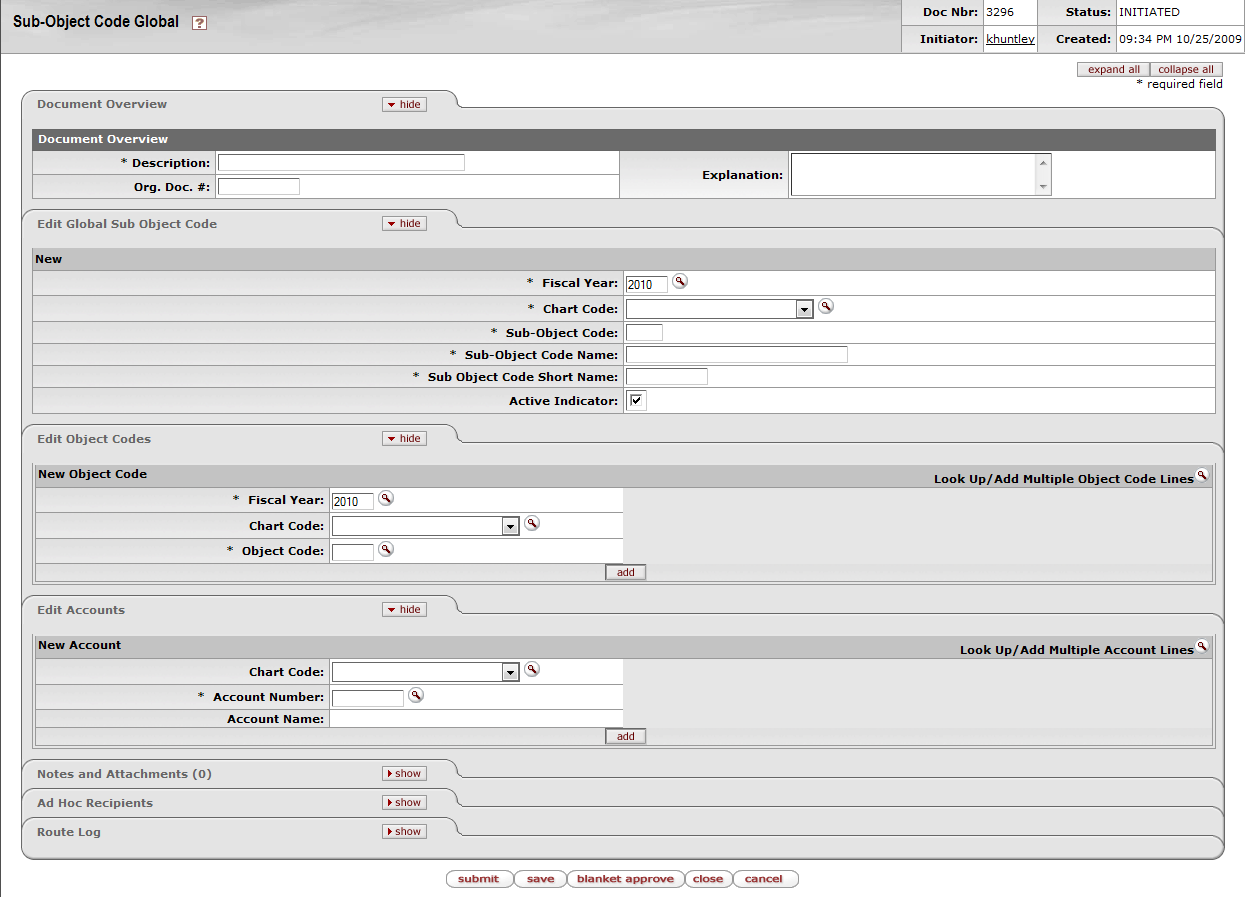
The Edit Global Sub Object Code tab works much the same as the Edit Sub Object Code tab of the Sub-Object Code document works. All of the fields on this tab are required. The Sub Object Code Global document can both create new and update existing records.

Note
For more information about how to complete the Edit Global Sub Object Code tab, see Sub-Object Code.
In the Edit Account tab, specify the chart
and object codes that the sub-object code belongs to. There are two ways to populate the object
codes in the Edit Object tab. One is by manually entering or
selecting one object code at a time from the normal Object Code
lookup  , the other is by using a special multiple value lookup called the Look Up / Add Multiple Object Code Lines
 to return multiple values.

In the Edit Account tab, specify the chart
and account that the sub-object code belongs to. There are two ways to populate the accounts that
you want to select in the Edit Account tab. One is by manually
entering or selecting one account at a time from the normal Account
lookup  , the other is by using a special multiple value lookup called the Look Up / Add Multiple Account Lines
 to return multiple values.

Note
For information about how to use the multiple value lookup, see Multiple Value Lookup on the OLE E-Doc Fundamentals wiki page.
The Global Sub-Object Code document is subject to the same business rules as the Sub-Object Code document. In addition, at least one account must be selected on the Edit Accounts tab and one object code must be selected on the Edit Object Code tab.
Complete the Edit Global Sub Object Code tab.
To add multiple object codes to the Edit Object Codes tab, click Look Up / Add Multiple Object Lines lookup
 .
.Enter the desired search criteria to search for the object codes you want to include and click
 .
.After the result is returned, select check boxes to make your object code selection and click
 . The selected accounts are returned to the Edit Object
Codes tab.
. The selected accounts are returned to the Edit Object
Codes tab.To add multiple accounts to the Edit Accounts tab, click the Look Up / Add Multiple Account Lines lookup
 .
.Enter the desired search criteria to search for the accounts you want to include and click
 .
.After the results are displayed, select check boxes to make your account selection and click
 . The selected accounts are returned to the Edit
Account tab.
. The selected accounts are returned to the Edit
Account tab.Click
 .
.
Complete the Edit Global Sub-Object Code tab
To add one object code at a time, enter the values or use the Object Code lookup
 .
.Search for an object code and click the
 link associated with the object code you want to select.
Click
 to add the object code to the list.
Repeat steps 2 through 4 until you have selected all of the object codes.
To add one account at a time, enter the values or use the Account lookup
 .
.Search for an account and click the
 link associated with the account you want to select.
Click
 to add the object code to the list.
Repeat steps 2 through 4 until you have selected all of the accounts.
Click
 .
.
Note
For information about field lookup and multiple value lookup, see Field Lookup and Multiple Value Lookup on the OLE E-Doc Fundamentals wiki page.
Table of Contents
 >
>  >
> 
On the Select/Acquire tab, the Vendor submenu provides access for users to create vendors and search for multiple OLE records.
 >
> >
> >
> >
> >
>
The Vendor (PVEN) document allows users to create and maintain a Vendor table to track businesses or other entities your institution has done or plans to do business with. Each record in this table maintains all information pertinent to a vendor, including tax ID, addresses, contacts and other details required for the management of your institution's procurement process.. Vendors created using this document are available for use on various purchasing documents (such as Requisition, Purchase Order, and Disbursement Voucher documents).
Vendors have many different attributes which may in some cases determine how and when they may be used.
The Vendor document is available from the Inquiry and Maintenance menu group on the Main Menu tab.
There are three situations where you may choose to use this menu:
To add a new vendor ('parent Vendor record')
To create a new division to an existing vendor ('child Vendor record')
To edit information about an existing vendor or division
For demo purposes, we suggest you use the following library vendors that we specifically created for OLE. The other existing vendors may be experimented upon to test editing, creating new, or adding Divisions to existing vendors.
|
Vendor name |
Vendor search alias |
Foreign/domestic |
|
Aleph-Bet Books |
ABB |
Domestic |
|
D. K. Agencies (P) Ltd. |
DKA |
Foreign |
|
Otto Harrassowitz |
HARRAS |
Foreign |
|
YBP Library Services |
YBP |
Domestic |
Wildcards are particularly helpful for searching vendors: *ybp*, harr*.
Note
To learn more about searching, see the section Searching OLE on the OLE E-Doc Fundamentals wiki page.
To create and modify vendors, please sign into OLE as:
| Role | Login |
|---|---|
| Acquisitions-AQ3, AQ4 | ole-cstan |
| Acquisitions-AQ5 | ole-ejacob |
| OLE-PURAP Purchasing Processor (for the Contracts tab) | ole-aferree |
| OLE ACQ-mgr | ole-hachris |
| Super user | ole-khuntley |
Note
Note: When creating a NEW vendor, if logged in as member of OLE_Acquisitions-AQ3 or AQ4, the new vendor e-doc will be processed, but stops at approval. Ole-khuntley or ole-hachris (OLE ACQ-mgr) may create and blanket approve a new vendor.
If the Vendor is Foreign, then additional fields are required, such as Currency Type shown in the tab below, and Is this a foreign vendor in the Vendor main tab. These data values will tie into workflows and currency conversion on requisitions, purchase orders and payment requests, as well as financial accounting with university systems.
The Vendor document offers a unique option from the Vendor Detail Lookup screen, called Create Division. This option is available only for ‘parent’ vendors (that is, vendors for which the Vendor Parent Indicator on the Vendor tab is set to ‘Yes’).
The Create Division option allows you to group entities under the same corporate office with the same Tax ID ('parent vendor'). You might use this feature to add information about the separate divisions or branches, without having to duplicate the corporate information. A division has a different name from the parent.
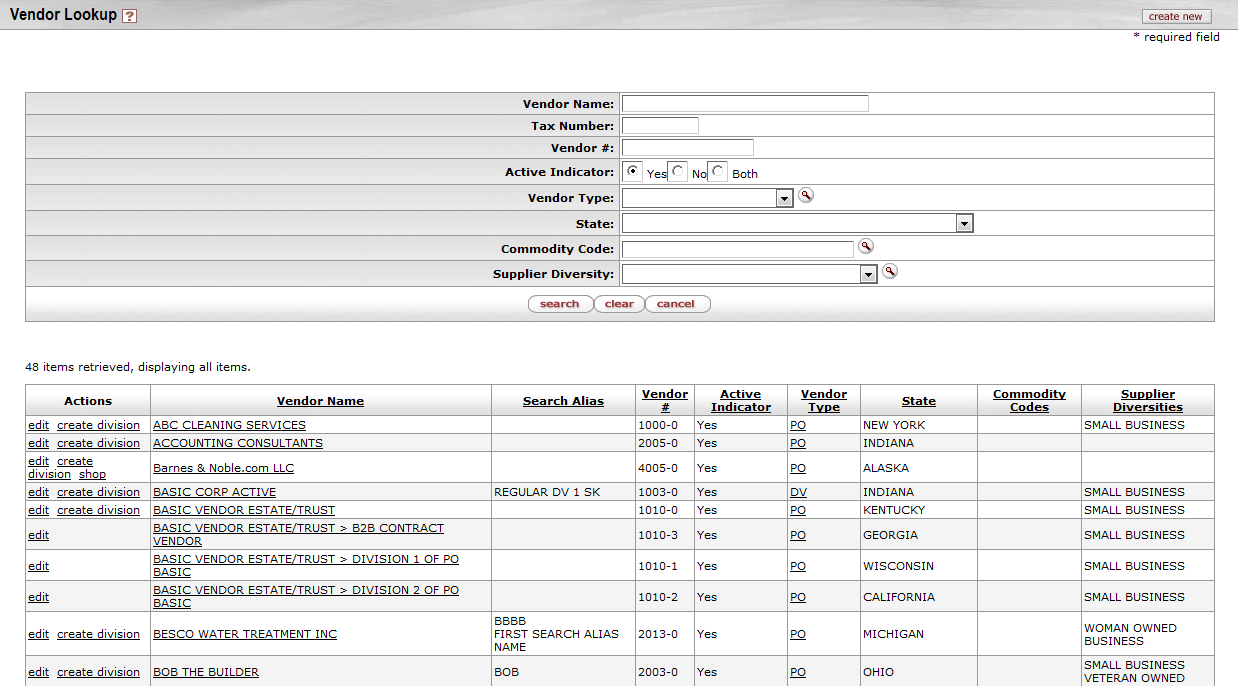
The create division link is available only for the 'parent' vendors. When you click the create division link, a new Vendor document is initiated and the information from the Corporate Information section of the Vendor tab is copied from its Corporate Vendor and remains display-only.
This is an inherited function from KFS. Divisions must be used for full Customer Relationship Management (CRM) type functions. However, if you want to account for a library organization’s specific Vendor account number without creating a division, you may enter the customer number and the Organization Code for the Account Number Owner on the Acquisition Unit Vendor Accounts tab. You may also add specific vendor discounts associated with the library organization’s customer number, as well as Standard Delivery Carrier and carrier’s standard interval of service (expressed as days/hours).
In the Vendor document, many tabs allow you to enter multiple sets of information ('Collections') for the tab. For example, you may add multiple addresses, contacts, phone numbers, etc. for a single vendor.
To add additional sets of information, complete the tab again and click  .
.
When a set of information is added it is collapsed but may be viewed by
clicking  individually.

In the Vendor document, not all the tabs are required for the creation of the Vendor record. For example, not all the vendors have supplier diversity requirement or multiple phone numbers. Nonetheless the required fields within these tabs are noted with an asterisk in the event that you decide to complete the information.
The Vendor document has various tabs including the Vendor, Transmission Format, Address, Contact, Supplier Diversity, Shipping Special Conditions, Vendor Commodity Codes, Search Alias, Vendor Phone Number, Acquisitions Unit Vendor Accounts, and Contracts tabs.
The Vendor document is broken into two images below:
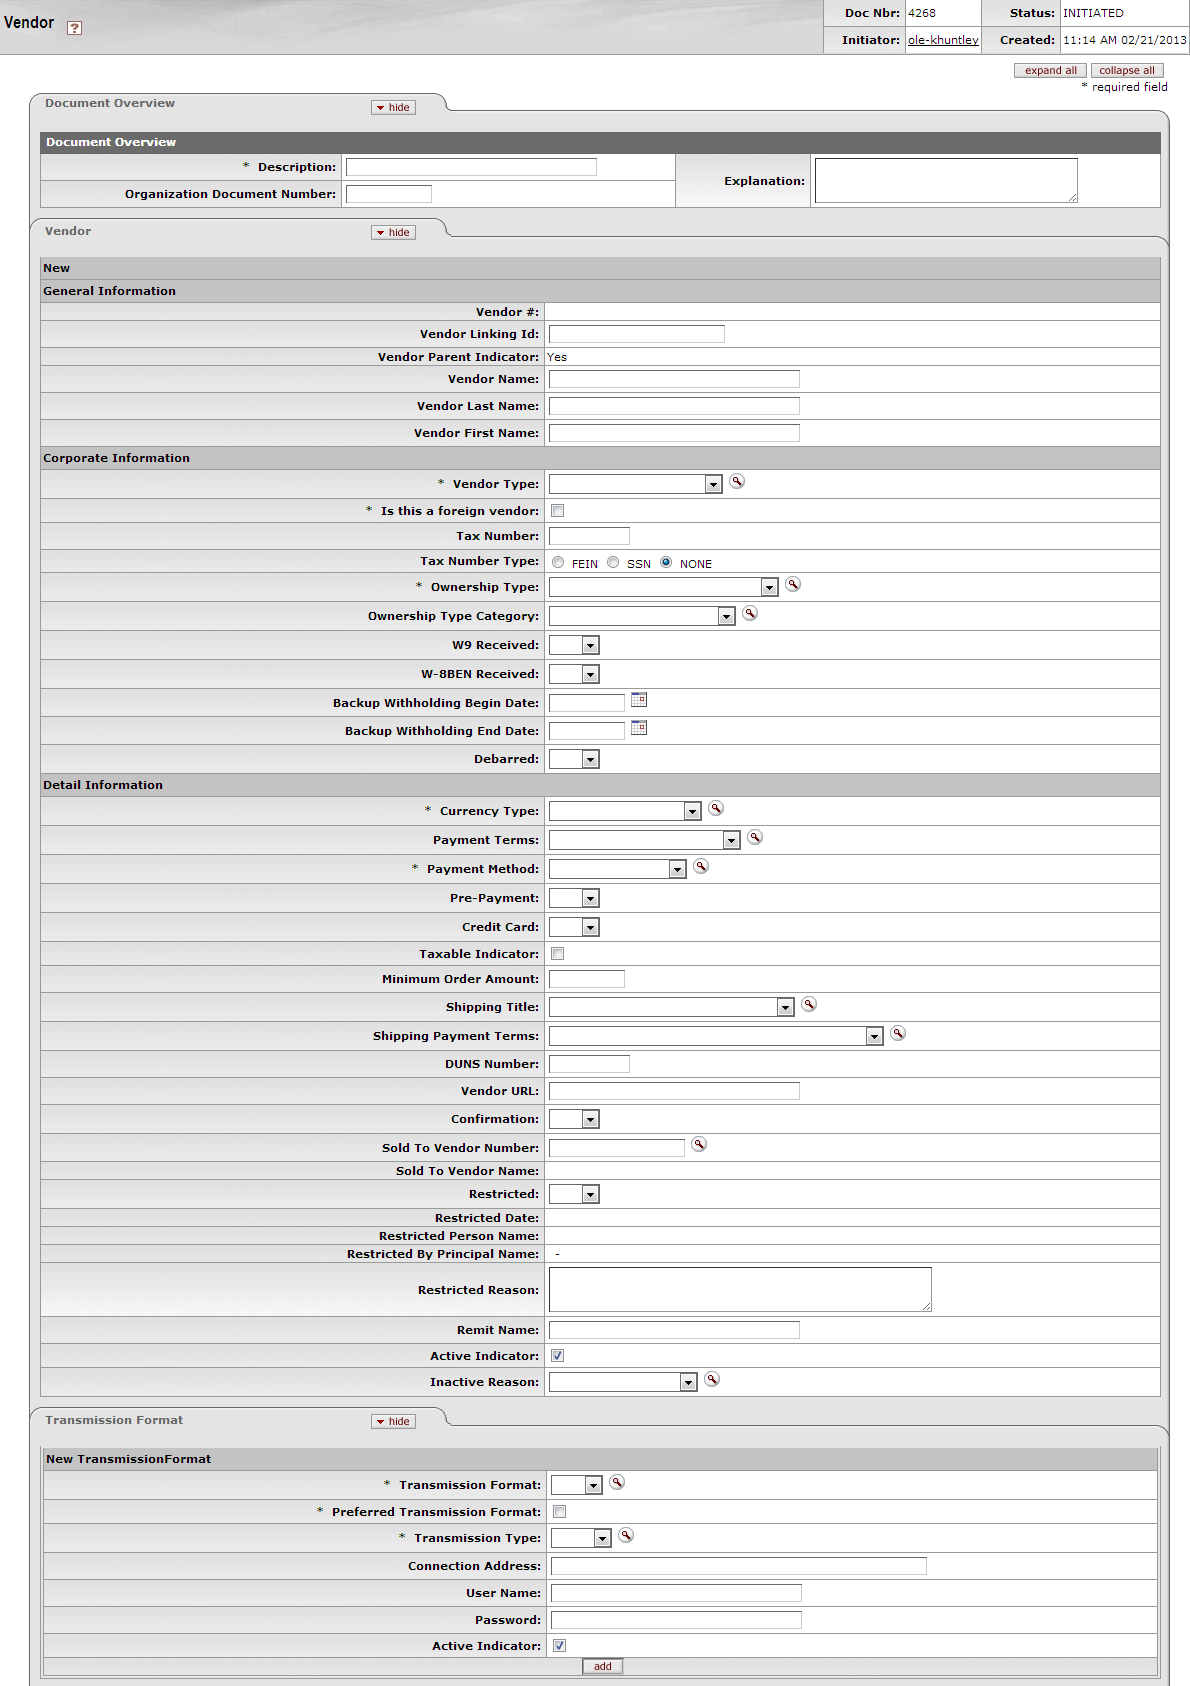 |
The Vendor tab collects fundamental information about a vendor such as the name, tax status and details. It is composed of three sections: General Information, Corporate Information and Detail Information sections.
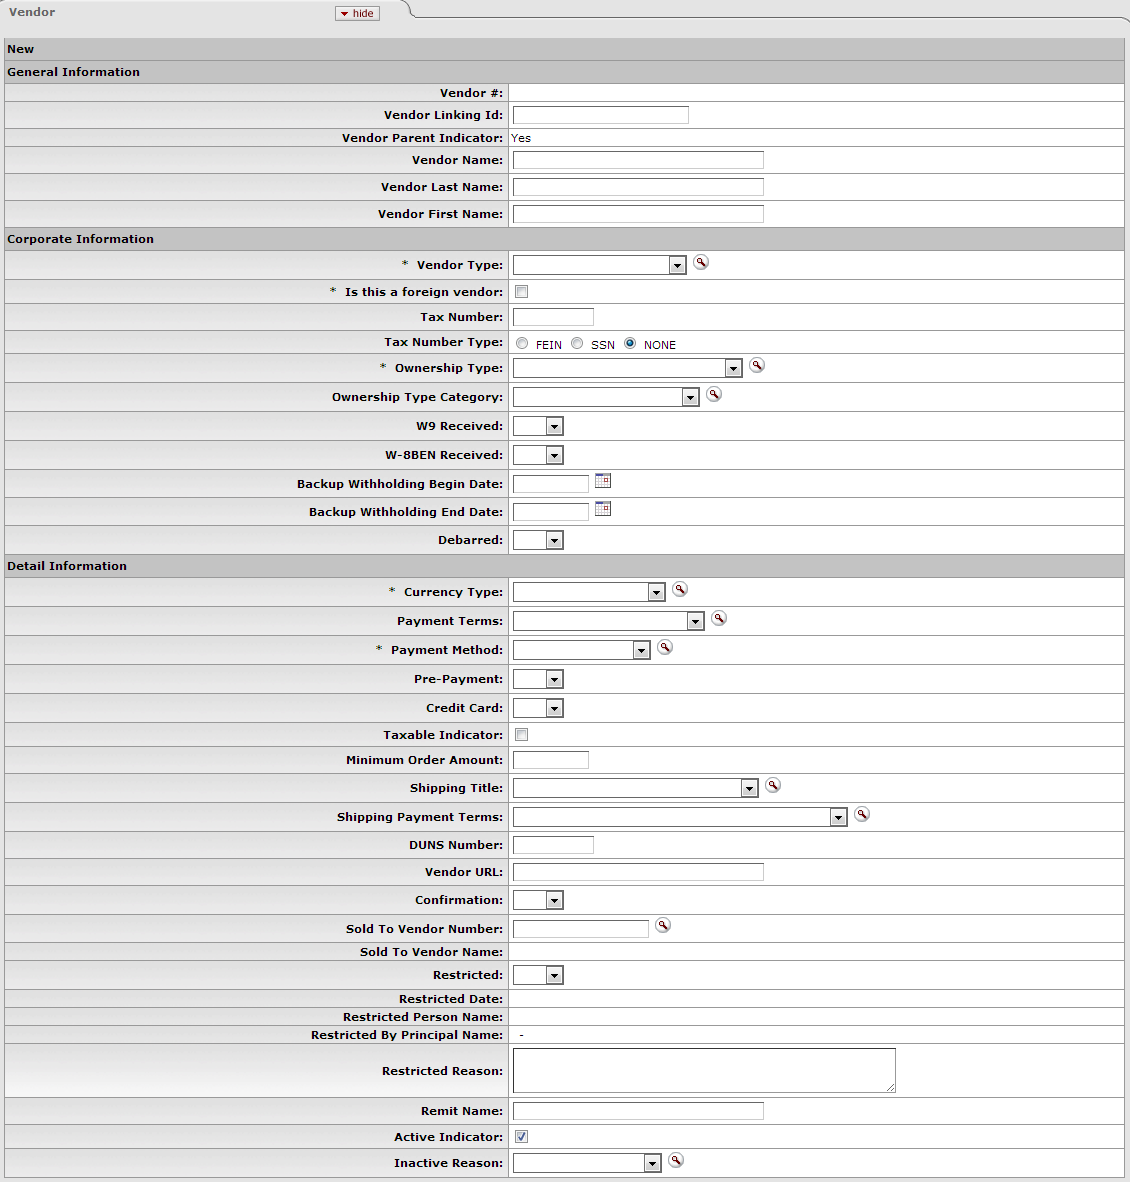
General information includes the Vendor Name and a system-assigned Vendor Number. This number is assigned when the document is approved.

General Information section definition
|
Title |
Description |
|
Vendor Number |
Display-only. A unique, system-generated number that identifies this vendor, assigned at the time the document is approved. |
|
Vendor Linking ID |
Locally defined. An identification to link OLE to your university’s accounts payable systems |
|
Vendor Parent Indicator |
Display only. Indicates whether the vendor is a parent or child record. |
|
Vendor Name |
Required if Vendor Last Name and Vendor First Name fields are blank. Enter the vendor name that is not a first and last name. If the vendor should be identified by a first and last name, leave this field blank. |
|
Vendor Last Name |
Required if Vendor Name field is blank. Enter the vendor last name. If the vendor should be identified by a company name or title, leave this field blank and use the Vendor Name field. |
|
Vendor First Name |
Required if Vendor Name field is blank. Enter the vendor first name. If the vendor should be identified by a company name or title, leave this field blank and use the Vendor Name field. |
Note
Either the vendor name or vendor first name and last name are required to identify the vendor.
The Corporate Information section includes the vendor tax information, such as tax number, ownership type, which tax forms are on file and any special withholdings or debarred information.
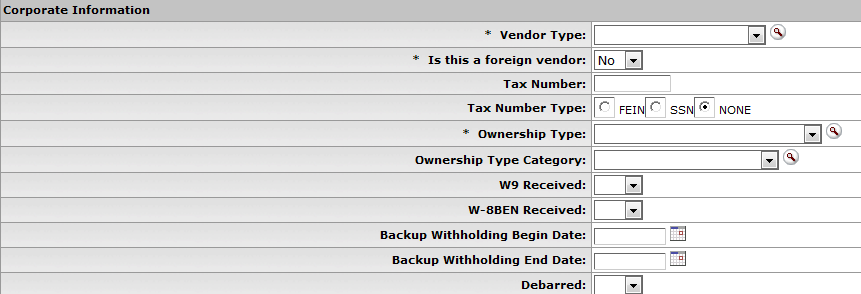
Corporate Information section definition
|
Title |
Description |
|
Vendor Type |
Required. Select the appropriate vendor type from the Vendor Type list or select if from the Vendor Type lookup |
|
Is this a Foreign Vendor? |
Required. Select 'Yes' from the list if the vendor should be identified as foreign. Select 'No' if the vendor is not identified as foreign. |
|
Tax Number |
Required for non-foreign vendors. Enter the vendor's tax ID number or SSN. |
|
Tax Number Type |
Required. Select the Tax Number Type option that describes the tax number entered in the Tax Number field. If no Tax Number was entered, select 'None. |
|
Ownership Type |
Required. Select the appropriate type from the Ownership Type list, or search for it from the Owner Type
lookup |
|
Ownership Category |
Optional. Select the appropriate category from the Ownership Category list, or search for it from the Owner
Category lookup |
|
W9 Received |
Optional. Select 'Yes' or 'No' from the list to indicate if a W9 has been received for this vendor. Certain types of vendors may be required to have a W9 on file before they may be approved for use. |
|
W-8BEN Received? |
Optional. Select 'Yes' or 'No' from the list to indicate if a W-8BEN has been received for this vendor. Certain types of foreign vendors may be required to have a W-8BEN on file before they may be approved for use. |
|
Backup Withholding Begin Date |
Optional. Enter the effective date for backup or select it from the
calendar |
|
Backup Withholding End Date |
Optional. Enter the date to discontinue backup withholding or select it
from the calendar |
|
Debarred |
Optional. Select 'Yes' or 'No' from the list to indicate whether or not this vendor has been debarred. This designation indicates that an institution has been barred from doing business with this vendor by the state or federal government. |
The Detail Information section contains additional data about the vendor including payment and shipping terms and whether or not they are restricted or inactive and why.
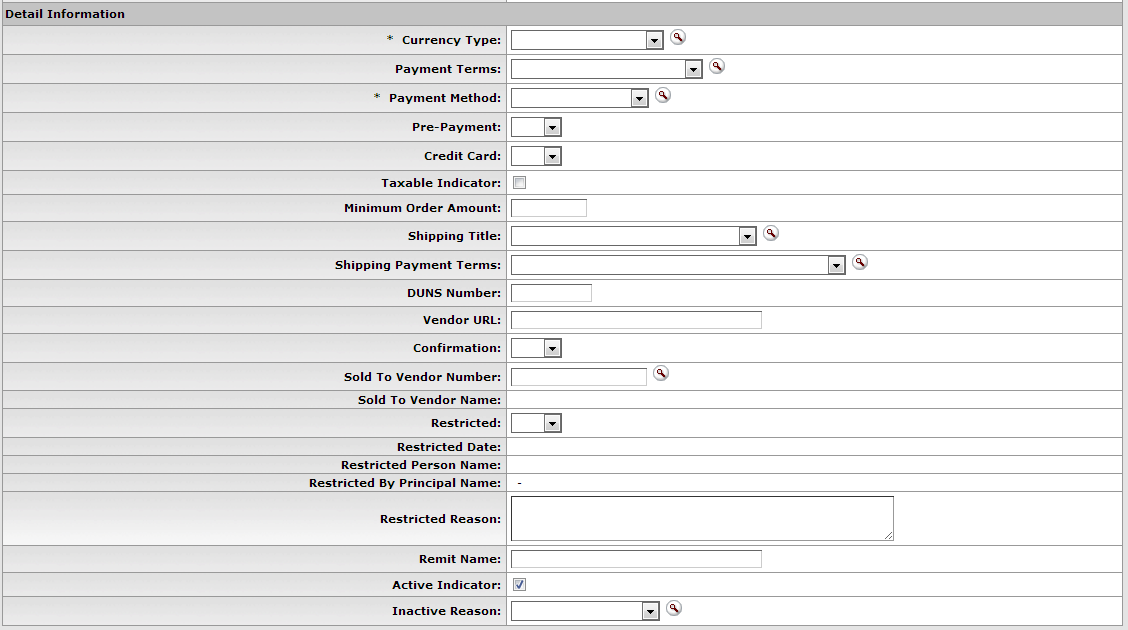
Detail Information section definition
The Transmission Formattab allows users to choose how purchase orders will be sent to vendors. Transmission formats could be EDI or PDF files while the transmission type could be set to FTP, Email, Mail, etc.
Be sure to select at least one Preferred Transmission Format on the Transmission format tab.
After entering the new transmission format information, click  to add it to the document.

Transmission Format tab definition
|
Title |
Description |
|
Transmission Format |
Required. Transmission format of the vendor. Select the appropriate
currency type from the Transmission Format list or select from the
Transmission Format lookup |
|
Preferred Transmission Format |
Indicate whether or not the vendor transmission format/type is the preferred one or not. Required. Select the check box if the Transmission Format is the preferred format. Clear the check box if it is not the preferred format. |
|
Transmission Type |
Required. Transmission Type of the Transmission Format. Select the
appropriate currency type from the Transmission Type list or select
from the Transmission Type lookup |
|
Connection Address |
Optional. Address of the transmission type. |
|
User Name |
Optional. User Name of the transmission type. |
|
Password |
Optional. Transmission Type password. |
|
Active Indicator |
Required. Select the check box if the Transmission Format is active. Clear the check box if it is inactive. |
The Address tab collects address information for a vendor. Different types of addresses may be entered, such as one for mailing purchase orders and another for remittance of payments. Vendors of a particular type may be required to have at least one address of a certain type (such as at least one 'remit to' address). Every vendor must have one default address.
After entering an address, click  to add it to the document.
Note
For more information about adding multiple addresses, see Collections'.
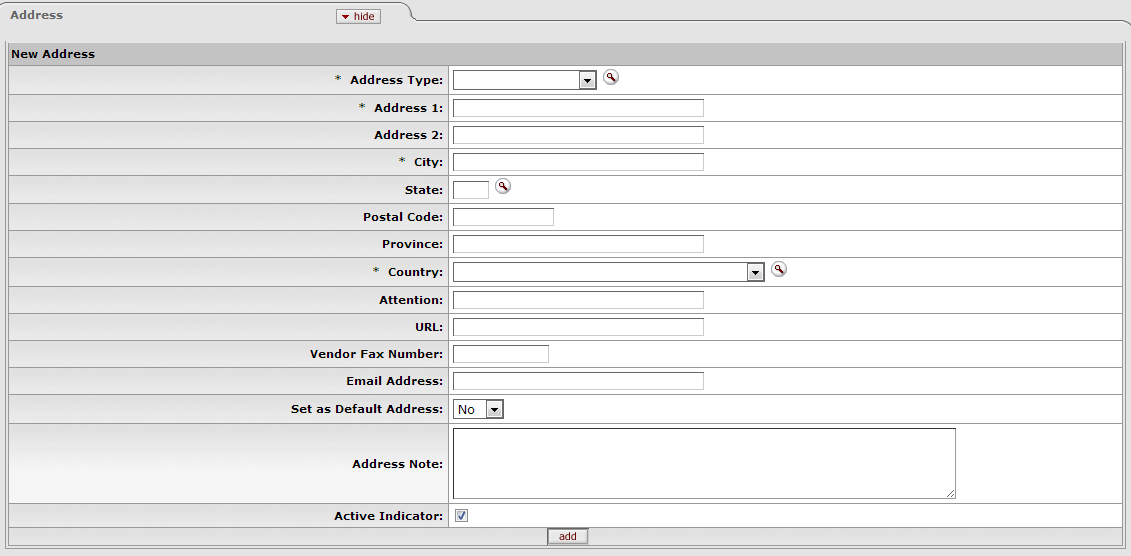
Address tab definition
|
Title |
Description |
|
Address Type |
Required. Select an address type from the Address
Type list or search for it from the Address Type lookup |
|
Address 1 |
Required. Enter the first line of the address information. |
|
Address 2 |
Optional. If necessary, enter the second line of the address information. |
|
City |
Required. Enter the city name for this address. |
|
State |
Optional. Select the state from the State
list or select it from the State Code lookup |
|
Postal Code |
Optional. Enter the postal code for this address. Postal code may be required under certain circumstances (such as when entering a US address). |
|
Province |
Optional. Enter the province for this address. |
|
Country |
Required. Select a country from the
Country list or select it from the Country lookup |
|
Attention |
Optional. Enter to whose attention it should be directed to, if you want this address to have an attention line. |
|
URL |
Optional. Enter a URL you want to associate with this vendor address. |
|
Vendor Fax Number |
Optional. Enter the vendor fax number you want to associate with this address. |
|
Email Address |
Optional. Enter the vendor email address you want to associate with this address. |
|
Set as Default Address |
Required. Select 'Yes' or 'No' from the list to indicate if this address should be used as the default for this vendor or not. Every vendor must have one default address. |
|
Address Note |
Optional. Enter additional information for the vendor’s address. |
|
Active Indicator |
Required. Select the check box if the address is active. Clear the check box if it is inactive. |
The Contact tab collects contact information for a vendor. Different types of contacts may be entered, such as sales, technical and customer service representatives.
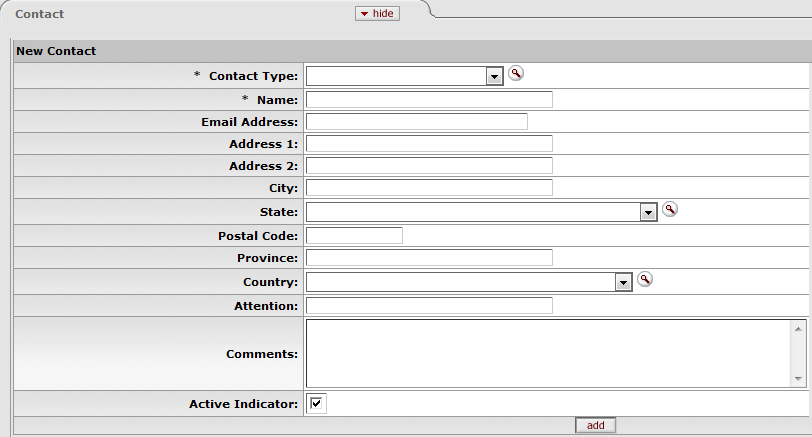
Contact tab definition
|
Title |
Description |
|
Contact Type |
Required. Select contact type from the Contact Type
list or select it from the Contact Type lookup |
|
Name |
Required. Enter the name of the contact. |
|
Email Address |
Optional. Enter the email address for this contact. |
|
Address 1 |
Optional. Enter the first line of the address information for this contact. |
|
Address 2 |
Optional. Enter the second line of the address information for this contact. |
|
City |
Optional. Enter the city name for this contact. |
|
State |
Optional. Select the state from the State
list or select it from the State Code lookup |
|
Postal Code |
Optional. Enter the postal code for this contact. |
|
Province |
Optional. Enter the province name for this contact. |
|
Country |
Optional. Select the country from the Country list or select it from the Country lookup |
|
Attention |
Optional. Enter to whose attention it should be directed to, if you want this address to have an attention line. |
|
Comments |
Optional. Enter any additional comments about this contact. |
|
Active Indicator |
Required. Select the check box if the contact is active. Clear the check box if it is inactive. |
After entering a contact, click  to add it to the document.
Note
For more information about adding multiple contacts, see 'Collections'.
The Supplier Diversity tab is used to indicate if any recognized supplier diversity categories apply to this vendor. The Small Business Administration has defined supplier diversity categories which may be based on size (small business), ownership (woman or minority owned), and/or geographical location (local).

Supplier Diversity definition
|
Title |
Description |
|
Supplier Diversity |
Required when the tab is used. Select the supplier diversity type from the
Supplier Diversity list or select it from the Supplier Diversity
lookup |
|
Active Indicator |
Required. Select the check box if the supplier diversity type is active. Clear the check box if it is inactive. |
After selecting a supplier diversity type, click  to add it to the document.
Note
For more information about adding multiple supplier diversity types, see 'Collections'.
The Shipping Special Conditions tab is used to indicate whether Accounts Payable is allowed to pay for additional freight charged when the vendor invoices for goods or services. Examples might include 'Express,' or 'Insured.'

Shipping Special Conditions tab definition
|
Title |
Description |
|
Shipping Special Conditions |
Required. Select the type from the Shipping Special
Conditions Type list or select it from the Shipping Special
Condition lookup |
|
Active Indicator |
Required. Select the check box if the shipping special conditions type is active. Clear the check box if it is inactive. |
After selecting a shipping special condition, click  to add it to the document.
Note
For more information about adding multiple shipping special condition types, see 'Collections'.
The Vendor Commodity Codes tab is used to assign commodity codes to this vendor. A commodity code may be added only by a Purchasing Department staff member.
The Purchasing Department assigns commodity codes to vendors in order to track spending by category. A vendor may be assigned multiple commodity codes. For example, a local company that both prints and designs documents might have two different commodity codes, one for printing and one for design.
Note
For information about adding commodity codes, see Commodity Code.

Vendor Commodity Codes tab definition
|
Title |
Description |
|
Commodity Code |
Optional. Enter the commodity code. |
|
Commodity Default Indicator |
Optional. Select the check box if this commodity code is to be used as the default for this vendor. This commodity code is used on APOs where an institution has indicated that the commodity code is required on POs but not on requisitions. Clear the check box if this commodity code is not to be used as the default. |
|
Active Indicator |
Optional. Select the check box if this commodity code is active for this vendor. Clear the check box if it is inactive for this vendor. |
After entering a commodity code, click  to add it to the document.
Note
For more information about adding multiple commodity codes, see 'Collections'.
The Search Alias tab is used to define other names that may be used when searching for this vendor. Search aliases can be used in future lookups as abbreviated forms of long vendor names, or to denote external vendor codes or standard address numbers (SAN). Alias types include Abbreviation, Vendor Code, etc.

Search Alias tab definition
|
Title |
Description |
|
Search Alias Name |
Required. Enter the alternate name that may be used to search for this vendor. |
|
Alias Type |
Optional. Identify the search alias type or select the type from the
Alias Type lookup |
|
Active Indicator |
Required. Select the check box if the search alias name is active. Clear the check box if it is inactive. |
After entering a search alias, click  to add it to the document.
Note
For more information about adding multiple aliases, see 'Collections'.
The Vendor Phone Number tab collects phone numbers for this vendor. It may be used to define various types of phone numbers. Examples of different phone number types include 'Toll Free,' 'Mobile,' and 'Purchase Order.'

Vendor Phone Number tab definition
|
Title |
Description |
|
Phone Type |
Required. Select the phone type from the Phone
Type list or select it from the Phone Type lookup |
|
Phone Number |
Required. Enter the phone number. |
|
Extension |
Optional. Enter the extension for the phone number. |
|
Active Indicator |
Required. Select the check box if the vendor phone number is active. Clear the check box if it is inactive. |
After entering a phone number, click  to add it to the document.
Note
For more information about adding multiple phone numbers, see 'Collections'.
The Acquisition Unit Vendor Account tab collects information about numbers the vendor uses to identify your institution. Multiple customer numbers may exist for the same vendor and they are specific to a chart and organization.
This is where libraries can record local account information for different departments purchasing authority within the same vendor e-doc.

Acquisition Unit Vendor Accounts tab definition
|
Title |
Description |
|
Acquisition Unit’s Vendor account / Vendor Info Customer # |
Required. Enter the number this vendor uses to identify your institution or organization as a customer. |
|
Chart Code |
Required. Select the chart this customer number should be associated with
from the Chart Code list or select it from the Chart lookup |
|
Account Number Owner (Organization Code) |
Optional. Enter an organization code to associate with this customer number
or select it from the Organization Code lookup |
|
Discount |
Optional. Enter the value of the discount. |
|
Discount Type |
Optional. Select the type of discount. |
|
Standard Delivery Carrier |
Optional. Enter the Delivery Carrier or select it from the Carrier lookup |
|
Standard Delivery Carrier Interval |
Optional. Enter the days from order date to delivery; used as default claim interval in POs |
|
Active Indicator |
Required. Select the check box if the customer number is active. Clear the check box if it is inactive. |
After entering a phone number, click  to add it to the document.
The Contracts tab collects information about contracts your institution has with this vendor. It includes information such as who manages the contract for your institution, when it begins and ends, any special payment or shipping terms that may specifically apply to the vendor. The Contracts tab is viewable only by the members of the OLE-PURAP Purchasing Processor role.
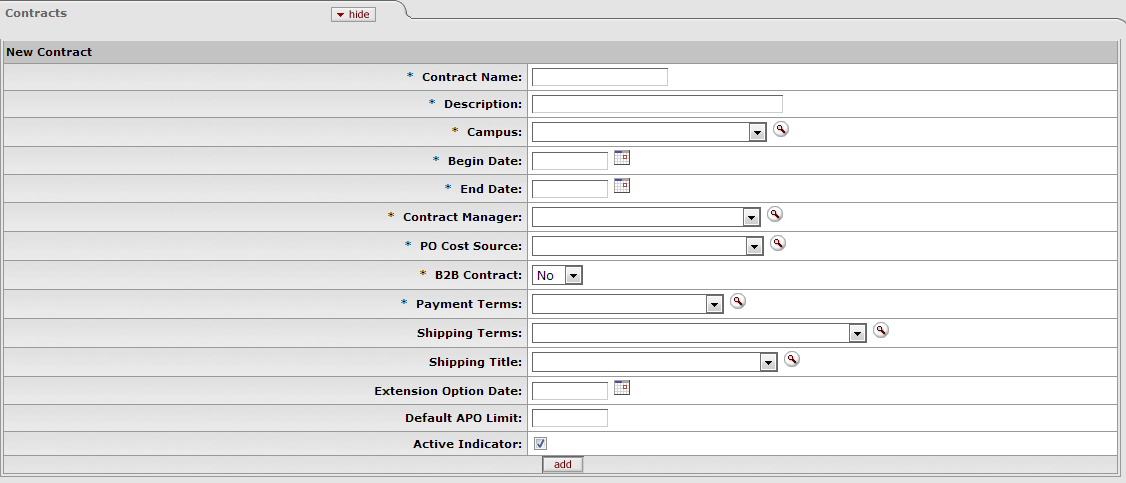
Contracts tab definition
|
Title |
Description |
|
Contract Name |
Required. Enter the name used to identify this vendor contract. |
|
Description |
Required. Enter a text description that describes the contract. |
|
Campus |
Required. Select what institution campus this contract is associated with
from the Campus list or select it from the
Campus lookup |
|
Begin Date |
Required. Enter the effective date of the contract or select it from the
calendar |
|
End Date |
Required. Enter the expiration date of the contract or select it from the
calendar |
|
Contract Manager |
Required. Select the name of the person at your institution who manages
this contract from the Contract Manager list or search for it from
the Contract Manager lookup |
|
PO Cost Source |
Required. Select a cost source for this contract from the PO
Cost Source list or search for it from the Purchase Order Cost Source lookup |
|
B2B Contract |
Select the business-to-business contract (yes, no) from the list |
|
Payment Terms |
Required. Select the payment terms for this contract from the Payment Terms list or search for it from the Payment
Term Type lookup |
|
Shipping Terms |
Optional. Select the shipping terms for this contract from the Shipping Terms list or search for it from the Shipping
Payment Terms lookup |
|
Shipping Title |
Optional. Select a shipping title for this contract from the Shipping Title list or search for it from the Shipping
Title lookup |
|
Extension Option Date |
Optional. Enter the date up until the contract may be extended or select it
from the calendar |
|
Default APO Limit |
Optional. Enter the upper dollar amount for which automatic purchase orders (APOs) under this contract may be created. |
|
Active Indicator |
Required. Select the check box if the contract is active. Clear the check box if it is inactive. |
After entering a contract, click  to add it to the document.
Note
For more information about adding multiple contracts, see 'Collections'.
Staff with appropriate levels of security can add, modify or delete data in the vendor record.
Either Vendor Name or Vendor Last Name and Vendor First Name fields must be filled.
If Vendor Name field is entered, Vendor First Name and Vendor Last Name fields must be blank.
If Vendor First Name and Vendor Last Name fields have been entered, the Vendor Name field must be blank.
Tax number must be 9-digits and cannot be all zeros.
The first three digits of an SSN cannot be '000' or '666.
The middle two digits of an SSN cannot be '00.
The last four digits of an SSN cannot be '0000.
The first two digits of a FEIN cannot be '00.
The vendor's Tax Number must be unique unless it is a division of a parent vendor.
Vendors of type 'Purchase Order' must have an address of the type 'Purchase Order.
Vendors of type 'Disbursement Voucher' must have an address of the type 'Remit.
A vendor must have one and only one address marked as a default address.
If a country for an address is 'United States' then state and zip code are required.
Phone and fax numbers must be formatted as ###-###-####.
If the Category Allowed Indicator for a specific ownership type is 'N' (No) then vendor category must be left blank.
If the SSN Allowed Indicator for this ownership type is 'N' (No) then the tax number type must not be SSN.
If the FEIN Allowed Indicator for this ownership type is 'N' (No) then the tax number type must not be FEIN.
Contract begin date must be earlier than contract end date.
Note
Note: In many of the tabs, at least one address or contact etc. must have Active Indicator checked. Otherwise when the user tries to submit the Vendor e-doc, the system will display an error message. If you input any information on the other tabs, then their local tab requirements are noted with asterisks as well.
 >
>  >
>  >
> 
Document Store Search is located on the Vendor submenu on the Select/Acquire tab. The Document Store Search is a content management system for library records such as Bibliographic, Instance (Holdings and Items), Licenses, etc.
Note
Note for searching records: Breadcrumbs are planned for a later release, for now you can navigate through the Doc Store but will want to make note of where you have been if you want to return to the same record.
From the Document Store Search, bibliographic data in the DocStore can be searched in a variety of ways. Select options from the dropdown menus and enter information to refine the search.
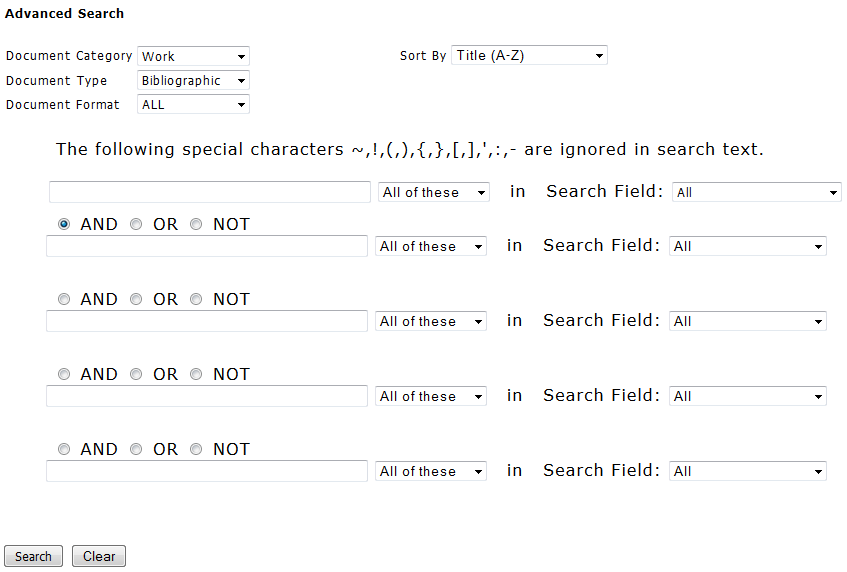
Advance Search Field Definitions
|
Title |
Description |
|
Document Category |
General category of documents being searched. NoteWork is the only valid category in 1.0 |
|
Document Type |
Type of documents associated with a category. For the category Work, these include bibliographic, licenses, Instances, items, etc. |
|
Document Format |
Limits searches to a specific data format (i.e., MARC, Dublin Core). Defaults to ALL. |
|
Sort By |
Sorts the records by title, author, publication date, and relevance |
Five search lines are provided in the Document Store Discovery Layer. Standard Boolean operators (AND, OR, NOT) can be chosen to combine the search terms. Truncation is not automatic in OLE 1.0; the truncation symbol is an asterisk. An asterisk can also be used as a wildcard character within a word.
Note
Known bug: Special characters such as ‘&’ and ‘:’ are not recognized when searching.
A default sort for the result set can be specified from either the search or the
results screen. After all search and sort parameters are entered, click  .
.
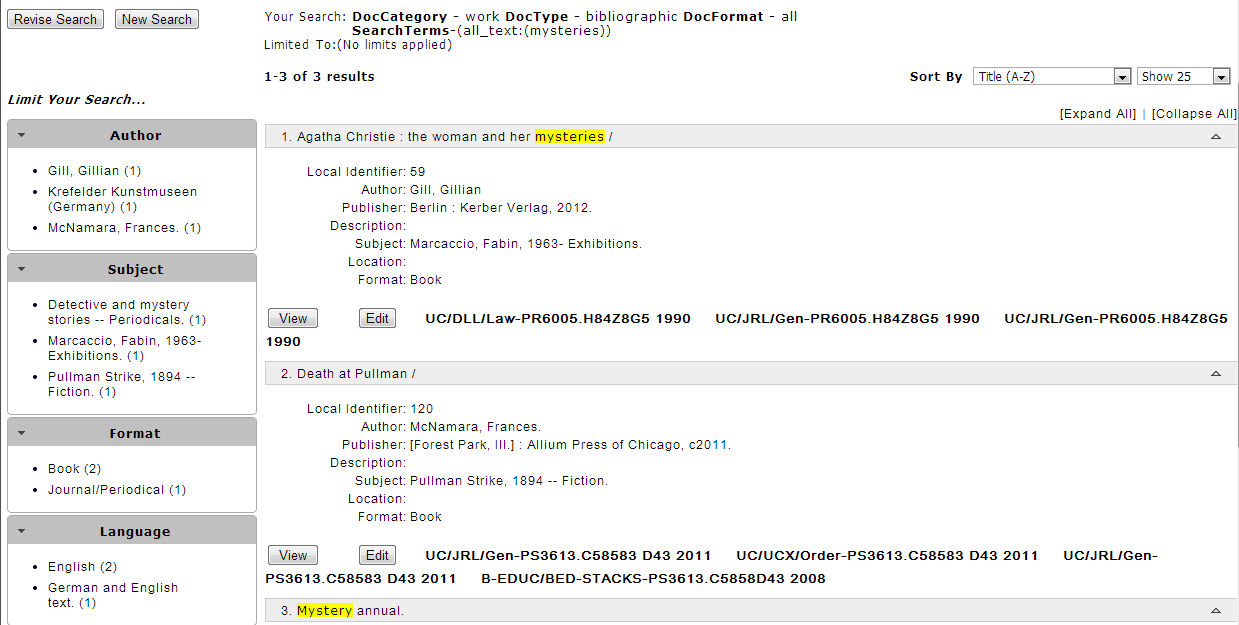
A short selection of fields from the bibliographic data is displayed for each title.
To refine your search, you can use the facets on the left-hand side of the results screen:
Clicking on these returns a smaller, more limited search result set. Clicking on more than one facet reduces the result set even further. The facets being used for limiting results are shown at the top of the results index:

To remove a limit, click on the red [x] next to it.
The search results are then re-displayed with that limit removed.
If you need to see more titles on a screen, each entry can be collapsed to show only its titles. All entries can be collapsed at once by using the Collapse All link in the upper right:

To view more results you may slide or click on the search bar, type in a page number, or hover your mouse near the left of the Selected page field to use the up/down arrows. You will then need to click Go to page.

OLE is designed to search data in a variety of formats. OLE contains bibliographic data in MARC and Dublin Core formats, both stored in XML. The record format is shown at the bottom of the bibliographic information.
Just below the bibliographic details for each title are links to the XML
versions. Click  to open an XML version of the record in a new window or browser tab:
Click  to open the Bibliographic Editor.
Note
For more information about the bibliographic editor, see the Editors section of the Guide to the Describe and Manage Module.
Note
Note: The View and Edit buttons will most likely change in future releases.
At any time, you may choose to revise your search or start a new search. These options are located at the top left side of the results screen.
Click the OLE tab to return to OLE's main portal.

Some bibliographic search results may include link(s) to one to many Instance (with Holding) and Item records, for those created during acquisitions or as part of OLE sample data:
You may select the call number link to see the Instance metadata, or link from it to further Holding or Item(s) data. There is limited data in the Item records that have been added to the Document Store. To return to the Bibliographic description, click the Title link.
To return to your search results, use your browser's navigation.
At present, users only have the Search Field option "source" available when searching Instance documents, but can further search Holdings data like below:

Or further, test searching on Item data.
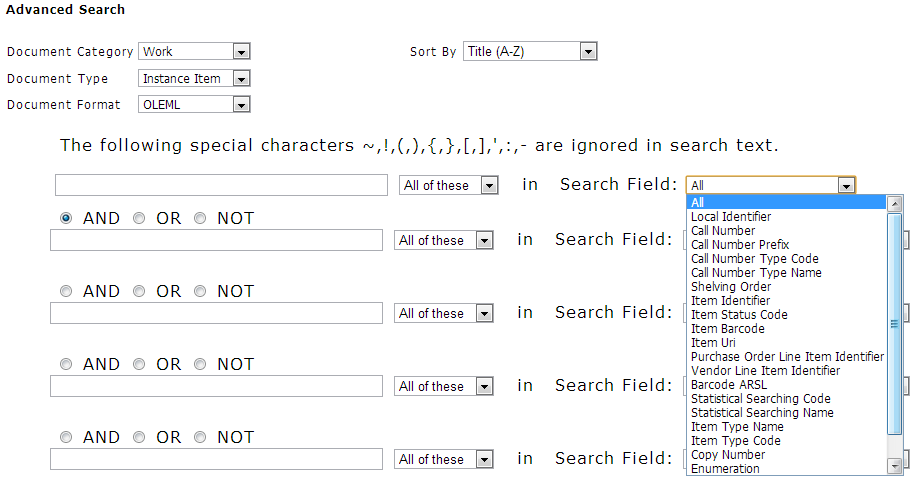
Facets for Holdings and Item data (such as location, call number sorting, etc.) will be designed and released in the future.
Notes and Tips on Bib, Instance and Item searching
Breadcrumbs are planned for a later release, for now you can navigate through the DocStore but will want to make note of where you have been if you want to return to the same record.
If you use multiple words in your search, only one gets highlighted in the search results, and it’s the first word that appears in the document (not the first word in your list of search terms).
If you search for a word in plural form, OLE will show results for the singular form as well.
Click the OLE tab to return to OLE's main portal.

Click  to see Instance, Holdings or Items in their raw .xml form. OLE will generate
new Instance/Holding/Item documents during the Import or Load process or during
Requisition-to-Purchase Order creation. You may also create and edit Instances through the Instance
Editor.
Note
For more information about the Instance editor, see the Instance Editor section of the Guide to the Describe and Manage Module.
 >
>  >
> >
>
OLE offers a general search for acquisition e-docs. The search screen contains the standard acquisition and bibliographic search fields.
Using the bibliographic search fields will result in acquisition documents pertaining to that title.
Note
For information about performing a search for one or more credit memos, see Performing Acquisition Searches on the OLE E-Doc Fundamentals wiki page.
Table of Contents
- Address Type
- Campus
- Commodity Code
- Contact Type
- Contract Manager
- Cost Source
- Ownership Type
- Ownership Type Category
- Payment Terms Type
- Phone Type
- Shipping Payment Terms
- Shipping Special Conditions
- Shipping Title
- Supplier Diversity
- Vendor Inactive Reason
- Vendor Search Alias Type
- Vendor Transmission Format
- Vendor Transmission Type
- Vendor Type
 >
>  >
> 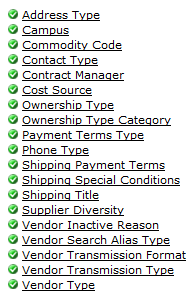
The Maintenance Menu provides access to many vendor-related e-docs that allow you to update vendor attributes used by the Vendor document.
 >
>  >
>  >
>  >
> 
The Address Type document is used to establish codes used to categorize various types of vendor addresses. These types can be used to identify different addresses for different purposes, such as defining one address to which purchase orders should be sent and another address to which tax documents should be addressed.
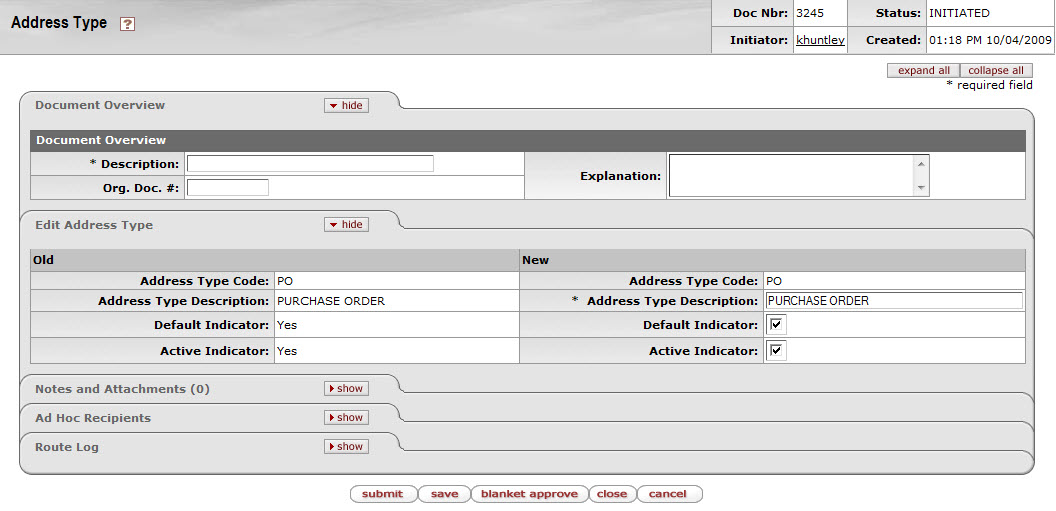
The Address Type document includes the Edit Address Type tab. The system automatically enters data into both the Old and New sections in this tab. Selected data fields are available for editing.
Edit Address Type tab definition
|
Title |
Description |
|
Address Type Code |
The code to identify a type of vendor address. |
|
Address Type Description |
Required. The familiar title of the vendor addresses type. |
|
Default Indicator |
Optional. Select the checkbox if an address of this type can be marked as the default address for a vendor. Clear the checkbox if it should not be used as a default. |
|
Active Indicator |
Indicates whether this vendor address is active or inactive. Remove the check mark to deactivate. |
 >
>  >
>  >
>  >
> 
The Campus document defines basic identifying attributes of a campus-level purchasing unit at your institution.
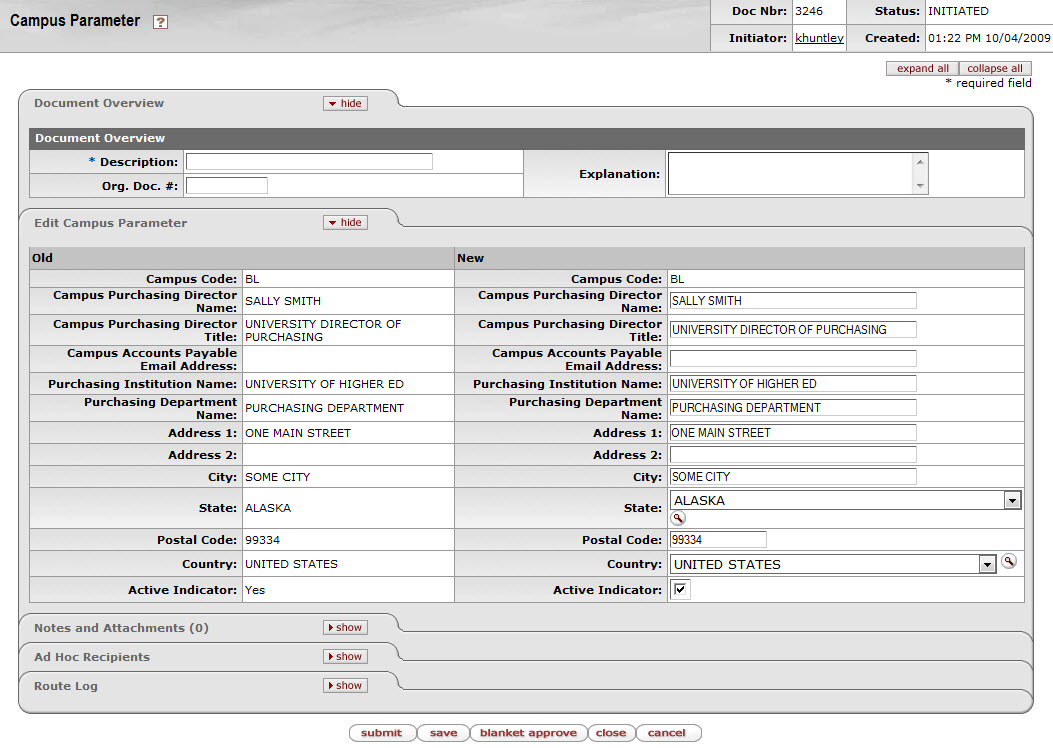
The Campus Parameter document includes the Edit Campus Parameter tab. The system automatically enters data into both the Old and New sections in this tab. Selected data fields are available for editing.
Edit Campus Parameter tab definition
|
Title |
Description |
|
Campus Code |
The campus code for which the parameters are used. |
|
Campus Purchasing Director Name |
The name of the purchasing director associated with this campus. |
|
Campus Purchasing Director Title |
The title of the purchasing director for this campus. |
|
Campus Accounts Payable Email Address |
The accounts payable email address for this campus. |
|
Purchasing Institution Name |
The institution's name that is associated with this campus code. |
|
Purchasing Department Name |
The Purchasing Department name for this campus. |
|
Address 1 |
The first line of the address for this campus office. |
|
Address 2 |
The second line of the address for this campus office. |
|
City |
The city for this campus office. |
|
State |
The state for this campus office.
Existing state codes may be retrieved from the list or from
the lookup |
|
Postal Code |
The postal code for this campus office. |
|
Country |
The country for this campus office.
Existing restricted status codes may be retrieved from the
list or from the lookup |
|
Active Indicator |
Indicates whether this campus parameter is active or inactive. Remove the check mark to deactivate. |
 >
>  >
>  >
>  >
> 
The Commodity Code document defines categories of items purchased from a vendor by assigning a set of attributes to a code.
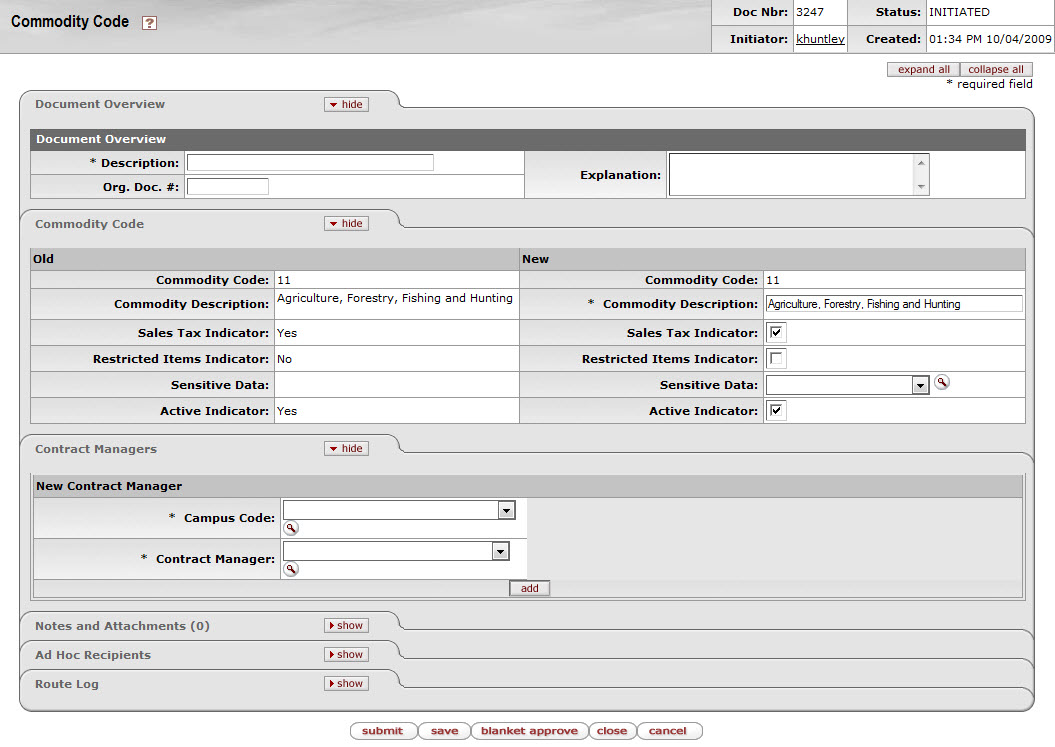
The Commodity Code document includes the Commodity Code tab and the Contract Managers tab.

The system automatically enters data into both the Old and New sections of this tab. Selected data fields are available for editing.
Commodity Code tab definition
|
Title |
Description |
|
Commodity Code |
The commodity code. Commodity codes can be used to categorize purchases. OLE is not delivered with a commodity code structure, but the system is designed so that industry standards can be loaded into the table or your organization can adopt its own coding structure. |
|
Commodity Code Description |
Required. A description of the commodity code. |
|
Sales Tax Indicator |
Indicates if sales tax applies to this commodity code. Remove the check mark if sales tax does not apply. |
|
Restricted Items Indicator |
Indicates if this is a commodity code of restricted items. Remove the check mark if there are no restrictions on items associated with this commodity code. |
|
Sensitive Data |
Optional. The type of sensitive
data for the commodity code. Existing sensitive data
descriptions may be retrieved from the list or from the
lookup |
|
Active Indicator |
Indicates whether this commodity code is active or inactive. Remove the check mark to deactivate. |

Note that multiple Campus Code/Contract Manager combinations may be assigned to the commodity code by clicking add after entering data for each combination.
Note
For more information about assigning multiple Campus Code/Contract Manager combinations, see 'Collections'.
Contract Managers tab definition
|
Title |
Description |
|
Campus Code |
Required. The campus for the
commodity code. Existing campus codes may be retrieved
from the list or from the lookup |
|
Contract Manager |
Required. The contract manager for
the commodity code. Existing contract managers may be
retrieved from the list or from the lookup |
 >
>  >
>  >
>  >
> 
The Contact Type document is used to establish various roles of the vendor contact, which may assist in determining how inquiries should be directed to the vendor. Examples of contact types include 'Accounts Receivable,' 'Sales Rep,' and 'Customer Service.'
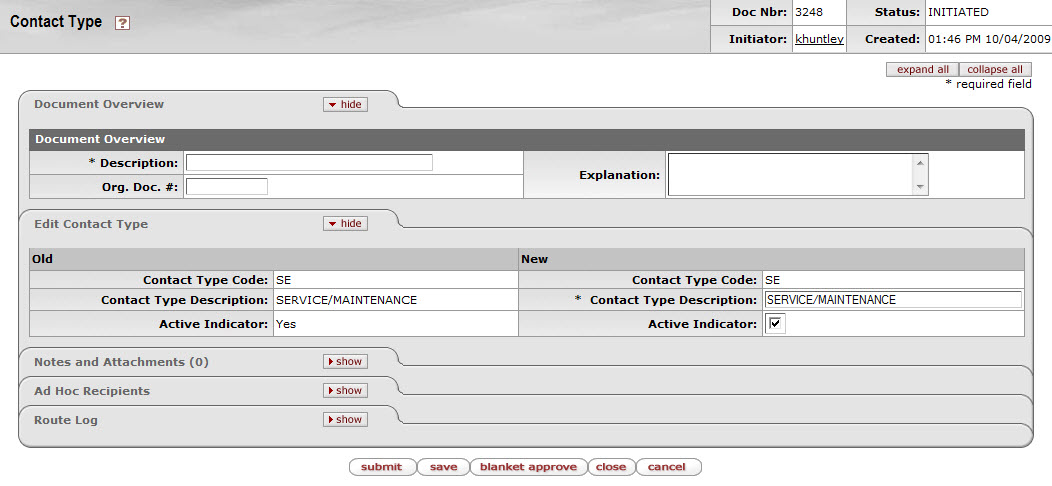
The Contact Type document includes the Edit Contact Type tab. The system automatically enters data into both the Old and New sections of this tab. Selected data fields are available for editing.
Edit Contact Type tab definition
|
Title |
Description |
|
Vendor Contact Type Code |
The code used to identify a type of vendor contact. |
|
Vendor Contact Type Description |
Required. The title of the contact type. |
|
Active Indicator |
Indicates whether this contact type is active or inactive. Remove the check mark to deactivate. |
 >
>  >
>  >
>  >
> 
The Contract Manager document is used to establish the list of individuals at the institution who are responsible for managing contracts for specific vendors. When associating a contract with a vendor in the Vendor document, a Contract Manager must be selected.
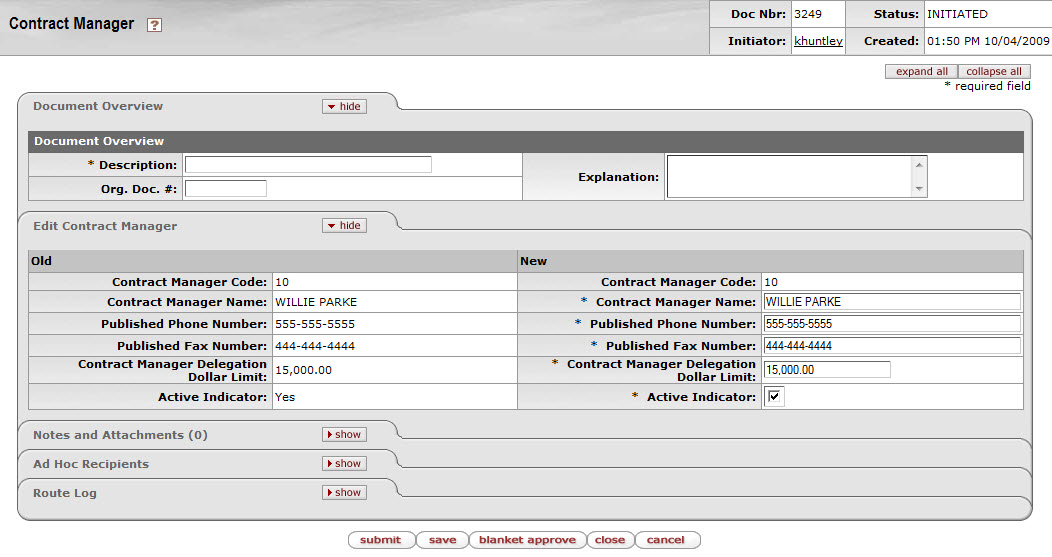
The Contract Manager document includes the Edit Contract Manager tab. The system automatically enters data into both the Old and New sections in this tab. Selected data fields are available for editing.
Edit Contract Manager tab definition
|
Title |
Description |
|
Contract Manager Code |
The code used to identify this contract manager. |
|
Contract Manager Name |
Required. The contract manager's name. |
|
Published Phone Number |
The published phone number of the contract manager, including area code. |
|
Published Fax Number |
Required. The published fax number of the contract manager, including area code. |
|
Contract Manager Delegation Dollar Limit |
Required. The upper dollar amount for which this contract manager is allowed to delegate approval authority. |
|
Active Indicator |
Indicates whether this contract manager is active or inactive. Remove the check mark to deactivate. |
 >
>  >
>  >
>  >
> 
The Cost Source document is used to establish codes that identify the method used to determine the pricing for a purchase order. Examples might include 'Quote', 'Estimate', 'Pricing Agreement', or the name of an affiliation that has negotiated a contract with one or more vendors.
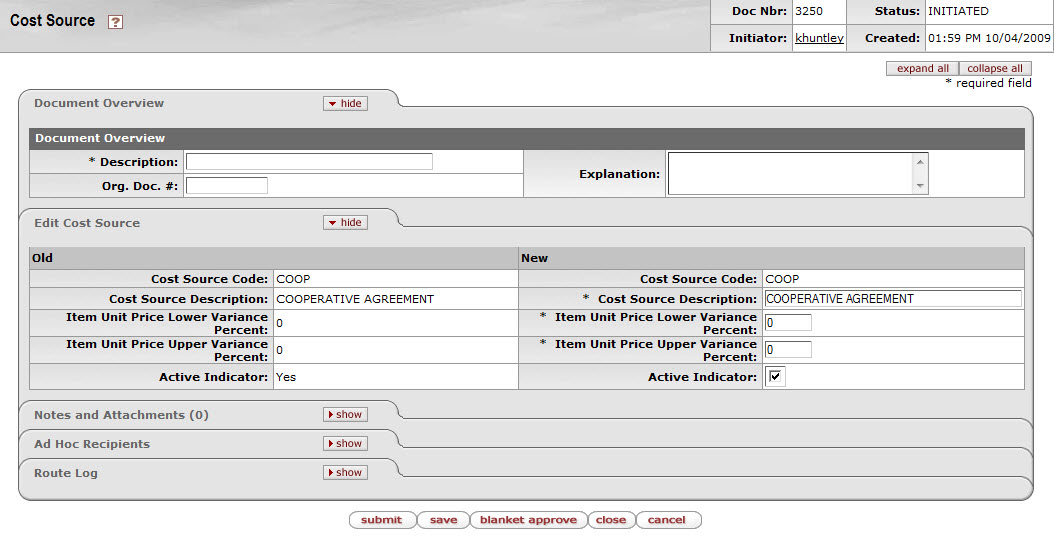
The Cost Source document includes the Edit Cost Source tab. The system automatically enters data into both the Old and New sections in this tab. Selected data fields are available for editing.
Edit Cost Source tab definition
|
Title |
Description |
|
Cost Source Code |
The code used to identify this purchase order cost source. |
|
Cost Source Description |
Required. The familiar title of the purchase order cost source. |
|
Item Unit Price Lower Variance Percent |
Required. Payment will not be made if the price variance is lower by this percentage. |
|
Item Unit Price Upper Variance Percent |
Required. Payment will not be made if the price variance is higher by this percentage. |
|
Active Indicator |
Indicates whether this cost source code is active or inactive. Remove the check mark to deactivate. |
 >
>  >
>  >
>  >
> 
The Ownership Type document is used to define the vendor for tax and reporting purposes, indicating for example, that the vendor is an individual, corporation, or non-profit entity. It also indicates if vendors of this type can be further defined using an Ownership Category.

The Ownership Type document includes the Edit Ownership Type tab. The system automatically enters data into both the Old and New sections in this tab. Selected data fields are available for editing.
Edit Ownership Type tab definition
|
Title |
Description |
|
Ownership Code |
The code used to identify this ownership type. |
|
Ownership Description |
Required. The familiar title of the ownership type. |
|
Ownership Type Category Allowed Indicator |
Indicates if a vendor with this ownership type is allowed to have an ownership category. Remove the check mark if ownership category is not allowed. |
|
Active Indicator |
Indicates whether this ownership type code is active or inactive. Remove the check mark to deactivate. |
 >
>  >
>  >
>  >
> 
Certain ownership types allow the selection of further refining ownership type category. The Ownership Type Category document further defines a vendor's ownership within Ownership Type.
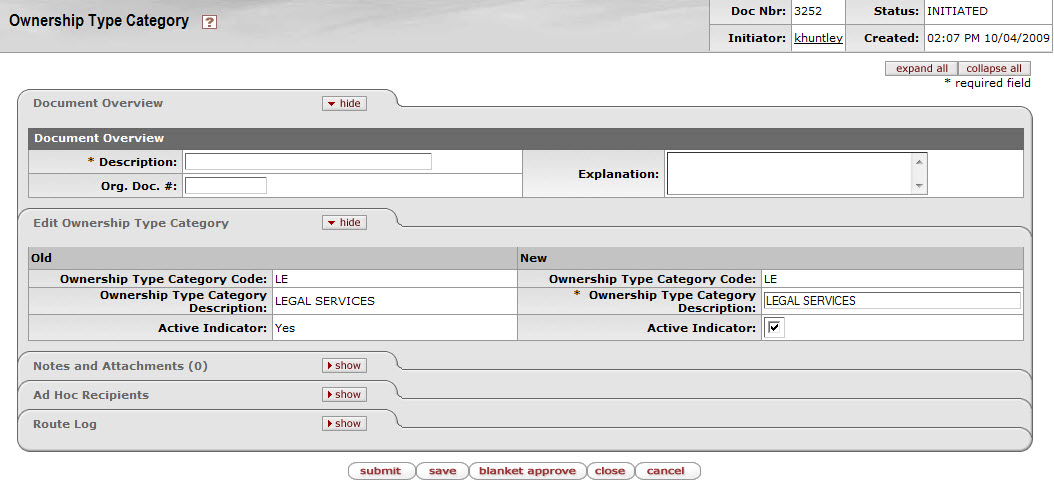
The Ownership Category document includes the Edit Ownership Category tab. The system automatically enters data into both the Old and New sections in this tab. Selected data fields are available for editing.
Edit Ownership Category tab definition
|
Title |
Description |
|
Ownership Type Category Code |
The code used to identify this ownership type category. |
|
Ownership Type Category Description |
Required. The familiar title of the ownership type category. |
|
Active Indicator |
Indicates whether this ownership type category code is active or inactive. Remove the check mark to deactivate. |
 >
>  >
>  >
>  >
> 
The Payment Terms Type document is used to establish codes that define a vendor's payment terms, including the number of days in which a payment is due and if a discount is available for prompt payment.
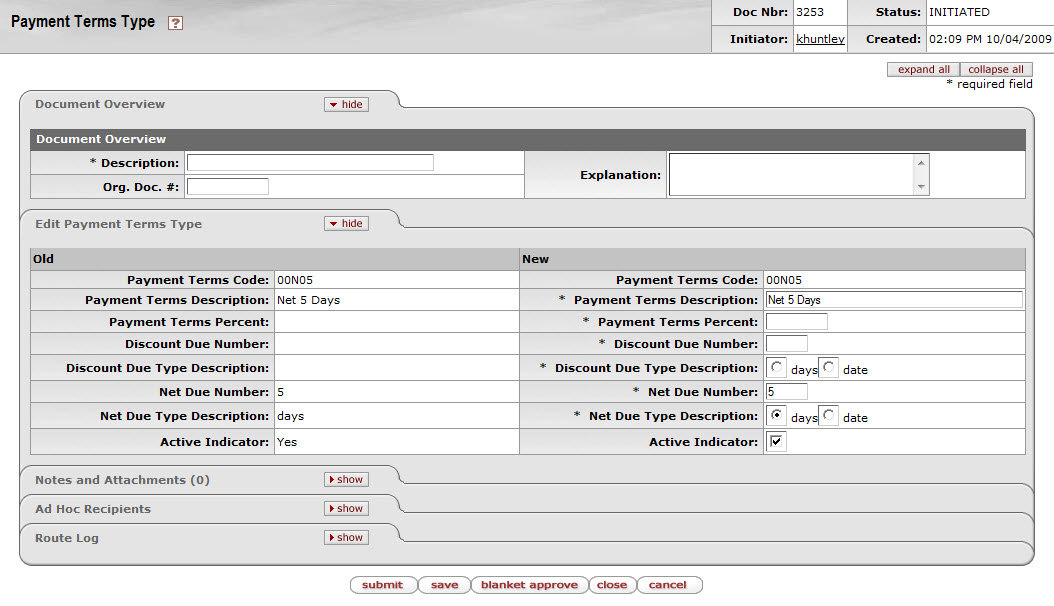
The Payment Terms Type document includes the Edit Payment Term Type tab. The system automatically enters data into both the Old and New sections in this tab. Selected data fields are available for editing.
Edit Payment Term Type tab definition
|
Title |
Description |
|
Payment Terms Code |
Required. Enter the code used to identify this payment terms type. |
|
Payment Terms Description |
Required. Enter the familiar title of the payment terms. |
|
Payment Terms Percent |
Required. Enter the percentage discount to be applied if the payment is made by the discount date. |
|
Discount Due Number |
Required. Enter a number that reflects either the number of days or the date (day of the month) by which payment must be made to qualify for the discount percentage. |
|
Discount Due Type Description |
Required. Select 'Days' or 'Date' to indicate whether the number entered in the Vendor Discount Due Number field is a number of days or a date (defined here as a specific day of the month). |
|
Net Due Number |
Required. Enter a number that reflects either the number of days or the date (day of the month) by which payment net is due. |
|
Net Due Type Description |
Required. Select 'Days' or 'Date' to indicate whether the number entered in the Vendor Net Due Number field is a number of days or a date (defined here as a specific day of the month). |
|
Active Indicator |
Optional. Select the check box if the payment term type is active. Clear the check box to inactivate the existing payment terms code. |
 >
>  >
>  >
>  >
> 
The Phone Type document is used to establish codes that identify various types of vendor phone or fax numbers. Sample phone types might be 'Phone,' 'Fax,' or 'Mobile.
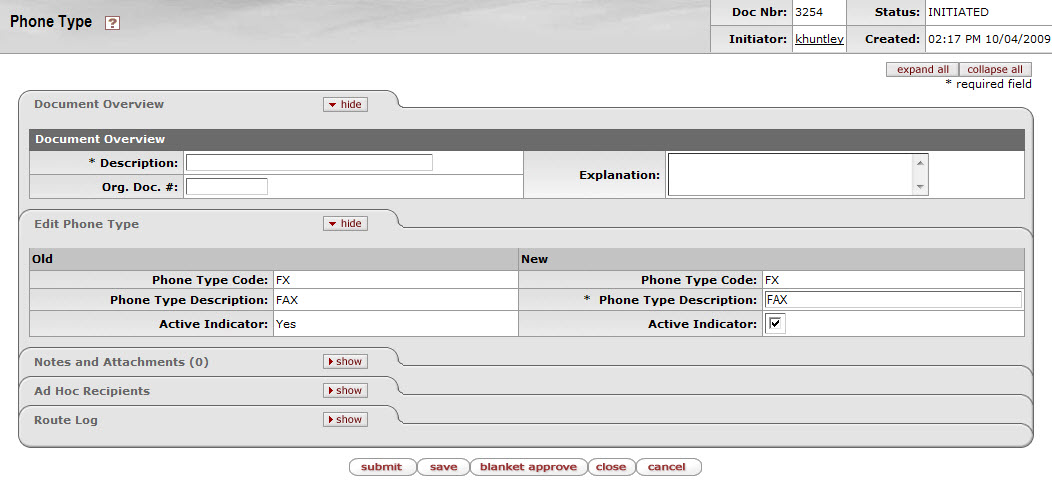
The Phone Type document includes the Edit Phone Type tab. The system automatically enters data into both the Old and New sections in this tab. Selected data fields are available for editing.
Edit Phone Type tab definition
|
Title |
Description |
|
Phone Type Code |
The code used to identify this phone type. |
|
Phone Type Description |
Required. The familiar title of the phone type. |
|
Active Indicator |
Indicates whether this phone type code is active or inactive. Remove the check mark to deactivate. |
 >
>  >
>  >
>  >
> 
The Shipping Payment Terms document establishes codes that define the various terms that specify who is responsible for the payment of shipping charges for purchases from a vendor. Examples might include 'Institute Pays, Part of PO,' 'Paid by 3rd Party,' or 'Vendor Pays'.

The Shipping Payment Terms document includes the Edit Shipping Payment Terms tab. The system automatically enters data into both the Old and New sections in this tab. Selected data fields are available for editing.
Edit Shipping Payment Terms tab definition
|
Title |
Description |
|
Shipping Payment Terms Code |
The code used to identify the shipping payment terms. |
|
Shipping Payment Terms Description |
Required. The title of the shipping payment terms. |
|
Shipping Payment Terms Pay Indicator |
Indicates if it is permissible for the vendor to add shipping charges to an invoice. Remove check mark if shipping payment terms does not apply to payments. |
|
Active Indicator |
Indicates whether this shipping payment terms code is active or inactive. Remove the check mark to deactivate. |
 >
>  >
>  >
>  >
> 
The Shipping Special Conditions document establishes various categories of commodities that require special shipping considerations. Examples might include 'Express' or 'Insured'.
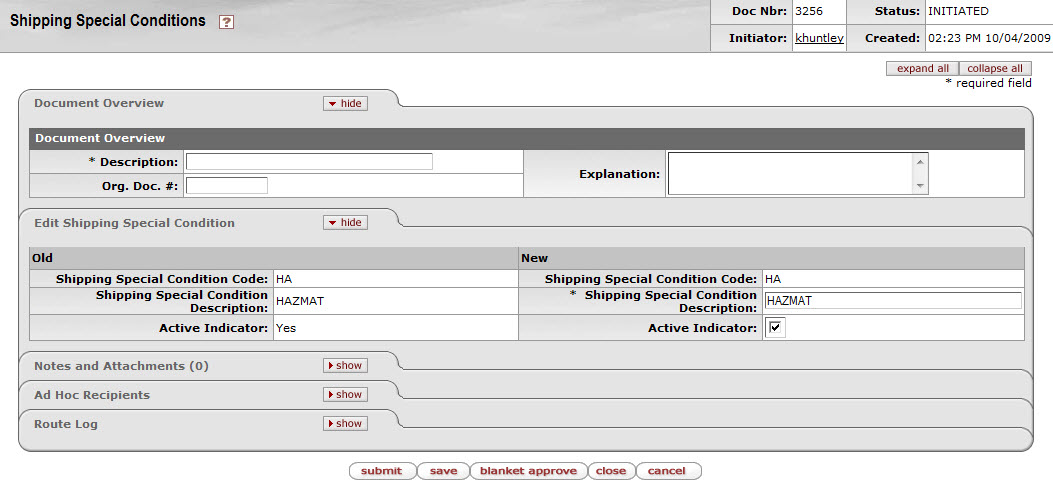
The Shipping Special Conditions document includes the Edit Shipping Special Condition tab. The system automatically enters data into both the Old and New sections in this tab. Selected data fields are available for editing.
Edit Shipping Special Condition tab definition
|
Title |
Description |
|
Shipping Special Condition Code |
The code used to identify the shipping special condition. |
|
Shipping Special Condition Description |
Required. The familiar title of the shipping special condition. |
|
Active Indicator |
Indicates whether this shipping special condition code is active or inactive. Remove the check mark to deactivate. |
 >
>  >
>  >
>  >
> 
The Shipping Title document establishes the codes that define the point at which shipping titles are transferred and the institution takes possession of a shipment. Examples might include 'Destination,' 'Origin (Vendor Location),' or 'Customs-US Port.
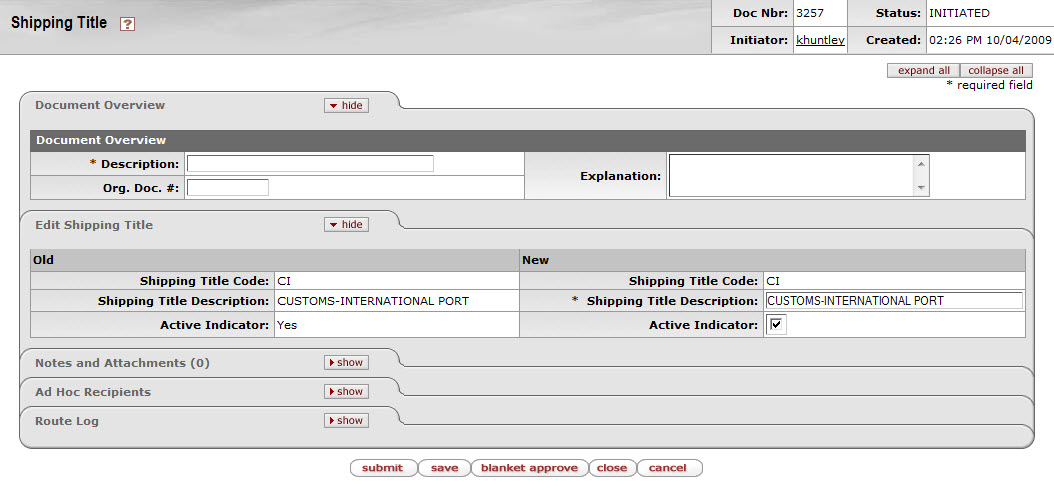
The Shipping Title document includes the Edit Shipping Title Tab. The system automatically enters data into both the Old and New sections in this tab. Selected data fields are available for editing.
Edit Shipping Title tab definition
|
Title |
Description |
|
Shipping Title Code |
The code used to identify this vendor shipping title. |
|
Shipping Title Description |
Required. The familiar title of the vendor shipping title. |
|
Active Indicator |
Indicates whether this shipping title code is active or inactive. Remove the check mark to deactivate. |
 >
>  >
>  >
>  >
> 
Certain vendors may merit special consideration due to their size (small business), ownership (woman or minority owned), geographical location (local), or other factors. The Supplier Diversity document establishes the codes to identify the categories defined by the Small Business Administration.
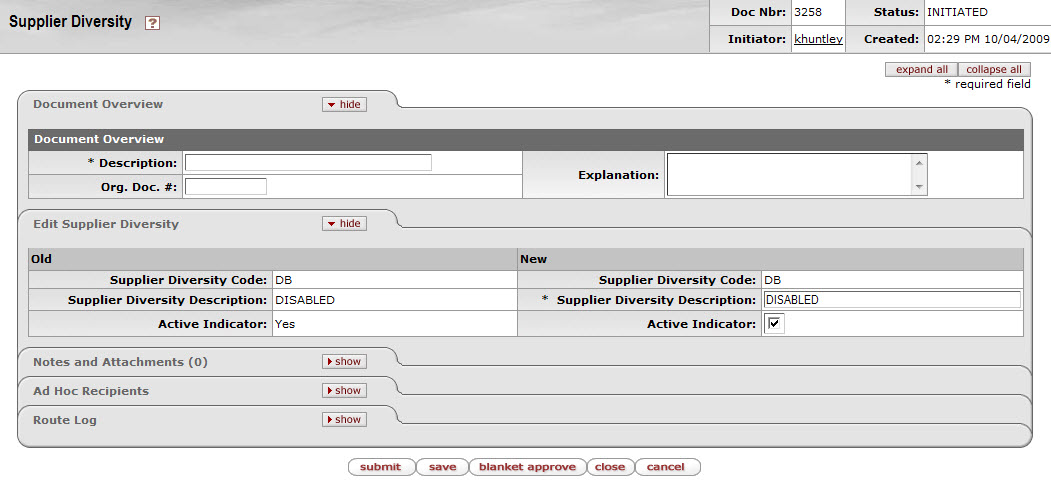
The Supplier Diversity document includes the Edit Supplier Diversity tab. The system automatically enters data into both the Old and New sections in this tab. Selected data fields are available for editing.
Edit Supplier Diversity tab definition
|
Title |
Description |
|
Supplier Diversity Code |
The code used to identify this supplier diversity type. |
|
Supplier Diversity Description |
Required. The title of the supplier diversity code. |
|
Active Indicator |
Indicates whether this supplier diversity code is active or inactive. Remove the check mark to deactivate. |
 >
>  >
>  >
>  >
> 
The Vendor Inactive Reason document establishes codes that indicate why a vendor is being inactivated in the system. Examples of codes might include 'Out of Business' or 'Merged.'
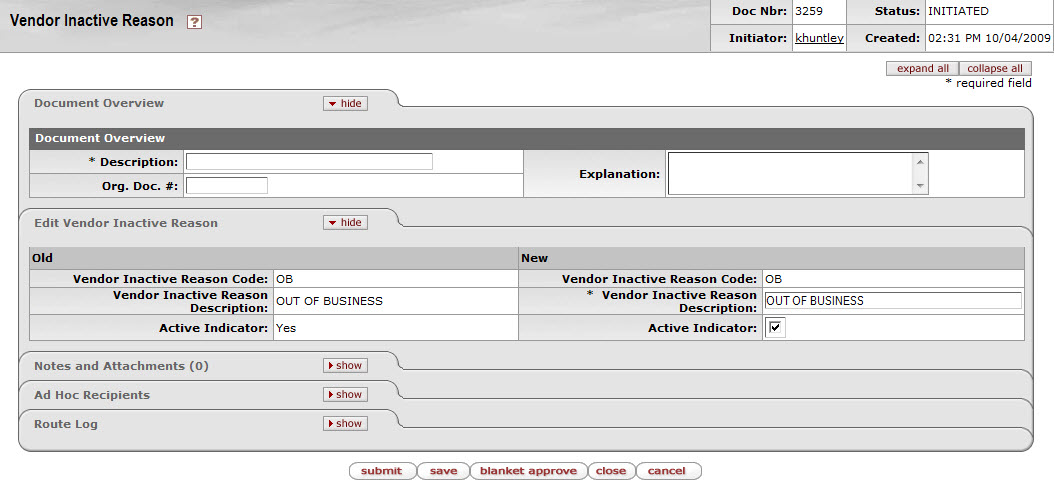
The Vendor Inactive Reason document includes the Edit Vendor Inactive Reason tab. The system automatically enters data into both the Old and New sections in this tab. Selected data fields are available for editing.
Edit Vendor Inactive Reason tab definition
|
Title |
Description |
|
Vendor Inactive Reason Code |
The code used to identify this vendor inactive reason. |
|
Vendor Inactive Reason Description |
Required. The familiar title of the vendor inactive reason code. |
|
Active Indicator |
Indicates whether this vendor inactive reason code is active or inactive. Remove the check mark to deactivate. |
 >
>  >
>  >
>  >
> 
The Vendor Search Alias Type document establishes codes that indicate what type of vendor alias is used on the Vendor document. Examples of codes might include 'Abbreviation' or 'External Vendor Code.'
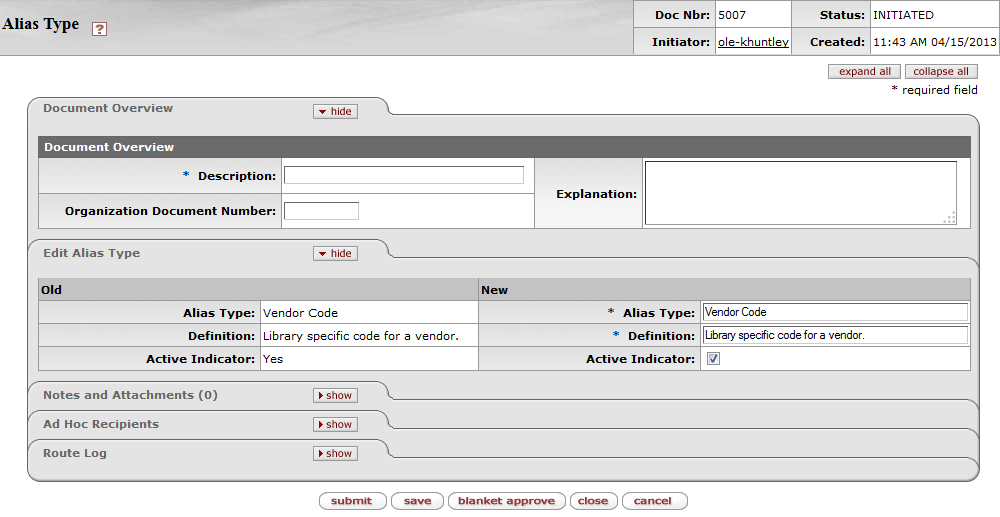
The Vendor Alias Type document includes the Edit Alias Type tab. The system automatically enters data into both the Old and New sections in this tab. Selected data fields are available for editing.
Edit Alias Type tab definition
|
Title |
Description |
|
Alias Type |
Required. The name of the alias type used to describe aliases. |
|
Definition |
Required. The description of the alias type. |
|
Active Indicator |
Indicates whether this alias type is active or inactive. Remove the check mark to deactivate. |
 >
>  >
>  >
>  >
> 
The Vendor Transmission Format document establishes the file formats that a vendor will use to receive purchase orders. Examples of formats might include ‘EDI’ or 'PDF'.
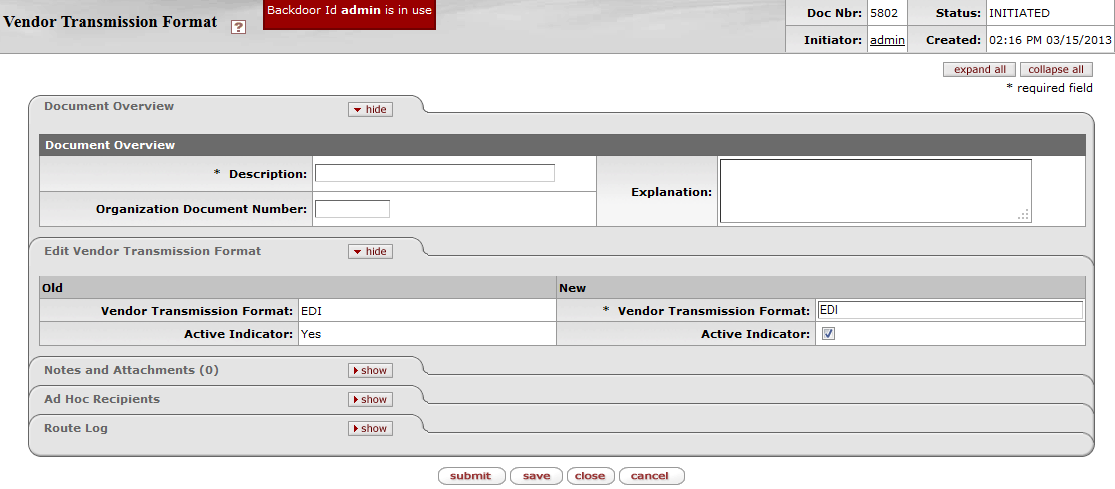
The Vendor Transmission Format document includes the Edit Vendor Transmission Format tab. The system automatically enters data into both the Old and New sections in this tab. Selected data fields are available for editing.
Edit Vendor Transmission Format tab definition
|
Title |
Description |
|
Vendor Transmission Format |
Required. The name of the vendor transmission format. |
|
Active Indicator |
Indicates whether this vendor inactive reason code is active or inactive. Remove the check mark to deactivate. |
 >
>  >
>  >
>  >
> 
The Vendor Transmission Type document establishes how a purchase order will be sent to the vendor. Examples of transmission types might include 'FTP', “Email’, or 'Fax'.
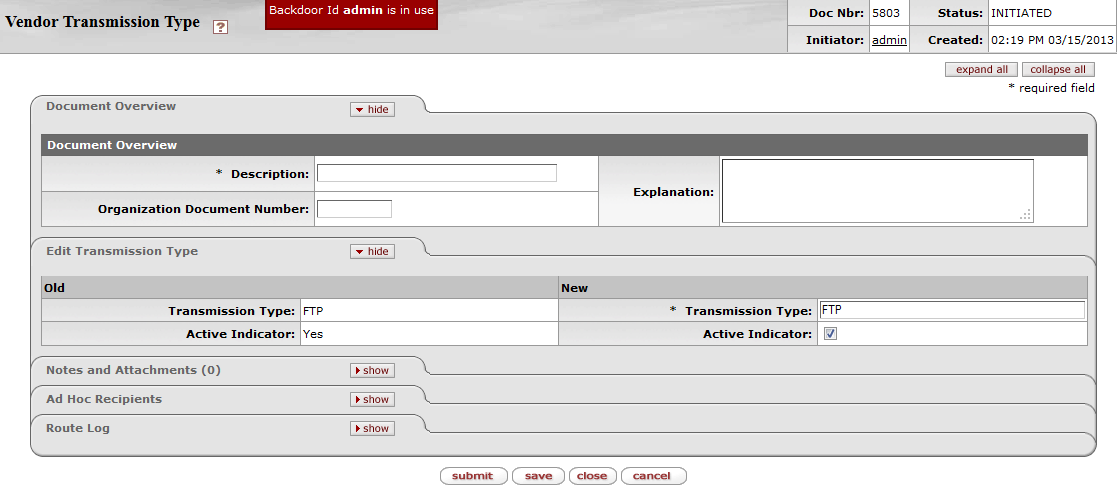
The Vendor Transmission Type document includes the Edit Vendor Transmission Type tab. The system automatically enters data into both the Old and New sections in this tab. Selected data fields are available for editing.
Edit Vendor Transmission Type tab definition
|
Title |
Description |
|
Transmission Type |
Required. The familiar name of the transmission type. |
|
Active Indicator |
Indicates whether this vendor inactive reason code is active or inactive. Remove the check mark to deactivate. |
 >
>  >
>  >
>  >
> 
The Vendor Type document establishes codes to identify different types of vendors. Common types include 'Disbursement Voucher' and 'Purchase Order' vendors. The selection of vendors on specific documents can be restricted based on this type.
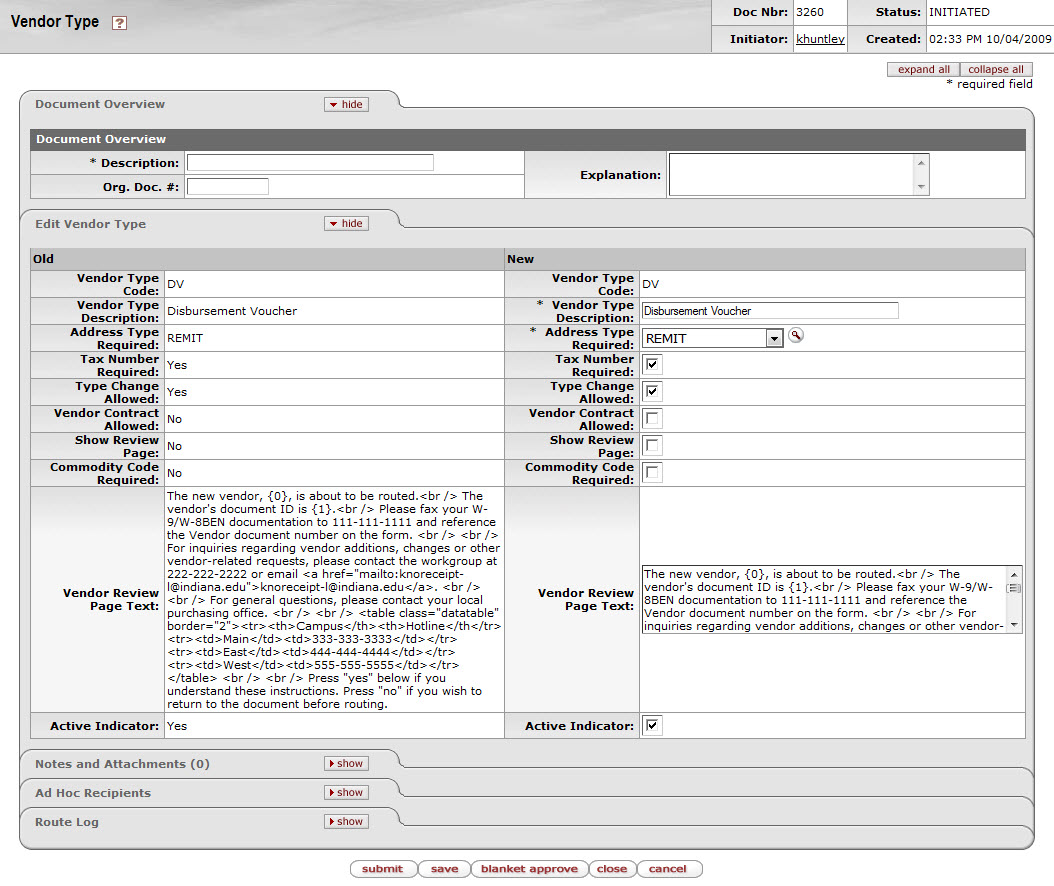
The Vendor Type document includes the Edit Vendor Type tab. The system automatically enters data into both the Old and New sections in this tab. Selected data fields are available for editing.
Edit Vendor Type tab definition
|
Title |
Description |
|
Vendor Type Code |
The code used to identify this vendor type. |
|
Vendor Type Description |
Required. The familiar title of this vendor type. |
|
Address Type Required |
Required. The Address type that is
required for this vendor type code. Existing address types
may be retrieved from the list or from the lookup |
|
Tax Number Required |
Indicates if a vendor of this type is required to have a tax number. Remove this check mark if this tax number is not required. |
|
Type Change Allowed |
Indicates if a vendor of this type can be changed to another vendor type after creation. Remove this mark if this tax type change is not allowed. |
|
Vendor Contract Allowed |
Indicates whether a vendor of a specific type will allow contracts to be created and maintained. (For example, a Disbursement Voucher type would not allow contracts.) |
|
Show Review Page |
Indicates if the vendor review page text should be shown on the review page. Remove this check mark if not desired. |
|
Commodity Code Required |
Indicates that a commodity code is required. Remove this check mark if a commodity code is optional. |
|
Vendor Review Page Text |
Optional. In the last stage of adding a vendor, the system displays a review page where the user sees a snapshot of the information for the vendor. Text entered in this field will be displayed to the user on the review page and is for informational purposes only. For example, you might use it to explain what will happen to the Vendor document after it is submitted and what further actions need to be taken. NoteNote: For security reasons, you must replace regular html <> brackets with square brackets [] in order to make vendor review page text display properly. Also, you must not use [table] or [a href]. [br] can be used but not [br/]. |
|
Active Indicator |
Indicates whether this vendor type code is active or inactive. Remove the check mark to deactivate. |
Table of Contents
 >
> >
>
On the Select/Acquire tab, the Import submenu provides access for users to import batch records and view load reports. Users may also import batch records from the Batch Process interface on the Admin tab.
Note
To learn more about the Batch Process interface, see the OLE Guide to System Administration Functions on the OLE Documentation Portal.
 >
> >
> >
>
The Staff Upload interface allows users to import order process. In OLE 1.0, this requires that two files simultaneously be uploaded – an EDIFACT file and accompanying MARC file, which together represent the order and details about the item(s) ordered. The files should contain a representation of the same records (and the same number of records) based on the original preprocessing or conversion of sample vendor EOCR files. The import process will accept both the RAW file formats and the XML representation.
The process is driven by a ‘profile’ (chosen at upload time) which contains the logic needed to determine the actions that should be taken if a match (or no match) is found and includes values needed during the creation of the bib, purchase order and instance records.
Presently, OLE 1.0 provides sample EDIFACT order messages and matching MARC bibliographic files to test import of firm, fixed orders. Future versions of Import will also be coded in new OLE releases to include other order types, bibliographic overlay, and invoices.
To access the order files to test-drive Import, sample order files that validate to our current coded schema are found at the OLE demo Web site (OLE-EOCR-master.zip):
https://wiki.kuali.org/display/OLE/OLE+Data+Import+Templates
Note
If technical users prefer to modify some of your own library records to match the schema, and upload those into the DEMO environment, we request that you limit your file loads at this time to no more than 10-20 documents or file pairs. This is out of courtesy to other users navigating the demo system, and to maintain overall performance.
One example, zipped files from Duke University, is available on the wiki.
The Staff Upload interface is available from the Main Menu, located under the Import sub tab.
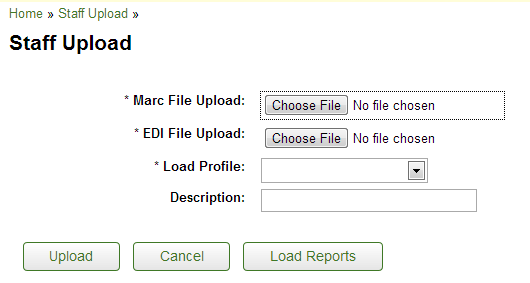
Receive files of bibliographic and order data from the vendor.
Note
If not already done by vendor, you will need to pre-process files into XML MARC and EDI files.
From the Staff Upload screen, select a MARC and an EDI file to upload and optionally provide a description.
Note
If you attempt to import a pair of EDI and MARC files that do not match the import schema you will get an error message.
Choose the Load Profile from the drop down menu.
Note
For testing, choose YBP.
Click the
 button to process the file.
Note: Provided sample files were created to match import rules and actions which make up a sample import profile. OLE demo users can use their own files as well if they can be modified to match the schema and do not exceed the recommended maximum file size of 10 EOCRs.
OLE will provide a message letting you know if the load was successful or not.
Click on
 to view load reports.
 Note
For more information about Load Reports, see below.
Users must upload paired files – either MARC and EDI or MARCXML and EDIFACT-XML
For successful loads, Purchase Orders and Bibliographic records with linked Instance (Holding and Item) are created.
Extra records will be logged in the Load Failure Details of the Load Report.
Any and all load error conditions will be included in the load report as attachment files.
 >
> >
> >
>  >
> 
Load Reports provide users with access to information about the loads performed within OLE. The reports give information about how many successes and/or fails were counted and links to the purchase orders and bibliographic records that may have been created.
OLE offers a customized document search related to load reports. The search screen contains the standard search fields along with special fields that are unique to this type of e-doc. Click the Document Id to open a Load Report.
Note
For information about performing a search for one or more load reports, see Performing Acquisition Searches on the OLE E-Doc Fundamentals wiki page.
The following displays an example of a successful load.
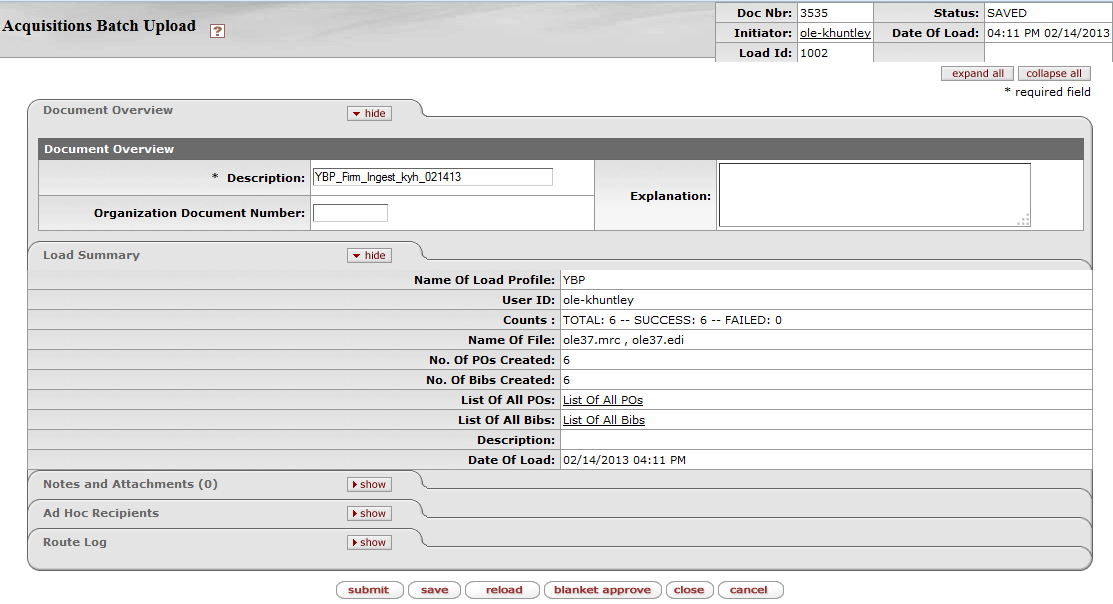
If there were problems with the load, an additional tab, Load Failure Details will display the errors and the files will be available to you in the Notes and Attachments tab.
The following displays an example of a failed load.
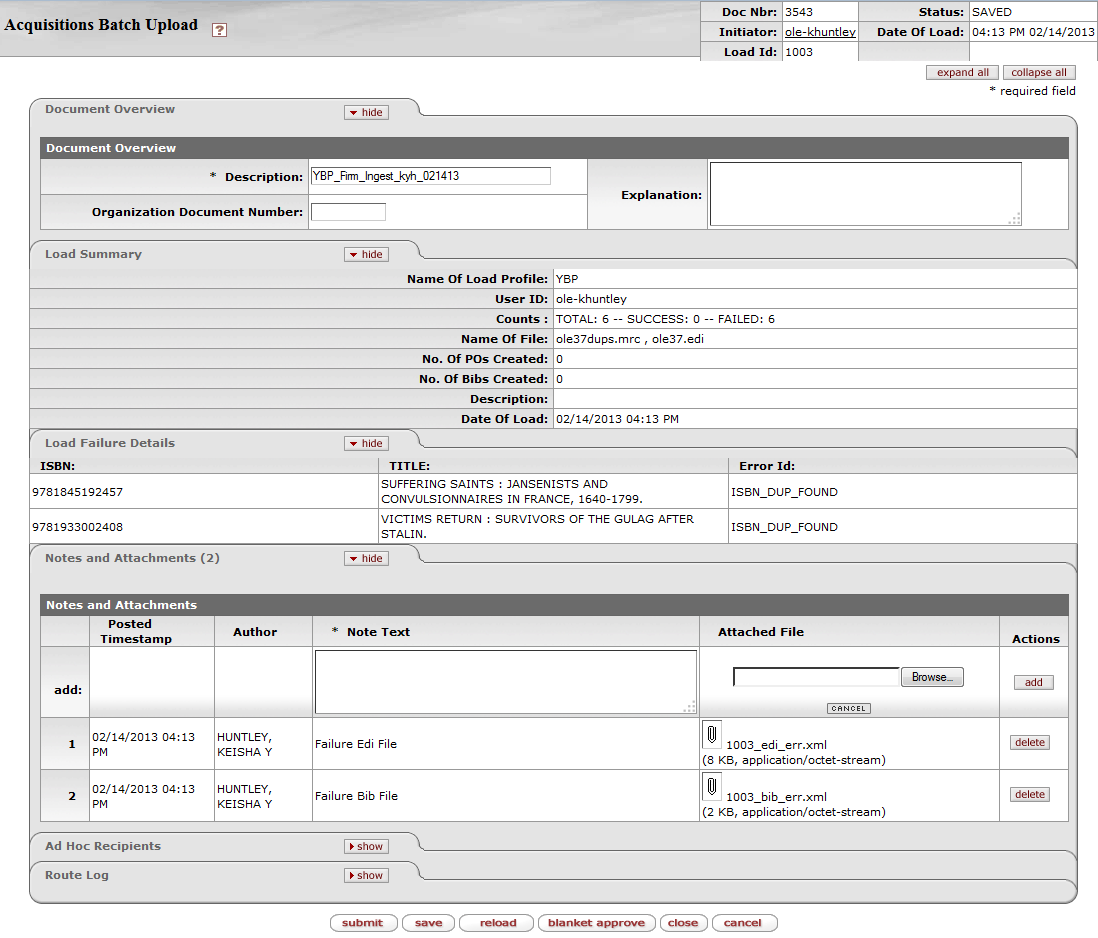
Load Summary tab definition
|
Title |
Description |
|
Name of Load Profile |
Reports the name of the Load Profile used during the import process |
|
User ID |
Reports who was logged in and performed the import |
|
Counts |
Reports the total amount of records imported along with the successes and fails |
|
Name of File |
Lists the MARC and EDI files processed during the import |
|
No of POs Created |
Reports the amount of Purchase Orders created |
|
No of Bibs Created |
Reports the amount of Bibliographic Records created |
|
List of All POs |
Links to the list of the Purchase Orders created |
|
List of All Bibs |
Links to the list of the Bibliographic Records created |
|
Description |
Presents the description that was input on the Staff Upload page |
|
Date of Load |
System generated time stamp of when the import occurred |
The import profile guides the processing of records during the import process. If the logic contained in the import profile reaches an exception point based on the match logic, the record will fail to be processed. OLE will display details about each failed record detected in the file under the tab Load Failure Details.

Load Failure Details tab definition
|
Title |
Description |
|
ISBN |
The ISBN number associated with the error record. |
|
Title |
The title of the record associated with the error record. |
|
Error Id |
Gives a description of the error that occurred. |
If any of the files have failed during the import process, the files will be attached under the Notes and Attachments tab.

Notes and Attachments tab definition
|
Title |
Description |
|
Posted Timestamp |
Display only. The date and time the error record was loaded. |
|
Author |
Display only. The name of the person who loaded the record into OLE |
|
Note Text |
A brief description as to why the file could not be imported. |
|
Attached File |
Click NoteYou will need to use the Staff Upload interface to re-load records. Adding new files as a Notes and Attachments file will not load items into the DocStore. |
From the Load Summary Lookup page, optionally enter details about the file import and click the search button. The system displays the search results in the same window or browser tab, below the search fields.
Note
To learn more about searching, see Searching OLE on the OLE E-Docs fundamentals wiki page.
Select the appropriate document listed under the Document Id to open the Acquisitions Batch Upload.
The Load Summary contains details about each load.
To view the purchase order, click the link List of All POs on the Load Summary tab. You may view and edit purchase orders from this list.
Note
To learn more about purchase orders, see above.
To view the bibliographic records, click the link List of All Bibs on the Load Summary tab. You may view and edit the bibliographic records from this list.
Note
To learn more about bibliographic records, see the Editor section in the Guide to Describe – DocStore and Editors. This and other OLE user guides are available for download from the OLE Documentation Portal.
Review the Notes and Attachments tab for failed file uploads.
Review the Route Log tab.
Note
For more information about the Route Log, see Route Log on the OLE Workflow Overview and Key Concepts wiki page.
Table of Contents
- Billing Address
- Carrier
- Category
- Delivery Required Date Reason
- Electronic Invoice Item Mapping
- Exception Type
- Format
- Funding Source
- Invoice Sub Type
- Invoice Type
- Item Price Source
- Item Reason Added
- Item Type
- Method of PO Transmission
- Negative Payment Request Approval Limit
- Note Type
- Organization Parameter
- Order Type
- Payment Method
- Payment Request Auto Approve Exclusions
- Purchase Order Contract Language
- Purchase Order Item Status
- Purchase Order Quote Language
- Purchase Order Quote List
- Purchase Order Quote Status
- Purchase Order Vendor Choice
- Receiving Address
- Receiving Threshold
- Recurring Payment Frequency
- Recurring Payment Type
- Request Source Type
- Requisition Source
- Sensitive Data
- Vendor Stipulation
- Licensing Requirement
- Authentication Type
- Access Location
- E-Resource Status
- Package Type
- Package Scope
- Material Type
- Access Type
- Content Type
- Payment Type
- Request Priority
- General Ledger Introduction
- GL Inquiries: Basic Information
- General Ledger Entry
- Available Balances
- Globally Protected Field
 >
>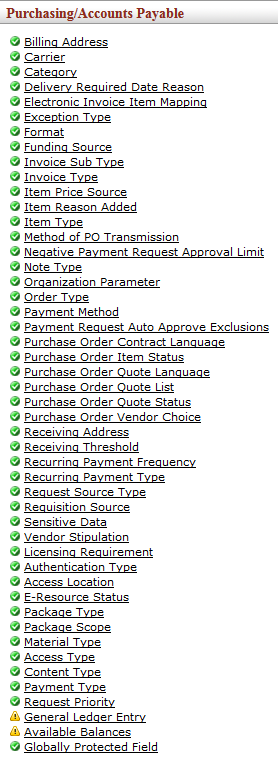
Order, Paying, Receiving, and E-Resource maintenance e-docs as well as general ledger entry and available balances lookups are available via the Purchasing/Accounts Payable submenu on the Select/Acquire menu tab.
 >
>  >
>  >
>  >
> 
The Billing Address document defines the various addresses to which vendors should send invoices. Addresses are specific to a campus but a campus can have multiple billing addresses.
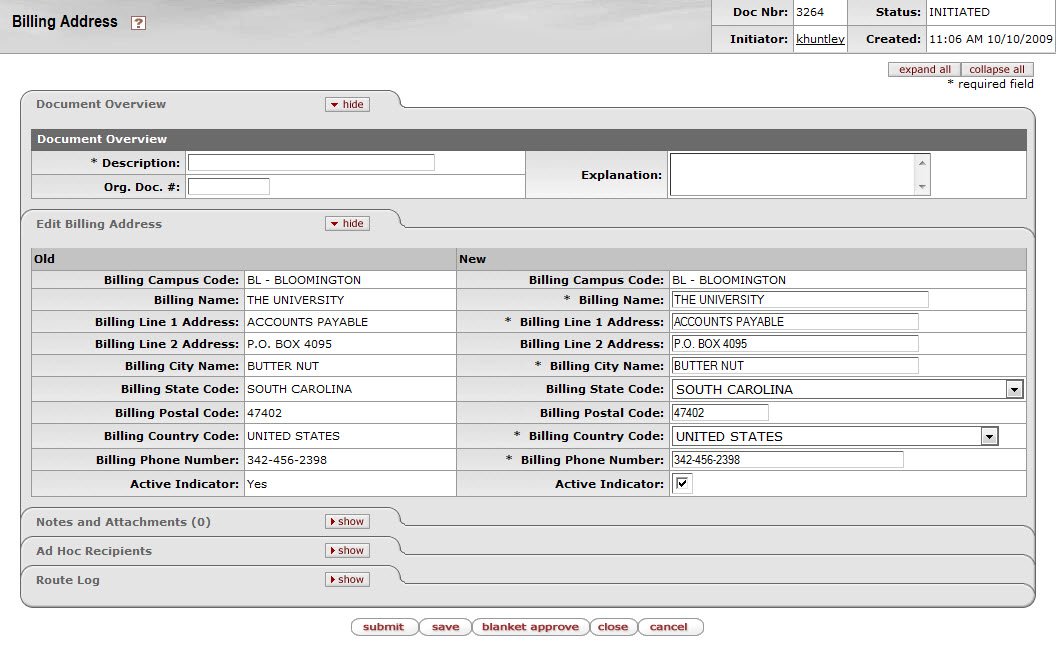
The Billing Address document includes the Edit Billing Address tab. The system automatically enters data into both the Old and New sections in this tab. Selected data fields are available for editing.
Edit Billing Address tab definition
|
Title |
Description |
|
Billing Campus Code |
The campus code associated with this billing address. |
|
Billing Name |
Required. The familiar title of the billing address. |
|
Billing Line 1 Address |
Required. The first line of the address information for this billing address. |
|
Billing Line 2 Address |
Optional. The second line of the address information for this billing address. |
|
Billing City Name |
Required. The city name associated with this billing address. |
|
Billing State Code |
The state associated with this billing address. Existing state codes may be retrieved from the list. |
|
Billing Postal Code |
The postal code associated with this billing address. |
|
Billing Country Code |
Required. The country associated with this billing address. Existing country codes may be retrieved from the list. |
|
Billing Phone Number |
Required. The phone number, including area code for this billing address. (Formatted: xxx-xxx-xxxx) |
|
Active Indicator |
Indicates whether this billing address is active or inactive. Remove the check mark to deactivate. |
 >
>  >
>  >
>  >
> 
The Carrier document defines the possible freight carriers and shipping companies assigned to deliver goods.

The Carrier document includes the Edit Carrier tab. The system automatically enters data into both the Old and New sections in this tab. Selected data fields are available for editing.
Edit Carrier tab definition
|
Title |
Description |
|
Carrier Code |
A unique code to identify a particular carrier. |
|
Carrier Description |
Required. A description or name of the carrier. |
|
Active Indicator |
Indicates whether this carrier code is active or inactive. Remove the check mark to deactivate the code. |
 >
>  >
>  >
>  >
> 
The Category document defines the possible groupings used to manage the selection and acquisition of titles on requisitions and purchase orders.
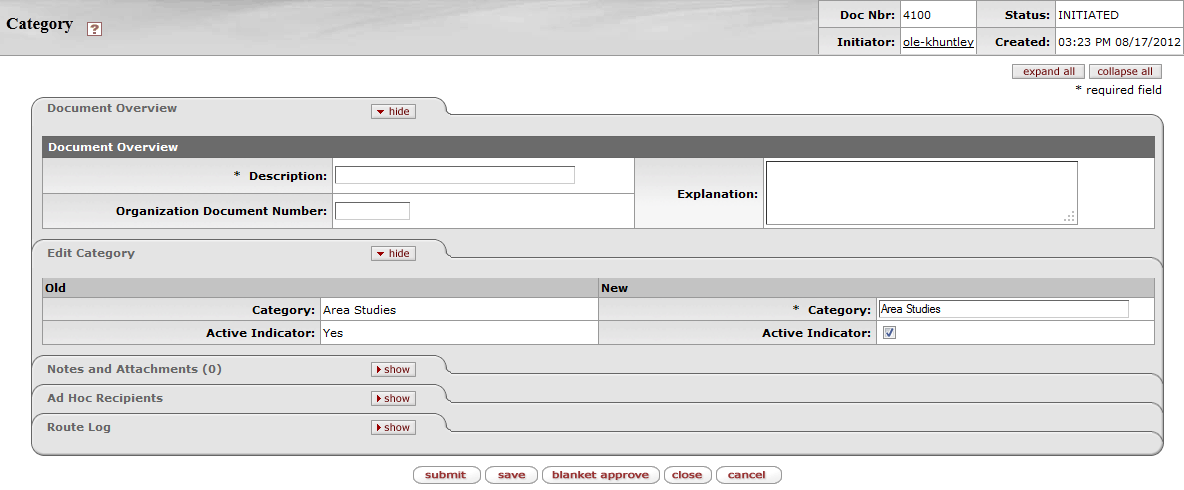
The Category document includes the Edit Category tab. The system automatically enters data into both the Old and New sections in this tab. Selected data fields are available for editing.
Edit Category tab definition
|
Title |
Description |
|
Category |
Required. A description or name of the category. |
|
Active Indicator |
Indicates whether this category is active or inactive. Remove the check mark to deactivate the code. |
 >
>  >
>  >
>  >
> 
The Delivery Required Date Reason document defines the reasons for requiring the delivery date in the Purchasing/AP module. Examples might include types of 'Must Receive' or 'Estimated Date.
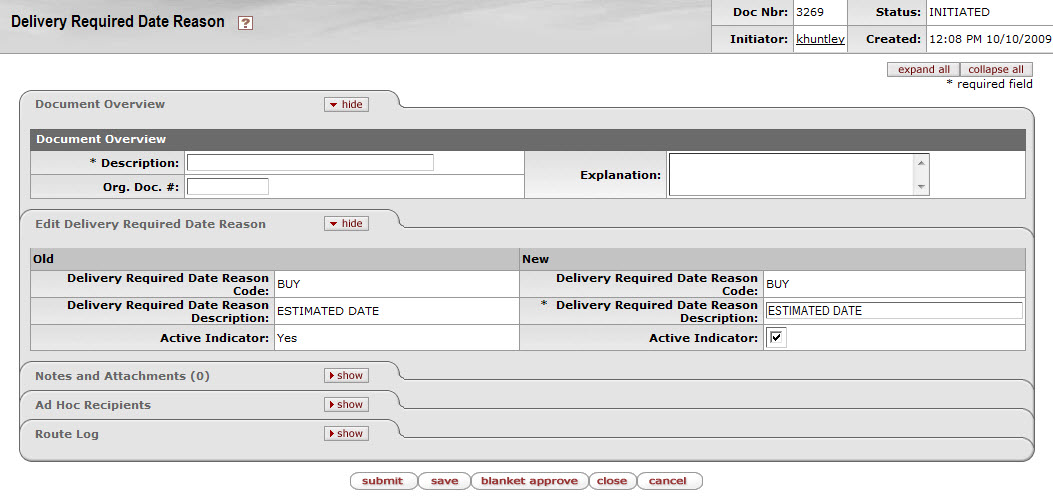
The Delivery Required Date Reason document includes the Edit Delivery Required Date Reason tab. The system automatically enters data into both the Old and New sections in this tab. Selected data fields are available for editing.
Edit Delivery Required Date Reason tab definition
|
Title |
Description |
|
Delivery Required Date Reason Code |
The code to identify this delivery required date reason from the Reason Code list. |
|
Delivery Required Date Reason Description |
Required. The familiar title for this delivery required date reason. |
|
Active Indicator |
Indicates whether this delivery required date reason code is active or inactive. Remove the check mark to deactivate this code. |
 >
>  >
>  >
>  >
> 
The Electronic Invoice Item Mapping document specifies unique mapping of additional items per vendor if the business need exists. OLE follows cXML standards in that five item types are defined (Item, Special Handling, Shipping, and Discount). Each vendor invoice is mapped according to the Electronic Invoice Item Mapping Code table via the electronic invoicing batch job.
The Electronic Invoice Item Mapping document includes the Edit Electronic Invoice Item Mapping tab.
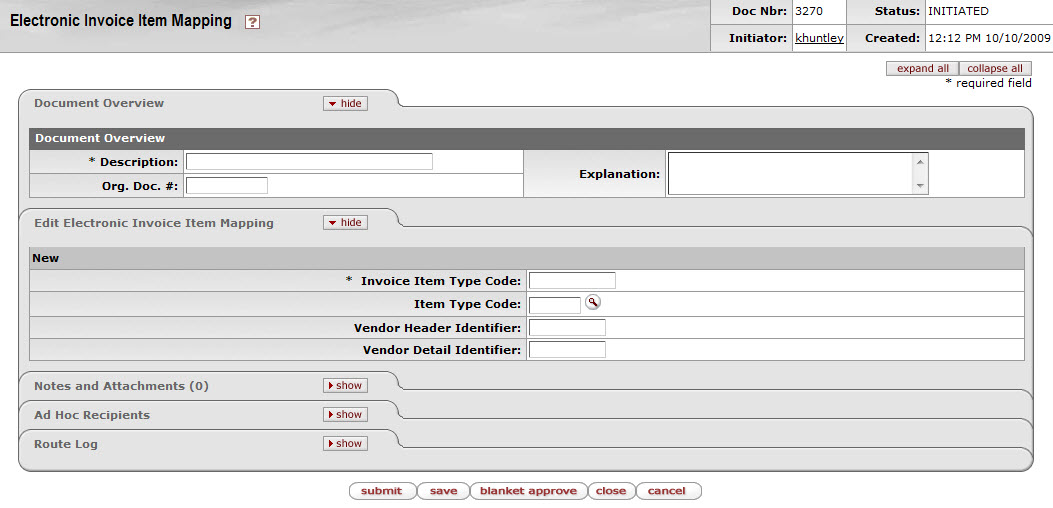
Edit Electronic Invoice Item Mapping tab definition
|
Title |
Description |
|
Invoice Item Type Code |
Required. The field name on the vendor invoice to compare the value. |
|
Item Type Code |
The item code in OLE to which the invoice item type code will map to.
Existing item type codes may be retrieved from the lookup |
|
Vendor Header Identifier |
Optional. The segment of the vendor number that precedes the dash. For example, for vendor number 1000-0, the vendor header identifier is 1000. |
|
Vendor Detail Identifier |
Required if the Vendor Header Identifier field is completed. The segment of the vendor number that follows the dash. For example, for vendor number 1000-0, the detail identifier is 0. |
 >
>  >
>  >
>  >
> 
The Exception Type identifies types of exceptions when receiving resources. Some exceptions are received damaged, received the wrong edition, etc.
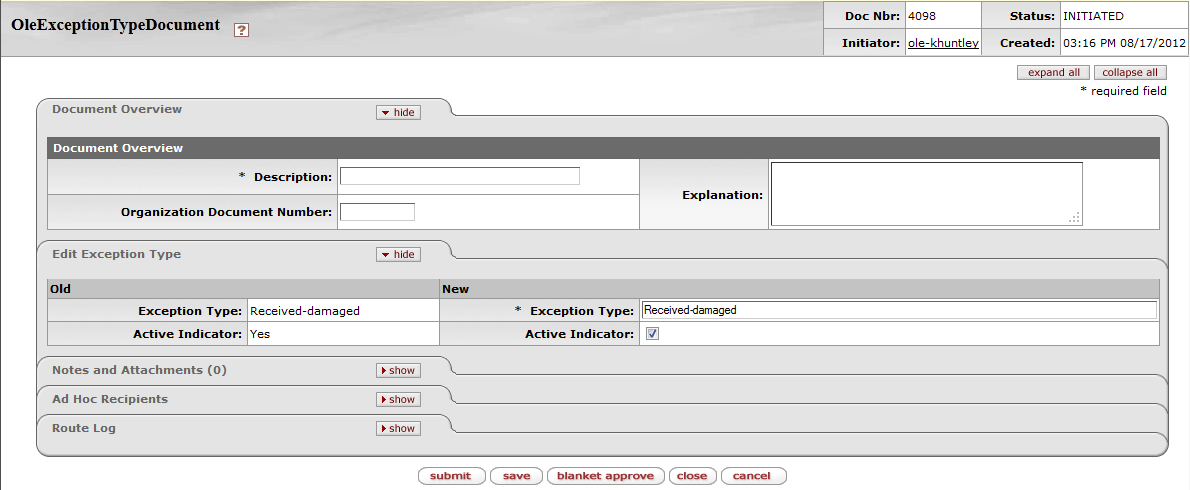
The Exception Type document includes the Edit Exception Type tab. The system automatically enters data into both the Old and New sections in this tab. Selected data fields are available for editing.
Edit Exception Type tab definition
|
Title |
Description |
|
Exception Type |
Required. A description or name of the exception type. |
|
Active Indicator |
Indicates whether this exception type is active or inactive. Remove the check mark to deactivate this type. |
 >
>  >
>  >
>  >
> 
The Format Type is the type of material of a title, e.g., a printed book, e-book, DVD, map, serial, CD, kit, etc.
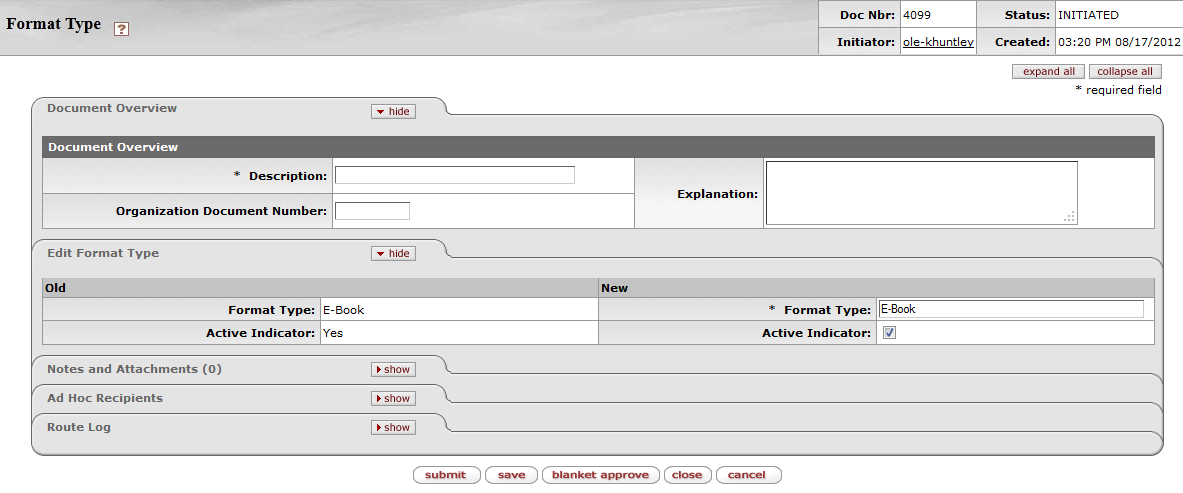
The Format Type document includes the Edit Format Type tab. The system automatically enters data into both the Old and New sections in this tab. Selected data fields are available for editing.
Edit Format Type tab definition
|
Title |
Description |
|
Format Type |
Required. A description or name of the format type. |
|
Active Indicator |
Indicates whether this format type is active or inactive. Remove the check mark to deactivate this type. |
 >
>  >
>  >
>  >
> 
The Funding Source document defines the different fund sources that are available to choose from for purchasing documents.
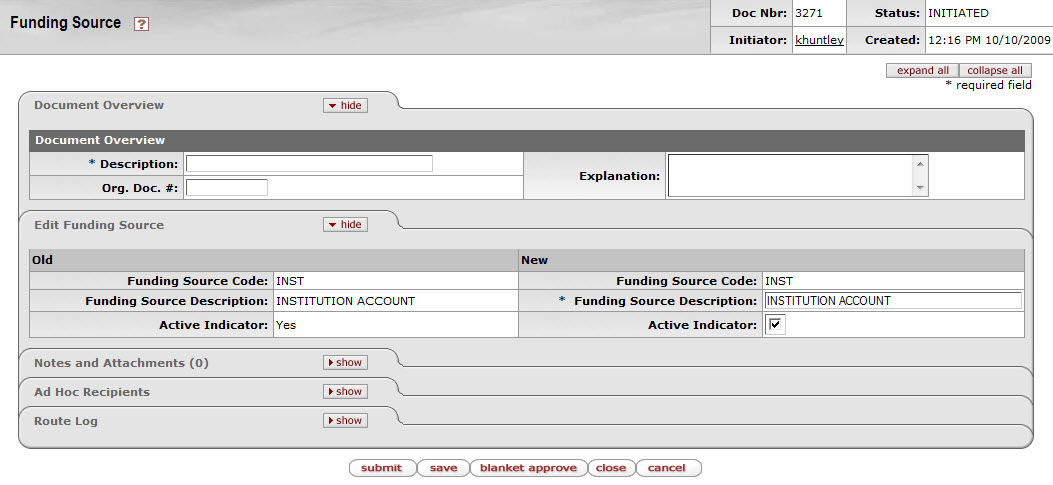
The Funding Source document includes the Edit Funding Source tab. The system automatically enters data into both the Old and New sections in this tab. Selected data fields are available for editing.
Edit Funding Source tab definition
|
Title |
Description |
|
Funding Source Code |
The code to identify this funding source. |
|
Funding Source Description |
Required. The familiar title of this funding source. |
|
Active Indicator |
Indicates whether this funding source code is active or inactive. Remove the check mark to deactivate this code. |
 >
>  >
>  >
>  >
> 
The Invoice Sub Type document identifies the subtype of an invoice on a payment request and may impact workflow.
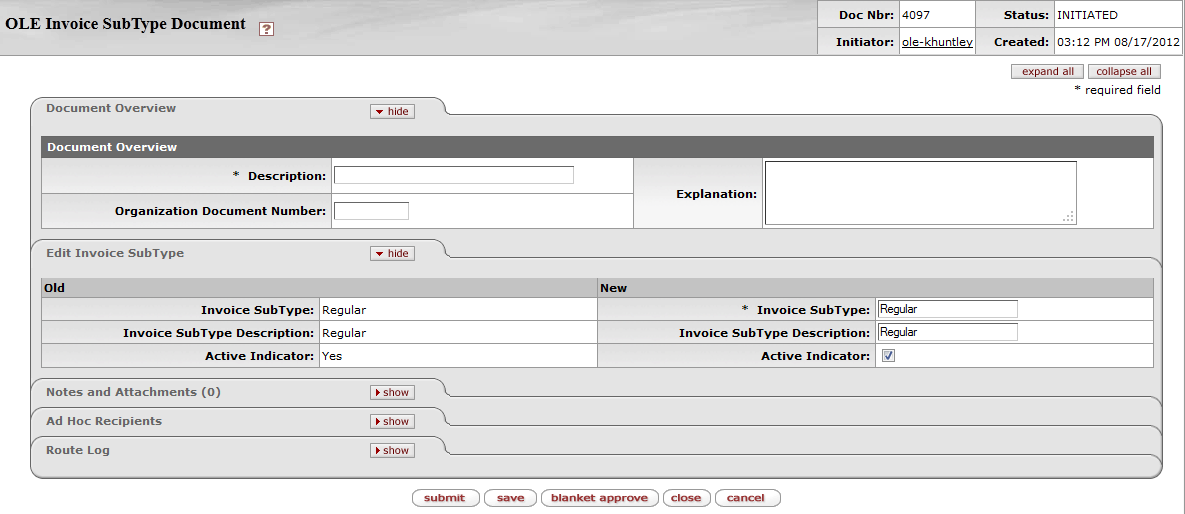
The Invoice Sub Type document includes the Edit Invoice Sub Type tab. The system automatically enters data into both the Old and New sections in this tab. Selected data fields are available for editing.
Edit Invoice Type tab definition
|
Title |
Description |
|
Invoice Sub Type |
Required. A description or name of the invoice subtype. |
|
Invoice Sub Type Description |
A description or name of the invoice subtype. |
|
Active Indicator |
Indicates whether this invoice subtype is active or inactive. Remove the check mark to deactivate this subtype. |
 >
>  >
>  >
>  >
> 
The Invoice Type document identifies the type of invoice on a payment request and may impact workflow.

The Invoice Type document includes the Edit Invoice Type tab. The system automatically enters data into both the Old and New sections in this tab. Selected data fields are available for editing.
Edit Invoice Type tab definition
|
Title |
Description |
|
Invoice Type |
Required. A description or name of the invoice type. |
|
Invoice Type Description |
A description or name of the invoice type. |
|
Active Indicator |
Indicates whether this invoice type is active or inactive. Remove the check mark to deactivate this type. |
 >
>  >
>  >
>  >
> 
The Item Price Source document identifies the source of the item price for titles on requisitions and purchase orders.
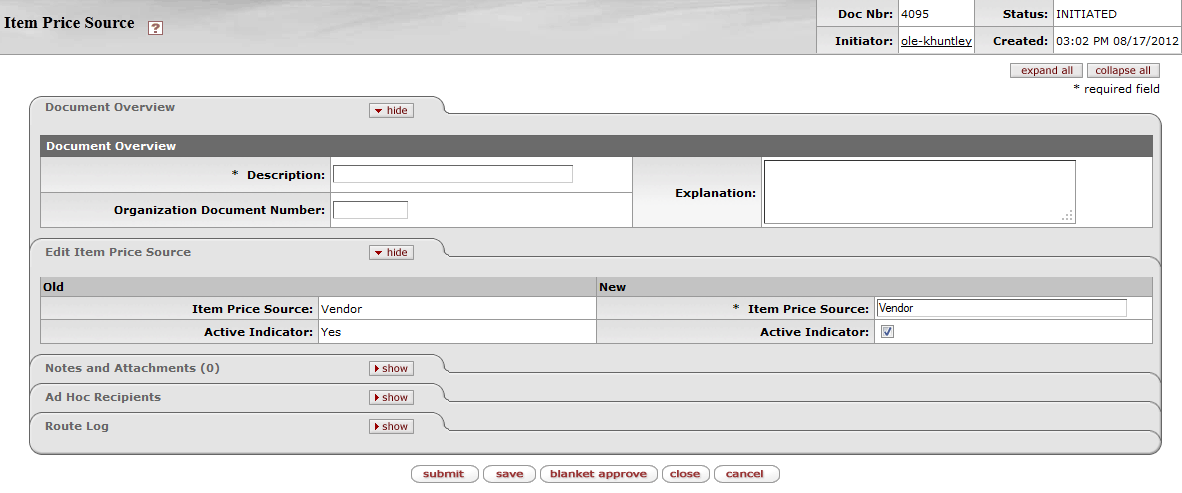
The Item Price Source document includes the Edit Item Price Source tab. The system automatically enters data into both the Old and New sections in this tab. Selected data fields are available for editing.
Edit Item Price Source tab definition
|
Title |
Description |
|
Item Price Source |
Required. A description or name of the item price source. |
|
Active Indicator |
Indicates whether this item price source is active or inactive. Remove the check mark to deactivate this source. |
 >
>  >
>  >
>  >
> 
The Item Reason Added document defines possible options to list on a receiving ticket as reasons for why an item was received that was not on the original purchase order.
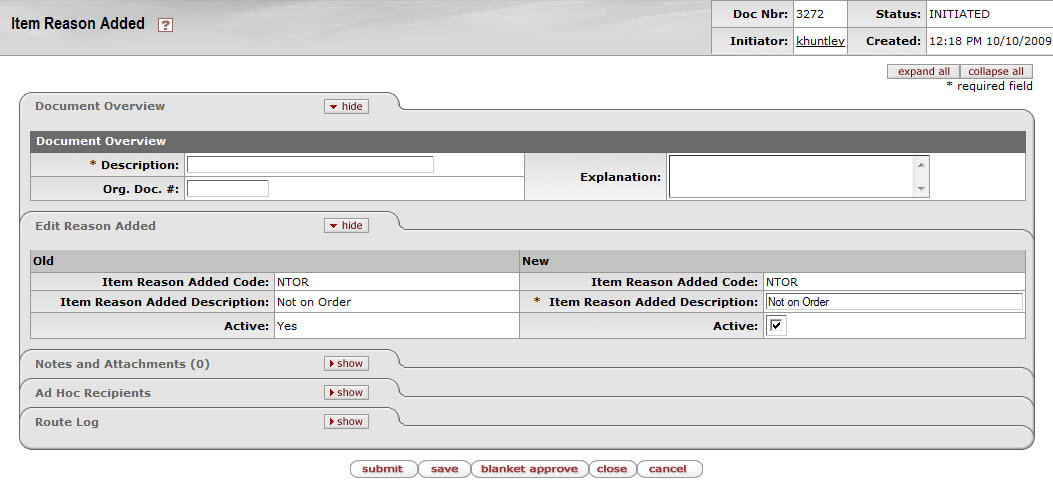
The Item Reason Added document includes the Edit Reason Added tab. The system automatically enters data into both the Old and New sections in this tab. Selected data fields are available for editing.
Edit Reason Added tab definition
|
Title |
Description |
|
Item Reason Added Code |
A unique code to identify a particular reason added. |
|
Item Reason Added Description |
Required. A description of the reason added. |
|
Active |
Indicates whether this item reason code is active or inactive. Remove the check mark to deactivate this code. |
 >
>  >
>  >
>  >
> 
The Item Type document defines the different descriptive categories that can be applied to requisition or purchase order line items. Examples might include Item, Service, State Tax, or Shipping and Handling.
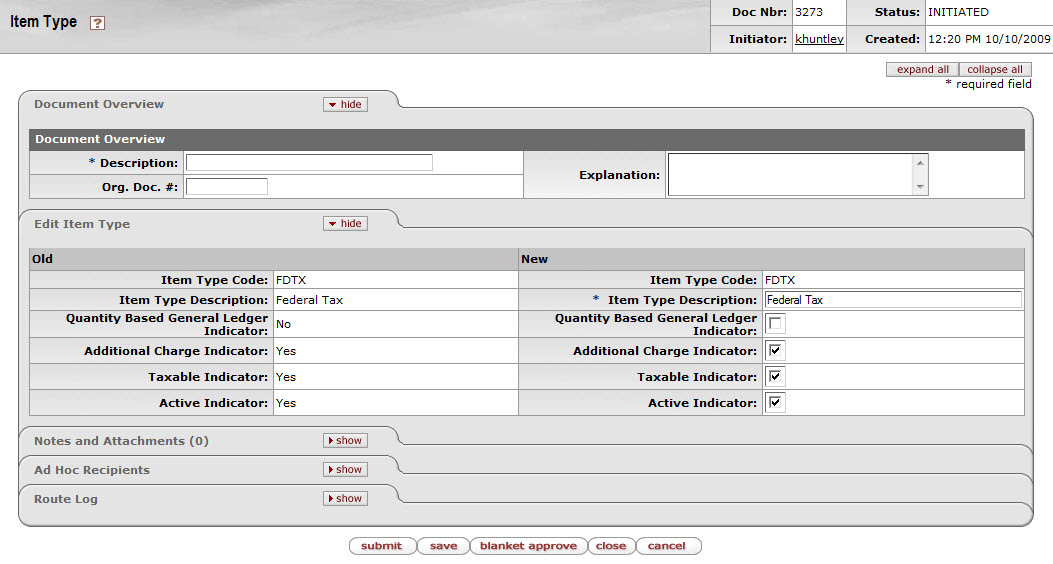
The document includes the Edit Item Type tab. The system automatically enters data into both the Old and New sections in this tab. Selected data fields are available for editing.
Edit Item Type tab definition
|
Title |
Description |
|
Item Type Code |
The code to identify this item type. |
|
Item Type Description |
Required. The familiar title of this item type. |
|
Quantity Based General Ledger Indicator |
Required. An indicator that the Dollar Total is calculated from the Item quantity times dollar amount rather than a reference to a dollar amount. |
|
Additional Charge Indicator |
Required. Used when additional charges are allowed. |
|
Taxable Indicator |
Used when the item is taxable. |
|
Active Indicator |
Indicates whether this item type code is active or inactive. Remove the check mark to deactivate this code. |
 >
>  >
>  >
>  >
> 
The Purchase Order Transmission Method document defines methods for transmitting purchase orders to vendors.
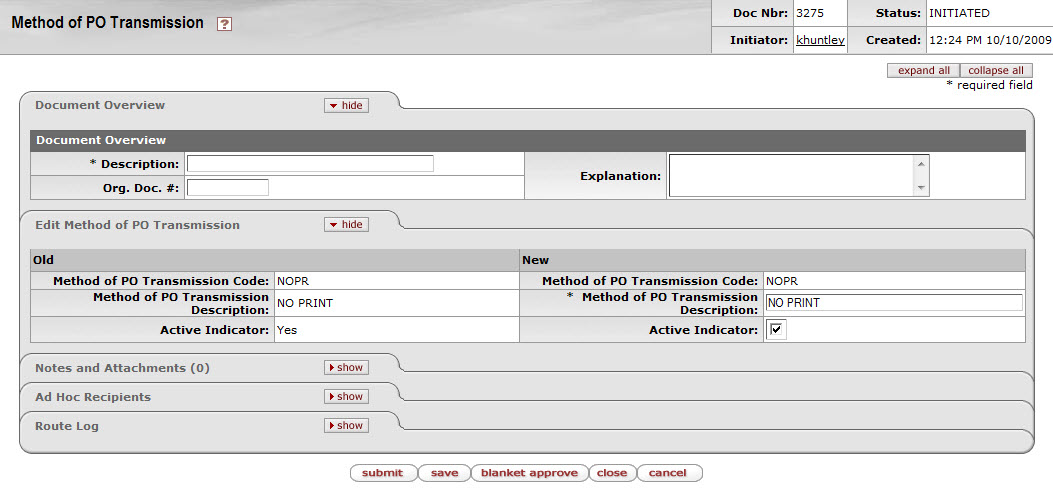
The Purchase Order Transmission Method document includes the Edit PO Transmission Method tab. The system automatically enters data into both the Old and New sections in this tab. Selected data fields are available for editing.
Edit PO Transmission Method tab definition
|
Title |
Description |
|
Method of PO Transmission Code |
The code to identify this purchase order transmission method. |
|
Method of PO Transmission Description |
Required. The familiar title of this purchase order transmission method. |
|
Active Indicator |
Indicates whether this method of PO transmission code is active or inactive. Remove the check mark to deactivate this code. |
 >
>  >
>  >
>  >
> 
The Negative Payment Request Approval Limit document identifies an account or organization and specifies a dollar amount limit to exclude the payment request from automated approvals. Payment requests referencing this account or organization and exceeding this dollar amount are excluded from automated approval.

The Negative Payment Request Approval Limit document includes the Edit Negative PREQ Approval Limit tab.
Edit Auto Approve Exclude tab definition
|
Title |
Description |
|
Chart of Accounts Code |
Required. The Chart of Accounts code associated with the account to which
the dollar limit will apply. Existing chart codes may be retrieved from the lookup |
|
Organization Code |
The organization code associated with the account to which the dollar limit
will apply. Existing organization codes may be retrieved from the lookup |
|
Account Number |
The account number to which this dollar limit will apply. Existing account
numbers may be retrieved from the lookup |
|
Negative Payment Request Approval Limit Amount |
Required. The dollar limit above which payment requests will be excluded from automated approval. |
|
Active Indicator |
Required. Indicates whether this negative payment request approval limit is active or inactive. Remove the check mark to deactivate. |
 >
>  >
>  >
>  >
> 
The Note Type document identifies the types of notes, e.g., Receipt Note, Special Conditions Note, or Special Processing Instruction Note that may be associated with Purchasing and Accounts Payable documents.
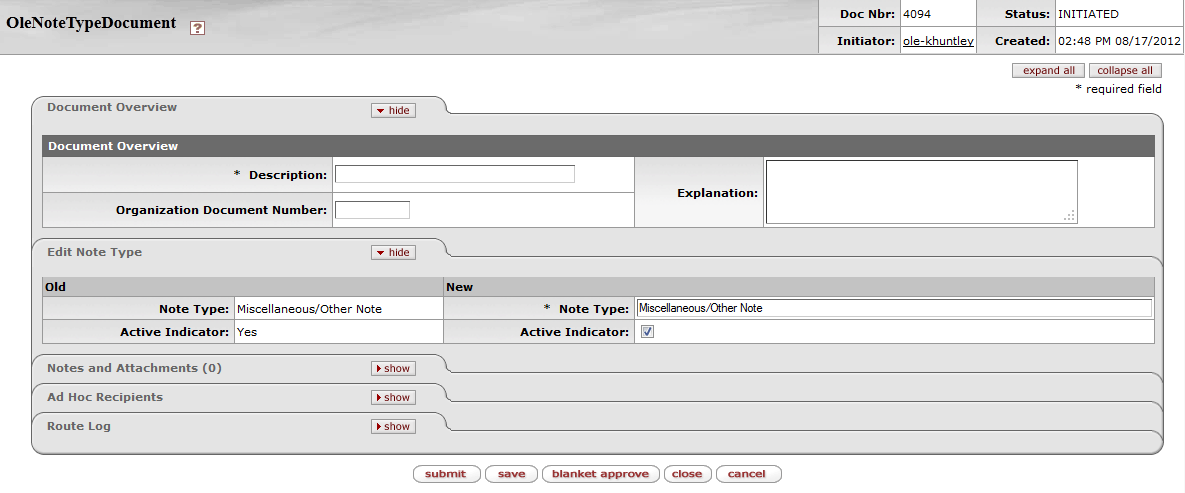
The Note Type document includes the Edit Note Type tab. The system automatically enters data into both the Old and New sections in this tab. Selected data fields are available for editing.
Edit Note Type tab definition
|
Title |
Description |
|
Note Type |
Required. A description or name of the note type. |
|
Active Indicator |
Indicates whether this note type parameter is active or inactive. Remove the check mark to deactivate. |
 >
>  >
>  >
>  >
> 
The Organization Parameter document defines an APO dollar amount limit for a specific organization as identified by a unique combination of chart and organization code.
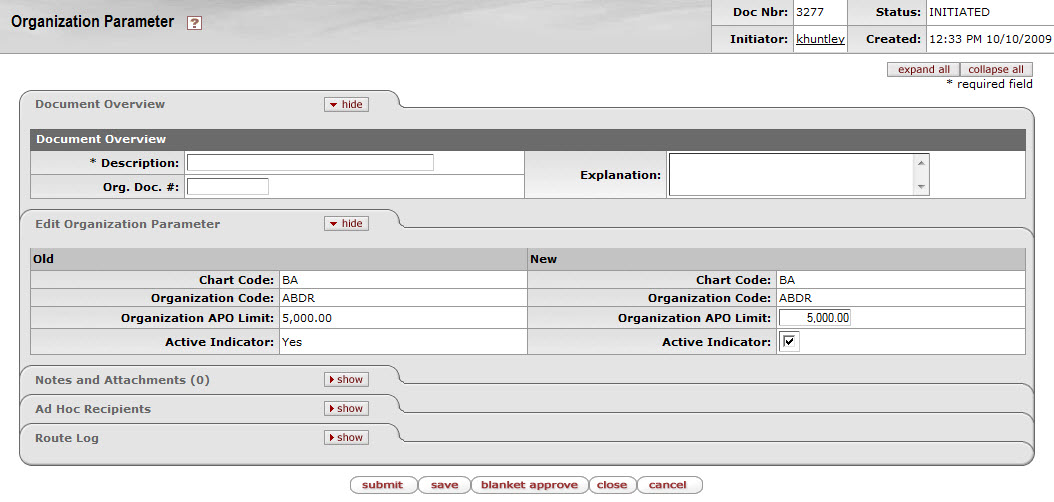
The Organization Parameter document includes the Edit Organization Parameter tab. The system automatically enters data into both the Old and New sections in this tab. Selected data fields are available for editing.
Edit Organization Parameter tab definition
|
Title |
Description |
|
Chart Code |
The chart code of the organization for which you want to create an APO limit. |
|
Organization Code |
The organization code that identifies the organization for which you want to create an APO limit. |
|
Organization APO Limit |
The upper dollar amount that you want this organization to be authorized for on APOs. |
|
Active Indicator |
Indicates whether this organization parameter is active or inactive. Remove the check mark to deactivate. |
 >
>  >
>  >
>  >
> 
Order Type identifies the type of order which affects workflow e.g., Firm, Standing, Subscription, etc.
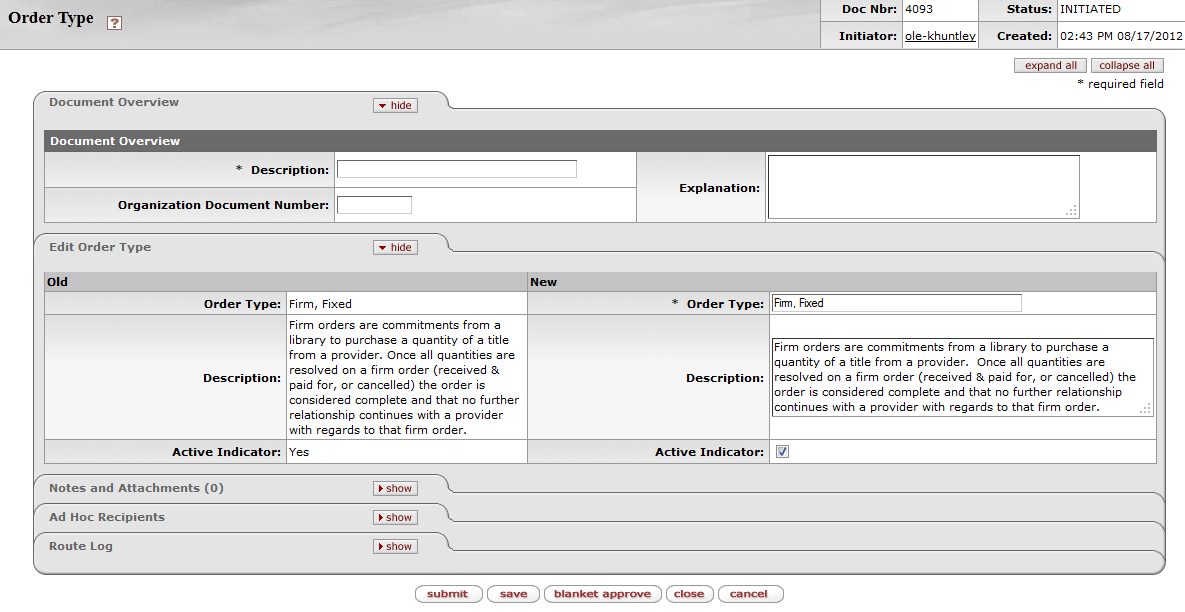
The Order Type document includes the Edit Order Type tab. The system automatically enters data into both the Old and New sections in this tab. Selected data fields are available for editing.
Edit Order Type tab definition
|
Title |
Description |
|
Order Type |
Required. A name of the order type. |
|
Description |
A description of the order type. |
|
Active Indicator |
Indicates whether this order type is active or inactive. Remove the check mark to deactivate. |
 >
>  >
>  >
>  >
> 
Payment method identifies the method of payment for invoicing e.g., check, cash, wire transfer, etc.
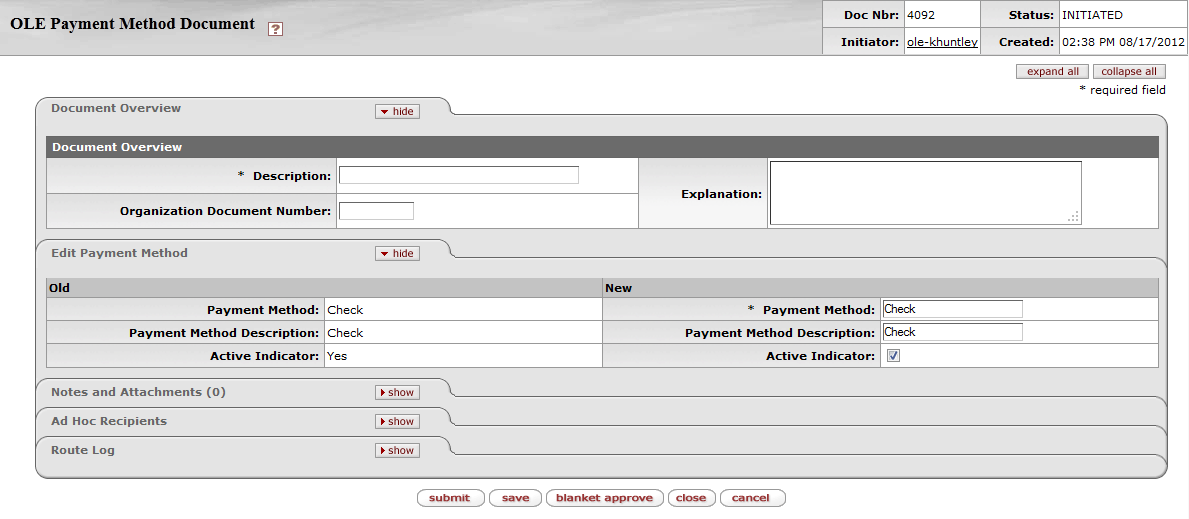
The Payment Method document includes the Edit Payment Method tab. The system automatically enters data into both the Old and New sections in this tab. Selected data fields are available for editing.
Edit Payment Method tab definition
|
Title |
Description |
|
Payment Method |
Required. A name of the payment method. |
|
Payment Method Description |
A description of the payment method. |
|
Active Indicator |
Indicates whether this payment method is active or inactive. Remove the check mark to deactivate. |
 >
>  >
>  >
>  >
> 
Payment requests using specified accounts can be excluded from the automatic approval process which approves an eligible en route document automatically after a specified number of days. The Payment Request Auto Approve Exclusions document identifies the accounts that should be excluded from automated approval.

The Payment Request Auto Approve Exclusions document includes the Edit Auto Approve Exclude tab. The system automatically enters data into both the Old and New sections in this tab. Selected data fields are available for editing.
Edit Auto Approve Exclude tab definition
|
Title |
Description |
|
Chart Code |
The Chart of Accounts code associated with the account to be excluded. |
|
Account Number |
The account number to be excluded from auto approval. |
|
Active Indicator |
Indicates whether this payment request auto approval exclusion is active or inactive. Remove the check mark to deactivate. |
 >
>  >
>  >
>  >
> 
The Purchase Order Contract Language document defines text to be included in purchase order contracts. The contract language is defined by campus, allowing variations among campus offices and inclusion of campus-specific language.
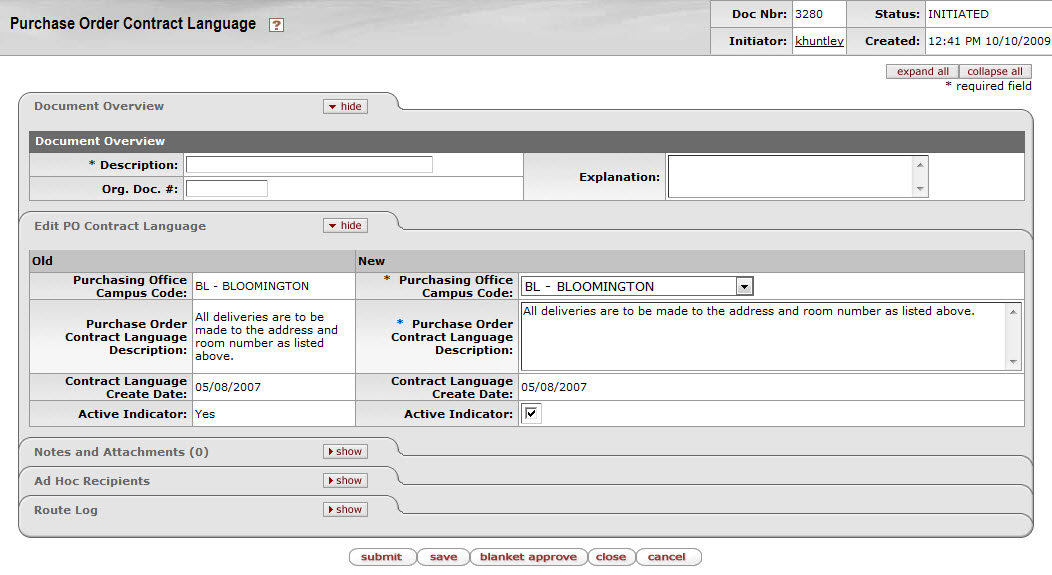
The Purchase Order Contract Language document includes the Edit PO Contract Language tab. The system automatically enters data into both the Old and New sections in this tab. Selected data fields are available for editing.
Edit PO Contract Language tab definition
|
Title |
Description |
|
Purchasing Office Campus Code |
Required. The campus code that uses this contract language. Existing campus codes may be retrieved from the list. |
|
Purchase Order Contract Language Description |
Required. Language description associated with this PO contract related to this campus code. |
|
Contract Language Create Date |
Display only. This field is filled automatically, indicating the date on which this contract language was created in the system. |
|
Active Indicator |
Indicates whether this purchase order contract language code is active or inactive. Remove the check mark to deactivate this code. |
 >
>  >
>  >
>  >
> 
The Purchase Order Item Status identifies the status of individual purchase order items e.g., On order, Received, In process.
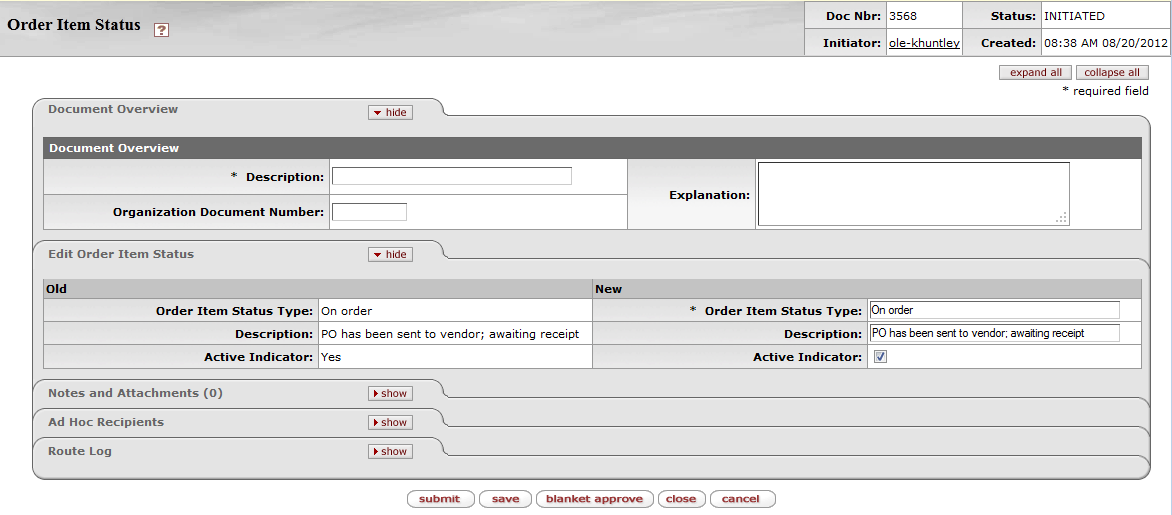
The Purchase Order Item Status document includes the Edit Order Item Status tab. The system automatically enters data into both the Old and New sections in this tab. Selected data fields are available for editing.
Edit PO Contract Language tab definition
|
Title |
Description |
|
Order item Status Type |
Required. A name of the order item status type. |
|
Description |
A description of the order item status type. |
|
Active Indicator |
Indicates whether this order item status type is active or inactive. Remove the check mark to deactivate this type. |
 >
>  >
>  >
>  >
> 
The Purchase Order Quote Language document defines the terms and conditions that print on every request for quotation.

The Purchase Order Quote Language document includes the Edit Purchase Order Quote Language tab. The system automatically enters data into both the Old and New sections in this tab. Selected data fields are available for editing.
Edit Purchase Order Quote Language tab definition
|
Title |
Description |
|
Purchase Order Quote Language Description |
Required. Enter the PO quote language specifying conditions and requirements for responding to a quote. |
|
Active |
Indicates whether this purchase order quote language is active or inactive. Remove the check mark to deactivate. |
|
Purchase Order Quote Language Create Date |
Display only. The date defaults to the current date for 'new and copy' actions. |
 >
>  >
>  >
>  >
> 
The Purchase Order Quote List document defines lists of vendors that have been created for a specific commodity. For example, a purchasing agent may need to get a quote for electrical supplies. Rather than add each electrical supply vendor to the quote one-by-one, he or she may select a pre-existing list of available electrical suppliers.
The Purchase Order Quote List document includes the Edit Quote List tab and the Vendors tab. The system automatically enters data into both the Old and New sections in this tab. Selected data fields are available for editing.

Edit Quote List tab definition
|
Title |
Description |
|
Purchase Order Quote List Name |
Required. The name of this PO quote list. |
|
Contract Manager |
Required. The contract manager for the quote list. Existing contract
managers may be retrieved from the list or from the lookup |
|
Active Indicator |
Indicates whether this purchase order quote list is active or inactive. Remove the check mark to deactivate. |
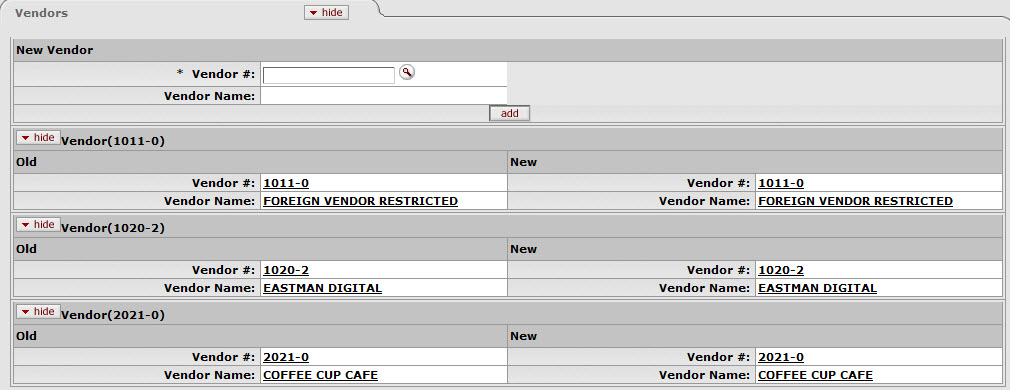
Note that more than one vendor may be assigned to the quote list using the 'add' functionality.
Vendors tab definition
|
Title |
Description |
|
Vendor # |
Required. The vendor number. Existing vendor numbers may be retrieved from
the lookup |
|
Vendor Name |
Display-only. The field is populated when a valid vendor number is selected. |
 >
>  >
>  >
>  >
> 
The Purchase Order Quote Status document defines the status options that may be assigned by a purchasing agent to each vendor in an existing quotation. For example, a vendor who did not submit a bid would be given the status 'No Response. For a vendor who submitted a bid that was unacceptable, the vendor would be given the status, 'Received, Bid Unacceptable.
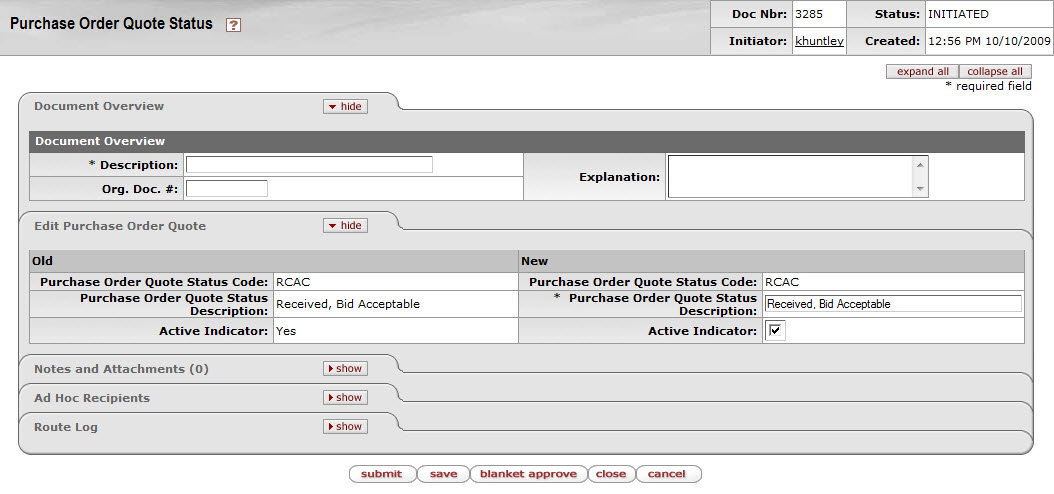
The Purchase Order Quote Status document includes the Edit Purchase Order Quote tab. The system automatically enters data into both the Old and New sections in this tab. Selected data fields are available for editing.
Edit Purchase Order Quote tab definition
|
Title |
Description |
|
Purchase Order Quote Status Code |
A unique code to identify a particular PO quote status. |
|
Purchase Order Quote Status Description |
Required. A description of the PO quote status. |
|
Active Indicator |
Indicates whether this purchase order quote status is active or inactive. Remove the check mark to deactivate. |
 >
>  >
>  >
>  >
> 
The Purchase Order Vendor Choice document defines reasons that indicate why a specific vendor was chosen for a purchase.
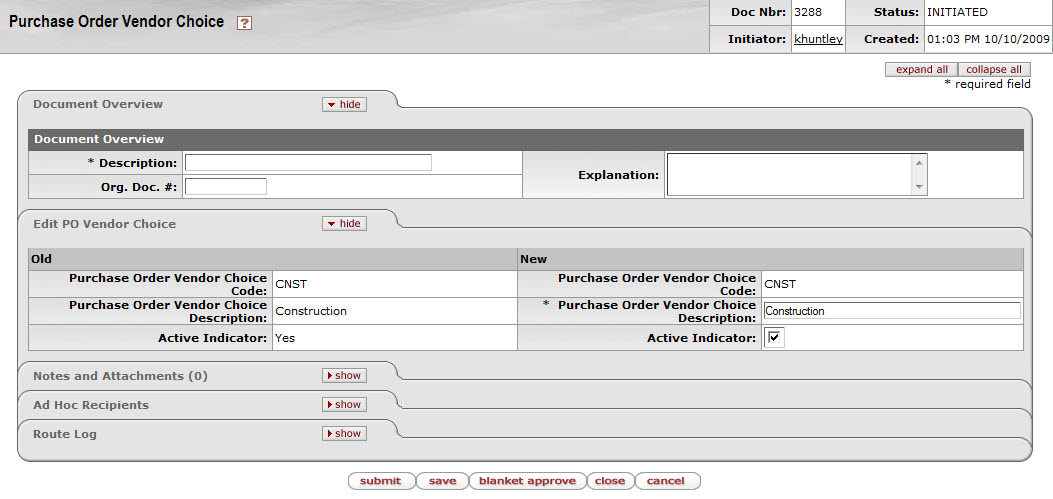
The Purchase Order Vendor Choice document includes the Edit PO Vendor Choice tab. The system automatically enters data into both the Old and New sections in this tab. Selected data fields are available for editing.
Edit PO Vendor Choice tab definition
|
Title |
Description |
|
Purchasing Order Vendor Choice Code |
The code to identify the reason for selecting this vendor. |
|
Purchase Order Vendor Choice Description |
Required. The familiar title for the purchase order vendor choice code. |
|
Active Indicator |
Indicates whether this purchase order vendor choice code is active or inactive. Remove the check mark to deactivate this code. |
 >
>  >
>  >
>  >
> 
The Receiving Address document defines the possible default receiving addresses for each department.

The Receiving Address document includes the Edit Receiving Address tab. The system automatically enters data into both the Old and New sections in this tab. Selected data fields are available for editing.
Edit Receiving Address tab definition
|
Title |
Description |
|
Chart Code |
Required. The Chart of Accounts code associated with this organization.
Existing chart codes may be retrieved from the lookup |
|
Organization Code |
Optional. The organization code associated with the receiving address.
Existing organization codes may be retrieved from the lookup |
|
Receiving Name |
Required. The familiar title of the receiving address. |
|
Receiving Line 1 Address |
Required. The first line of the address information for this receiving address. |
|
Receiving Line 2 Address |
Optional. The second line of the address information for this receiving address. |
|
Receiving City Name |
Required. The city name associated with this receiving address. |
|
Receiving State Code |
The state code associated with this receiving address. Existing state codes may be retrieved from the list. |
|
Receiving Postal Code |
The postal code associated with this receiving address. |
|
Receiving Country Code |
Required. The country associated with this receiving address. Existing countries may be retrieved from the list. |
|
Use Receiving Address Indicator |
Indicates if users are to be allowed to specify the receiving address on requisitions and POs. Clear the box if users are not to be allowed to specify the receiving address (if, for example, all goods are shipped to a central receiving area). |
|
Default Indicator |
Indicates if this address is to be used as the default receiving address. Clear the check box if it is not. |
|
Active Indicator |
Indicates whether this receiving address is active or inactive. Remove the check mark to deactivate. |
 >
>  >
>  >
>  >
> 
The Receiving Threshold document is used to define criteria that determine when an order requires line-item receiving. When an order meets certain criteria and is above a pre-defined dollar limit, the purchase order will not be paid until line item receiving has occurred.
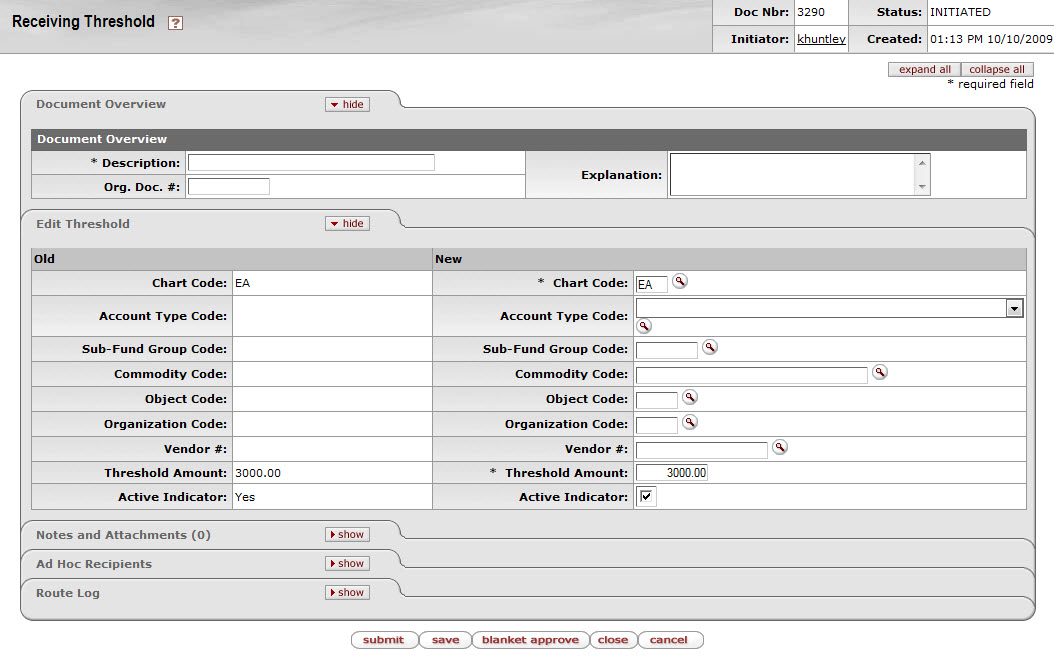
The Receiving Threshold document includes the Edit Threshold tab. The system automatically enters data into both the Old and New sections in this tab. Selected data fields are available for editing.
Edit Threshold tab definition
|
Title |
Description |
|
Chart Code |
The Chart of Accounts code associated with this receiving threshold.
Existing chart codes may be retrieved from the lookup |
|
Account Type Code |
The account type code to be used on this receiving threshold. Existing
account type codes may be retrieved from the list or from the lookup |
|
Sub-Fund Group Code |
The sub fund group code associated with this receiving threshold. Existing
sub fund group codes may be retrieved from the lookup |
|
Commodity Code |
The commodity code associated with this receiving threshold. Existing
commodity codes may be retrieved from the lookup |
|
Object Code |
The object code associated with this receiving threshold. Existing object
codes may be retrieved from the lookup |
|
Organization Code |
The organization code associated with this receiving threshold. Existing
organization codes may be retrieved from the lookup |
|
Vendor # |
The vendor number associated with this receiving threshold. Existing vendor
numbers may be retrieved from the lookup |
|
Threshold Amount |
Required. The minimum amount that is required to be processed through the receiving process. |
|
Active Indicator |
Indicates whether this receiving threshold is active or inactive. Remove the check mark to deactivate. |
 >
>  >
>  >
>  >
> 
The Recurring Payment Frequency document defines payment frequency periods, such as 'annually,' 'monthly,' or 'quarterly.
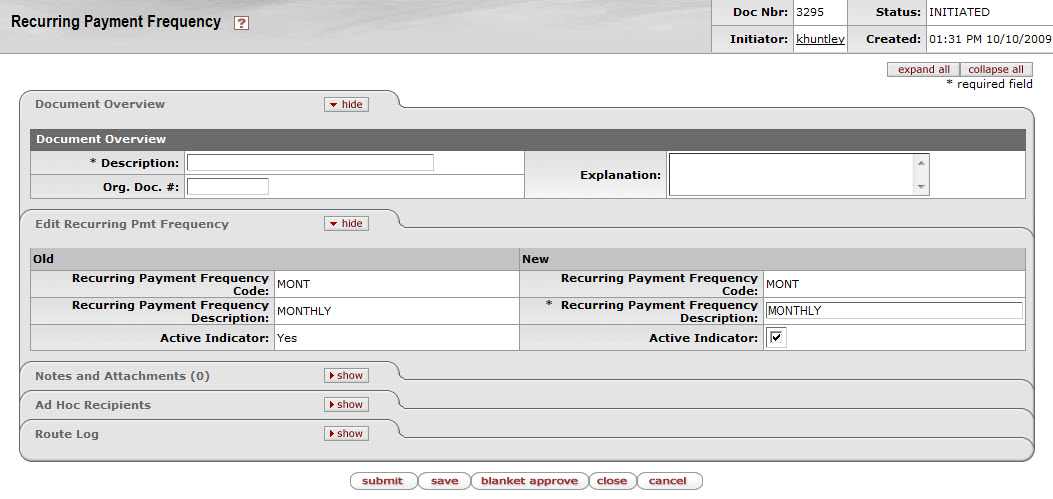
The Recurring Payment Frequency document includes the Edit Recurring Pmt Frequency tab. The system automatically enters data into both the Old and New sections in this tab. Selected data fields are available for editing.
Edit Recurring Pmt Frequency tab definition
|
Title |
Description |
|
Recurring Payment Frequency Code |
The code to identify this type of recurring payment frequency. |
|
Recurring Payment Frequency Description |
Required. The familiar title of this recurring payment frequency. |
|
Active Indicator |
Indicates whether this recurring payment frequency code is active or inactive. Remove the check mark to deactivate this code. |
 >
>  >
>  >
>  >
> 
This Recurring Payment Type document defines different types of recurring payments that can be established for a purchase order. Examples might include 'Fixed Schedule, Fixed Payment' or 'Fixed Schedule, Variable Amount.
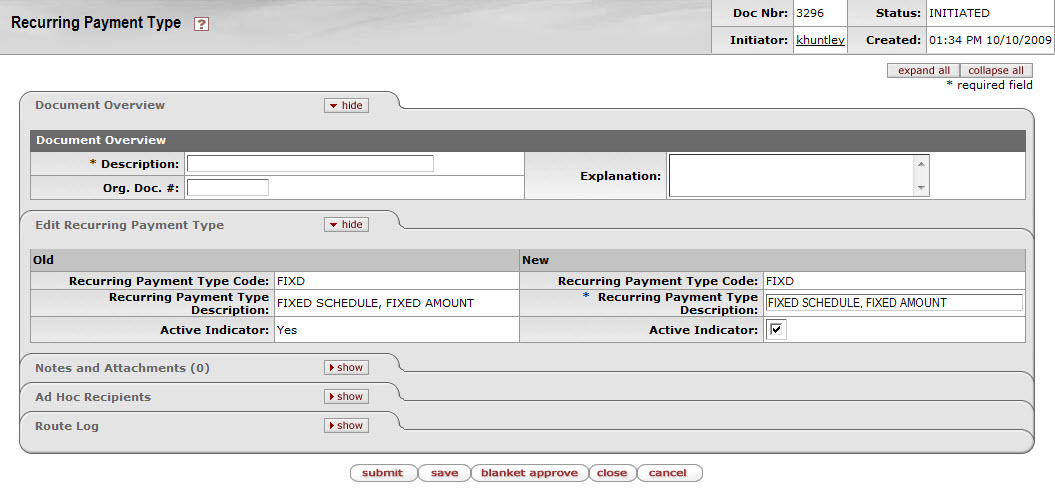
The Recurring Payment Type document includes the Edit Recurring Payment Type tab. The system automatically enters data into both the Old and New sections in this tab. Selected data fields are available for editing.
Edit Recurring Payment Type tab definition
|
Title |
Description |
|
Recurring Payment Type Code |
The code to identify this recurring payment type. |
|
Recurring Payment Type Description |
Required. The description of this recurring payment type. |
|
Active Indicator |
Indicates whether this recurring payment type code is active or inactive. Remove the check mark to deactivate this code. |
 >
>  >
>  >
>  >
> 
The Request Source Type document identifies the source of the request e.g., WorldCat, Amazon etc.
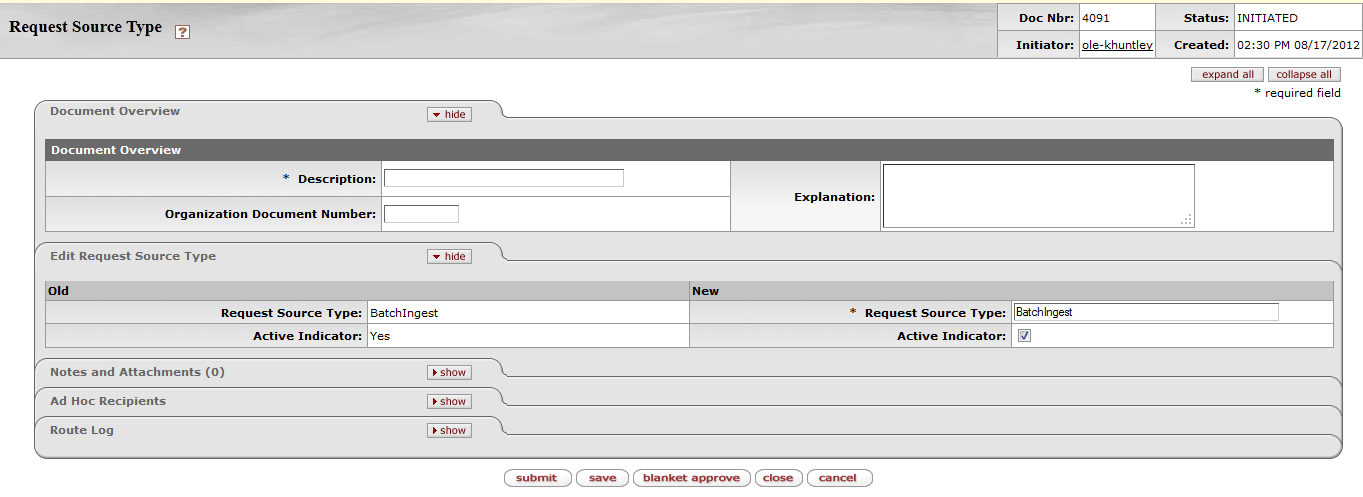
The Request Source Type document includes the Edit Request Source Type tab. The system automatically enters data into both the Old and New sections in this tab. Selected data fields are available for editing.
Edit Request Source Type tab definition
|
Title |
Description |
|
Request Source Type |
Required. The description or name of this request source type. |
|
Active Indicator |
Indicates whether this request source type is active or inactive. Remove the check mark to deactivate. |
 >
>  >
>  >
>  >
> 
This table defines different sources for requisitions that can be imported into the Kuali AP/Purchasing documents.
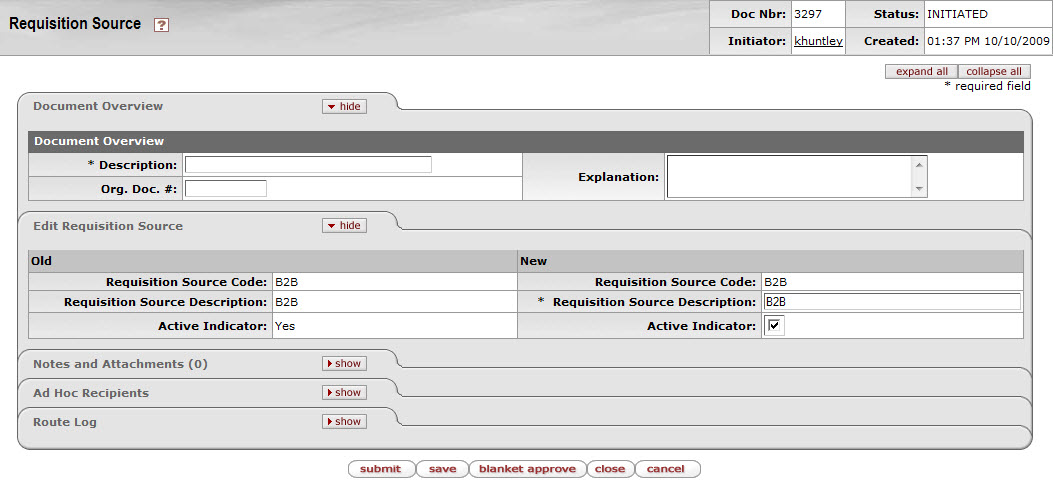
The Requisition Source document includes the Edit Requisition Source tab. The system automatically enters data into both the Old and New sections in this tab. Selected data fields are available for editing.
Edit Requisition Source tab definition
|
Title |
Description |
|
Requisition Source Code |
The code that identifies this source of requisition information. |
|
Requisition Source Description |
Required. The description of this source of requisition. |
|
Active Indicator |
Indicates whether this requisition source code is active or inactive. Remove the check mark to deactivate this code. |
 >
>  >
>  >
>  >
> 
The Sensitive Data document indicates why a Purchase Order document might be restricted from viewing. When a user wants to restrict a document from view because it contains sensitive data, he/she must select a reason why the data is sensitive. After a reason is specified, only authorized staff members may view the document.

The Sensitive Data document includes the Edit Sensitive Data tab. The system automatically enters data into both the Old and New sections in this tab. Selected data fields are available for editing.
Edit Sensitive Data tab definition
|
Title |
Description |
|
Sensitive Data Code |
A unique code to identify a particular type of sensitive data. |
|
Sensitive Data Description |
Required. A description of this type of sensitive data. |
|
Active Indicator |
Indicates whether this sensitive data code is active or inactive. Remove the check mark to deactivate this code. |
 >
>  >
>  >
>  >
> 
This Vendor Stipulation document defines text to be included in purchase order documents that stipulates order conditions to vendors. The stipulations are defined by a unique identifier, which allows pre-defined stipulation language to be easily added to orders.
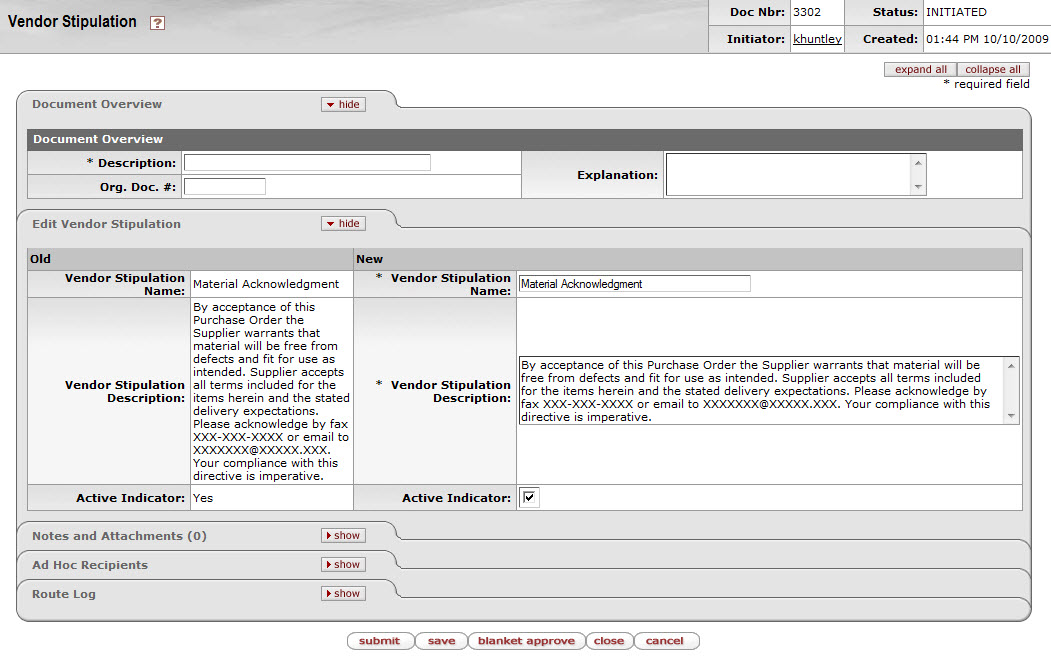
The Vendor Stipulation document includes the Edit Vendor Stipulation tab. The system automatically enters data into both the Old and New sections in this tab. Selected data fields are available for editing.
Edit Vendor Stipulation tab definition
|
Title |
Description |
|
Vendor Stipulation Name |
Required. The familiar title of this vendor stipulation. |
|
Vendor Stipulation Description |
Required. The text describing the stipulation conditions and reasons for this vendor stipulation. |
|
Active Indicator |
Indicates whether this vendor stipulation is active or inactive. Remove the check mark to deactivate |
 >
>  >
>  >
>  >
> 
Licenses are initiated on the requisition when the “Licensing Requirement/Review” is checked. As licenses continue through their workflow, the “Licensing Requirement/Review Status” field on a requisition is automatically updated. The License Requirement document is used to inform the requisition of the workflow and status of the License Request.
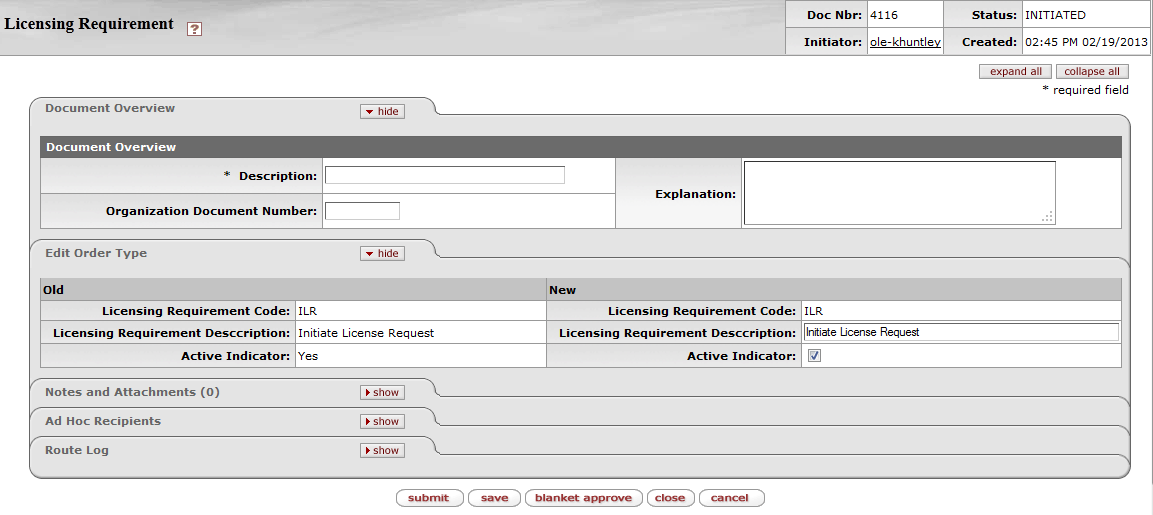
The Licensing Requirement document includes the Edit License Requirement tab. The system automatically enters data into both the Old and New sections in this tab. Selected data fields are available for editing.
Edit Requisition Source tab definition
|
Title |
Description |
|
Licensing Requirement Code |
The code that identifies this source of licensing requirement. |
|
Licensing Requirement Description |
Required. The description of this licensing requirement. |
|
Active Indicator |
Indicates whether this licensing requirement code is active or inactive. Remove the check mark to deactivate this code. |
 >
>  >
>  >
> 
Authentication Types are used to describe the authentication necessary for the E-Resource. Some examples may include IP address or Username and Password.
Authentication Types can be locally configured to be specific to each institution.
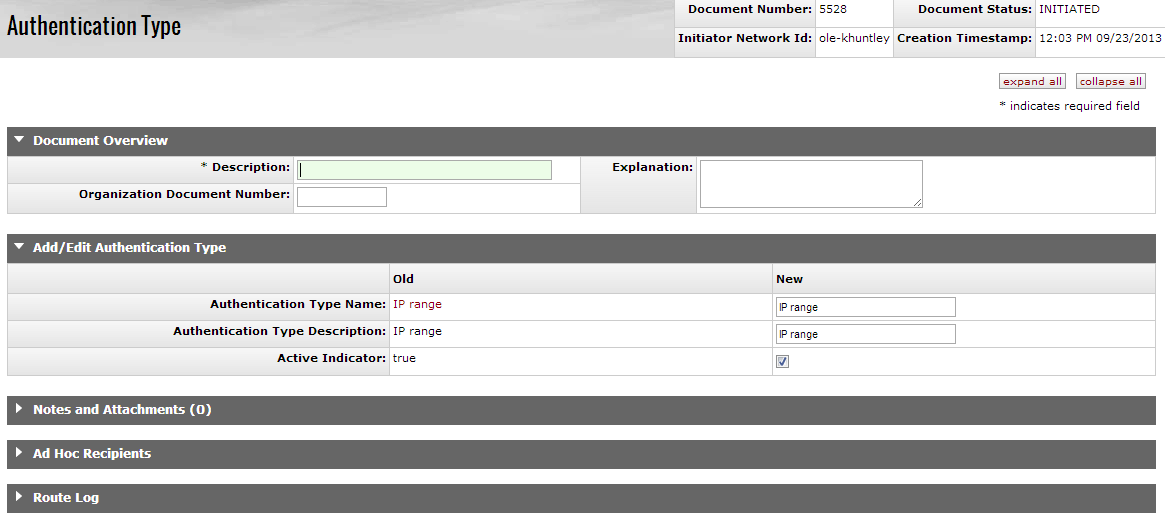
The Authentication Type document includes the Add/Edit Authentication Type tab. The system automatically enters data into both the Old and New sections. Selected data fields are available for editing.
Add/Edit Authentication Type Tab Definitions
|
Title |
Description |
|
Authentication Type Name |
Required. Brief name that will display in the Authentication Type field of the Access tab on the E-Resource Record. |
|
Authentication Type Description |
Optional. Include a brief description. |
|
Active Indicator |
Indicates whether this status is active or inactive. Remove the check mark to deactivate. |
 >
>  >
>  >
> 
The Access Location document is used to describe parts or locations of an institution that access has been granted to for a particular E-Resource. Access Locations can be locally configured to be specific to each institution.
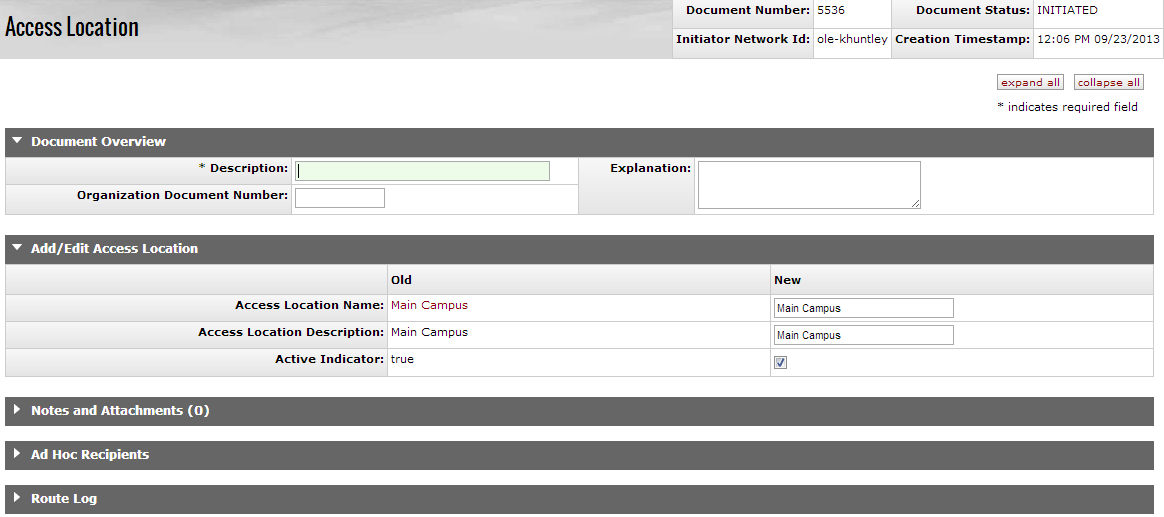
The Access Location document includes the Add/Edit Access Location tab. The system automatically enters data into both the Old and New sections. Selected data fields are available for editing.
Add/Edit Access Location Tab Definitions
|
Title |
Description |
|
Access Location Name |
Required. Brief name that will display in the Access Location field on the Access tab of the E-Resource Record. |
|
Access Location Description |
Optional. Include a brief description. |
|
Active Indicator |
Indicates whether this status is active or inactive. Remove the check mark to deactivate. |
 >
>  >
>  >
> 
E-Resource status is used to describe the current status of the E-Resource according to local workflow and reporting needs. This field is manually applied to the record by staff and is not automatically updated. Status values can be locally configured to be specific to each institution.
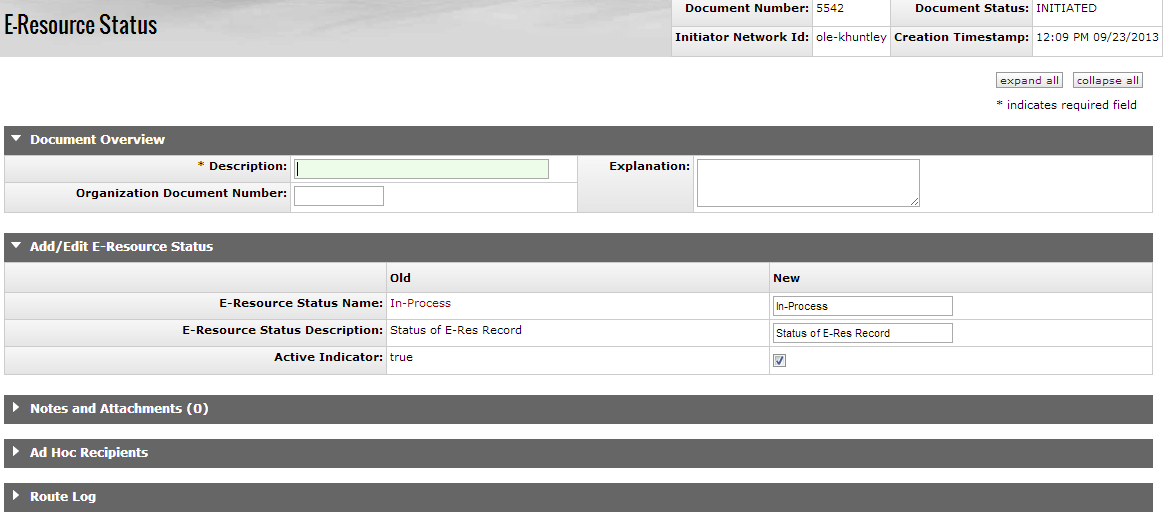
The E-Resource Status document includes the Add/Edit E-Resource Status tab. The system automatically enters data into both the Old and New sections. Selected data fields are available for editing.
Add/Edit E-Resource Status Tab Definitions
|
Title |
Description |
|
E-Resource Status Name |
Required. Brief name that will display in the Status field on the Overview tab of the E-Resource Record. |
|
E-Resource Status Description |
Optional. Include a brief description. |
|
Active Indicator |
Indicates whether this status is active or inactive. Remove the check mark to deactivate. |
 >
>  >
>  >
> 
Package Type reflects the type of the package in GOKb. For example, locally negotiated or consortial package.
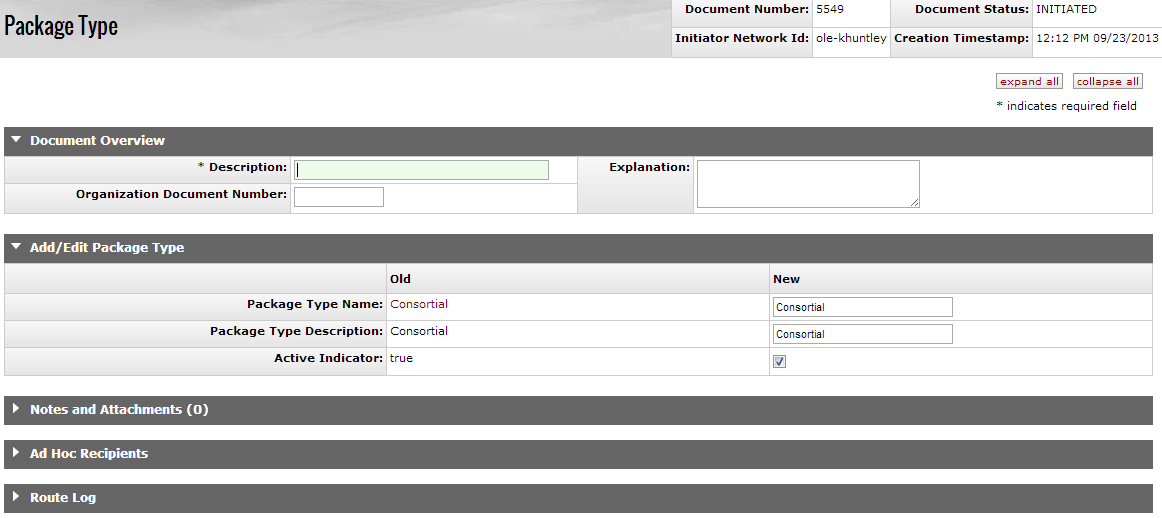
The Package Type document includes the Add/Edit Package Type tab. The system automatically enters data into both the Old and New sections. Selected data fields are available for editing.
Add/Edit Package Type Tab Definitions
|
Title |
Description |
|
Package Type Name |
Required. Brief name that will display in the Package Type field in the Acquisitions tab of the E-Resource Record. |
|
Package Type Description |
Optional. Include a brief description. |
|
Active Indicator |
Indicates whether this status is active or inactive. Remove the check mark to deactivate. |
 >
>  >
>  >
> 
Package scope represents the scope of the E-Resource as pulled from GOKb. For example, front file or back file.
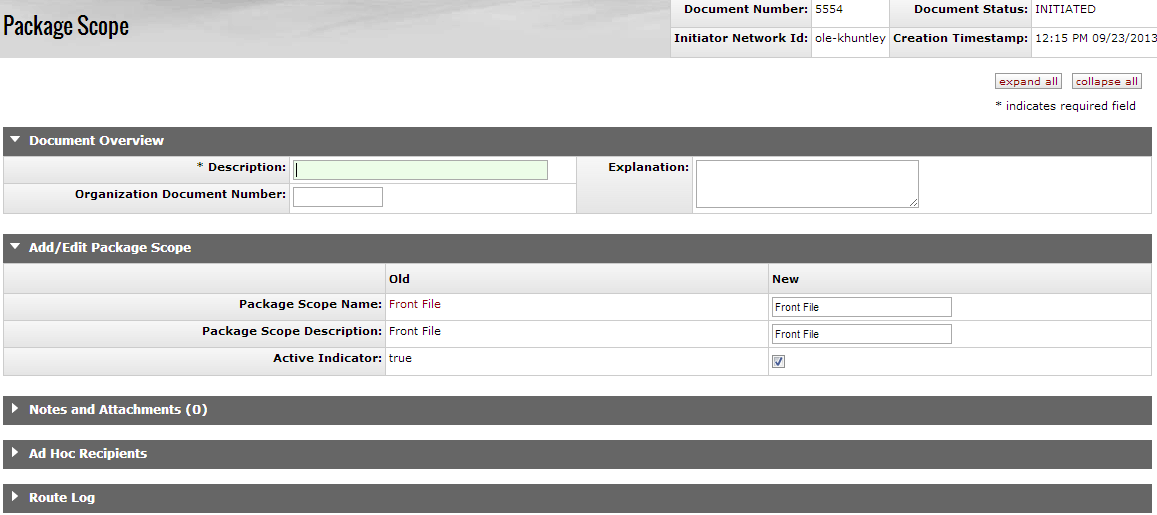
The Package Scope document includes the Add/Edit Package Scope tab. The system automatically enters data into both the Old and New sections. Selected data fields are available for editing.
Add/Edit Package Scope Tab Definitions
|
Title |
Description |
|
Package Scope Name |
Required. Brief name that will display in the Package Scope field in the Acquisitions tab of the E-Resource Record. |
|
Package Scope Description |
Optional. Include a brief description. |
|
Active Indicator |
Indicates whether this status is active or inactive. Remove the check mark to deactivate. |
 >
>  >
>  >
> 
The Material Type document is used to define the type(s) of material (ex: journal, database) for reporting and managing different types of E-Resources. Material Type can be locally configured to be specific to each institution.
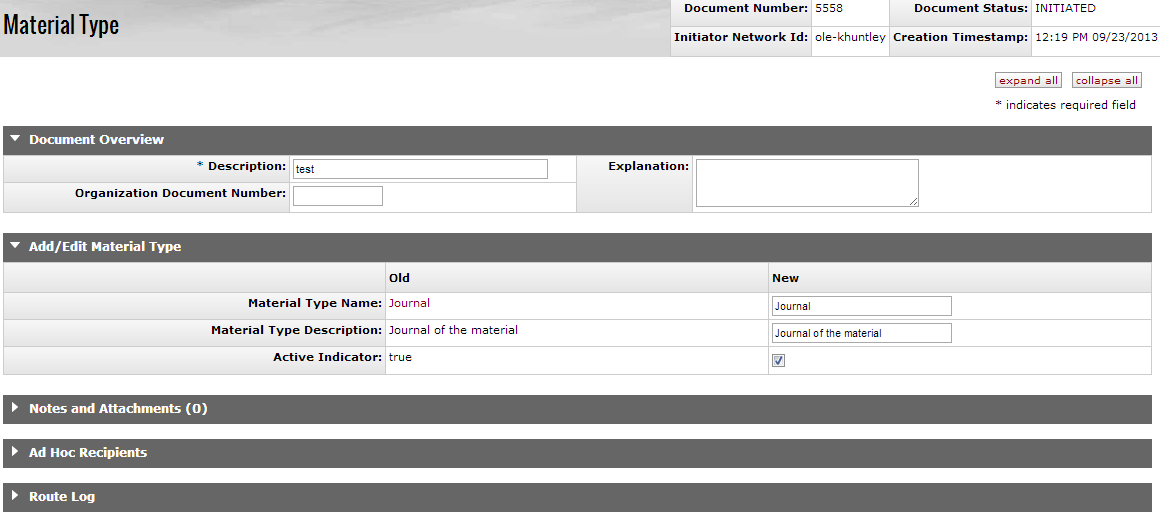
The Material Type document includes the Add/Edit Material Type tab. The system automatically enters data into both the Old and New sections. Selected data fields are available for editing.
Add/Edit Material Type Tab Definitions
|
Title |
Description |
|
Material Type Name |
Required. Brief name that will display in the Material Type field on the Acquisitions tab of the E-Resource Record. |
|
Material Type Description |
Optional. Include a brief description. |
|
Active Indicator |
Indicates whether this status is active or inactive. Remove the check mark to deactivate. |
 >
>  >
>  >
> 
Access Types represent the type of access available for the E-Resource, for example, site-wide or limited access. Access Type can be locally configured to be specific to each institution.
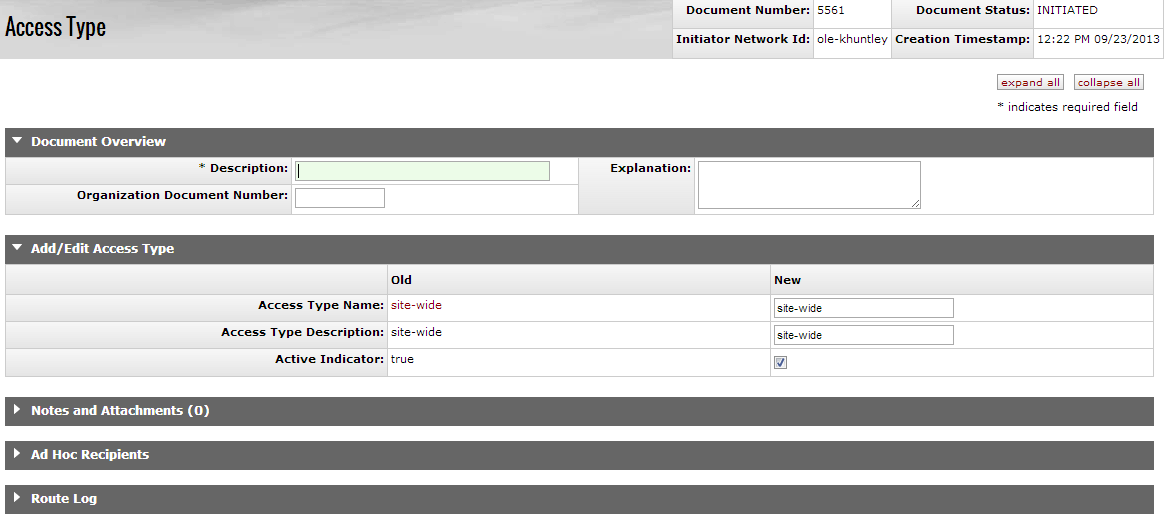
The Access Type document includes the Add/Edit Access Type tab. The system automatically enters data into both the Old and New sections. Selected data fields are available for editing.
Add/Edit Access Type Tab Definitions
|
Title |
Description |
|
Access Type Name |
Required. Brief name that will display in the Type of Access field on the Access tab of the E-Resource Record. |
|
Access Type Description |
Optional. Include a brief description. |
|
Active Indicator |
Indicates whether this status is active or inactive. Remove the check mark to deactivate. |
 >
>  >
>  >
> 
The Content Type Document is used to define the type(s) of content included in the E-Resource (ex: text, images) for reporting and management. Content Type can be locally configured to be specific to each institution.
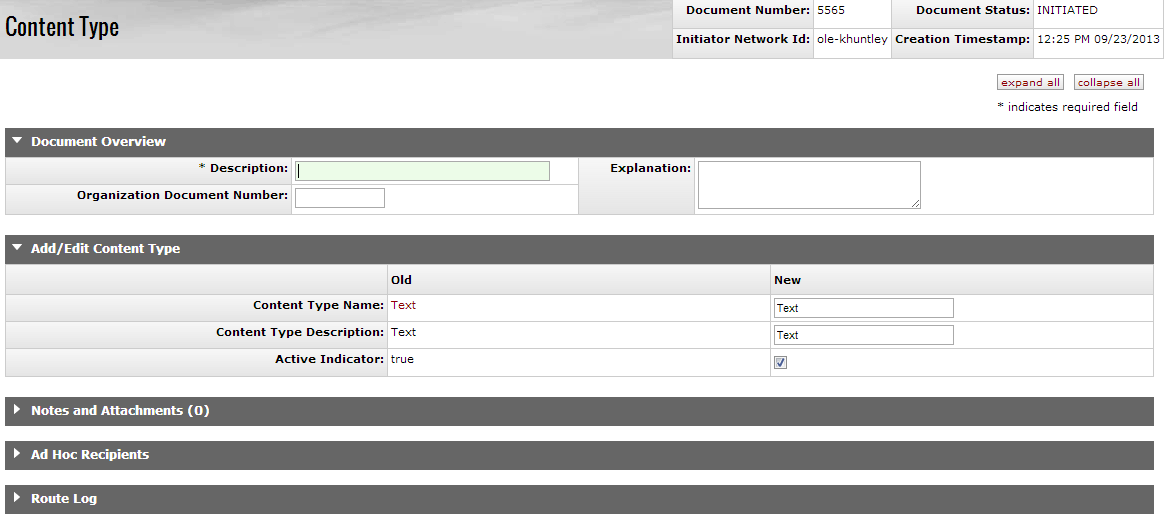
The Content Type document includes the Add/Edit Content Type tab. The system automatically enters data into both the Old and New sections. Selected data fields are available for editing.
Add/Edit Content Type Tab Definitions
|
Title |
Description |
|
Content Type Name |
Required. Brief name that will display in the Content Type field on the Acquisitions tab of the E-Resource Record. |
|
Content Type Description |
Optional. Include a brief description. |
|
Active Indicator |
Indicates whether this status is active or inactive. Remove the check mark to deactivate. |
 >
>  >
>  >
> 
The Payment Type document is used to define the type of payment for the E-Resource. Examples may include free, paid, includes print, etc. Payment Type can be locally configured to be specific to each institution.
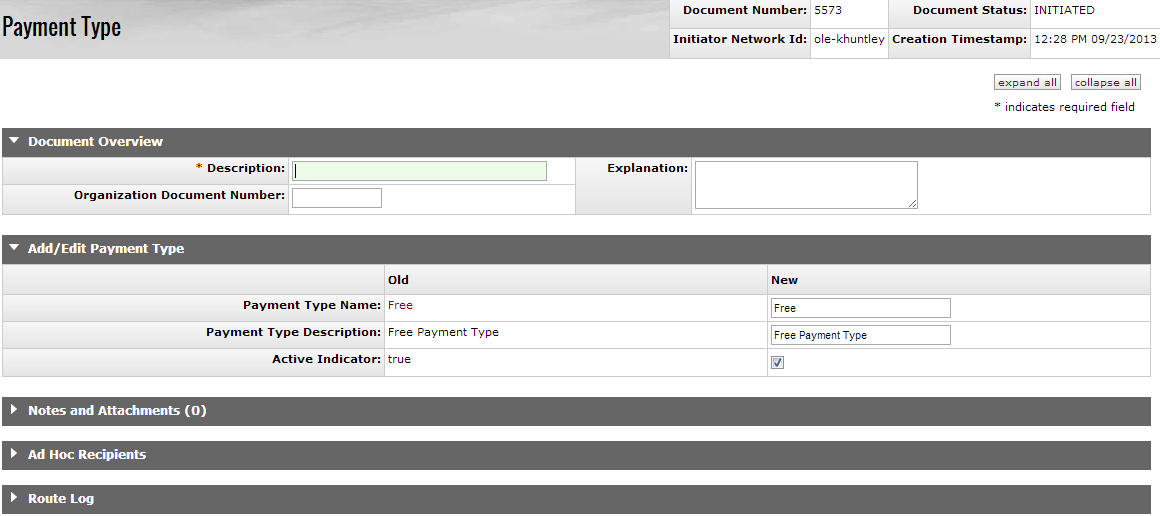
The Payment Type document includes the Add/Edit Payment Type tab. The system automatically enters data into both the Old and New sections. Selected data fields are available for editing.
Add/Edit Payment Type Tab Definitions
|
Title |
Description |
|
Payment Type Name |
Required. Brief name that will display in the Payment Type field on the Acquisitions tab of the E-Resource Record. |
|
Payment Type Description |
Optional. Include a brief description. |
|
Active Indicator |
Indicates whether this status is active or inactive. Remove the check mark to deactivate. |
 >
>  >
>  >
> 
The Request Priority document is used to define the priority of the request for purchase. Request Priority can be locally configured to be specific to each institution.
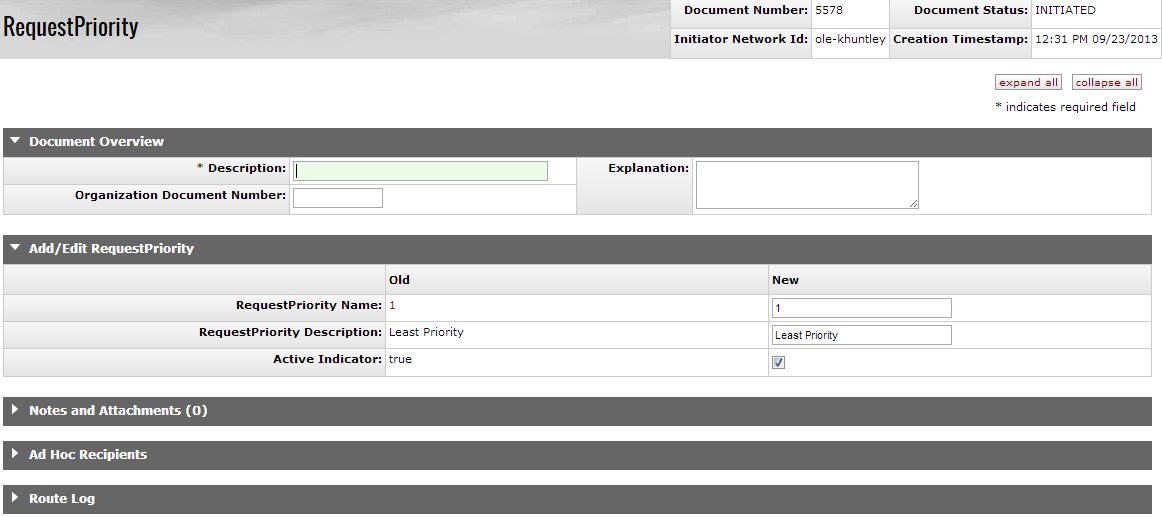
The Request Priority document includes the Add/Edit Request Priority tab. The system automatically enters data into both the Old and New sections. Selected data fields are available for editing.
Add/Edit Request Priority Tab Definitions
|
Title |
Description |
|
Request Priority Name |
Required. Brief name that will display in the Request Priority field on the Selection tab of the E-Resource Record. |
|
Request Priority Description |
Optional. Include a brief description. |
|
Active Indicator |
Indicates whether this status is active or inactive. Remove the check mark to deactivate. |
The General Ledger (GL) contains numerous processes that ensure that OLE runs correctly. For users processing e-doc transactions, the most apparent of these processes are the generation of offsets and the posting of transactions to the balance tables. Other important General Ledger processes are less apparent to users. These processes ensure that transaction data are valid, that capitalization entries are created, and that indirect cost recovery and cost share transfers occur. OLE also offers related features such as sufficient funds checking and flexible offsets for institutions that want to utilize this functionality.
OLE will apply encumbrances and expenses to the General Ledger as a result of OLE implemented functionality for encumbrances, expenses, budget adjustments and transfers of funds. Real-time GL posting is made available, with certain GL entries updating their status through nightly “batch jobs”.
Note
We continue to reconcile university financial integrations and OLE’s use of Budget vs. Actual (cash) balances in our coding efforts.
Requisition
No GL entries for this form of “pre-order”
Purchase Order, Purchase Order Amendment, other forms of PO
A final, “approved” Purchase Order will apply an encumbrance to the General Ledger as “pending”. During nightly batch jobs, the pending entry goes to “final”. Pending GL entries will be visible on the PO’s General Ledger Pending Entries tab, and be reflected in balance inquiries when “pending” or “all” transactions included.
Sample: pending GL entry from approved PO with default (OLE Sample Data/object code 9892- RESV OUTSTANDING ORDR EXTRNL ENCUMBRNCES, Credit offset to the purchase order Debit) Offset- not yet processed through nightly batch job

Sample: PO that has processed to nightly batch job- no pending GL entries

Payment Request
As PREQ’s are payments to vendors, any PREQ created with accounting lines will post to the GL as “pending” whether it has completed workflow or not (unlike PO which must be final/approved).
PREQ will reverse the encumbrance, as noted on the e-Doc, and apply the expense immediately.
Nightly batch jobs will take approved PREQ’s to final status, and also apply liabilities to the balance sheet.
Sample, PREQ with relieved encumbrance:

Sample: General Ledger Pending entries on approved PREQ (encumbrance and initial offset from PO are reversed. Expense applied with offset to Acct Payable/liability object code 9041):

For all of the above transactions (Requisition to Purchase Order to Receiving to Payment Request), a user can see how the transactions post to the general ledger during the course of one day, i.e. if all docs created in same day, but including filter All on balance inquiry searches.
Tip
OLE is cloud-based, allowing users to have multiple browser windows open. If a user wants to query multiple Account-Objects for available balances, while having a transaction open in another window- that user could jump through multiple queries or details in one window, then just copy/paste preferred Chart, Account, Object codes into the Accounting lines of an open transactional document in another window- Requisition, Purchase Order, Payment Request, Transfer of Funds etc.
After you select the desired inquiry, you are taken to the lookup criteria screen. The lookup criteria may display some default values, which you may change. To view all General Ledger balances on a specific account you need to enter just the chart and the account number. You can be more specific by including additional criteria. To view specific sub-accounts, object codes or sub-object codes you may enter these criteria. On some of the inquiry screens the balance type may be changed to view something other than actual balances. For example, to view budget transactions, you can change the balance type to either ‘CB’ (current budget), ‘BB’ (base budget), or ‘MB’ (monthly budget which may not be available on all accounts).
The following is an example of the lookup criteria screen for the General Ledger Balance Lookup.
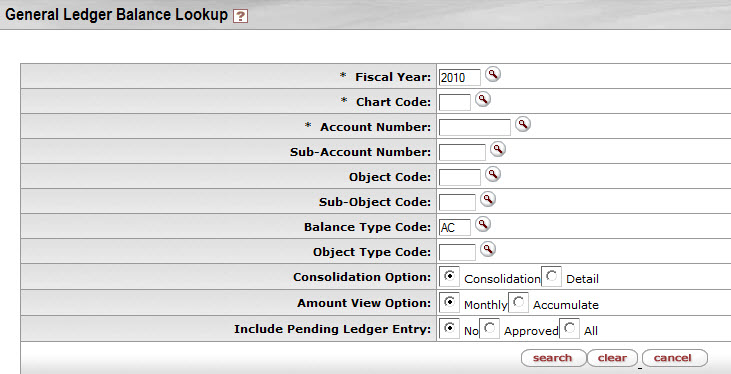
Click  when you have entered all necessary criteria and are ready to retrieve the
balances.
The inquiries contain various dollar accumulators. The following describes the meaning of each of the amounts displayed in the inquiry results, and which inquiries contain the bucket type.
Dollar Accumulator definition
|
Column Title |
Description |
|
Account Line Annual Balance Amount |
The total amount of activity in this account for this balance type across all periods of the selected fiscal year. Appears in Cash Balances inquiry and the General Ledger Balance inquiry. |
|
Actual Amount |
The total of all actual activity for a given balance line of the selected fiscal year. Appears in Available Balances inquiry and Balances by Consolidation inquiry. |
|
Available Cash Balance |
The total of the beginning balance and the year-to-date balance. Appears in the Cash Balances inquiry. |
|
Beginning Balance Line Amount |
The amount in this account for this balance type and object code at the beginning of the selected fiscal year. Appears in the General Ledger Balance inquiry. |
|
[Month] Balance Amount |
The total of all activity for a given accounting period. These fields are labeled as the month to which they refer (July, August, September, etc.). |
|
Budget Amount |
The current budget amount in this account for the selected fiscal year. Appears in Available Balances inquiry and Balances by Consolidation inquiry. |
|
Closed Amount |
The amount of the encumbrance that has been closed. Appears in the Open Encumbrances inquiry. |
|
Contracts Grants Beginning Balance Amount |
The cumulative amount in this account for this balance type and object code that was carried forward from the previous fiscal year. Appears in the Cash Balance inquiry and the General Ledger Balance inquiry. |
|
Encumbrances Amount |
The total of all encumbrance activity for a given account for the selected fiscal year. Appears in Available Balances inquiry and Balances by Consolidation inquiry. |
|
Ledger Entry Amount |
The dollar amount associated with a particular ledger entry. Appears in General Ledger Entry inquiry and Pending General Ledger Entry inquiry. |
|
Open Amount |
The amount of the original encumbrance. Subtracting the Closed Amount from the Open Amounts gives the amount of the encumbrance that is still outstanding. Appears in the Open Encumbrances inquiry. |
|
Variance |
The difference between the available budget and the actual amounts, plus encumbrances for an object code or category. Appears in Available Balances inquiry and Balances by Consolidation inquiry. |
The various inquiries display their initial balances at different levels of aggregation. You may drill down into detail when there is the Drill Down link available, or if the amount or other attribute (e-doc, for example) is a hyperlink. The following illustrations show the types of drilldowns available in the inquiries.
 |
You may drill down to the next level from the Drill Down link.
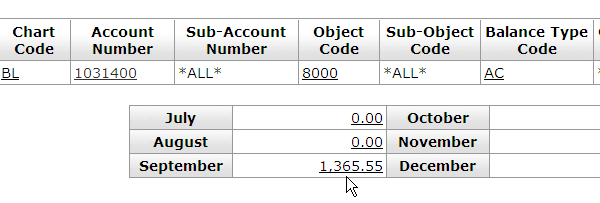 |
You may drill down to the entries that make up the total from the amount link.
 |
You may drill down to the actual e-doc from the document Number link.
 |
Drill down to pending entry
Balance inquiries allow you to choose to include or exclude pending ledger entries. These entries have been generated by OLE documents that have not yet been posted through the GL accounting cycle. After a financial processing e-doc is saved, it generates pending ledger entries. These entries are considered pending until the document is disapproved (at which point they are removed) or the document is fully approved and the entries are posted to the General Ledger.
You can choose to exclude pending ledger entries (the default behavior), include all pending ledger entries, or include only those entries associated with documents that have been approved (documents that have reached 'Processed' or 'Final' workflow status).
Note
Including all pending ledger entries in an inquiry can generate misleading results. Note that choosing to include all pending ledger entries in a balance inquiry can generate misleading results because saved documents may contain incomplete or unbalanced accounting entries. Choosing to view all pending ledger entries should be done with the understanding that unapproved entries may change drastically prior to actually posting or they may not post at all.
Refer to the following chart to identify the inquiry that applies to your analysis.
Inquiry Drilldown Patterns
|
By Consolidation |
By Level |
By Object |
GL Balance |
GL Entry Lookup |
By e-doc | |
|
Available Balances |
|
|
| |||
|
Cash Balances |
Lists cash balances only (no drilldown) | |||||
|
GL Balances |
|
|
| |||
|
GL Entry |
|
| ||||
|
GL Pending Entry |
|
| ||||
|
Open Encumbrances |
Lists open encumbrance amounts only (no drilldown) | |||||
 >
> >
> >
>
Note
For general information about entering lookup criteria, interpreting dollar accumulators, drilling down into inquiries to see more detail, and including or excluding pending entries, see GL Inquiries: Basic Information.
The General Ledger Entry inquiry displays the individual transactions that make up the balance in an account. It is the same inquiry that can be displayed by drilling down into the General Ledger Balance report, but instead of drilling down from the General Ledger Balance screen you can go directly to this report by selecting it from the main Balance Inquires menu.
The drilldown pattern of this inquiry is as follows:
General Ledger Entry
E-Doc
Fill in at least Fiscal Year, Chart Code, Account Number, and Fiscal Period or Fiscal Year and Document Number. The lookup criteria default to the current fiscal year, balance type of 'AC'(actuals), and the current fiscal period.
Use the lookup icon  as necessary to select the criteria. Select the desired Pending Ledger Entry Approved Indicator option. The Pending General Ledger inquiry offers two alternatives for including the pending
ledger entries: the ability to include all pending entries by selecting All or only those pending entries that are fully approved by selecting Approved. Cancelled and disapproved pending entries are not pulled into the
balance inquiry results.
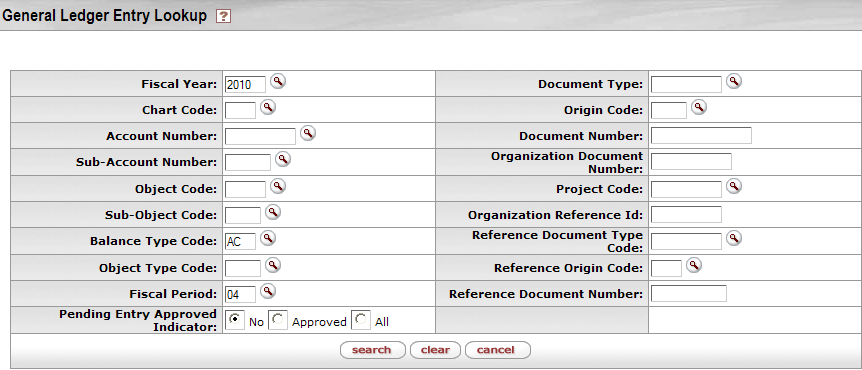
The inquiry results list the transactions that meet your lookup criteria. From here you can drill down into the e-doc that created the transaction.

Clicking the document number link from the General Ledger Entry inquiry results allows you to open the underlying e-doc which makes up the transaction. You may view, copy or perform error correction once the document is open, within the constraints of your existing OLE role(s). Note that no link will be displayed if the document originates from a system other than OLE.
 >
> >
> >
>
Note
For general information about entering lookup criteria, interpreting dollar accumulators, drilling down into inquiries to see more detail, and including or excluding pending entries, see GL Inquiries: Basic Information.
The Available Balances inquiry displays the cumulative balances for an account by object code. The drilldown pattern is as follows:
General Ledger Balance
GL Entry Lookup
E-Doc
Fill in at least Fiscal Year, Chart Code and Account Number. Use the lookup
icon  as necessary to select the criteria. Select the desired Consolidation and Included Pending Entry
options.
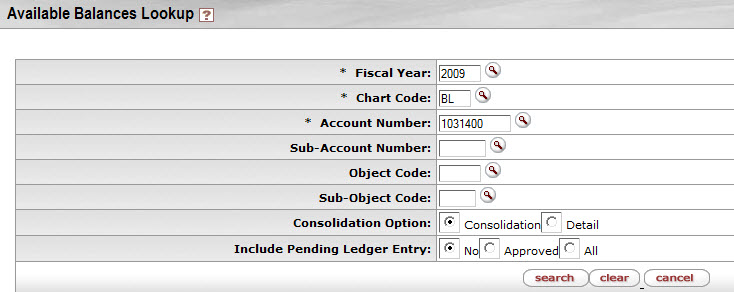
The search results will show the amount of money that has been budgeted for this
account broken down by Object Codes. To see further details including Actuals and Encumbrance
Amounts, select All on the Include Pending
Ledger Entry field and click the  button again. You may drill into the amount column to view the details that
make up the total amount.
 Each underlined piece of information in the results grid is an active URL which
when clicked can provide you further details about each piece of information. For example clicking
on the Actuals amount gives you a monthly breakdown of payment requests that have been
processed.
For more information on drilldowns, see above.
Available Balance details can also be accessed from the Requisitions page by
clicking on the  button after you have added an accounting line:

From the Balance Inquiry Report Menu, select Available Balances:

To return to the requisition, click the  button on each screen.
 >
>  >
>  >
>  >
> 
The Globally Protected Field Maintenance Document is used to maintain the protected fields for importing files into the OLE DocStore. The globally protected fields contain MARC tags/indicators/subfields that should not be dropped from the MARC record but could be modified if indicated.
A list entry has several data elements: tag, first indicator, second indicator, (optionally) subfield code, and protection flag. Wildcards (for example: 01*, 9**, 050*) can be used anywhere except for the protection flag. The list entry will apply to all matching fields.
Note
Globally protected fields can be overridden through the load profile.
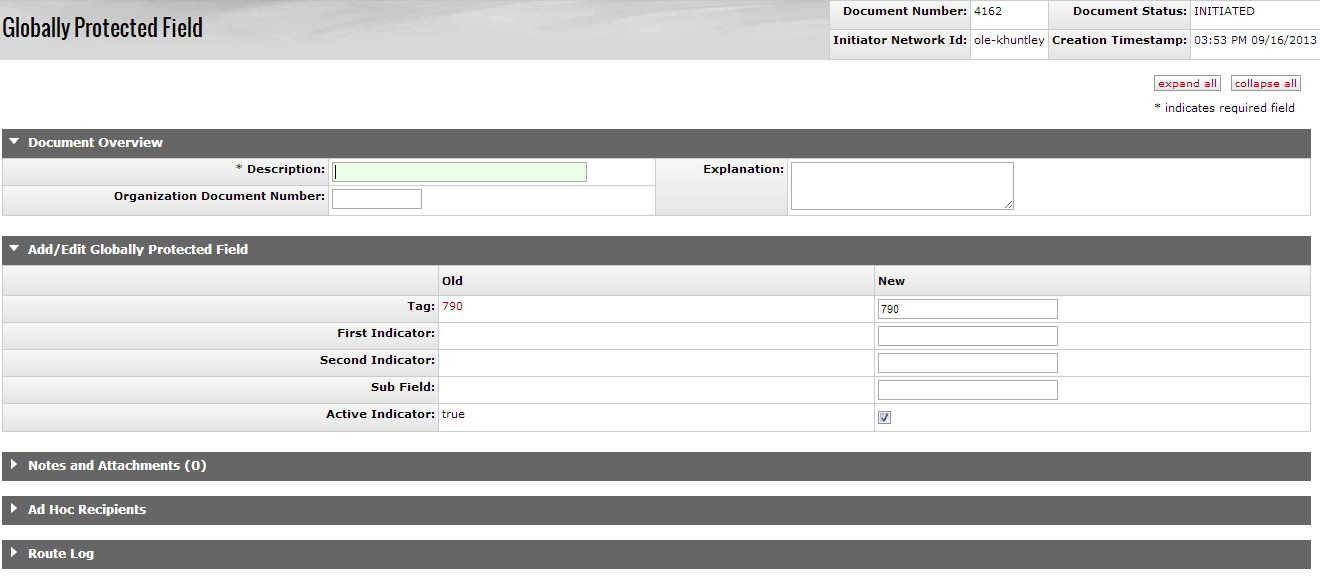
The Globally Protected Field document includes the Add/Edit Globally Protected Field tab. The system automatically enters data into both the Old and New sections in this tab. Selected data fields are available for editing.
Add/Edit Globally Protected Field tab definition
|
Title |
Description |
|
Tag |
Required. The MARC tag that will globally protected during ingest. |
|
First Indicator |
Optional. The MARC first indicator that will be globally protected during ingest. |
| Second Indicator | Optional. The MARC second indicator that will be globally protected during ingest. |
| Sub Field | Optional. The MARC subfield that will be globally protected during ingest. |
|
Active Indicator |
Indicates whether this licensing requirement code is active or inactive. Remove the check mark to deactivate this code. |
Table of Contents
Licensing is only a part of the Select and Acquire module. To learn more about module, see the Select and Acquire Overview from the OLE Documentation Portal.
The Licensing process in OLE includes a back and forth negotiating process between the licensing institution and the electronic resource vendor to set the final terms of the license contract. This is intended to be completed whenever appropriate during the electronic resource acquisition process. OLE will store notes, data and attached documents from this licensing period in an electronic document, or e-doc, called a License Request.
Licensing workflows are a variable part of the electronic acquisitions process. Some resources do not require a license at all and can be used within the guidelines of copyright law, while others require extensive negotiation of business and licensing terms. In general, the licensing process consists of:
Requesting a standard license from a publisher for a resource
Assigning the license to a “shepherd” or license owner
Comparing the license with standard requirements established by the institution and/or library
Back and forth negotiation with the publisher / library administration to modify license language if necessary.
If approval, final signatures from both parties.
Storing final license document (generally a PDF) in OLE.
Coding machine-readable interpretation of license terms in OLE via a license editor (will be stored as ONIX-PL in the Doctor). Note that this final step is planned for a future release.
The documents and workflows in the Licensing module will allow authorized users to gather information on available terms, store reference materials from providers, track and record external communications or “events,” and trace internal reviews, approvals, and signatures/signed agreements.
Note
In order to work efficiently in the system’s Licensing screens, you need to understand the basics of the user interface. For information and instructions on logging on and off, navigating, understanding the components of screens, and performing basic operations in the screens, see the OLE Basic Functionality and Key Concepts.
OLE Licensing utilizes e-documents and XML documents to store information about the Licensing process and all internal and external negotiations and communications. Initial OLE licensing will utilize:
E-Resource Record to initiate licensing workflows by auto-creating the License Request when requested.
License Request e-doc captures critical information and communication that takes place during vendor negotiations. It is used to create an institutional workflow for the license negotiation process.
Agreement Documents (title lists, sample contracts, signed license, etc.) are external files that can be attached to License Requests
ONIX-PL Agreement is used to record the interpreted terms of the license in a machine-readable format. Note that the Agreement is not available in the interface in 1.0, but the underlying infrastructure to import and store these documents has been created.
Maintenance Documents & Code Lists
A License Request might be initiated for acquisitions of new titles, renewals of existing titles, or making changes to previous Agreements (amendments). OLE 1.0 provides for a License Request generated from an E-Resource Record as part of the acquisitions process. Future releases may address licensing for Addendums, Renewals, and Trials in more detail.
Table of Contents
 >
> 
On the Licensing tab, the Licensing submenu allows users to view and maintain Licensing E-Docs.
 >
>  >
>
For OLE 1.0, licensing and License Requests can be initiated from an E-Resource Record on the Select/Acquire tab.
When creating an E-Resourse record, a user must click  to start the licensing workflow.

To open the newly created license, click on the Document ID. Alternatively, from the Licensing tab, click License Request.
Note
To learn more about the E-Resource Record, see the section above.
 >
> >
>  >
> 
A License Request e-doc is a tool for collecting related information and documents during license investigations and negotiations. The License Request is a routable document, allowing various authorized users to complete workflow actions like reviews, approvals, signatures, or just notifications.
Note
License Requests will continue to be developed and modified in future releases.
Suggested roles and logins to test License Requests:
| Role | Login |
|---|---|
| OLE_Licenses | fred |
| OLE_LicenseManager | frank |
In order for a License Request to be created, the start new license box must be clicked on the E-Resource Document's Licenses tab. If this was done, staff may look for the License Request related to the E-Resource by clicking License Request under the Licensing header of the Licensing Menu.
Note
For information on searching, see Searching OLE on the OLE E-Doc Fundamentals wiki page.
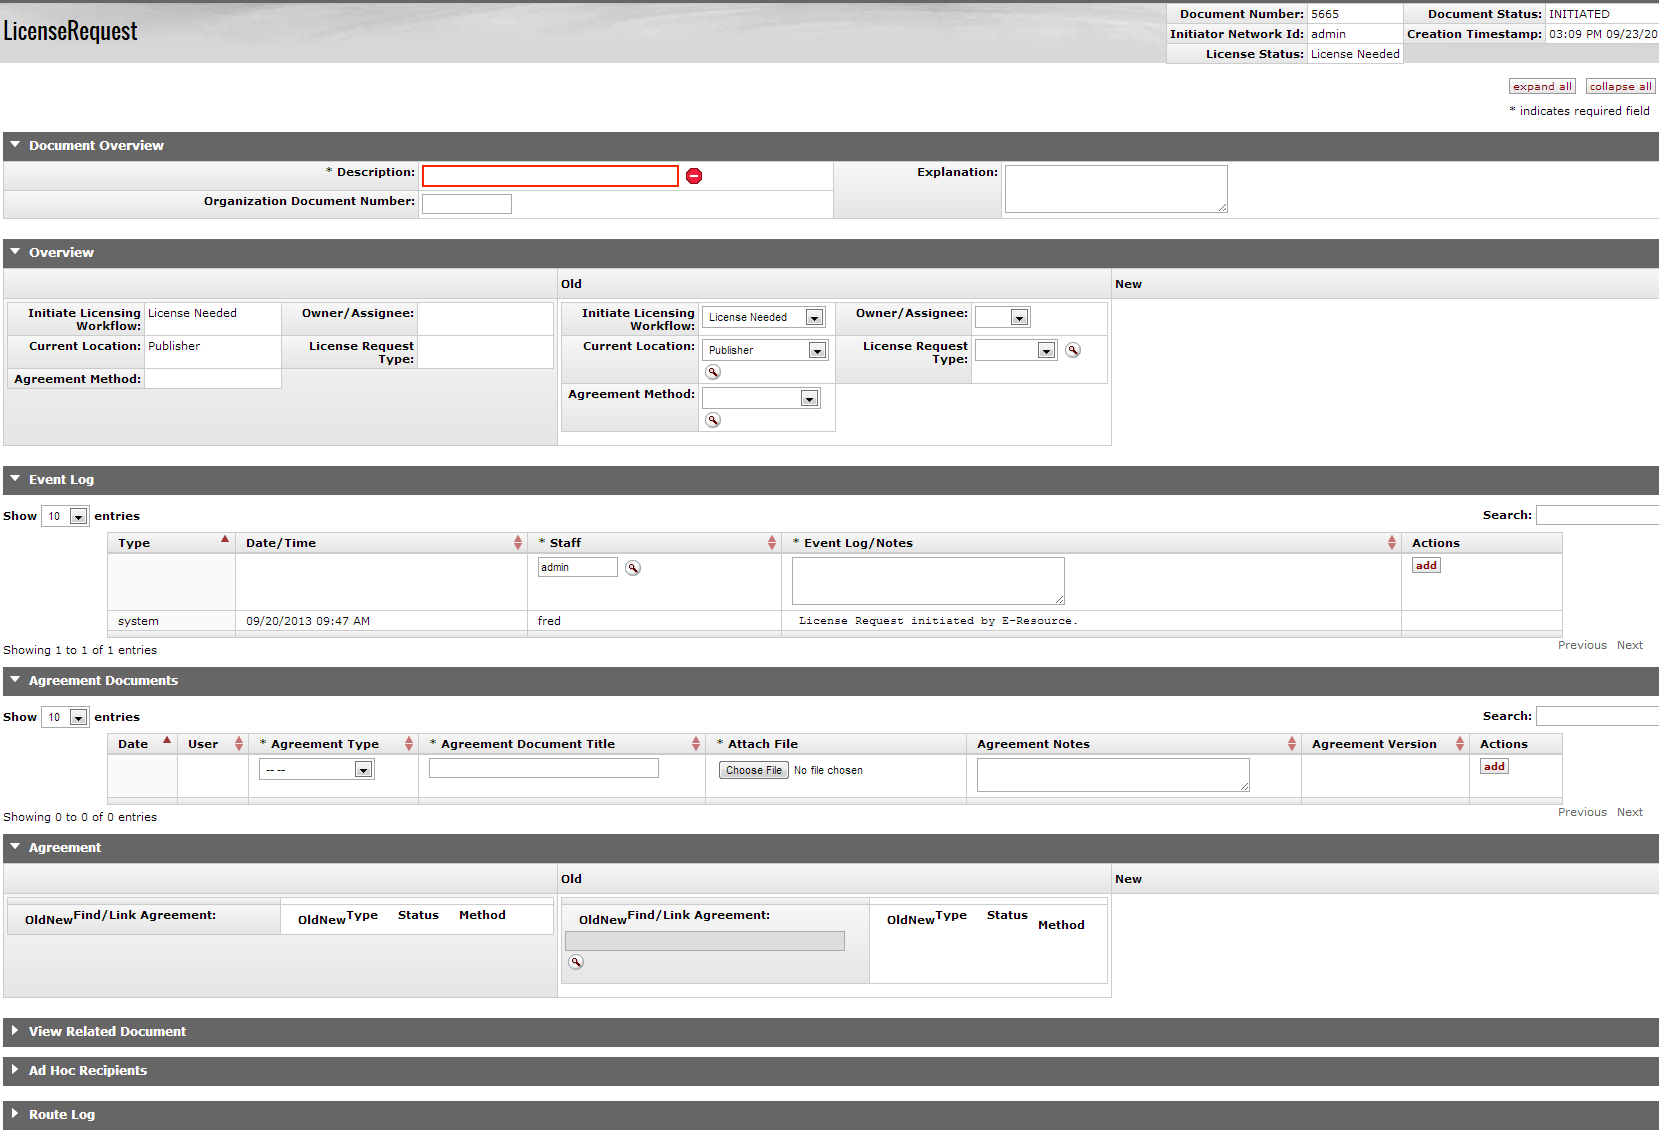
The License Request document includes the Overview, Event Log, Agreement Documents, and Agreement tabs, in addition to the standard tabs.
Note
For information about the standard tabs, see Standard Tabs on the OLE E-Doc Fundamentals wiki page.
The License Request contains a custom tab called the Overview that contains basic information about the License Request. The License Request status, agreement method (license, SERU, etc.) and the type of License Request (new, addendum, renewal) are noted here.
Tip
It is important to understand the workflow functions of licensing before working in the Overview tab. See Workflows Overview for more information about the license workflows steps.

Document Overview Tabs Definitions
|
Title |
Description |
|
Initiate Licensing Workflow |
Required. Select workflow to utilize for this License Request. |
|
Current Location |
Required. Select current location of the negotiation process or documentation (such as at Vendor, or at Campus Purchasing). |
|
Agreement Method |
Required. Describes the type of agreement being documented (negotiated, SERU, Copyright, etc.). |
|
Owner/Assignee |
Required. A combined list of all users in OLE_Licenses or OLE_LicenseManagers who can be “owners” for a License Request. Intended to be used to “assign” a License Request to a single user within a larger role or group. |
|
License Request Type |
Required. Indicates the type of this license negotiation process, whether new, renewal, or addendum. |
Tip
Fields marked Required must be completed before the License Request can be submitted. The License Request can be saved without completing these fields.
The Event Log captures automated entries for workflow status
changes, adding or linking Agreements or Agreement Documents. Users can also
manually add entries to capture external communications, notes, or to
summarize any actions external to OLE (such as with Vendor/Provider,
University Legal, University Purchasing, etc.). You may add an event note by
filling out the required fields and clicking  .
.
Many events can be recorded in the event log. You may display 10, 25, 50, or 100 entries at one time. Additionally, you may search for events from the search bar.

Event Log Tabs Definitions
|
Title |
Description |
|
Type |
System generated. The event type value will be ‘system’ when the request is initiated, 'user' if a line was added manually by user; 'file' if an Agreement doc was added; 'agreement' if a linked Agreement document was edited or added; 'location' if a location change occurred; 'status' if a license status change occurred. |
|
Date/Time |
System generated. Logs the date and time for the event log line item. |
|
Staff |
Required. Logs the user id of the
person associated with the event log change. Defaults to
current user but can be modified by entering a name or
searching from the lookup |
|
Event Log/Notes |
Required; may be manually added or system generated. Users may input information to provide audit trail information. System also records what events have occurred. |
Throughout negotiations and investigations, various Licensing staff may need to upload or download miscellaneous documents. These are not restricted, and could be any documents that licensing staff wish to archive or share within the licensing process, such as Title Lists, Emails, Analytics or Statistics, sample agreements, signed and unsigned vendor agreements.
Agreement Documents should also be used to store updated Checklists used in the licensing process. Staff may download blank checklists from the Manage Checklist (Word documents, PDF Forms, Excel, etc.) and upload completed or in-progress Checklists to the License Request, specific to this negotiation process.

Agreement Documents Tab Definitions
|
Title |
Description |
|
Date |
System Generated. Date and time the document was uploaded. |
|
User |
System Generated. The name of the user who uploaded the file. |
|
Agreement Type |
Type of Agreement Document that has been uploaded. Samples from the dropdown list include Agent information, Checklist, or Email. |
|
Agreement Document Title |
Allows staff to identify a file with a short title. |
|
Attach File |
Select Browse to search for a document on your local computer and upload it to OLE Select Download attachment to open a document on your local computer. |
|
Agreement Notes |
Users may add quick summaries or other notes about the document |
|
Agreement Version |
If the same named document was uploaded more than once, users may keep track of multiple versions. |
|
Action |
Must choose add to attach the document to OLE or Delete to remove it. |
Select an agreement type from the dropdown menu.
Enter a brief title for future search in the Agreement Document Title field.
Input any Notes about the document so that you will understand what it contains.
To select the document to upload, click on Browse to find your locally-saved file and select it for upload.
Click
 to save the Agreement Document.
Click
 at the bottom of the e-doc to save the
License Request with the new Agreement Document.
As licensing investigations and negotiations workflows continue, staff may upload or link Agreements, or ONIX-PL format licenses. Users may use the Lookup to search for an existing Agreement to link to the License Request or create a new Agreement. The Agreement is an XML representation of the actual terms of the license itself.
Note
Although Agreements are not available as part of 1.0, future releases should allow staff to either upload an ONIX-PL document directly or use a license editor GUI to record license terms as an Agreement.

Click on the Lookup  to search existing Agreements, and link to an existing
Agreement for reference or future renewal or amendment. It is not possible
to upload an Agreement in 1.0, so there are no Agreements to link to License
Requests in this release. Users will also be able to create a new Agreement
from this screen for this License Request in future releases.

License Requests can be searched via the License Request menu selection.
Select the Document Number of the E-doc you wish to modify.
Add notes and/or agreement documents, or link to agreements as necessary.
Select the appropriate option for Initiate Licensing Workflow. See workflow information below.
Send ad hoc as necessary once the License Request status is enroute (a workflow must be initiated).
Warning
Known bug: The send ad hoc button is not working correctly. Rice developers are working to correct this error. To send ad hoc, users must add ad hoc recipients and approve the document. This will send the document to the ad hoc recipient and then move the document to the next person of the workflow.
Click  or
or  as appropriate.
A License Request can link to none, one, or many Agreement Documents.
A License Request must have a License Request Type, an Agreement Method, a Current Location, and an Owner before submitting to a workflow.
A License Request can only have one Current Location.
A License Request can only have one current Owner.
A License Request can only have one current License Workflow.
The routing of License Request e-docs will be based on data values in the License Request, and will be initiated via user selection of a value from the Initiate License Workflow drop-down.
OLE will be pre-configured with some sample workflows and statuses to assist libraries in setting up initial Licensing processes.
Selected workflows, as defined below, will route the License Request to the selected Role to complete a desired action.
Tip
Reminder: A Role can be a single or many users.
Licensing Workflow Descriptions
|
Workflow Name |
Workflow Description |
|
Manual (Blank) |
N/A, Self= No routing or workflow selection required. License Request will not become final with custom doc status “Complete” until an actual workflow is selected and completed. |
|
Review Only |
This workflow allows owners to route License Request to OLE_Reviewer (role) to complete reviews as defined in local policies (external to OLE) |
|
Signatory Only |
This workflow allows owners to route License Request to OLE_Signatory (role) to complete signatures of noted agreement Documents. This workflow requires ALL members of the signatory role to approve the License Request, indicating they have signed the document. |
|
Approval Only |
This workflow allows owners to route License Request to OLE_LicenseApprover (role) to approve the License Request. |
|
Full Approval |
This is full composite workflow (combining Signature workflow, university approval step, Review workflow, and Approval workflow), requiring all approvals and steps. Approval will be the last step, and based on Approved/Disapproved, complete the Licensing workflow. |
|
Renewal* |
This workflow is a modification to Full Approvals, and could be customized locally to fit Local Renewal approval policy. |
|
Addendum* |
This workflow is a modification to Full Approvals, and could be customized locally to fit Local Addendum approval policy. |
As delivered, OLE Licensing workflows are optional, and are at the discretion of the owner of License Request to determine which workflow to initiate, based on knowledge of vendor and existing (external to OLE) policies.
Delivered OLE Licensing Workflows require that “Any” member of a Role defined in workflow must complete the Action for workflow and status to move forward, with the exception of “Signatory” workflows which require all Users defined in OLE_Signatory to complete the action.
OLE will offer combined and single PeopleFlows defined and editable by adopting libraries, with ability to use different metadata to establish rules for routing or available routing.
KRMS rules engine will pull metadata from the License Request and tell the system how to update statuses of related and linked documents, and which PeopleFlow workflows are enabled for the License Request.
OLE will currently only support a single active workflow at one time (future OLE may include recall/replace workflow options, or options to edit and initiate multiple simultaneous or sub-workflows.)
Each individual workflow will update License Request Custom Document Status.
OLE will provide sample workflows, roles, routing and UIs to act as template for locally configurable roles, workflows. Using KRMS and PeopleFlow, sites should be able to modify, add to, or remove steps or options in Licensing workflows, including additional rules or metadata conditions into KRMS agenda(s).
Note
Known bug: There is a bug being worked on in Rice that is preventing the “send adhoc” button to work. Users may send a license request only while approving a document.
Statuses & Workflow Definitions
|
License Request Manual Selection |
E-Doc Custom Status |
Description. |
Description of the Workflow |
|
License Needed |
License Needed |
Default custom doc status upon initiation. |
N/A (manual status change only). |
|
License Requested |
License Requested |
Manual custom doc status saved from "Initiate Licensing Workflow" selection. |
N/A (manual status change only). |
|
In Process |
In Process |
Manual custom doc status saved from "Initiate Licensing Workflow" selection. |
N/A (manual status change only). |
|
In Negotiation |
In Negotiation |
Manual custom doc status saved from "Initiate Licensing Workflow" selection. |
N/A (manual status change only). |
|
License Received |
License Received |
Manual status derived from "Initiate Licensing Workflow" selection, submitted by OLE_Licenses for routing to OLE_LicenseManager. |
Upon Submit, this concludes licensing investigations by OLE-Licenses, and license request will route to “Owner” in OLE_LicenseManager role. |
|
Review Only |
Pending Review |
Status when "Review Only" workflow selected from “Initiate Licensing Workflow”, and submitted. |
Initiate Licensing Workflow= Review Only. Status updates while pending outstanding review action by OLE-Reviewer. |
|
-- |
Review Complete |
Status when "Review only" workflow is completed by user approving License Request. |
Initiate Licensing Workflow= Review Only. Status updates when outstanding review action by OLE-Reviewer is completed. |
|
Signatory Only |
Pending Signature |
Status when "Signature Only" is selected from “Initiate Licensing Workflow” and submitted. |
Initiate Licensing Workflow= Signature Only. Status updates while pending outstanding review action by OLE-Signatory. |
|
-- |
Signature Complete |
Status when "Signature Only" workflow is completed by OLE_Signatory and approved. |
Initiate Licensing Workflow=Signature Only. Status updates when outstanding signature action by OLE-Signatory is completed. |
|
<Current Location> |
Pending University |
Manual Status when University Approval step is required in Full Approval or Renewal workflows; routes to Owner/OLE_LicenseManager. |
Initiate Licensing Workflow= Full Approval. When combined workflow hits University approval step e-doc routes to owner, and goes to Pending University status. |
|
-- |
University processing complete |
Status when Owner/OLE_LicenseManager approves License Request to complete University approval workflow step. |
Initiate Licensing Workflow= Full Approval. When combined workflow hits University approval step (above) and Owner approves to indicate when university purchasing is complete. |
|
Approval Only |
Pending Approval |
Status when "Approval only" workflow selected from “Initiate Licensing Workflow” and submitted. |
Initiate Licensing Workflow= Approval Only. Status updates while pending outstanding Approval action by OLE-Licensing Approver. |
|
Full Approval |
<varies> |
Status will update based on current action pending or most recent action completed. “Full Approval” is a composite workflow, and sequentially processes all 3 primary workflows: Review Only, then Signatory Only, and finally Approval Only. It also includes a “University Approval step between Review and Signatory workflows. |
Initiate Licensing Workflow=Full Approval. Status updates when approval actions are taken. |
|
Complete |
Complete |
Status when "Approval Only" workflow is completed by OLE_LicensingApprover via "Approve" button. |
Initiate Licensing Workflow=Approval Only. Status updates when outstanding approval action by OLE_LicensingApprover is completed. Should report to Requisition. |
|
Failed |
Negotiation Failed. |
Status when "Approval only" workflow is completed by OLE_LicensingApprover role via "Disapprove" button. |
Initiate Licensing Workflow=Approval Only. Status updates when outstanding approval action by OLE_LicensingApprover is completed. Should report to Requisition. |
|
-- |
<exception> |
Something fails in workflow, License Request returns to Owner. Owner can re-select workflow and Submit again. |
To select and initiate workflows, authorized users are able to select from drop-down selections (as defined above and below) and click on “Submit” at bottom of License Request to initiate the workflow request.

Manual changes to Status/Initiate Licensing Workflow will also update the status of the License Request that will be seen by anyone who views the License Request, or sees it listed in Search Results or Action Lists, to assist in managing staff expectations and assignments across multiple License Requests (status will tell them where each License Request is in progress).
Phase I:
Description: Selection staff believes title requested will require a License/Agreement.
Action(s): Staff member clicks ‘start new license’ button on the appropriate E-Resource :
System auto-routes to Action List of all members of OLE_Licenses.
Custom Doc Status= License Needed.
Phase II:
Description: Investigations, gathering documentation
Action(s): OLE-Licenses role fills in missing data on License Request, communicates with Vendor/Provider, and uploads Agreement Documents, or creates/links draft Agreement/ONIX-PL.
Workflow/Status Options:
License Needed. License Request “save”. No routing, License Request Custom doc status is updated.
License Requested. License Request “save”. No routing, License Request Custom doc status is updated.
In Process, or In Negotiation. License Request “save”. No routing, License Request Custom doc status is updated.
License Received. Member of OLE_Licenses fills in required metadata, changes “Owner” to a member of OLE_LicenseManager, and “Submits” License Request. License Request removed from OLE_Licenses Action List and routed to the selected Owner in OLE_LicenseManager role.
Phase III:
Description: Negotiations & Pre-Contracting
Action (s): Specific user in OLE_LicenseManager now is “Owner” of License Request and is responsible in OLE for completing all licensing and negotiations.
Permitted user for editing: Any user in role OLE_Licenses, OLE_LicenseManager, OLE_LicenseReviewer, or OLE_LicenseConfiguration.
Can select any statuses in “Initiate Licensing Workflow” and Save License Request in order to update License Request custom doc status to describe repeating steps (i.e., negotiation process and therefore statuses may go back and forth).
Additional Workflow options:
Review Only: Initiate a review only workflow by selecting “Review Only” and “Submit”. License Request will Route to/appear in Action List of OLE_Reviewer. OLE_Reviewer (any user available in role to complete action) can review license request or linked Agreement or Agreement Documents, upload or replace new versions of Agreement Documents- including local Checklists. OLE_Reviewer can continue to modify via “Save”, and only “Approve” when all Reviews complete. License Request will route back to Owner for final approval and completion.
Signatory Only: Initiate a signatory only workflow by selecting “Signatory Only” and “Submit”. License Request will Route to/appear in Action List of OLE_Signatory. OLE_Signatory (all users defined in role to complete action) can review license request or linked Agreement or Agreement Documents; and, download, and upload signed documents. OLE_Signatory can continue to modify via “Save”, and only “Approve” when all required documents signed, uploaded and reviews complete. License Request will route back to Owner.
Approval Only: Initiate Approval step by selecting “Approval Only” and “Submit”. License Request will Route to/appear in Action List of OLE_LicensingApprover. OLE_LicensingApprover (any user available in role to complete action) can review license request or linked Agreement or Agreement Documents. OLE_LicensingApprover can continue to modify via “Save”, and only “Approve” or “Disapprove” when review is complete. This will complete the License Request workflow.
Full Approval: Full Approval workflow combines a sequence of above- first routing to OLE_Reviewer. When Approved system routes to OLE_Signatory. When Approved, routes to OLE_LicensingApprover. If Disapproved, status will go to “Negotiation Failed.” If License Request Approved, then workflow is complete and status goes to “Complete”.
Complete: Any licensing workflow (Signatory only, Approval only, Review only, etc.) is completed
Negotiation Failed. Any licensing workflow (Signatory only, Approval only, Review only, etc.) is disapproved at any approval step in the workflow.
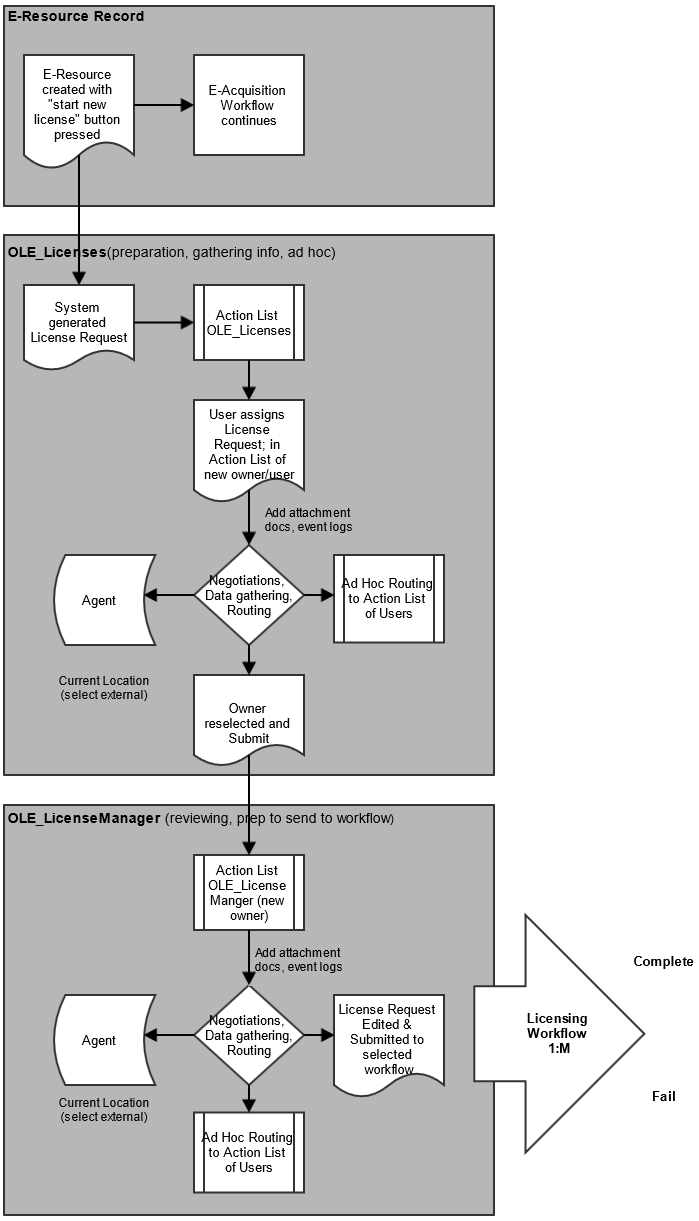
Note
To learn more about workflows, Action Lists, and Ad Hoc Routing, see OLE Workflow Overview and Key Concepts wiki page.
Table of Contents
 >
>  >
> 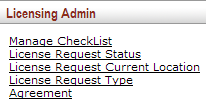
Licensing maintenance e-docs are available via the Licensing Admin submenu on the Licensing menu tab.
 >
>  >
>  >
> 
Checklists contain the list of local institutions’ contractual requirements, and can be downloaded for use with individual License Requests. The basic checklists will contain action lists, compliancy checks, or internal policies for different types or Agreements. Users may attach locally-downloaded and filled-in copies to specific License Requests in 1.0.
Note
To upload completed Checklists to License Request negotiations, see Agreement Documents Tab.
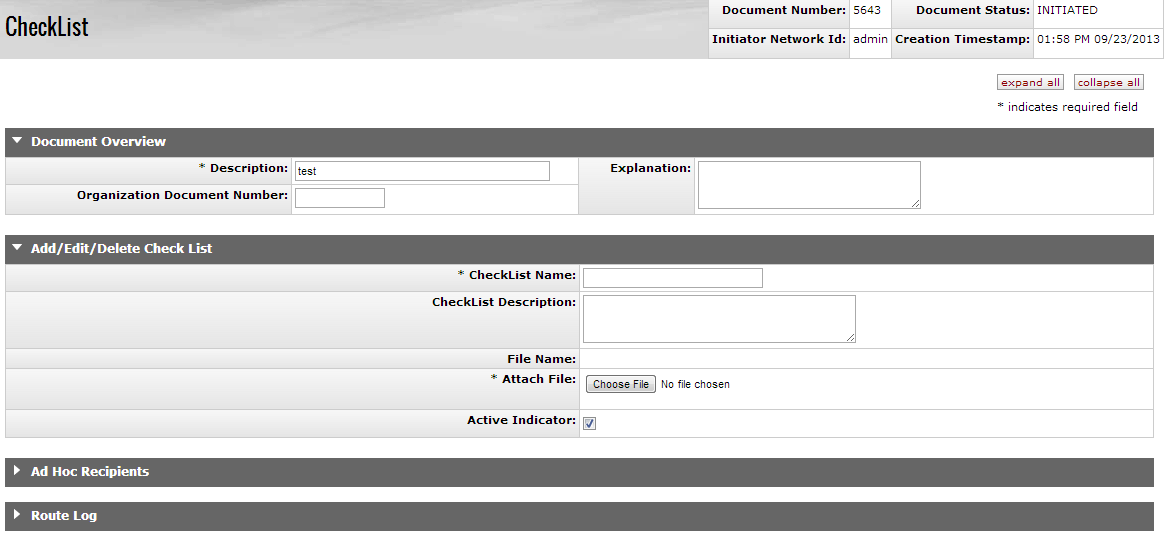
The Manage Checklist document includes the Add/Edit/Delete Checklist tab. The system automatically enters data into both the Old and New sections. Selected data fields are available for editing.
Add/Edit/Delete Check List Tab Definitions
|
Title |
Description |
|
CheckList Name |
Required. A user-provided short name for the checklist, and easy search and retrieval in future. |
|
CheckList Description |
Detailed description that may explain when, where to use this checklist versus another. Purpose. |
|
File Name |
Name of the file associated with this checklist. |
|
Attach File |
Browse to select checklist to upload. |
|
Active Indicator |
Indicates whether this checklist is active or inactive. Remove the check mark to deactivate. |
Checklist maintenance and the Checklist Maintenance e-doc can be undertaken to:
Create/Upload new checklists
Enter the required fields.
Attach a file from your local computer.
Click
 .
.Ad Hoc route the document as needed.
Click
 .
.Download & utilize local copy of checklist
Search for the checklist you wish to use.
Click on the checklist name to download the file.
Delete a checklist
Search for the checklist you wish to delete.
Click delete in the actions column.
Activate/Re-activate a checklist
Search for the checklist you wish to activate/re-activate.
Click edit in the actions column.
Check the Active Indicator box.
Click
 .
.
Overlay/Replace a checklist
Search for the checklist you wish to activate/re-activate.
Click edit in the actions column.
Browse for a new file to attach.
Click
 .
.
 >
>  >
>  >
> 
License Request Status is used to describe the status of the License Request as it moves through the workflow of requesting, negotiating, and documenting a license. Licensing staff use the License Request Status document on License Request to manually select and label the status of the license request for easier search, and management of Action Lists. Some statuses will NOT be available to the License Request, as they will be system-statuses only, such as at completion of a system-defined PeopleFlow/workflow step.
Note
Only those License Request Statuses not associated with completion of system-configured workflows will be available for manual selection on the License Request e-doc.
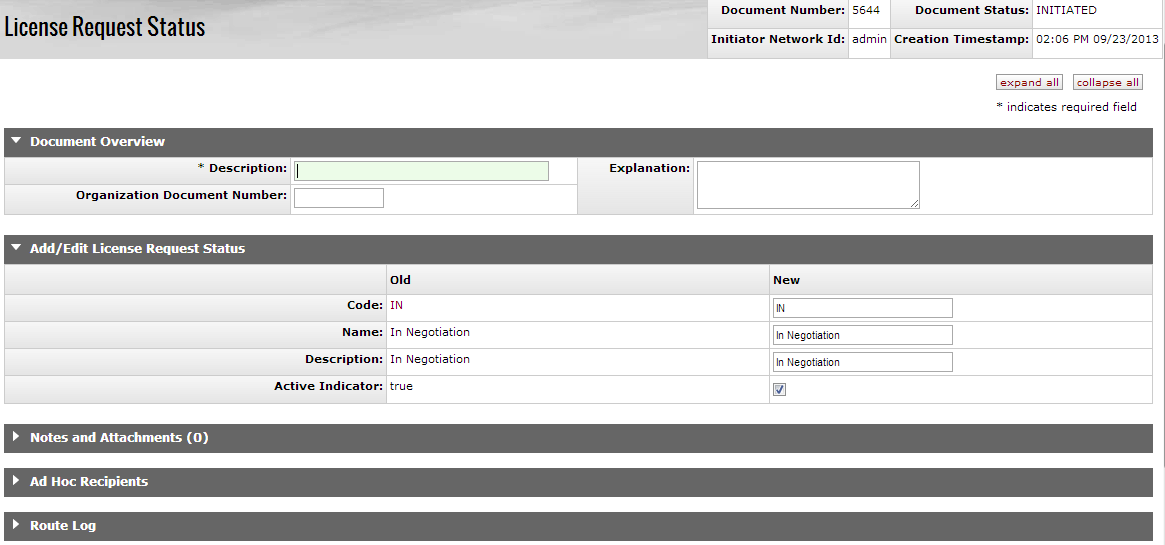
The License Request Status document includes the Add/Edit License Request Status tab. The system automatically enters data into both the Old and New sections. Selected data fields are available for editing.
Add/Edit License Request Status Tab Definitions
|
Title |
Description |
|
Code |
Required. Unique code for this status. |
|
Name |
Required. Brief name that will display anywhere status appears. |
|
Description |
Optional. Include a brief description. |
|
Active Indicator |
Indicates whether this status is active or inactive. Remove the check mark to deactivate. |
 >
>  >
>  >
> 
The License Request Current Location is the secondary status field on a License Request; would most commonly be use to describe where the License Request is when it has been assigned outside of the OLE system. Current Locations allow licensing staff to search / report / filter License Requests in order to see how many licenses are waiting for signature, waiting for vendor, etc. It also provides a more complete summary of the current status of the license, ex: at Publisher, Copyright Office, Campus Purchasing, etc.
Current Location may be set manually at any time throughout system workflows.
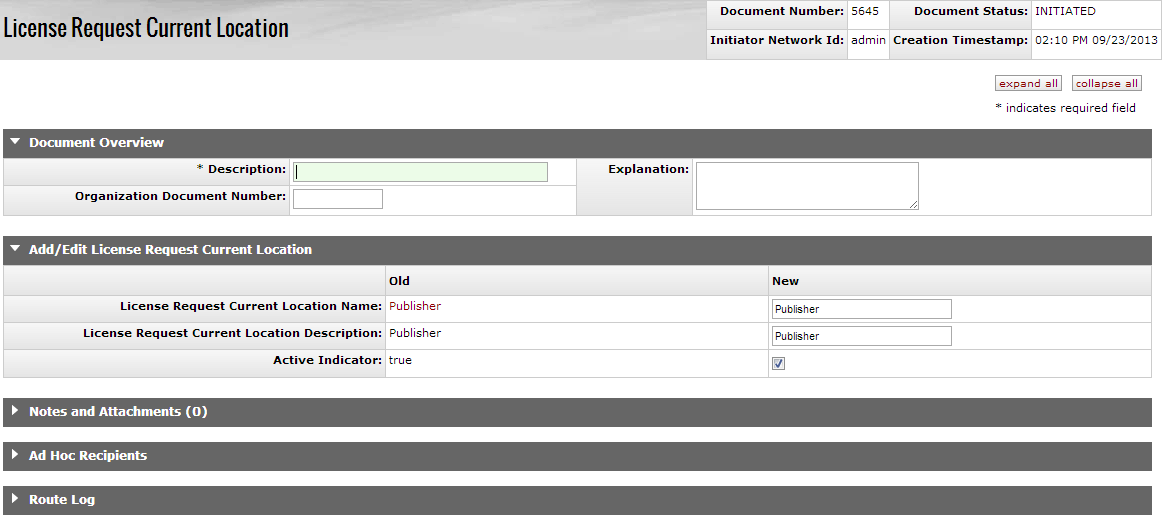
The License Request Current Location document includes the Add/Edit License Request Current Location tab. The system automatically enters data into both the Old and New sections. Selected data fields are available for editing.
Add/Edit License Request Current Location Definitions
|
Title |
Description |
|
License Request Current Location name |
Required. Brief name to appear in displays for the location. |
|
License Request Current Location Description |
Brief description for this licensing location value or its use. Required. |
|
Active Indicator. |
Indicates whether this is active or inactive. Remove the check mark to deactivate. |
 >
>  >
>  >
> 
The License Request Type document is used to describe whether the request is a new request, a renewal, an amendment, or some of type of licensing change request.
The License Request Type will be used in configuring which workflows are valid for a specific License Request, along with Agreement Method and other metadata on the License Request.
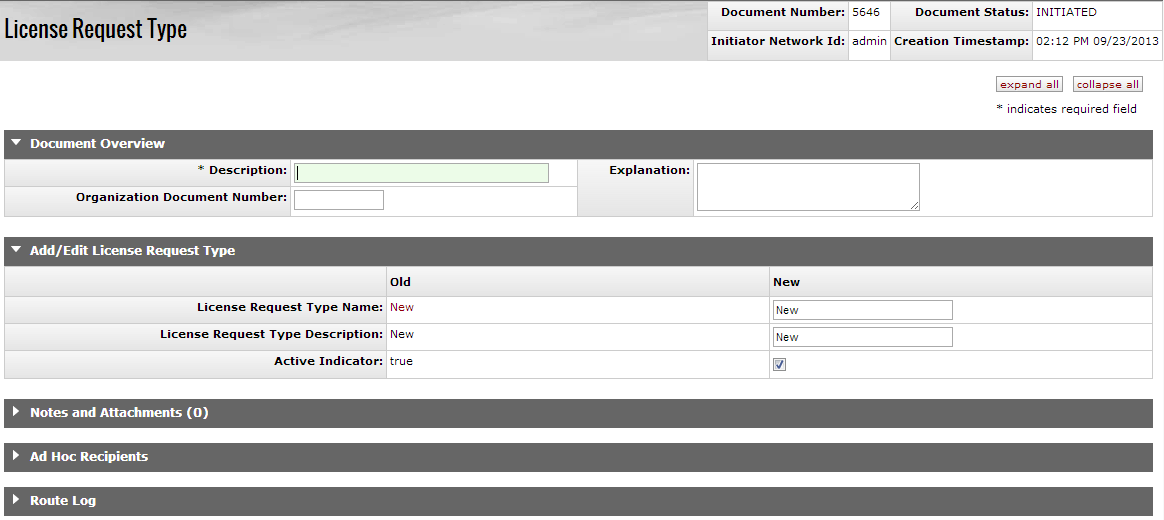
The License Request Type document includes the Add/Edit License Request Type tab. The system automatically enters data into both the Old and New sections. Selected data fields are available for editing.
Add/Edit License Request Type Tab Definitions
|
Title |
Description |
|
License Request Type Name |
Required. Brief Name for display. |
|
License Request Type Description |
Required. Brief description |
|
Active Indicator |
Indicates whether this license request is active or inactive. Remove the check mark to deactivate. |
Table of Contents
 >
>  >
> 
Agreement maintenance e-docs are available via the Agreement submenu on the Licensing menu tab.
 >
>  >
>  >
> 
The Agreement DocType document is used to describe the type of Agreement Document that has been uploaded, allowing staff to easily identify the desired file out of possibly multiple files associated with an Agreement or License Request.
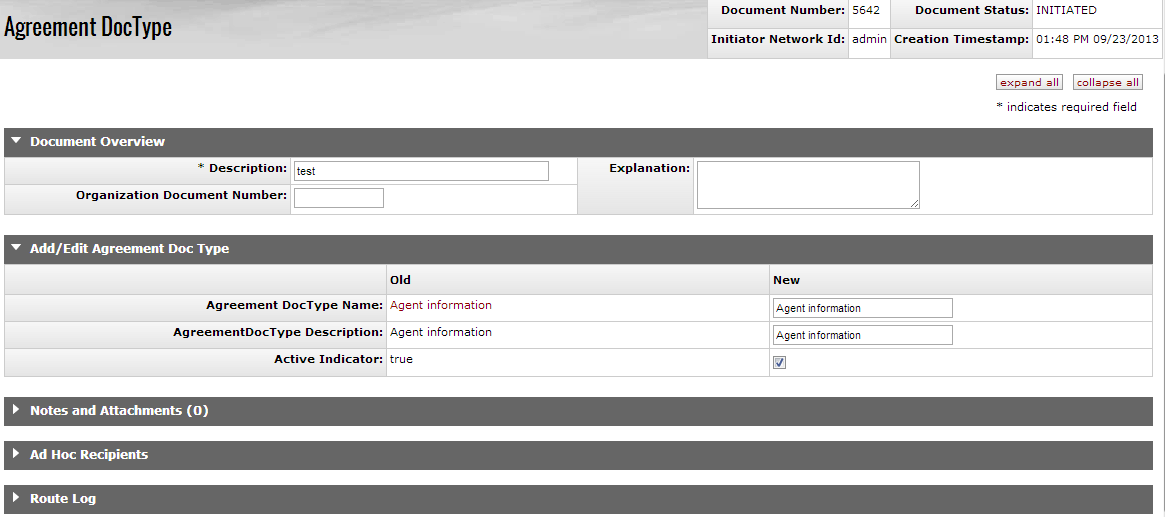
The Agreement Document Type document includes the Add/Edit Agreement Doc Type tab. The system automatically enters data into both the Old and New sections. Selected data fields are available for editing.
Add/Edit Agreement Document Type Tab Definitions
|
Title |
Description |
|
Agreement DocType Name |
Required. Brief name of Agreement document to display (such as title list, rider, etc.). |
|
Agreement DocType Description |
Required. Brief description of the Agreement document type. |
|
Active Indicator |
Indicates whether this Agreement DocType is active or inactive. Remove the check mark to deactivate. |
 >
>  >
>  >
> 
The Agreement Method document is used to store the form of the Agreement, and to inform locally-configurable business rules and workflows. This might contain negotiated, SERU, shrink-wrap, copyright, etc.
The Agreement Method is used in determining which workflows are valid for a specific License Request.

The Agreement Method document includes the Add/Edit Agreement Method tab. The system automatically enters data into both the Old and New sections. Selected data fields are available for editing.
Add/Edit Agreement Method Tab Definitions
|
Title |
Description |
|
Agreement Method Name |
Required. Brief name for method (can use local or ONIX-PL suggested). |
|
Agreement Method Description |
Required. Brief description of the Agreement Method. |
|
Active Indicator |
Indicates whether this Agreement Method is active or inactive. Remove the check mark to deactivate. |
 >
>  >
>  >
>
The Agreement Status document is used to communicate the current status of the Agreement (ONIX-PL.xml) in workflow or processing, such as: Active/Inactive, Draft, Final, or other status on Agreement.
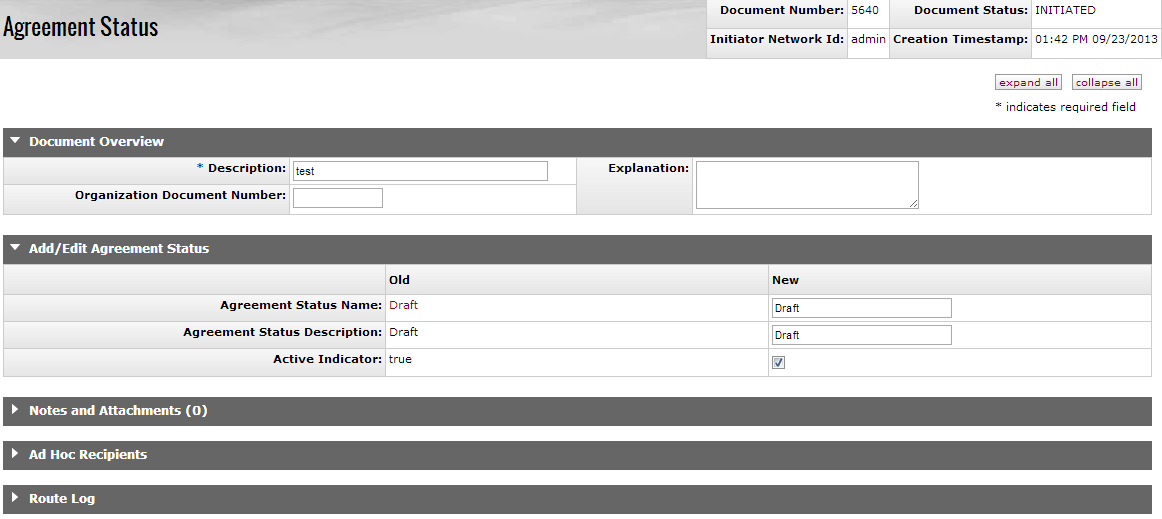
The Agreement Status document includes the Add/Edit Agreement Status tab. The system automatically enters data into both the Old and New sections. Selected data fields are available for editing.
Add/Edit License Request Type Tab Definitions
|
Title |
Description |
|
Agreement Status Name |
Required. Brief name to display. |
|
Agreement Status Description |
Required. Brief description of the agreement status. |
|
Active Indicator |
Indicates whether this Agreement Status is active or inactive. Remove the check mark to deactivate. |
 >
>  >
>  >
> 
The Agreement Type document is used to communicate the Types of Agreements, such as supplemental, trial, regular, addendum, etc.
The Agreement Type and Agreement Method will be used in determining which workflows are valid for a specific License Request.
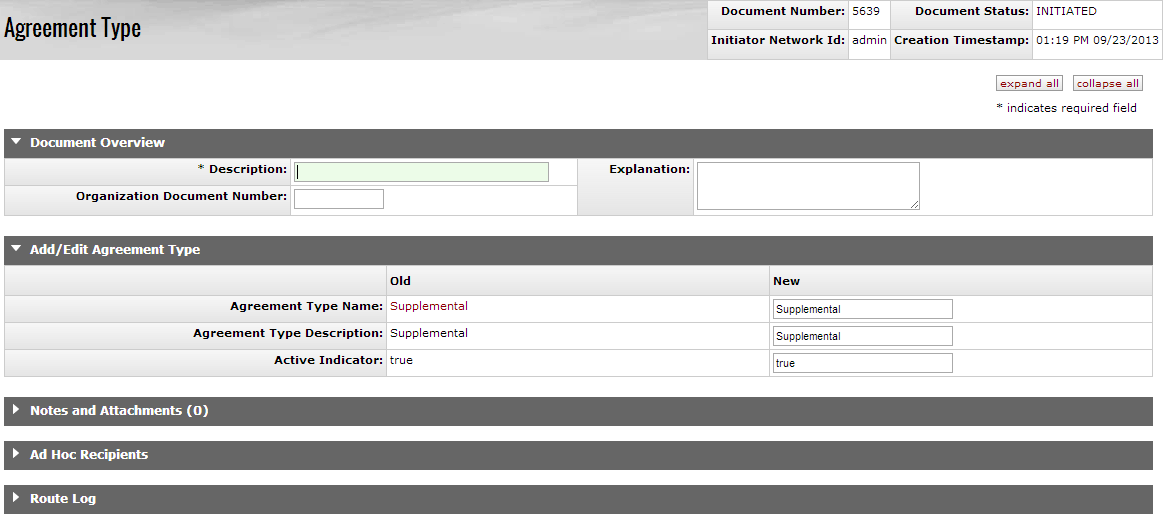
The Agreement Type document includes the Add/Edit Agreement Type tab. The system automatically enters data into both the Old and New sections. Selected data fields are available for editing.
Add/Edit License Request Type Tab Definitions
|
Title |
Description |
|
Agreement Type Name |
Required. Brief name for display. |
|
Agreement Type Description |
Required. Brief description to explain use of Agreement Type. |
|
Active Indicator |
Indicates whether this license request is active or inactive. Remove the check mark to deactivate. |
Table of Contents
|
Term |
Definition |
|
Account |
Identifies a pool of funds assigned to a specific university organizational entity for a specific purpose. Global document functionality is available for this document. |
|
Agent |
Any individual or organization entity that is represented in Kuali OLE. An agent could be an institution, a staff member, a library consortia, a publisher, a provider, or an individual working for a publisher / vendor. Synonyms: Vendor, Licensor, Publisher, Organization, Provider; Licensor or Licensee |
|
Agreement |
An agreement or understanding between the library / institution and a publisher / provider / donor regarding access to content. May include descriptive metadata, such as start date, end date, and contract number, as well as information about rights, restrictions, and business terms. An agreement will often represent either a negotiated license or a SERU agreement, although it could conceivably also represent other types of agreements, such as restrictions surrounding use of digital materials deposited in an institutional repository, use of donations made to a special collections unit, or use of gifts to the institution. Stored as DocStore .xml ONIX-PL. (Previous handoff for architecture. Future functional specification handoff for “Record License” with ONIX-PL license editor) Synonyms: Agreement Entity, License |
|
Agreement Document |
A file associated with an Agreement in OLE. Many types of files are utilized in the negotiation process / provide further details about an Agreement, including a variety of word processing files, spreadsheet files, and pdfs. Think: attachments, reference, title lists, SERU, checklists- primarily .doc, .xls, .pdf, but not limited by type. Synonyms: Agreement documents, attachments, linked files |
|
Allocations |
This is the primary area in which the ILS accounting is more granular and specific than at the parent organization level. A university will commonly budget operating funds for library acquisitions in one lump sum. The library then commonly subdivides that money into smaller chunks, according to the perceived needs of its users. The most common ways to subdivide the collection budget are: by school or administrative unit -- $x for the School of Medicine, for instance, $X for the School of Arts and Sciences, $X for the Business School, etc.; by subject -- with the library deciding how many subject funds to subdivide the money into; by material type – dividing the budget among monographs, print serials, e-serials, other e-resources, rare material, etc.; or by combinations of these categories. |
|
Batch Job |
Batch jobs, or batch processing, are what update General Ledger balances, other KFS/OLE tables, and files/jobs for exports. Batch jobs need to be run on some schedule to keep OLE in sync with external systems, such as University Financial. |
|
Claim |
The action (or a record thereof) of notifying a vendor that an ordered item has not been received for whatever reason. A claim can be made for a PO line item OR for a single issue of a serial title. Claims can be prompted by: non-receipt, receipt of the wrong version of an item, receipt of a damaged copy, etc. |
|
Chart |
The Chart document is used to define the valid charts that make up the high-level structure of the KFS Chart of Accounts. It also indicates who has management responsibilities for each chart and which object codes are used for system-generated accounting lines for the chart. |
|
Checklist Template |
A specific file (or files) that represents a university, library, or other institution’s contractual requirements; licenses negotiated by the institution usually must meet (or attempt to meet) these specific requirements. Form of Agreement Document. |
|
Commitments |
This is a running total of costs expected in the future, from purchase orders that have been placed, but not yet paid for. Commitments are an inexact science, and their importance varies according to the types of purchases the library makes. Many libraries only use them for some types of orders (like firm orders, or print monographs), but don’t use them at all for other types (like serial standing orders). |
|
DocStore |
OLE architecture for structured and unstructured metadata (e.g., bib, item, holding, authority, licenses) that works in conjunction with linked transactional data in OLE RDBMS/relational tables (e.g., purchasing, circulation, users, financial, borrowers). Also referred to as the Document Store. |
|
EDI |
Electronic Data Interchange; structured transmission of data between organizations by electronic means. Usually a sequence of formatted messages between two parties. EDI formatted data can be transmitted using any methodology agreed to by the sender and recipient: FTP, HTTP, VAN, etc. |
|
e-Doc |
"electronic document", an online business transaction initiated in a Web-based form and routed electronically through a prescribed sequence of approvers. When the e-Doc has been through its entire approval process, it is maintained in a database for future reference. The OLE adaption of Kuali Financial System (KFS) for Select and Acquire uses e-Docs. |
|
EDIFACT |
Electronic Data Interchange for Administration, Commerce and Transport, an EDI standard adopted by the United Nations. |
|
EDIFACT Invoice Message |
A file containing EDIFACT data for one or more vendor invoices. |
|
Import |
The act of importing and processing information from an external vendor; performing match-n-merge overlay; and creating appropriate documents inside OLE. |
|
License |
Generic term that reflects the final outcome or document- when a License is secured, the library may grant access to electronic resources for staff and patrons. The final License (future stories/specs) will likely be a signed and co-signed contractual Agreement between the Library and Agent, saved to DocStore, with its key terms reflected in the License/ONIX-PL editor. |
|
Line Item |
an entity to be ordered, usually identified by title on a purchase order; any purchase order can have more than one line item, e.g., 10 books on a purchase order = 10 line items, one for each. Intended for ease of purchasing multiple items from one vendor. |
|
Negotiated License |
One specific type of Agreement, which usually covers negotiated access to a purchased resource or collection of resources. The ONIX-PL standard was developed specifically to describe / transport both the text and interpretation of a negotiated license. |
|
Object Code |
Object codes represent all income, expense, asset, liability and fund balance classifications that are assigned to transactions and help identify the nature of the transaction Object Level. The Object Level document is used to maintain an attribute of the object code that is used to group similar object codes into categories for reporting Object Consolidation The Object Consolidation document defines a general category of object codes for reporting. One object consolidation includes the object codes belonging to one or more object levels. |
|
ONIX-PL |
ONIX for Publications Licenses (ONIX-PL) is intended to support the licensing of electronic resources – such as online journals and eBooks – to academic and corporate libraries. ONIX-PL enables libraries to: (1) express licenses in a machine-readable format; (2) load them into electronic resource management systems; (3) link them to digital resources; and (4) communicate key usage terms to users. Publishers can also benefit from the ability to maintain their licenses in a standard machine-readable form. |
|
Payment Method |
The form of the desired or completed payment. Could be check (paper or ACH system), credit card/procard, wire transfer, cash, internal transfer/payment, foreign draft. Libraries will not process actual payments, but submit batch files to University for payment, and receive back confirming information. |
|
Payment Request/Invoice |
Vendor Invoices are processed thru an OLE Payment Request, and represent money owed/due to a Vendor for products or services. |
|
Purchase Order |
A document describing an entity to be bought or licensed along with vendor, fund, order type and other related data; OLE uses an adaptation of the Kuali Financial System's purchase order. |
|
Requisition |
A pre-order document for a title being considered for acquisition as submitted by a library user or library staff using various input methods (e.g., submitting a Web form, manual keying, etc.) Default workflow is for a requisition to be approved by a selector and, upon supply of information such as vendor, fund, etc., be transformed into a purchase order. Selectors may also decide against acquisition and cancel the requisition with notice to the original requestor. |
|
SERU |
A statement (Shared Electronic Resource Understanding) that describes common understandings around e-resource subscriptions. This statement of common understandings can be used by libraries and publishers in place of a formal negotiated license. |
|
Vendor |
An organization or individual supplying materials for purchase, exchange or at no cost; KFS term is "supplier" |
For additional OLE terms and definitions, see the OLE glossary wiki page.
Below are some of the roles that will be authorized to use Purchasing and Accounts Payable Documents and related maintenance documents. Please see individual e-docs for specific requirements in each workflow.
Note
Sample users are provided for ease of testing and can be replaced with local library users.
|
Role |
User ID |
Permission Description |
|
OLE_Load |
ole-jpaul |
Staff upload interface and Load Reports search |
| Accounting-AQ1 | ole-brunelle | This Role is for View only document (Not for edit) |
| Accounting-AQ2 | ole-cphovis | This Role is for low-level staff with specific needs only. This role is able to create and edit selected functions: payment requests, credit memos, disbursement vouchers, invoices) |
| Accounting-AQ3 | ole-cstan; ole durbin | This Role is for staff performing function. This role is able to create and edit all functions (payment requests, purchase orders, credit memos, disbursement vouchers, invoices). |
| Accounting-AQ4 | ole-earley; ole-ejacob | This Role is for when you want to restrict deletion to high-level staff. This role is able to create edit or delete all functions (payment requests, purchase orders, credit memos, disbursement vouchers, invoices, COA maintenance). |
| Acquisitions-AQ1 | ole-brunelle | This Role is for View only document (Not for edit) |
| Acquisitions-AQ2 | ole-cphovis; ole-ejacob | This Role is for low-level staff with specific needs only. This role is able to create and edit selected functions (receiving, purchase orders, requistions, payment requests). |
| Acquisitions-AQ3 | ole-cstan; ole-durbin | This Role is for staff performing function.This role is able to create and edit all functions (receiving, purchase orders, requistions, payment requests, vendors). |
| Acquisitions-AQ4 | ole-cstan; ole-earley | This Role is for when you want to restrict deletion to high-level staff. This role is able to create edit or delete all functions (receiving, purchase orders, requistions, payment requests, vendors, PURAP maintenance). |
| Acquisitions-AQ5 | ole-ejacob; ole-fermat; ole-flaherty | This role can perform functions and assign appropriate security level to others (receiving, purchase orders, requistions, payment requests, vendors, PURAP maintenance). |
| Collection Manager | admin | This Role can close/cancel E-Resource Record if it is currently assigned to this group and Can approve/route to Acquisitions for purchase. |
| Financial-AQ1 | ole-brunelle | This Role is for View only document (Not for edit) |
| Financial-AQ2 | ole-cphovis | This Role is for low-level staff with specific needs only. This role is able to create and edit selected functions (purchase orders, payment requests). |
| Financial-AQ3 | ole-durbin; ole-fermat | This Role is for staff performing function. This role is able to create and edit all functions (purchase orders, payment requests, invoices). |
| Financial-AQ4 | ole-earley; ole-ejacob | This Role is for when you want to restrict deletion to high-level staff. This role is able to create edit or delete all functions (budget documents, transfer funds, deposit documents, COA maintenance, purchase orders, payment requests, edit sufficient fund checks and restrictions). |
| Financial-AQ5 | ole-cstan; ole-flaherty | This role can perform functions and assign appropriate security level to others (budget documents, transfer funds, deposit documents, COA maintenance, , purchase orders, payment requests, edit sufficient fund checks and restrictions). |
| Receiving-AQ1 | ole-brunelle | This Role is for View only document (Not for edit) |
| Receiving-AQ2 | ole-cphovis; ole-ejacob | This Role is for low-level staff with specific needs only. This role is able to create and edit selected functions (receiving). |
| Receiving-AQ3 | ole-durbin | This Role is for staff performing function. This role is able to create and edit all functions (receiving, payment requests, purchase orders, invoices). |
| Receiving-AQ4 | ole-cstan; ole-earley | This Role is for when you want to restrict deletion to high-level staff. This role is able to create edit or delete all functions (receiving, payment request,purchase orders, invoices, receiving maintencance). |
| OLE_Acquisitions-select | admin; admin1 | This Role performs can create edit view but not delete E-Resource Records. |
| OLE_Cataloger | admin1 | This role can only view E-Resource Record. |
| OLE_E-resource | admin | This role can create edit delete E-Resource Record start any sub-workflow link to GOKb particular focus is on Activation and using the AccessDashboard. |
| OLE_E-ResourceManager | This role manages site-wide configurations like values for the E-Resource status and time periods for alerts. | |
| OLE_Head | admin | This Role performs can create edit view but not delete E-Resource Records. |
| [OLE-SELECT] Operator | dev2 | Operator for Serial Receiving |
|
OLE_Selectors |
ole-cstan |
Create requisitions No acquisitions authority- REQ would route to Acquisitions staff to complete. Use Order Holding Queue on own requisitions |
|
OLE_Selectors_ serial |
ole-lreeder |
(above, for continuing orders) |
|
OLE_Super-Selectors |
ole-mandrew |
Same as Selectors, plus Assign any requisitions in OHQ |
|
OLE-VND Reviewer |
ole-eurainer ole-jtlieb ole-cofye |
This role receives workflow action requests for the Vendor document. |
|
OLE_Acquisitions |
ole-fermat |
All of above, plus processing Purchase Orders, Purchase Order Amendments, APO-automatic Purchase Orders, Vendor. |
|
OLE_Acquisitions_serial |
ole-smills |
(above, for continuing orders) |
|
OLE_ACQ-Mgr |
ole-hachris, ole-kgeorge |
All of above, plus approval actions for above users. |
|
OLE_ACQ_mgr_serial |
ole-bperser |
(above, for continuing orders) |
|
BL (organization) Chart Manager |
ole-cswinson |
Derived role- approves Chart changes, or Organization changes on an Account, or Campus code changes |
|
OLE-SYS- Org Reviewer |
ole-cknotts (ACK) ole-smorell (APPROVE) |
Changes to Accounts under BL organization, or changes that affect BL organization require these approvals. |
|
Budget Reviewer |
ole-butt |
Default user/role charged with reviewing Purchase Order documents that exceed an account's sufficient funds balance (OLE is modifying code pending KFS 5 debugging of SFC). |
|
Fiscal Officer Account Supervisor Account Manager |
ole-rorenfro ole-jaraujo ole-rorenfro |
Only Fiscal Officer has to approve account changes (based on name on account) |
|
Sub-Fund Reviewer |
ole-wakins |
If sub-fund is present on Account, this is approver for changes. |
|
Sub-Account Reviewer |
ole-wjwitte (ACK) ole-gpbilly (APPROVE) |
If sub-account changes made |
|
Account Reviewer |
N/A |
N/A unless editing IU- University Level Chart. “BL” chart in sample data does not require, or defaults to Fiscal Officer. |
|
Super user |
ole-khuntley | |
|
OLE_Licenses |
fred |
Standard user of License Request. Compiles initial documentation, notes. All edits to “owned/initiated” License Request documents. View, edit, create License Requests, upload Agreement docs |
|
OLE_LicenseManager |
frank |
Owner of License Request and licensing workflows, becomes central point of contact for negotiations. View, Edit, Create License Requests, upload, download Agreement Docs |
|
OLE_LicenseReviewer |
edna |
Must acknowledge or approve completion of Review of Agreement, Agreement Documents, or License Request. View, edit License Request; download & upload agreement docs. |
|
OLE_Signatory |
eric |
Must download, sign, and upload signed copy of Agreement Documents to License Request from Licensor. View, Edit License Request, download/upload Agreement Documents. |
|
OLE_Licensing_Approver |
supervisr |
Must Approve overall License Request, in order for library to enter into binding agreement with Licensor. Approve/Disapprove License Request. Permission to execute Action buttons. Cannot change or upload Agreement documents, or edit License Request metadata. NoteKnown bug: OLE_Licensing_Approver cannot add Event Log entries in 1.0. |
|
OLE_LicenseViewer |
kuluser (or any) |
Users authorized to view Agreements, License Requests. |
|
OLE_LicenseConfiguration |
admin |
System user who can setup licensing module, code lists, statuses, workflows, checklists. View, Edit, Create, delete Checklist, and manage any maintenance docs. |
|
OLE_LicenseAssignee |
OLE_LicenseManager |
System grouping of authorized licensing roles that can be selected as “Owners” on License Request. Role/Group used to combine OLE Licenses and OLE License manager into single group for use in “Owner” options for License Request. |
|
<any user-Action List> |
<any Kuali user> |
Agreements and Licenses will be highly controlled. Unlike other Searches or Document View-only documents in OLE, only users in above listed licensing roles can view any ERMS docs. |
|
Purchasing/Accounts Payable Maintenance Document Name |
Edit/save/submit or Blanket approve permissions: *blanket approve available if no approver listed in next column |
Routes for Approval to (if approval required): |
|
Billing Address |
OLE-Acquisitions | |
|
Carrier |
OLE-Acquisitions | |
|
Category |
OLE-Acquisitions |
OLE-ACQ-Mgr |
|
Exception Type |
OLE-Receive |
OLE-Receive-Mgr |
|
Format Type |
OLE-Acquisitions |
OLE-ACQ-Mgr |
|
Funding Source |
OLE-PAYMENT | |
|
Invoice SubType |
OLE-PAYMENT | |
|
Invoice Type |
OLE-PAYMENT | |
|
Item Price Source |
OLE-Acquisitions |
OLE-ACQ-Mgr |
|
Material Type |
OLE-Acquisitions |
OLE-ACQ-Mgr |
|
Note Types |
OLE-Acquisitions |
OLE-ACQ-Mgr |
|
Order Type |
OLE-Acquisitions |
OLE-ACQ-Mgr |
|
Payment Method |
OLE-PAYMENT | |
|
Purchase Order Item Status |
OLE-Acquisitions |
OLE-ACQ-Mgr |
|
Receiving Address |
OLE-Acquisitions, OLE-Selectors, OLE-Super Selectors, OLE-ACQ-Mgr | |
|
Receiving line item Note Type |
OLE-Receive-Mgr | |
|
Receiving Threshold |
OLE-PAYMENT, OLE-ACQ-Mgr, OLE-Receive-Mgr | |
|
Request Source Type |
OLE-Acquisitions |
OLE-ACQ-Mgr |
|
Requestor | ||
|
Requestor |
OLE-Acquisitions, OLE-Selectors, OLE-Super Selectors, OLE-ACQ-Mgr | |
|
Vendor Maintenance Document Name | ||
|
Commodity Code |
OLE-Acquisitions |
OLE-PAYMENT |
|
Contact Type |
OLE User |
OLE-ACQ-Mgr |
|
Contract Manager |
OLE-Acquisitions |
ole-khuntley |
|
Cost Source |
OLE-Acquisitions |
OLE-ACQ-Mgr |
|
Ownership Type |
OLE-PAYMENT | |
|
Ownership Type Category |
OLE-PAYMENT | |
|
Payment Terms Type |
OLE-PAYMENT | |
|
Phone Type |
OLE-Acquisitions | |
|
Shipping Payment Terms |
OLE-PAYMENT | |
|
Shipping Special Conditions |
OLE-Acquisitions | |
|
Shipping Title |
OLE-Acquisitions | |
|
Vendor Search Alias Type |
OLE-Acquisitions |
|
Role Name |
Users |
|
OLE_Selectors |
ole-cstan, ole-khuntley |
|
OLE_Super-Selectors |
ole-mandrew, ole-khuntley |
|
OLE_Acquisitions |
ole-fermat, ole- khuntley |
|
OLE_ACQ-Mgr |
ole-hachris, ole- khuntley, ole-kgeorge |
|
OLE_Receive_Mgr |
ole-msmith, ole-jfunk, ole-khuntley |
|
OLE_Payment |
ole-abeal, ole-khuntley |
|
Type |
Chart |
Account # |
Name |
|
university acct |
BL |
1047410 |
Library Monographs |
|
university acct |
BL |
1047415 |
Library Serials |
|
Fund code |
BL |
2947486 |
CHEMISTRY |
|
Fund code |
BL |
2947482 |
EDUCATION |
|
Fund code |
BL |
2947430 |
GEOLOGY |
|
Fund code |
BL |
2947485 |
BIOLOGY |
|
Fund code |
BL |
2947483 |
MEDICAL SCIENCES |
|
Fund code |
BL |
2947498 |
COMM & CULTURE |
|
Fund code |
BL |
2947499 |
CENTRAL EURASIAN |
|
Fund code |
BL |
2947487 |
COMPARATIVE LIT |
|
Fund code |
BL |
2947489 |
FRENCH & ITALIAN |
|
Fund code |
BL |
2947488 |
FOLKLORE |
|
Fund code |
BL |
2947491 |
HISTORY |
|
Fund code |
BL |
2947492 |
HIST & PHIL OF SCI |
|
Fund code |
BL |
2947493 |
LATIN AMERICAN |
|
Fund code |
BL |
2947494 |
LINGUISTICS |
|
Fund code |
BL |
2947495 |
RELIGIOUS STUDIES |
|
Fund code |
BL |
2947496 |
SOCIOLOGY |
|
Fund code |
BL |
2947490 |
SPEECH AND HEARING |
|
Fund code |
BL |
2947497 |
SPANISH/PORTUGESE |
|
Fund code |
BL |
2947500 |
SCHOOL of MEDICINE |
|
Object Code |
Chart Name |
Object Short Name |
Object Name |
|
7110 |
IU |
MONO |
MONOGRAPHS |
|
7120 |
IU |
SERIAL ACQ |
SERIAL ACQUISITIONS |
|
7100 |
BL |
LIB ACQUIS |
LIBRARY BOOKS |
|
7110 |
BL |
MONO |
MONOGRAPHS |
|
7112 |
BL |
Mono Firm |
Monograph Firm |
|
7115 |
BL |
Mono Appr |
Monograph Approval |
|
7120 |
BL |
SERIALS |
SERIALS |
|
7122 |
BL |
Serials Firm |
Serials Firm |
|
7125 |
BL |
Serials Appr |
Serials Approval |
|
Chart Code |
Account |
Acct Name |
Fiscal Year |
Object |
Object Name |
CB Budget Amount |
|
BL |
2947486 |
CHEMISTRY |
2014 |
7112 |
Monograph Firm |
20,000 |
|
BL |
2947486 |
CHEMISTRY |
2014 |
7115 |
Monograph Approval |
20,000 |
|
BL |
2947486 |
CHEMISTRY |
2014 |
7122 |
Serials Firm |
20,000 |
|
BL |
2947486 |
CHEMISTRY |
2014 |
7125 |
Serials Approval |
20,000 |
|
BL |
2947482 |
EDUCATION |
2014 |
7112 |
Monograph Firm |
20,000 |
|
BL |
2947482 |
EDUCATION |
2014 |
7115 |
Monograph Approval |
20,000 |
|
BL |
2947482 |
EDUCATION |
2014 |
7122 |
Serials Firm |
20,000 |
|
BL |
2947482 |
EDUCATION |
2014 |
7125 |
Serials Approval |
20,000 |
|
BL |
2947430 |
GEOLOGY |
2014 |
7112 |
Monograph Firm |
20,000 |
|
BL |
2947430 |
GEOLOGY |
2014 |
7115 |
Monograph Approval |
20,000 |
|
BL |
2947430 |
GEOLOGY |
2014 |
7122 |
Serials Firm |
20,000 |
|
BL |
2947430 |
GEOLOGY |
2014 |
7125 |
Serials Approval |
20,000 |
|
BL |
2947485 |
BIOLOGY |
2014 |
7112 |
Monograph Firm |
20,000 |
|
BL |
2947485 |
BIOLOGY |
2014 |
7115 |
Monograph Approval |
20,000 |
|
BL |
2947485 |
BIOLOGY |
2014 |
7122 |
Serials Firm |
20,000 |
|
BL |
2947485 |
BIOLOGY |
2014 |
7125 |
Serials Approval |
20,000 |
|
BL |
2947483 |
MEDICAL SCIENCES |
2014 |
7112 |
Monograph Firm |
20,000 |
|
BL |
2947483 |
MEDICAL SCIENCES |
2014 |
7115 |
Monograph Approval |
20,000 |
|
BL |
2947483 |
MEDICAL SCIENCES |
2014 |
7122 |
Serials Firm |
20,000 |
|
BL |
2947483 |
MEDICAL SCIENCES |
2014 |
7125 |
Serials Approval |
20,000 |
|
BL |
2947498 |
COMM & CULTURE |
2014 |
7112 |
Monograph Firm |
20,000 |
|
BL |
2947498 |
COMM & CULTURE |
2014 |
7115 |
Monograph Approval |
20,000 |
|
BL |
2947498 |
COMM & CULTURE |
2014 |
7122 |
Serials Firm |
20,000 |
|
BL |
2947498 |
COMM & CULTURE |
2014 |
7125 |
Serials Approval |
20,000 |
|
BL |
2947499 |
CENTRAL EURASIAN |
2014 |
7112 |
Monograph Firm |
20,000 |
|
BL |
2947499 |
CENTRAL EURASIAN |
2014 |
7115 |
Monograph Approval |
20,000 |
|
BL |
2947499 |
CENTRAL EURASIAN |
2014 |
7122 |
Serials Firm |
20,000 |
|
BL |
2947499 |
CENTRAL EURASIAN |
2014 |
7125 |
Serials Approval |
20,000 |
|
BL |
2947487 |
COMPARATIVE LIT |
2014 |
7112 |
Monograph Firm |
20,000 |
|
BL |
2947487 |
COMPARATIVE LIT |
2014 |
7115 |
Monograph Approval |
20,000 |
|
BL |
2947487 |
COMPARATIVE LIT |
2014 |
7122 |
Serials Firm |
20,000 |
|
BL |
2947487 |
COMPARATIVE LIT |
2014 |
7125 |
Serials Approval |
20,000 |
|
BL |
2947489 |
FRENCH & ITALIAN |
2014 |
7112 |
Monograph Firm |
20,000 |
|
BL |
2947489 |
FRENCH & ITALIAN |
2014 |
7115 |
Monograph Approval |
20,000 |
|
BL |
2947489 |
FRENCH & ITALIAN |
2014 |
7122 |
Serials Firm |
20,000 |
|
BL |
2947489 |
FRENCH & ITALIAN |
2014 |
7125 |
Serials Approval |
20,000 |
|
BL |
2947488 |
FOLKLORE |
2014 |
7112 |
Monograph Firm |
20,000 |
|
BL |
2947488 |
FOLKLORE |
2014 |
7115 |
Monograph Approval |
20,000 |
|
BL |
2947488 |
FOLKLORE |
2014 |
7122 |
Serials Firm |
20,000 |
|
BL |
2947488 |
FOLKLORE |
2014 |
7125 |
Serials Approval |
20,000 |
|
BL |
2947491 |
HISTORY |
2014 |
7112 |
Monograph Firm |
20,000 |
|
BL |
2947491 |
HISTORY |
2014 |
7115 |
Monograph Approval |
20,000 |
|
BL |
2947491 |
HISTORY |
2014 |
7122 |
Serials Firm |
20,000 |
|
BL |
2947491 |
HISTORY |
2014 |
7125 |
Serials Approval |
20,000 |
|
BL |
2947492 |
HIST & PHIL OF SCI |
2014 |
7112 |
Monograph Firm |
20,000 |
|
BL |
2947492 |
HIST & PHIL OF SCI |
2014 |
7115 |
Monograph Approval |
20,000 |
|
BL |
2947492 |
HIST & PHIL OF SCI |
2014 |
7122 |
Serials Firm |
20,000 |
|
BL |
2947492 |
HIST & PHIL OF SCI |
2014 |
7125 |
Serials Approval |
20,000 |
|
BL |
2947493 |
LATIN AMERICAN |
2014 |
7112 |
Monograph Firm |
20,000 |
|
BL |
2947493 |
LATIN AMERICAN |
2014 |
7115 |
Monograph Approval |
20,000 |
|
BL |
2947493 |
LATIN AMERICAN |
2014 |
7122 |
Serials Firm |
20,000 |
|
BL |
2947493 |
LATIN AMERICAN |
2014 |
7125 |
Serials Approval |
20,000 |
|
BL |
2947494 |
LINGUISTICS |
2014 |
7112 |
Monograph Firm |
20,000 |
|
BL |
2947494 |
LINGUISTICS |
2014 |
7115 |
Monograph Approval |
20,000 |
|
BL |
2947494 |
LINGUISTICS |
2014 |
7122 |
Serials Firm |
20,000 |
|
BL |
2947494 |
LINGUISTICS |
2014 |
7125 |
Serials Approval |
20,000 |
|
BL |
2947495 |
RELIGIOUS STUDIES |
2014 |
7112 |
Monograph Firm |
20,000 |
|
BL |
2947495 |
RELIGIOUS STUDIES |
2014 |
7115 |
Monograph Approval |
20,000 |
|
BL |
2947495 |
RELIGIOUS STUDIES |
2014 |
7122 |
Serials Firm |
20,000 |
|
BL |
2947495 |
RELIGIOUS STUDIES |
2014 |
7125 |
Serials Approval |
20,000 |
|
BL |
2947496 |
SOCIOLOGY |
2014 |
7112 |
Monograph Firm |
20,000 |
|
BL |
2947496 |
SOCIOLOGY |
2014 |
7115 |
Monograph Approval |
20,000 |
|
BL |
2947496 |
SOCIOLOGY |
2014 |
7122 |
Serials Firm |
20,000 |
|
BL |
2947496 |
SOCIOLOGY |
2014 |
7125 |
Serials Approval |
20,000 |
|
BL |
2947490 |
SPEECH AND HEARING |
2014 |
7112 |
Monograph Firm |
20,000 |
|
BL |
2947490 |
SPEECH AND HEARING |
2014 |
7115 |
Monograph Approval |
20,000 |
|
BL |
2947490 |
SPEECH AND HEARING |
2014 |
7122 |
Serials Firm |
20,000 |
|
BL |
2947490 |
SPEECH AND HEARING |
2014 |
7125 |
Serials Approval |
20,000 |
|
BL |
2947497 |
SPANISH/PORTUGESE |
2014 |
7112 |
Monograph Firm |
20,000 |
|
BL |
2947497 |
SPANISH/PORTUGESE |
2014 |
7115 |
Monograph Approval |
20,000 |
|
BL |
2947497 |
SPANISH/PORTUGESE |
2014 |
7122 |
Serials Firm |
20,000 |
|
BL |
2947497 |
SPANISH/PORTUGESE |
2014 |
7125 |
Serials Approval |
20,000 |
|
BL |
2947500 |
LIBRARY ACQUISITIONS GENERAL |
2014 |
7119 |
Mono Services |
45,000 |
|
BL |
2947500 |
LIBRARY ACQUISITIONS GENERAL |
2014 |
7129 |
Serial Services |
45,000 |
|
BL |
1047410 |
Library Acquisitions |
2014 |
7100 |
LIB ACQUIS |
0 |
|
CHART CODE |
ORG CODE |
ORG NAME |
|
HIGHER LEVEL ORGANIZATIONS | ||
|
BL |
LIBR |
LIBRARY |
|
BL |
LACQ |
LIBRARY ACQUISITIONS |
|
OLE Level Organizations | ||
|
BL |
BI |
BIOLOGY - LIFESCI |
|
BL |
CHEM |
CHEMISTRY - CHEM |
|
BL |
CMLT |
COMPARATIVE LITERATURE - WELLS |
|
BL |
FOLK |
FOLKLORE/ETHNOMUSICOLOGY - WELLS |
|
BL |
FRIT |
FRENCH & ITALIAN - WELLS |
|
BL |
GEOL |
GEOLOGICAL SCIENCES - GEOLOGY |
|
BL |
SPHS |
SPEECH & HEARING - WELLS |
|
BL |
HIST |
HISTORY - WELLS |
|
BL |
HPSC |
HIST & PHIL OF SCIENCE - WELLS |
|
BL |
LNAM |
LATIN AMERICAN - WELLS |
|
BL |
LING |
LINGUISITICS - WELLS |
|
BL |
REL |
RELIGIOUS STUDIES - WELLS |
|
BL |
SOC |
SOCIOLOGY - WELLS |
|
BL |
SPAN |
SPANISH & PORTUGUESE - WELLS |
|
BL |
CMCL |
COMMUNICATION & CULTURE - WELLS |
|
BL |
CEUS |
CENTRAL EURASIAN STUDIES - WELLS |
|
BL |
EDL |
EDUCATION - EDUC |
|
BL |
MEDS |
MEDICAL SCIENCES - LIFESCI |
|
Code |
Status |
|
AMND |
Pending Amendment |
|
CANC |
Cancelled |
|
CGIN |
Change in Process |
|
CLOS |
Closed |
|
CLPE |
Pending Close |
|
CNCG |
Cancelled Change |
|
CXER |
Error occurred sending cxml |
|
CXPE |
Pending cxml |
|
DACG |
Disapproved Change |
|
DBUD |
Disapproved Budget |
|
DCG |
Disapproved C & G |
|
DCOM |
Disapproved Commodity Code |
|
DPUR |
Disapproved Purchasing |
|
DTAX |
Disapproved Tax |
|
FXER |
Error occurred sending fax |
|
FXPE |
Pending Fax |
|
INPR |
In Process |
|
OPEN |
Open |
|
PHOL |
Payment Hold |
|
PHPE |
Pending Payment Hold |
|
PRPE |
Pending Print |
|
QUOT |
Out for Quote |
|
RHPE |
Pending Remove Hold |
|
ROPE |
Pending Reopen |
|
RTPE |
Pending Retransmit |
|
RTVN |
Retired Version |
|
VOID |
Void |
|
VOPE |
Pending Void |
|
WBUD |
Awaiting Budget Approval |
|
WCG |
Awaiting C & G Approval |
|
WCOM |
Awaiting Commodity Code Approval |
|
WDPT |
Waiting for Department |
|
WNUI |
Awaiting New Unordered Item Review |
|
WPUR |
Awaiting Purchasing Approval |
|
WTAX |
Awaiting Tax Approval |
|
WVEN |
Waiting for Vendor |
|
Code: |
Status: |
|
ACHA |
Awaiting Chart Approval |
|
AFOA |
Awaiting Fiscal Officer Approval |
|
APAD |
Awaiting AP Review |
|
ARVR |
Awaiting Receiving |
|
ASAA |
Awaiting Sub-Account Manager Approval |
|
ATAX |
Awaiting Tax Approval |
|
AUTO |
Auto-Approved |
|
CANC |
Cancelled |
|
CIPR |
Cancelled - In Process |
|
DPTA |
Department-Approved |
|
INIT |
Initiated |
|
INPR |
In Process |
|
PEIN |
Pending Route Electronic Invoice |
OLE Basic Functionality and Key Concepts.: E-Docs, action buttons- basic overview of elements
OLE 1.0 Milestone User Documentation on the wiki


