 >
> >
>  >
> 
The Bibliographic (Bib) Editor may be accessed through other menu items listed below the Describe submenu as well as through the edit or create new buttons in transactional line items of Requisitions, Purchase Orders, Receiving, etc. or by clicking on the record title in the Search Workbench.
Tip
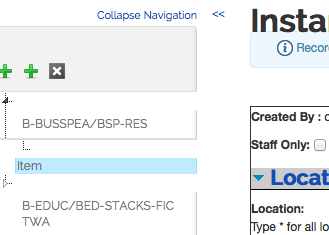
While viewing a record in the Bib Editor, notice the left panel
navigation. This navigation panel will allow you to add (click the  ) OLE Instance (Holding and Item) and E-Instance records or
delete (click the
  ) Bibliographic Records. While hovering over these icons, a
pop-up note will inform the user which icon to click to Add
Instance, Add EInstance, or
Delete Bib.
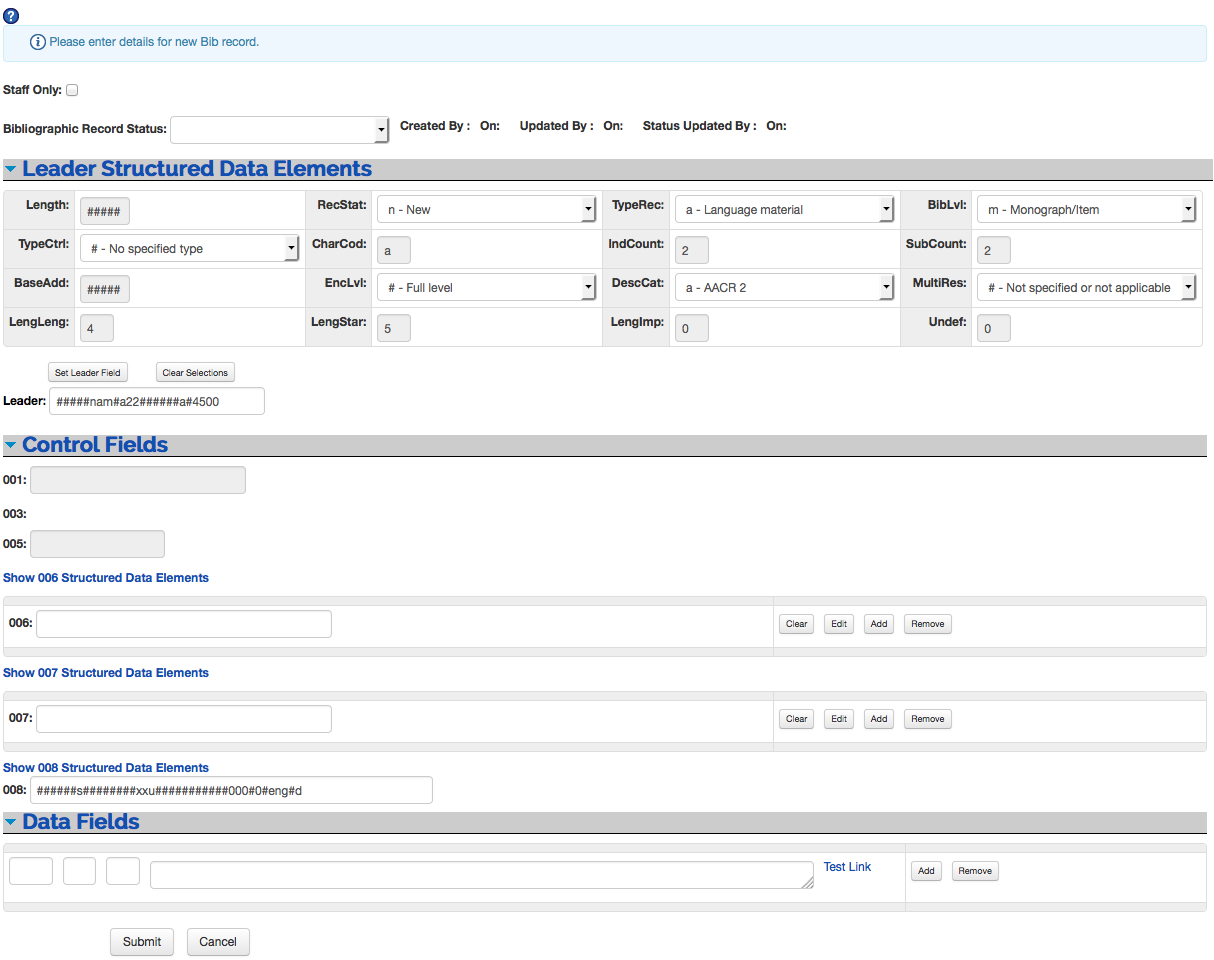 |
The following data fields are required, at a minimum:
one Leader field
one 008 fixed field
one 245
A Staff Only checkbox (found at the top of the record) is available to mark a record so that it does not display in the discovery layer.
An optional tool is the Bibliographic Record Status (found at the top of the record).
Bibliographic record status and the date the status was updated can be used as filters when developing a Batch Process Profile (under the Admin tab) for Batch Export. This can be helpful for sending a holdings update file to a bibliographic vendor (such as OCLC or SkyRiver)
Though locally configurable, OLE's predefined statuses are None, Cataloguing, and Catalogued.
New statuses can be developed through the Maintenance tab, under Cataloging Admin. Statuses are not required and can be locally configured.
If a status is not chosen, the field will remain blank.
Following each Data Field is the text hyperlink Test Link. This provides for testing URIs that might be entered in any Data Field (such as the 856). More information on this function can be found in the document Testing URIs in the Bibliographic Editor.
Future enhancements include the ability to create templates to prepopulate fields.
If it is not edited, the leader will be populated with default codes.
A blank code is represented by the pound sign (#).
Select a valid element from the field's drop down lists and click Set Leader Field.
Click Clear Selections to remove the selected elements and return to the default settings.
When set, the Leader field will appear as a text string below the data elements:

The leader can be edited both in the text string box and in the structured data elements display.
Click the down arrow to the left of the Leader Structured Data Elements heading to collapse the display:

If it is not edited, the 008 will be populated with default codes. The 006 and 007 can be populated with defaults once the code for the 00 position is chosen (since default codes are dependent upon the selection of the code for the 00 position) and then the Set Control Field button is clicked.
When creating a new record, the 008 displays as a text string with default codes. By clicking on the text Show 008 Structured Data Elements, the 008 will display all the data elements with drop down menus and search boxes to select valid codes.
Select a valid element for the field's drop down lists or search boxes and click Set Control Field.
Click Clear Selections to remove the selected elements and return to the default settings.
When set, the 008 will appear in a single line below the data elements:

Click the down arrow to collapse the 008 Structured Data Elements display.
Note
Character positions 00-05 (DataEnt) in the 008 field will first appear as ###### when a new record is being created and will update with the Date Entered on File once the bibliographic record has been submitted.
Considering all Control Fields: tags for Control fields can be any 001-008 value
The 001 and 005 cannot be edited in OLE
For version 1.5, there is no validation for the Control Fields. If data in the text string includes coding that is not found in the drop down menus, the record can still be saved and will not reject invalid data.
Data Fields (also known as variable fields) must have a three-digit numeric tag and values in both indicator positions (blanks are allowed). Variable fields 01X through 8XX must start with a delimiter and a subfield code (a letter or number) and include some text in the body of the field. If no subfield code is entered, a subfield code (|a) will be added to the edited field when the bibliographic record is submitted.
Indicators may be blank. A blank can be entered by either
typing a pound (#)
pressing the spacebar
pressing the tab key
leaving the indicator blank (not inserting a value)
Once the “ Submit ” button has been pressed, any blank indicators will display as a pound (#) sign.
The delimiter character used in OLE is the pipe (|).
Except for the initial subfield code, subfield codes should be preceded and followed by a space (e.g. <space>|b<space>).
If a space is not supplied, OLE will add one.
If an initial subfield code is not entered, OLE will assume a |a and will enter it once the “ Submit ” button is clicked.
Enter the data field information. Click
 to add additional data fields. A data field left
blank will be removed once the Submit
button has been clicked.
to add additional data fields. A data field left
blank will be removed once the Submit
button has been clicked.To remove a data field, click the
 button.
Click
 .
.OLE will save and redisplay the record.
Click
 to cancel the edits and return to your original
screen. A browser window will open stating:
to cancel the edits and return to your original
screen. A browser window will open stating:This page is asking you to confirm that you want to leave - data you have entered may not be saved.
Clicking Leave Page will take you to the search screen. Clicking Stay on Page will keep you at the Bib Editor screen but does not remove edits.
Click
 to cancel the edits and close the window.
If you submit an invalid record, OLE will display an error message.

On the left navigation panel, click the first top level plus sign
 to add an OLE Holdings records.
Note
For more information about the OLE Holdings and Item Editor, see Instance Editor
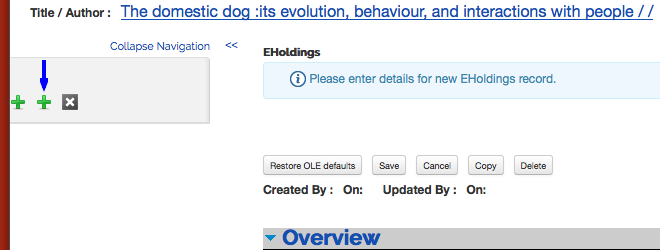
Click the second top level plus sign
 to add an OLE EHoldings records.
Note
For more information about the OLE E-Instance Editor, see E-Instance Editor
Right click on the call number or the word "Holdings" to delete a holdings record or add an item record.

Tip
On the Delete confirmation screen, be sure that the record you want to delete is highlighted in the left panel. Otherwise you may delete the wrong record. If the record is not displayed, scroll in the navigation panel.
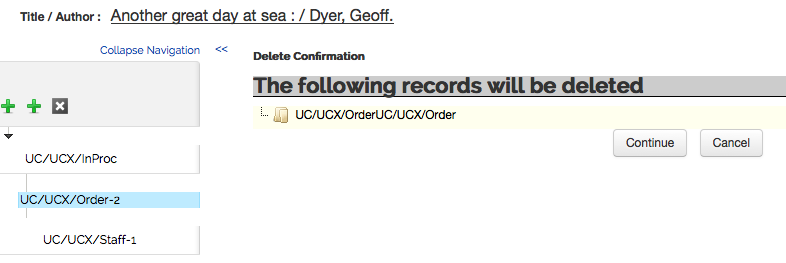
Click the top level
 to delete the current bibliographic record.
OLE provides hyperlinks for Uniform Resource Identifiers (URIs) that are contained in MARC data fields of the Bibliographic Editor. This gives the user an efficient means to test the validity of a URI, directly from the MARC record.
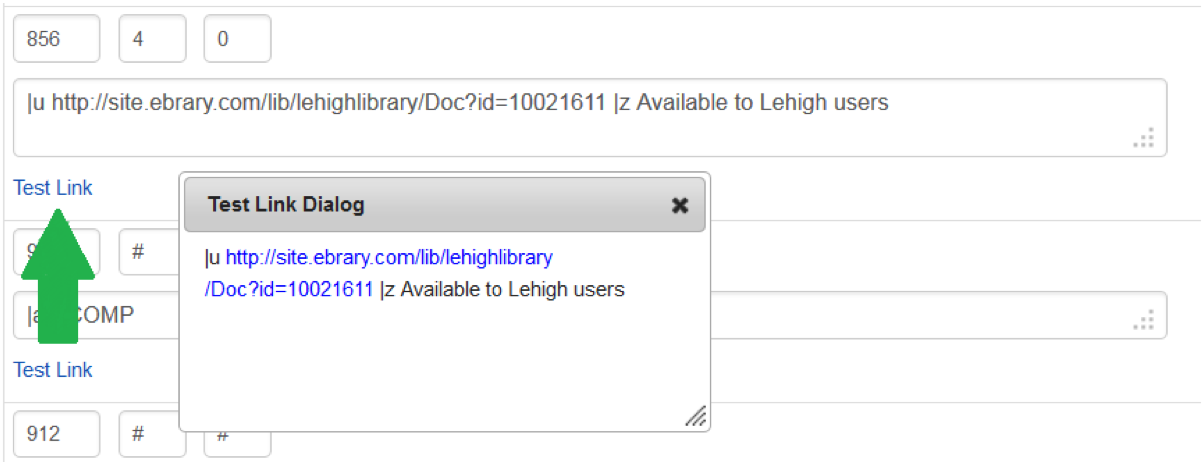
Any URI that is entered in any of the MARC fields of the Data tab in the Bibliographic Editor can be hyperlinked by OLE. To test a link the user must click on the words Test Link, located either to the right or beneath the MARC field that contains the URI. The location of Test Link will depend on the size of the browser window.
 |
When Test Link is clicked, a Test Link Dialog window will open. The URI or URIs that are included in the MARC field will be hyperlinked in this new open window.
 |
If more than one URI is in the MARC field they must have at least one space between them in order for OLE to distinguish them as two separate URIs and create separate links for them. Subfield coding does not interfere with the interpretation of the URI as a web address. In the example above, two URIs were entered into two subfield 0s in a MARC 100 field. When the Test Link Dialog window opened, each URI remained distinct and led to its own web page.
All URIs must begin with the protocol directive of http:// or https:// in order for OLE to recognize the text string as a web address. If OLE has not recognized a given URI as a web address, the text will not be hyperlinked in the Test Link Dialog window.
Once the user is finished testing the link or links, the Test Link Dialog box can be closed by clicking on the X in the top right corner of that window.
Note
Submit does not have to be clicked in order for this function to work.


