 >
>  >
>  >
> 
The Batch Process interface, available from the Admin menu, allows staff to run import and export jobs in OLE. Once the job has run, staff may receive notifications of completion, view reports and, for importing, make changes to records as necessary.
Open the Batch Process interface from the Admin tab.

Enter a name to distinguish your batch process. This field is not required but it will be helpful to identify the batch process. If left blank, the profile name chosen and a number is used by OLE.
Choose the Batch Process Profile. You must search for it from the lookup
 .
. Modify the batch size. This is the number of record to import or export. For example, for a database of seven million records, you might specify a batch size of one million.
If you wish to receive the batch process job report via email, enter your email in Send Job Report To.
If you do not want to receive email notifications, you may also check the listing of job outputs from the Batch Process Job Details interface (see below).
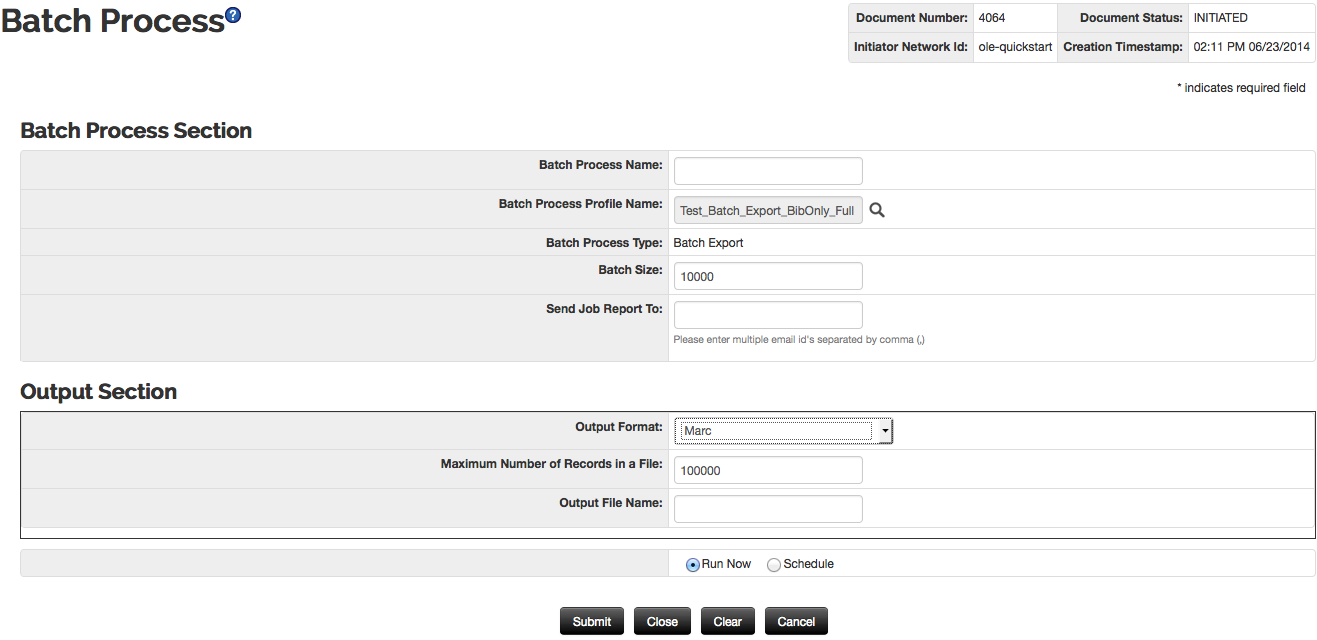
Depending on the Batch Process Type (auto-populated when the Batch Process Profile Name is selected), an Input Section or an Output Section will appear.
Output Section is made available for exporting records types. Select the Output Format (MARC or MARCXML) from the drop down.
Enter the Output File Name, a name given to the file.
Note
A note on naming the Output File:
If a "Batch Process Name" is specified, and no "Output File Name" is specified, the batch process name is used for the filename.
If an "Output File Name" is specified, and no "Batch Process Name" is given, the "Output File Field" is used for the filename.
If a "Batch Process Name" is specified, and a filename is given in the "Output File Name" field, the "Output File Name" field is used to generate the filename.
If a file name containing a space is entered in either the "Output File Name" field or the "Batch Process Name" field on the Batch Process screen, although the file will appear normal in the directory display (accessed from Batch Process Job Details > View Job Report > View Export Path), the link to download the file will break off the filename at the first space, with no extension.
This is a known bug to be fixed in a future release. See OLE-6603.
Exported file location will be: export/[batch_process_profile or user_specified_location]/[job_name or job [batch_id]]- [start timestamp] [-part#]. [extension]
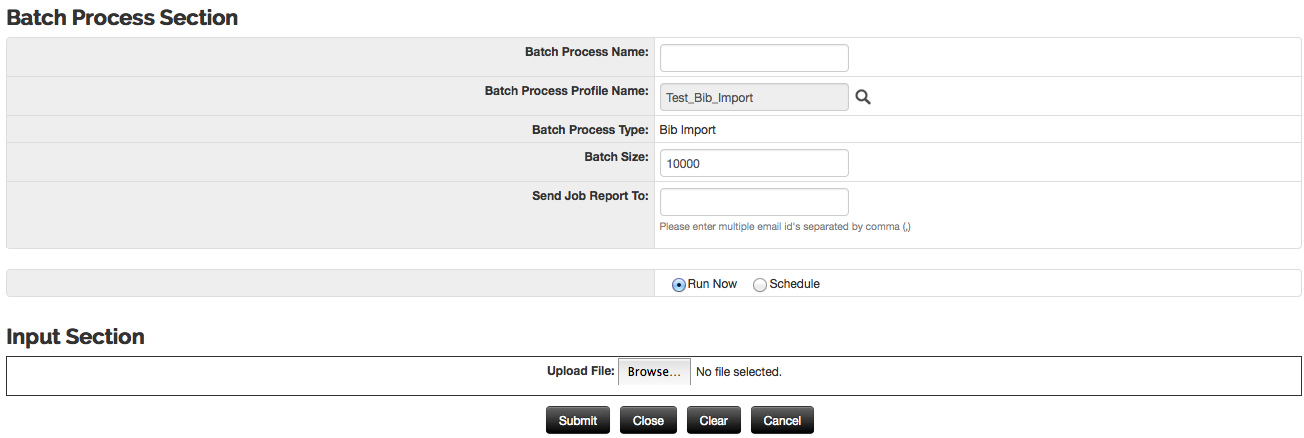
Input Section is made available for most importing record types. Select Browse... to search for the file from your local machine.
Input Section for Order Records requires you to choose both a Marc and Edi file.

Select Run Now and click
 to begin the job immediately.
Alternatively, you may select Schedule to schedule the job.
To review completed batch jobs, review the report, or restart the job see Batch Process Job Details.
Note
For additional information on Batch Process Job Details, see Batch Process Job Details
To Review jobs that are scheduled, reschedule or remove the job from OLE, see Batch Process Job Schedule.
Note
For additional information on Batch Process Job Schedule, see Batch Process Job Schedule
If you select schedule to schedule the Batch Process job, an additional tab will appear to assist in the scheduling process.
You may choose to schedule by Cron Expression. Select the radio button next to Cron Expression and enter the expression in the available text box. For example, "0 0 * * * ?" will export data hourly.

Note
For more information about CRON expressions in OLE, see Job Cron Expression - controlling the frequency/schedule of job execution.
You may also choose the radio button Schedule to manually enter when the job should occur. You will have two options:
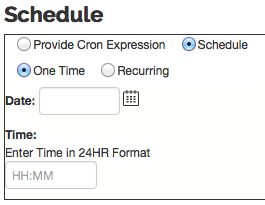
One Time: Enter the date or search for it from the calendar icon
 and time for the job to begin.
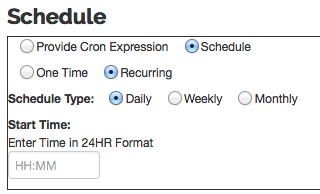
Recurring: Select the schedule type Daily, Weekly or Monthly.
If you selected the Schedule Type Daily, enter the time for the job to begin.
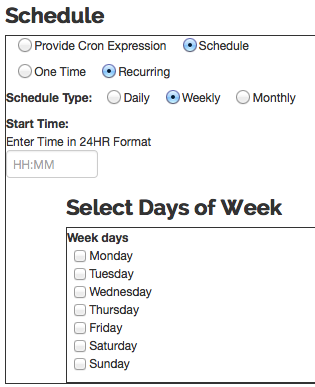
If you selected the Schedule Type Weekly, enter the time for the job to begin and check the box for the days of the week that the job should run.
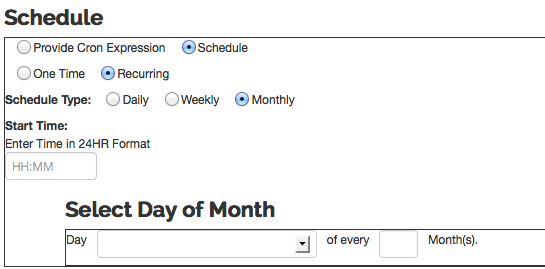
If you selected the Schedule Type Monthly, enter the time for the job to begin, select the calendar date (for example, 23 for the 23rd day of each month), and enter the number of months that should elapse before the job runs again (for example, you may set the job to run every 3 or 6 months).
Once your schedule has been determined, click  .
.
To see the details of the batch process, including the percent completed and the job report, go to the Batch Process Job Details.
Note
For more information about Batch Process Job Details, see the section below.
First, create the full batch export profile and run the batch process job.
Search for the batch process profile name that will export full records.
Note
To make a batch process profile, see below.
Adjust the batch size as needed.
Select the output format.
Enter a file name in the Output filename.
Verify that the radio button Run Now is chosen.
Click Submit to run the full dump.
Next, create the incremental and schedule it to run daily at preferred time.
Search for the batch process profile name that will export incremental records. A separate profile is needed for this.
Note
To make a batch process profile, see below.
Adjust the batch size as needed.
Select the output format.
Enter a file name in the Output filename.
Select the radio button Schedule and schedule the preferred time. The job will pick up changes that exist since the job's creation.
Note
For more information about scheduling a job, see Scheduling a Batch Process.
Click Submit to start the schedule.
If items are created through Batch Process (in BIB MARC XML format), there is no limit to the amount of records that can be imported at one time but the code may fail if too many item records are to be created for a single bibliographic record.
Note
There is no limit for the initial (bulk) ingest.


