Table of Contents
- Introduction
- 1. System Administration Documents
- 2. Location Administrative Documents
- 3. Batch Administrative Documents
- 4. Batch Framework Administrative Documents
- 5. Kuali OLE Modules Administrative Documents
- 6. KRMS Rules Administrative Documents
- 7. Global Configuration Settings Administration Documents
- 8. Configuration Administrative Documents
- 9. Monitoring Administrative Documents
This guide provides information about using OLE system administration functions available via the user interface. Users with proper authorization are able to perform powerful functions that affect the entire system. These functions, which are accessible via the Admin menu tab, allow you to:
Support the Kuali Identity Management (KIM) module and implement security based on accounting line attributes
Define basic types of location and reference information
Control the running of batch jobs
Support the Kuali Enterprise Workflow (KEW) module and
Enable authorized users to perform a variety of other functional and technical activities.
Note
Only members of OLE-SYS Manager and KR-SYS Technical Administrator roles may initiate most documents in the Admin Menu. Other users may look up values from the lookup screens but may not be able to access other options at all.
This guide is organized to follow the layout of the Admin tab. Please note that some submenus are not covered in this guide.
System provides access to KIM identy (roles and permissions) and locations, as well as identy management references (maintenance documents associated with KIM identities).
Location provides access to creating and maintaining locations and location levels for the maintenance of library records.
Batch allows users to upload files used by various OLE batch jobs, run batch jobs and see files generated by those jobs for Financial Processing, General Ledger, and System processes.
Batch Framework submenu allows users to perform a variety of functional and technical activities that process cataloging records in batch.
Kuali OLE Modules submenu allows you to perform a variety of functional and technical activities that affect the entire system. This includes uploading XML and People Flow rules to modify workflows. Users may also access the Staff Upload interface.
KRMS Rules provides access to agendas, context, attribution, term and category lookups.
Global Configuration Settings provide access to administering export and global import services.
Configuration provides access to high level configuration options. Users may modify workflows and parameters for OLE.
Monitoring provides access to the Kuali Service Bus and additional workflow documentation.
These sections are divided into subsections covering individual functions in the menu grouping. For each function, the applicable subsection presents a breadcrumb trail showing you how to access the function, information about the layout of and fields on the applicable screen(s), and where appropriate, additional information to help you use the screen(s).
Note
In order to work efficiently, you need to understand the basics of the OLE’s user interface. For information and instructions about logging on and off, navigating, understanding the components of screens, and performing basic operations in the screens, see the OLE Basic Functionality and Key Concepts.
This guide as well as guides to other OLE modules are available for download from the OLE Documentation Portal.
Tip
Bookmark any page within OLE. This will allow you to easily navigate back to an interface or e-doc in one click, just log in.
Table of Contents
 >
>![]() >
> 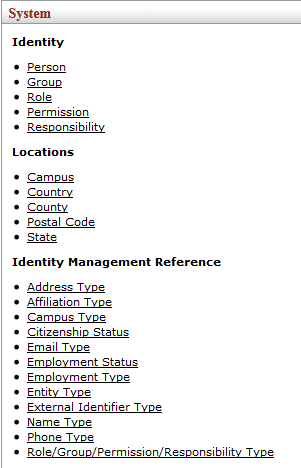
The system submenu provides access to screens that allow you to perform functions related to identity, security, locations, and reference.
System submenu groups
|
Document |
Description |
|
Allows you to establish and maintain user data and the associated roles and permissions in the Kuali Identity Management (KIM) system | |
|
Enables you to define valid values for various types of location information in OLE. | |
|
Provides a means of defining valid values for use on the KIM Person document. |
 >
>  >
> 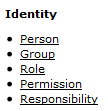
The Identity submenu group provides access to screens in order to establish and maintain user data and the associated roles and permissions in the Kuali Identity Management (KIM) system. This system handles user identification, permissions, and responsibilities for multiple Kuali applications, including OLE. KIM may also be used with non-Kuali applications.
OLE communicates with KIM to determine each user's permissions and workflow responsibilities. These permissions and responsibilities are defined by the user's role or roles in the system. Roles can be customized to handle permissions and responsibilities in a variety of ways based on your institution's needs.
Note
Learn more about KIM functions in the video KIM functions (roles, permissions, responsibilities).
In OLE, most KIM documents are available from the Admin menu tab in the System menu group in the Identity submenu group. The Routing & Identity Management Document Type Hierarchy is available in the Configuration menu group in the Workflow submenu group.
The purpose of each document in the Identity subgroup in the System menu group is explained in the following table.
This section introduces KIM permissions, responsibilities, roles, and groups as well as the Routing & Identity Management Document Type Hierarchy tool.
Entries in KIM control user permissions to edit a document, to blanket approve transactions, and to perform many other activities in OLE.
KIM also identifies responsibilities that generate workflow action requests in OLE. When a Fiscal Officer approves a financial processing document or a Chart Manager approves a Chart of Accounts maintenance document, the user is acting on a request that has been generated by a responsibility specified in KIM.
In KIM, you do not assign permissions and responsibilities directly to individual users; instead, you associate users with roles, and you give each role an appropriate set of responsibilities and permissions. For example, the Fiscal Officer role includes permission to edit accounting lines on certain enroute documents. This role also includes responsibilities that generate requests for the specific actions fiscal officers must take on documents. The Limited Circulation Attendant role includes permissions to view but not make changes to a patron record.
In the base OLE configuration, similar business functions are often grouped into a single role. Your institution may choose to assign permissions and responsibilities differently or even create its own roles to fit its business processes.
In KIM, each user is identified on the KIM Person document. This document identifies the person by a Principal ID and assigns that person to any number of roles. Role assignments may be made via the Person document or the Role document. Some types of roles, called 'derived roles,' automatically determine their members from data in other OLE components. For example, because Fiscal Officer is a definition of the Account in OLE, the Fiscal Officer role derives its assignees based on the data in the Account table. You do not need to assign users to derived roles such as this one.
Groups provide another important tool in KIM. Groups are an optional feature that allows you to associate persons, roles or other groups with each other for the purpose of making role assignments. For example, if you want to assign the same role to three users, you could create a group, assign the three users to it, and then assign the group to the desired role. (Alternatively, you could add the three users individually to the role. The choice of whether to use a group or assign individual users to roles is entirely yours.)
 >
>  >
>  >
>  >
>  >
> 
The Person document allows you to identify each user to KIM (and, by extension, to OLE). Each Person document includes data about a user's relationship with your institution as well as the roles and groups to which this person belongs.
In KIM a person is a unique combination of an 'entity ID' and a 'principal ID.' The entity ID represents a person with a unique number, and the document associates the entity ID with the user's principal ID number and principal name (often referred to as a user name or user ID). When searching for or working with users in KIM, you usually reference either the principal ID or the principal name. A single entity ID can have multiple principals associated with it, but the base OLE implementation of KIM assumes that each entity ID has only a single principal.
Note
Note that initiation of the Person document is restricted to members of the KR-SYS Technical Administrator or OLE-SYS Manager role.
The Person document includes Overview, Contact, Privacy Preferences, and Membership tabs.
![]()
![]()
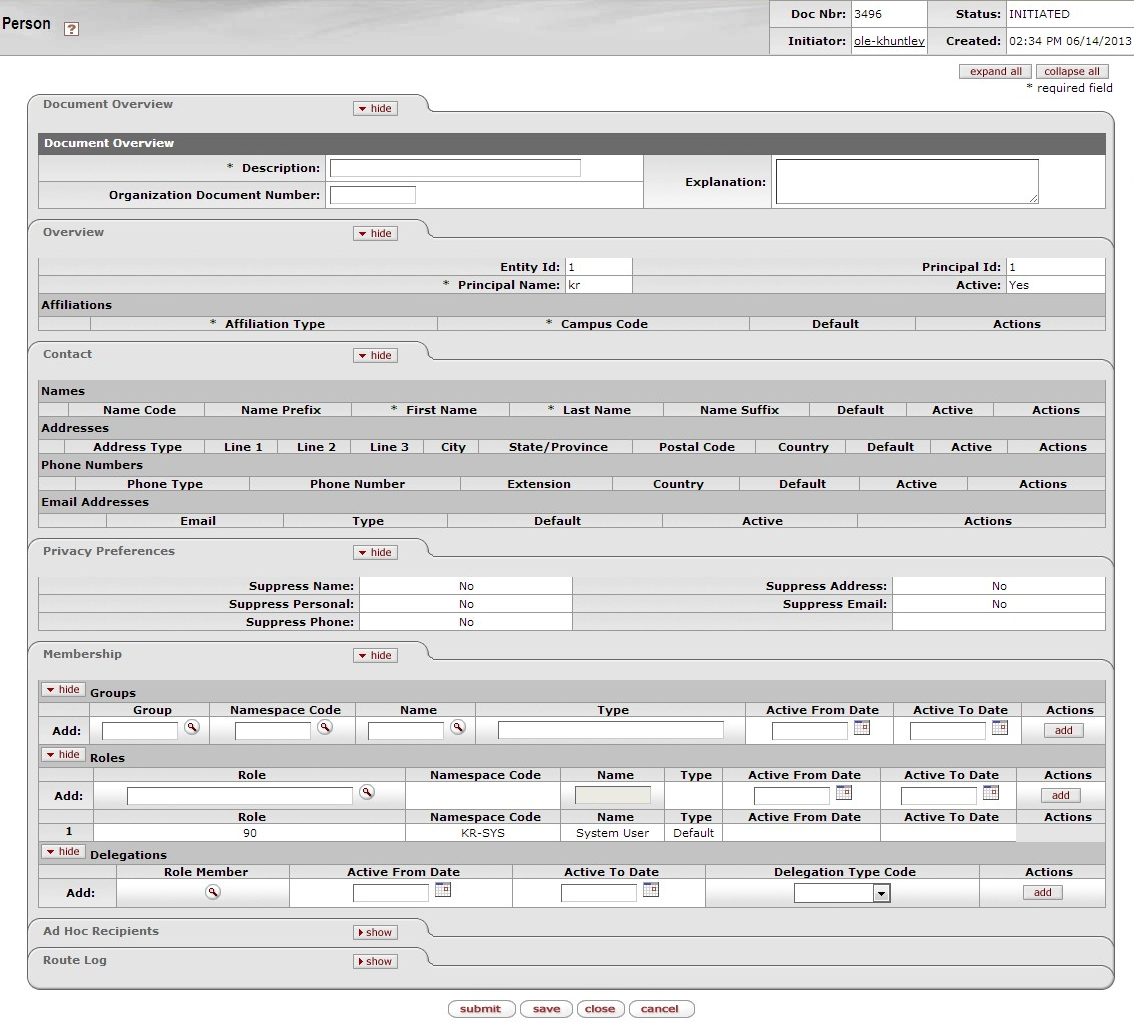
The Overview tab identifies the person as a unique combination of entity and principal ID. It also contains information about how this person is affiliated with your institution. Two types of affiliations—staff and faculty—contain additional data elements to further define a person's relationship with your institution.
The instructions below assume that you are manually completing this information. Many institutions may want to either have this data fed from an existing person database or simply override this information with existing person data.

The first section in the Overview tab is the Overview section.
Overview section Definitions
|
Title |
Description |
|
Entity Id |
Display only. The unique ID number identifying this person in your database. An individual may have multiple principal IDs but only one entity ID. The base OLE implementation assumes that each user will have only one entity ID and one principal ID. The system completes this entry automatically when you save or submit the document. |
|
Principal ID |
Display only. The unique ID number identifying this principal. Whereas Entity ID represents a unique person, principal represents a set of login information for that person. When selecting a person, you ordinarily reference his or her principal ID. The system completes this entry automatically when you save or submit the document. |
|
Principal Name |
Required. Enter the user name by which this principal is to be identified. |
|
Principal Password |
Optional. Enter the password for this principal ID. |
|
Active |
Check the box to indicate that this principal ID is active. Uncheck the box to indicate that this principal ID is inactive. |
Use the Affiliations section of the Overview tab to add affiliations for this principal ID. Depending on the affiliation type added, you may need to complete additional fields.
Affiliations section definition
|
Title |
Description |
|
Affiliation Type |
Optional. Select the type of affiliation from the list. Options include: Affiliate: An affiliation for users in your system that are neither employees nor students. Faculty: A faculty employee. Staff: A non-faculty employee. Student: A non-employee identified as a student of your institution. Affiliation types of Faculty and Staff require additional information (see below). |
|
Campus Code |
Required. Select the campus code associated with this affiliation. |
|
Default |
Check the box to indicate that this affiliation is this principal's default association with your institution. Each principal must have at least one default affiliation. |
|
Actions |
Click the Add button to add the affiliation. |
If you have selected an Affiliation of 'Faculty' or 'Staff,' the system displays additional fields to collect employment information.
![]()
Employment Information fields definition
|
Title |
Description |
|
Employment ID |
Optional. Enter the Employment ID number associated with this faculty or staff affiliation. Ordinarily this entry is the ID number identifying this principal in your HR system. |
|
Primary |
Check the box to indicate that this faculty or staff affiliation represents the principal's primary job with your institution. Each principal with a faculty or staff affiliation must have exactly one affiliation marked as 'primary. |
|
Employee Status |
Required. Select a value to identify the current status of this faculty or staff affiliation. Options include: Active, Deceased, On Non-Pay Leave Status, Not Yet Processed, Processing, Retired, Terminated |
|
Employee Type |
Required. Select a value to indicate the type of employment for this affiliation. Options include Non-Professional, Other, and Professional |
|
Base Salary Amount |
Required. Enter the base salary yearly amount earned for this faculty or staff affiliation. |
|
Primary Department Code |
Optional. Enter the code for the department associated with this faculty or staff affiliation. OLE-SYS User role parses this field to determine the default chart and organization for a user if it is formatted as 'Chart-Organization Code' such as BL-PSY or BA-PARK. |
|
Actions |
Click theAdd button to add this row of employment information. |
The Contact tab records the names, addresses, phone numbers and email addresses associated with this Person record. Any Person record can store multiple records for contact information of each type (name, address, phone number, and email address), with one value of each type identified as the default value for the Person record.

![]()
Names section definition
|
Title |
Description |
|
Name Code |
Optional. Select the type of name to be added in this row. Options include: Other, Preferred, Primary |
|
Name Prefix |
Optional. Select the appropriate title for the name being added in this row. Options include: Ms, Mrs, Mr, Dr |
|
First Name |
Optional. Enter the first name for this record. |
|
Last Name |
Optional. Enter the last name for this record. |
|
Name Suffix |
Optional. Select a suffix for this name record. Options include: Jr, Sr, Mr, Md |
|
Default |
Check this box to indicate that this Name record is to be used as the default for this person. Each Person record must have exactly one Name record identified as the default. |
|
Active |
Check the box to indicate that this Name record is active. Uncheck the box to indicate that this record should be considered inactive. |
|
Actions |
Click the Add button to add this Name record. |
![]()
Addresses section definition
|
Title |
Description |
|
Address Type |
Optional. Select the type of address being added on this row. Options include: Home, Other, Work |
|
Line 1-3 |
Optional. Use lines 1, 2 and 3 to enter the street address for this row. |
|
City |
Optional. Enter the city associated with this address. |
|
State/Province |
Optional. Select the state or province associated with this address from the list. |
|
Postal Code |
Optional. Enter the postal code associated with this address. |
|
Country |
Optional. Select the country associated with this address. |
|
Default |
Check this box to indicate this address record should be used as the default. A Person record can have no more than one default Address record. |
|
Active |
Check this box to indicate that this Address record is active. Uncheck the box to indicate that this record is inactive. |
|
Actions |
Click the Add button to add this Address record. |
![]()
Phone Numbers section definition
|
Title |
Description |
|
Phone Type |
Optional. Select the type of phone number being added on this row. Options include: Home Mobile Other Work |
|
Phone Number |
Optional. Enter the area code and phone number. |
|
Extension |
Optional. Enter the appropriate extension. |
|
Country |
Optional. Select the country associated with this Phone Number record. |
|
Default |
Check this box to indicate that this Phone Number record should be used as the default. A Person record can have no more than one default Phone Number record. |
|
Active |
Check this box to indicate that this Phone Number record is active. Uncheck the box to indicate that this record is inactive. |
|
Actions |
Click the Add button to add this Phone Number record. |
![]()
Email Address section definition
|
Title |
Description |
|
|
Optional. Enter the email address for this record. |
|
Type |
Optional. Select the type of email address being added on this row. Options include: Home, Other, Work |
|
Default |
Check this box to indicate that this Email Address record should be used as the default. A Person record can have no more than one default Email Address record. |
|
Active |
Check this box to indicate that this Email Address record is active. Uncheck the box to indicate that this record is inactive. |
|
Actions |
Click the Add button to add this Email Address record. |
Note
Note that no role in the base data configuration can modify this privacy preferences information. If you wish this capability to be available via the user interface, you must assign the 'Override Entity Privacy Preferences' permission to a role.
The Privacy Preferences tab allows you to suppress the display of fields on the Contact Tab.

Privacy Preferences tab definition
|
Title |
Description |
|
Suppress Name |
Optional. Check this box to specify that the system is not to display this person's names. |
|
Suppress Personal |
Optional. Do not display this person's personal data. This selection currently performs no function in OLE. |
|
Suppress Phone |
Optional. Check this box to specify that the system is not to display this person's phone numbers. |
|
Suppress Address |
Optional. Check this box to specify that the system is not to display this person's addresses. |
|
Suppress Email |
Optional. Check this box to specify that the system is not to display this person's email addresses. |
The Membership Tab allows you to associate a person with groups and roles and, by extension, with KIM permissions and responsibilities. Assigning a person to a role is the most direct way to give a user KIM permissions and responsibilities.

The tab is divided into three sections, one for managing assignments to Groups, another for Roles, and a third for Delegations.
Groups section definition
|
Title |
Description |
|
Group |
Optional. Enter the name of the KIM group you want to assign this person
to. You can also use the Group lookup |
|
Namespace Code |
Display only. After you select a group to add this person to, the namespace code associated with the selected group is displayed. |
|
Name |
Display only. After you select a group to add this person to, the name of that group is displayed. |
|
Type |
Display only. After you select a group to add this person to, the type associated with the selected group is displayed. |
|
Active From Date |
Optional. If this user's assignment to this group is to be effective as of a certain date, enter that date here. |
|
Active To Date |
Optional. If this user's assignment to this group is to terminate as of a certain date, enter that date here. NoteThere is no way to delete a person's assignment to a group. To remove a person from a group, use this field to specify a date in the past. |
|
Actions |
Click the Add button to add this group assignment. |
|
Title |
Description |
|
Role |
Optional. Use the Name lookup |
|
Namespace Code |
Display only. After you select a role to assign to this Person record, the system displays the namespace code associated with that role. |
|
Name |
Display only. After you select a role to assign to this Person record, the system displays the name associated with that role. |
|
Type |
Display only. After you select a role to assign to this Person record, the system displays the role type associated with the selected role here. |
|
Active From Date |
Optional. If this user's assignment to this role is to be effective as of a certain date, enter that date here. |
|
Active To Date |
Optional. If this user's assignment to this role is to terminate as of a certain date, enter that date here. NoteNote that there is no way to delete a person's assignment to a role. To remove a person from a role, use this field to specify a date in the past. |
|
Actions |
Click the Add button to add this role data. |
Note
When assigning some roles, you may need to supply additional qualifying values that further define this person's assignment. For more information about role qualifiers, see Role.
Delegations allow you to set a user as a primary or secondary delegate for a current member of a role. The delegate has the same permissions as the role member and is able to act on action requests generated for the role member by KIM.
Delegations section definition
|
Title |
Description |
|
Role Member |
Optional. Use the Role Member lookup |
|
Active From Date |
Optional. If this delegation is to be effective as of a certain date, enter that date here. |
|
Active To Date |
Optional. If this delegation is to terminate as of a certain date, enter that date here. NoteNote that there is no way to delete a person's delegation. To remove a person from a role, use this field to specify a date in the past. |
|
Delegation Type Code |
Optional. This defines how the delegate will be able to access workflow action requests generated to the delegating role member. Options are 'Secondary' (the user must use the secondary delegate action list filter to view action requests) and 'Primary' (action requests will route directly to the delegate's action list). |
|
Actions |
Click the Add button to add this delegation data. |
A person must have at least one affiliation.
Each faculty or staff affiliation must have at least one Employment Information record associated with it.
If a person has any faculty or staff affiliations then one Employment Information record must be marked as 'primary.
Each person must have a default Name record in the Contacts section.
Each affiliation must be associated with a campus.
Each type of contact information can have only one record marked as the default.
 >
>  >
>  >
>  >
>  >
> 
The Group document allows you to associate persons, roles or other groups with each other in order to assign the same role to all group members.
Groups have no inherent permissions or responsibilities of their own. Only by associating a group with a role do the members of that group become associated with permissions and responsibilities.
The Group document includes Document Overview, Overview, Definitions and Assignees tabs.
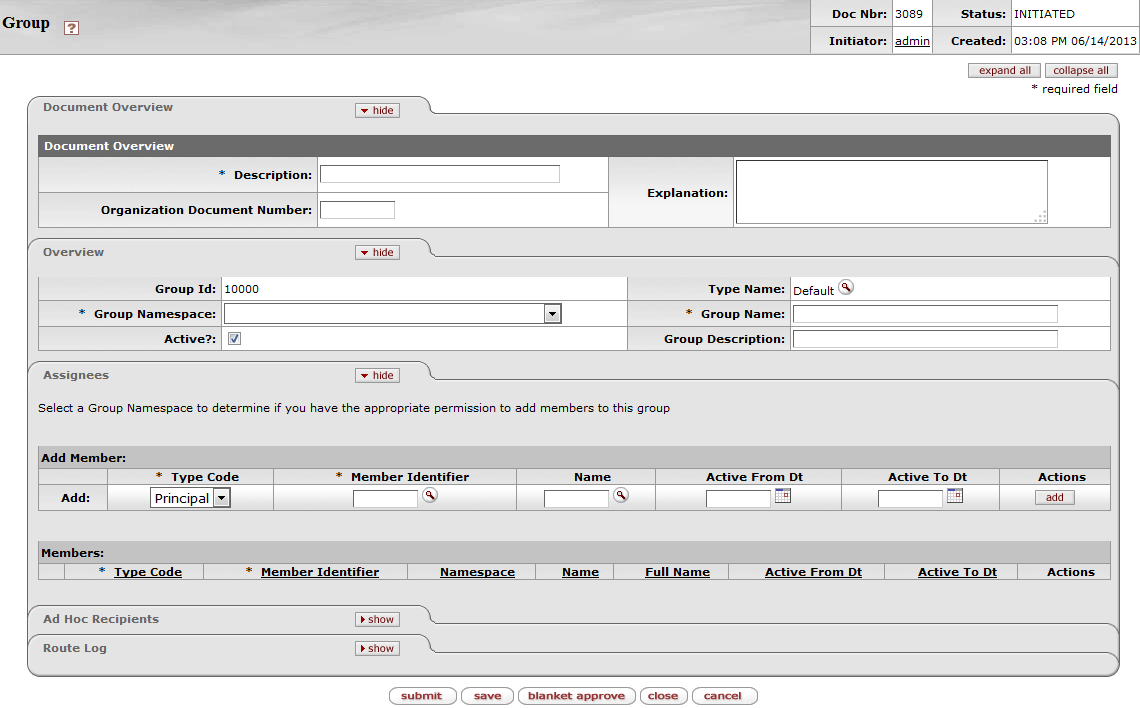
This tab identifies the group with a unique system-assigned ID number, a namespace and a name. Each group also has a type that specifies any qualifiers that this group might require.

Overview tab definition
|
Title |
Description |
|
Group ID |
Display only. The unique system-assigned ID number that identifies this group. The system completes this field when you submit the document. |
|
Type Name |
Required. The type of definitions that will be associated with this group. Some group types, such as the Default Type, require no definitions to be collected. NoteWhen creating a new group, you must select the Type before the system can generate the document. See below. |
|
Group Namespace |
Required. An indicator that associates the group with a particular application and module. |
|
Group Name |
Required. The common descriptive name by which this group is known. |
|
Active |
Check this box to indicate that this Group is active and is a valid choice for assigning to roles. Uncheck the box to indicate that this group is inactive (no longer valid when making role assignments). |
|
Group Description |
Additional description field for the group. |
When you click the lookup button ![]() , the system displays the KIM Type Lookup screen. You must search for and select
an existing Type in order for the system to generate a new Group document.
, the system displays the KIM Type Lookup screen. You must search for and select
an existing Type in order for the system to generate a new Group document.

This lookup is used whenever you create a new group or role. The search definitions are explained below.
KIM Type Lookup definition
|
Title |
Description |
|
Namespace Code |
Optional. Select the code identifying the application and module this KIM type pertains to. |
|
Type Name |
Optional. Enter the name identifying this KIM type. |
|
Type Identifier |
Optional. Enter the unique system-assigned identifying number for this KIM type. |
|
Active Indicator |
Required (defaults to 'Yes'). Change the default selection to view KIM types that are inactive or are both active and inactive. |
The display of search results includes the same fields as the Lookup screen. To select the type you want to use for your new group, click the return value link for it.

This tab contains any definitions specific to this group's type. For example, if a group has a type of Chart and Organization, this tab will record the Chart and Organization values that are specific to this group. In the example below a Chart Code and Organization Code are required for establishing groups of this type.

This tab contains the members who belong to this group. It can also be used to add new members or edit the values associated with existing members.

Assignees tab definition
|
Title |
Description |
|
Type Code |
Required. Select the type of member you are adding to this group. Group members can be principals (as defined on the Person document), roles or other groups. |
|
Member Identifier |
Required. Enter the ID that identifies the member you are adding or use the
lookup |
|
Name |
Display only. Displays the name of the member you've selected. |
|
Active From Dt |
Optional. To specify the earliest date on which this member is to be considered a valid member of this group, enter a From Date. |
|
Active To Dt |
Optional. To specify a date on which this member is no longer to be considered a valid member of this group, enter a To Date. NoteNote that you cannot delete or inactivate group members. To remove a member from a group enter an Active To Date. |
|
Actions |
Click the Add button to add this member to the group. |
 >
>  >
>  >
>  >
>  >
> 
The Role document allows you to create a new KIM role and edit an existing role. Each role aggregates a specific set of permissions and responsibilities and allows you to assign members to the role. OLE contains many existing roles that your institution may want to use as is, but you may also change existing roles and add new ones by using the Role document.
The purpose of each role is defined by its associated permissions and responsibilities. Roles are classified by types that generally indicate the type of permissions and responsibilities with which they can be associated.
Note
The process of creating a new type requires technical assistance. Consequently, KIM does not provide an interface for creating role types.
The Role document includes Document Overview, Overview, Permissions, Responsibilities, and Assignees tabs.
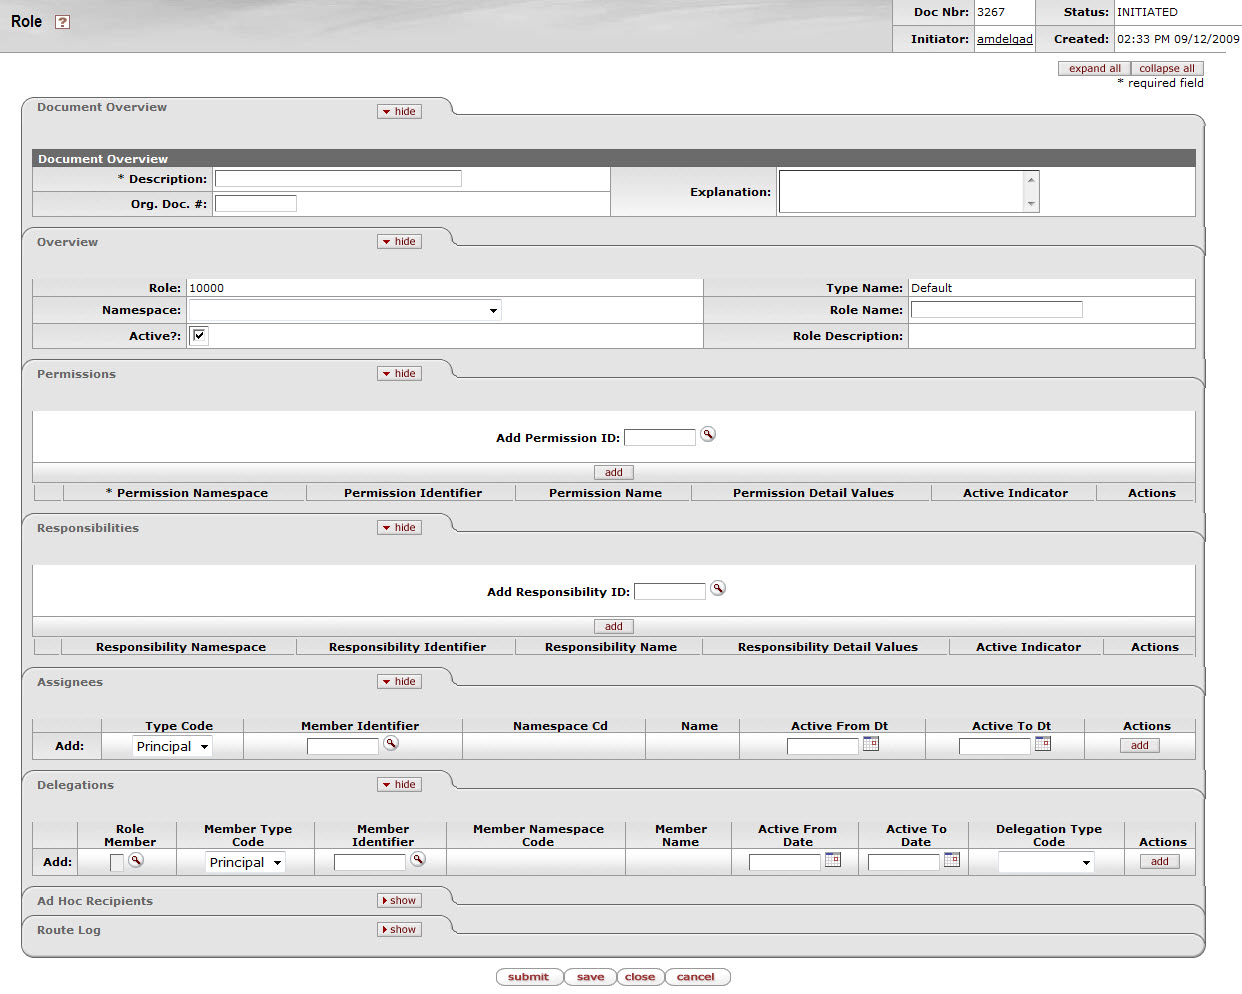
This tab identifies the role with a unique system-assigned ID number, a namespace and a name. Each role also has a type which tends to match the types of permissions and responsibilities associated with it.

Overview tab definition
|
Title |
Description |
|
Role |
Display only. The unique, system-assigned ID number that identifies this role. |
|
Type Name |
Display only. Because the role type normally reflects the type of qualifiers this role will need to collect when members are added, this name usually identifies the general types of permissions and responsibilities associated with it. NoteWhen creating a new role, you must select its type before the system will generate the document. See Creating New Roles. |
|
Role Namespace |
Required. An indicator that associates the role with a particular application and module. |
|
Role Name |
Required. The common descriptive name by which this role is known. |
|
Active |
Check this box to indicate that this role is active and is, therefore, to be included by KIM when evaluating permissions and responsibilities. Uncheck the box to indicate that this role is inactive. |
When you click the Create New button, the system displays the KIM Type Lookup. You must search for and select an existing Type in order for the system to generate a new Role document.
Note
Note that while the KIM Type Lookup is used when creating new groups and roles, not all KIM types are valid for both. When using this Lookup, you may receive different results depending on the KIM types that are valid for the entity you are working with.

This tab identifies the permissions associated with this role. Permissions authorize specific actions in the system with which they are associated. A role can have any number of permissions (including no permissions) associated with it.

Permissions tab definition
|
Title |
Description |
|
Add Permission ID |
To add a permission to this role, enter the appropriate permission ID or
search for and select a value using the Permission lookup |
|
Add |
Click the Add button to add the selected permission to this Role document. |
After you add a permission to the document, the system displays additional information about the permission.
Note
Permissions cannot be edited via the Role document. Use the Permission document to perform this function.
 |
Permissions tab definition, continued
|
Title |
Description |
|
Permission Namespace |
Display only. The Namespace identifies the application and module associated with this permission. |
|
Permission Identifier |
Display only. The unique system-assigned ID number for this permission. |
|
Permission Name |
Display only. The descriptive name of this permission. This often identifies, in general terms, what the permission authorizes. |
|
Permission Detail Values |
Display only. The document types, tabs and/or fields this permission authorizes. Not all permissions have detail values. |
|
Active Indicator |
Display only. Indicator showing whether this permission is active within the system or not. |
|
Actions |
Click the Delete button to remove this permission from the role. NoteYou may delete a permission only if it has not yet been saved to the database (i.e., you added it to this role but have not yet submitted the document). |
This tab identifies the responsibilities associated with this role. Responsibilities define the workflow actions that will be requested of the role. A role can have any number of responsibilities (including none) associated with it.

Responsibilities tab definition
|
Title |
Description |
|
Add Responsibility ID |
To add a responsibility to this role enter the responsibility ID or search
for and select a value using the Responsibility lookup |
|
Add |
Click the Add button to add the selected responsibility to this Role document. |
After you add a responsibility to the document, the system displays additional information about this responsibility.
Note
Responsibilities cannot generally be edited via the Role document, but some responsibilities have associated definitions that you must define at the role level. For information about editing responsibilities, see Responsibility.

Responsibilities tab definition, continued
|
Title |
Description |
|
Responsibility Namespace |
Display only. The Namespace identifies the application and module associated with this responsibility. |
|
Responsibility Identifier |
Display only. The unique system-assigned ID number identifying this responsibility. |
|
Responsibility Name |
Display only. The descriptive name of this responsibility. For most Responsibilities the name is 'Review. |
|
Responsibility Detail Values |
Display only. This identifies more specific information about the responsibility. Responsibility Detail Values are formatted in a standard way with the following definitions delimited by commas: Route Node: The workflow route level at which this responsibility is invoked. Document Type: The document type for which this responsibility generates workflow requests. Action Details at Role Member Level: A True or False indicator that defines where the details of this workflow action request are defined. If the value is 'True' then action details will be collected when Members are assigned to the role. If the value is 'False' then the action details must be collected when this responsibility is assigned to a role (see Assigning Action Detail Values elsewhere in this section.) Required: Indicates if the routing represented by this responsibility should be required. If this is set to True and the responsibility fails to generate an action request (perhaps because no one is assigned to the associated Role) then the document will go into Exception status. If this routing is optional this value will be False and the document will simply skip this responsibility if no requests are generated. |
|
Active Indicator |
Display only. Indicator showing whether this responsibility is active within the system or not. |
|
Actions |
Click the Delete button to remove this responsibility from this role. NoteYou can delete a responsibility only if it has not yet been saved to the database (i.e., you have added it to this role but have not yet submitted the document). |
When adding a responsibility with an Action Detail Values at Role Member Level value of 'False,' you must complete additional fields in a Responsibility Action sub-section. The system displays this section immediately beneath the responsibility you've just added.
The fields in this sub-section define the type of action requests generated for and the general workflow behavior associated with this responsibility. Entries in these fields cause the system to generate the same type of action requests for all members of this role and handle actions by all members in the same way.
![]()
Responsibility Action subsection definition
|
Title |
Description |
|
Name |
Display only. The namespace and name of the responsibility associated with these action details. |
|
Action Type Code |
Required. The type of action request that the system is to generate for this responsibility. Options include Approve, FYI and Acknowledge. |
|
Priority Number |
Optional. If multiple requests are generated at the route node specified on this responsibility, this value determines in the order in which the system will generate these requests. The system processes requests with lower priority numbers before processing requests with higher numbers. Requests with no number are treated as a priority of 1. |
|
Action Policy Code |
Required. This value determines what happens if multiple members of this role receive the same action request and one of them takes the action. This currently only applies in situations where a single action request is generated to multiple role members (i.e. the action details exist at the role level) or a role is assigned to another role and these nested role members receive an action request. For example, if a role with a responsibility with action details defined at the role level has three members assigned, all of these members receive the action request defined here; this code determines what the system does when one of them takes action on the document. A value of FIRST indicates that the first role member to take action on the document will automatically clear all the requests for this responsibility that may be in other role member's action lists. A value of ALL indicates that each role member must take individual action to clear his or her requests. |
|
Force Action |
Check the box to indicate that each user must take this action for this request even if the user has already previously taken action on this document. Leaving the box unchecked allows a request to be immediately fulfilled if the role member has previously taken action on this specific document. |
This tab contains all members who belong to this role. You may also use the tab to add new members and edit the values associated with existing members.

Assignees tab definition
|
Title |
Description |
|
Type Code |
Required. Role members can be principals (as defined on the Person document), groups or other roles. Select the type of member you want to add to this Role. |
|
Member Identifier |
Required. Enter the ID of the member you want to add or use the lookup |
|
Namespace Cd |
Display only. Identifies the namespace code associated with this role member. Note that only groups and roles will display a namespace code. |
|
Name |
Display only. Identifies the name of the member being assigned to this role. |
|
Active From Date |
Optional. Allows you to qualify this member's association with this role by date. Entering a from date will define the earliest date on which this member is a valid member of this role. |
|
Active To Date |
Optional. Allows you to deactivate a member's association with a role on a specific date. The date you enter defines the date the user is no longer a member of this role. NoteYou cannot delete or inactivate role members. To remove a member from a role, specify an active to date. |
|
Actions |
Click the Add button to add this member to the role. |
Note
Additional fields may be required, such as Chart Code or Organization Code, depending on the role type selected.
Note
Note that when assigning roles to other roles (nesting roles), qualifying values are not required. Some roles in OLE base data contain special logic to derive the required qualifiers from the nested role itself without qualifiers being specified. You may always specify qualifying values for a nested role and should do so unless you know the role being assigned contains logic to derive the qualifiers from the nested role. Roles without the proper qualifiers can cause problems throughout your OLE instance. Please consult with a OLE technical resource if you are unsure of whether or not to provide qualifying values when assigning a role to another role.
This tab identifies delegates associated with the role. Delegates are users that a member of this role has authorized to have the same permissions and take the same actions as the member is authorized to take.
The Assignees Tab dealing with Delegates is slightly different as detailed in the following table. Note that if the members of a role require qualifying values, the delegation requires these values as well. In most cases, delegates must have the same qualifiers as the role member they are associated with.

Delegations tab definition
|
Title |
Description |
|
Role Member |
Required. Use the lookup |
|
Member Type Code |
Required. Delegates may be principals (as defined on the Person document), groups or other roles. Select the type of delegate you want to add to this role. |
|
Member Identifier |
Required. Enter the ID that identifies the delegate you want to add or use
the lookup |
|
Member Namespace Code |
Display only. Identifies the namespace associated with the selected delegate. Note that only delegations to groups or roles will display a member namespace code. |
|
Member Name |
Display only. Shows the name of the selected delegate. |
|
Active From Date |
Optional. If you want you can qualify this delegate's association with this role by date. Entering a from date will define the earliest date on which this delegate is a valid delegate for this role. |
|
Active To Date |
Optional. Allows you to deactivate a delegate's association with a role on a specific date. The date you enter defines the date on which the user is no longer a delegate for this role. NoteYou cannot delete or deactivate delegates. To remove a delegate from a role, enter an active to date. |
|
Delegation Type Code |
Required. Select 'Secondary' or 'Primary. Note that this selection only applies to responsibilities associated with the role and indicates if the delegate will receive documents directly in their action list (Primary) or may choose to view documents in their action list using the secondary delegate list (Secondary). |
|
Actions |
Click the Add button to add this delegate to the role. |
Note
Additional fields may be required depending on the role type selected.
 >
>  >
>  >
>  >
> 
The Permission document allows you to create new permissions or edit existing ones. The Permission Lookup allows you to search for and view existing permissions. You can view summarized information about the permission detail values as well as the roles that are currently associated with this permission.
Only members of OLE-SYS Technical Administrator or OLE-SYS Manager role can create or modify Permission documents. These documents do not route for approval.
Note
Extreme caution should be exercised when modifying existing permissions or adding new ones. Even small changes can have application-wide consequences. Changes should be made only after sufficient testing with your local configuration.
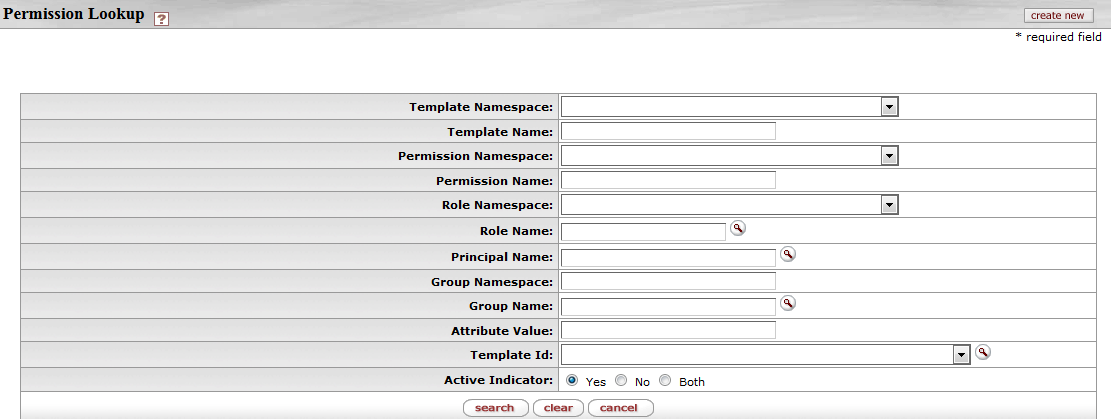
Permission Lookup search criteria
|
Title |
Description |
|
Template Namespace |
Optional. To search for a permission based on its template namespace (that is, the name of the application and module to which its template belongs), select the appropriate namespace. |
|
Template Name |
Optional. To search for a permission based on the name of the template it is based on, enter the appropriate template name. |
|
Permission Namespace |
Optional. To search for a permission based on its namespace, select the appropriate permission namespace. |
|
Permission Name |
Optional. To search for a permission by name, enter its name. |
|
Role Namespace |
To search for a permission based on the namespace of the role to which it is assigned, enter the appropriate role namespace. |
|
Role Name |
Optional. To search for a permission based on the role to which it is assigned, enter the appropriate role name. |
|
Principal Name |
Optional. To search for a permission based on the principals that currently have this permission through their association with a role, enter an appropriate principal name. |
|
Group Namespace |
Optional. To search for a permission based on the namespace of groups that have this permission through the group's association with a role, enter an appropriate group namespace. |
|
Group Name |
Optional. To search for a permission based on the name of a group that has this permission through its association with a role, enter an appropriate group name. |
|
Attribute Value |
Optional. A specific permission detail value associated with a permission |
|
Template ID |
Numerical value of the template namespace |

The Permission results display contains the fields described in the table below.
Permission Lookup results fields
|
Title |
Description |
|
Actions |
Actions allow selection of edit or copy for each permission displayed. |
|
Template Namespace |
The code identifying the application and module the template pertains to. Because templates tend to be general categories, they are often associated with system-level namespaces. |
|
Template Name |
The template the permission is based on. A template usually defines, in a broad sense, what the permission controls. Similar types of permissions share the same template. |
|
Permission Namespace |
The code designating the application and module this permission is associated with. |
|
Permission Name |
The descriptive name for this permission. In most cases this will match the Template Name. |
|
Permission Description |
Display only. Detailed information that describes the permission and its purpose. |
|
Permission Detail Values |
Display only. Detailed information that, in combination with the permission name, defines the permission's function. For example, if the permission name is 'Initiate Document,' the Permission Detail Values field indicates the specific type of document the initiate permission pertains to. Permission detail values can include many different types of data. Some common types are defined below. documentTypeName: The name of the document type associated with this permission. routeNodeName: The point in a document's workflow routing at which this permission becomes relevant. routeStatusCode: The routing status that a document must be in for this permission to apply. propertyName: Often, a field or document element that the permission pertains to. |
|
Granted to Roles |
Lists the namespace and name of roles that have this permission. Click on the linked name to view the Role inquiry. |
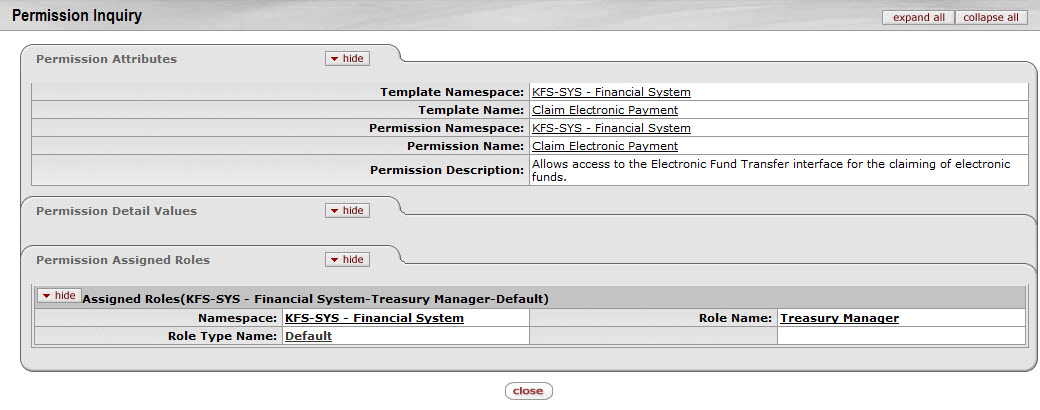
To view an Inquiry screen for a permission, select the Permission Name of the appropriate row in the search results. The Inquiry screen contains the same information as the Search Results in a slightly different format.
The Permission document includes Document Overview, Permission Info, and Permission Details tabs.
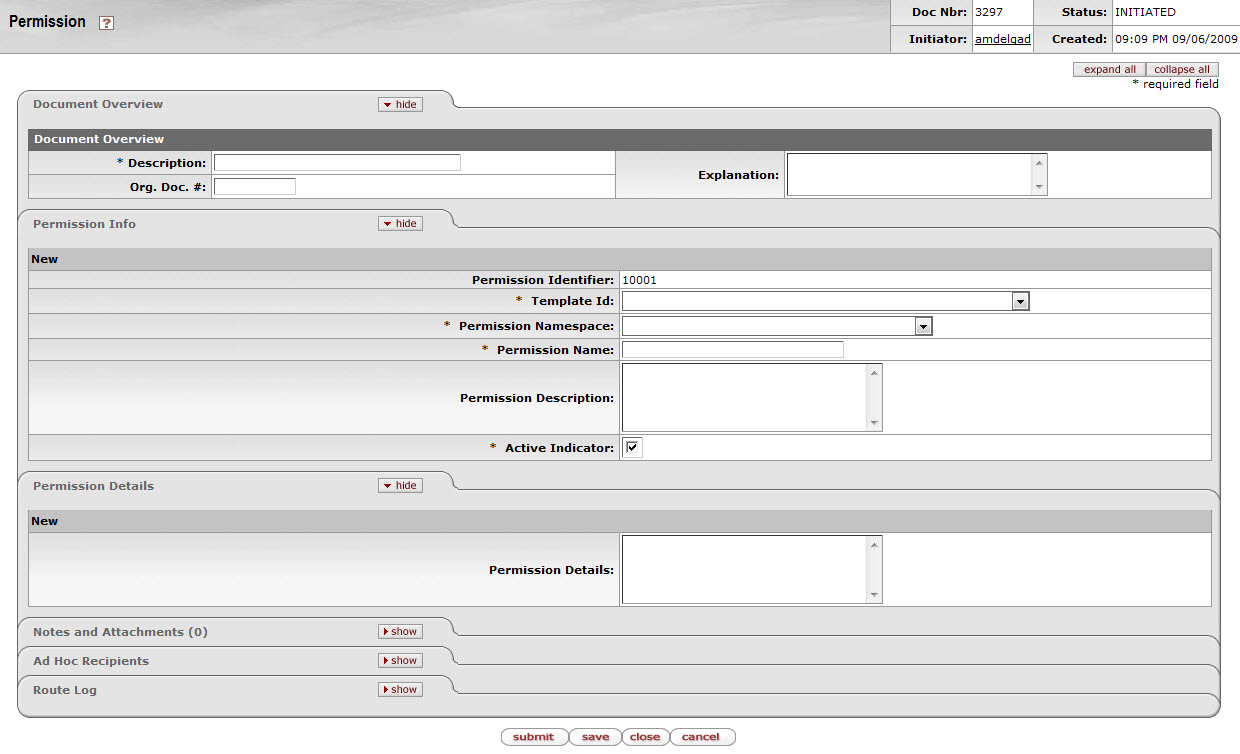
This tab identifies the permissions with a unique system-assigned ID number, a template, namespace, name and description.
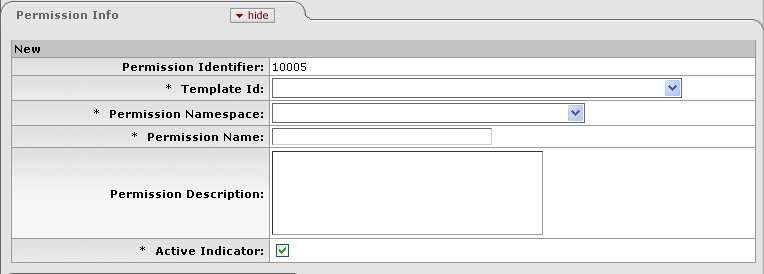
Permission Info tab definition
|
Title |
Description |
|
Permission Identifier |
Display only. The unique, system-assigned ID number that identifies this permission. |
|
Template ID |
Required. Select the Template this permission is associated with. Templates identify broad permission types. |
|
Permission Namespace |
Required. An indicator that associates the permission with a particular application and module. |
|
Permission Name |
Required. A text name identifying this permission. |
|
Permission Description |
Optional. Enter a text description of what this permission does. |
|
Active Indicator |
Required (defaults to 'Yes'). Change the default selection if you wish this permission to be inactive. Inactive permissions will be disregarded by KIM when doing permission checks. |
This tab identifies the permission values that KIM needs to make this permission function. These values vary greatly depending on the type of permission being created. It is highly recommended that users view similar permissions (those with the same Template ID) and discuss Permission Details with technical resources to ensure values are entered correctly.

Permission Details tab definition
|
Title |
Description |
|
Permission Details |
Optional (though most permissions require some details to be functional). Enter the permission details specific to this permission. Details should be entered as the name of the property followed by an '=' followed by the value of the property. When entering multiple details they should be separated by a hard return in the text box, such as: componentName=IdentityManagementPersonDocument |
 >
>  >
>  >
>  >
> 
The Responsibility document allows you to create new responsibilities or edit existing ones. The Responsibility Lookup allows you to search for and view existing responsibilities. You can view summarized information about the responsibility detail values as well as the roles with which the responsibility is currently associated.
Only members of OLE-SYS Technical Administrator or OLE-SYS Manager role can create or modify a Responsibility document and it does not route for approval. Information about the Responsibility document follows detailed information about the Responsibility Lookup below.
Note
Caution should be exercised when modifying existing responsibilities or adding new ones. Relatively minor changes can result in disruptions to the workflow of documents if made in error. Changes should be made only after sufficient testing with your local configuration.
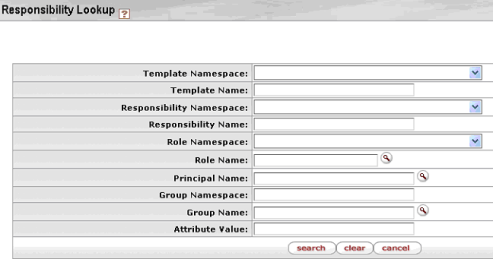
Responsibility Lookup search criteria
|
Title |
Description |
|
Template Namespace |
Optional. To search for a responsibility based on its template namespace (that is, the name of the application and module to which its responsibility template belongs), select the appropriate namespace. |
|
Template Name |
Optional. To search for a responsibility based on the name of the template it is based on, enter the appropriate template name. |
|
Responsibility Namespace |
Optional. To search for a responsibility based on its namespace, select the appropriate responsibility namespace. |
|
Responsibility Name |
Optional. To search for a responsibility by name, enter its name. |
|
Role Namespace |
To search for a responsibility based on the namespace of the role to which it is assigned, enter the appropriate role namespace. |
|
Role Name |
Optional. To search for a responsibility based on the role to which it is assigned, enter the appropriate role name. |
|
Principal Name |
Optional. To search for a responsibility based on the principals that currently have this responsibility through their association with a role, enter an appropriate principal name. |
|
Group Namespace |
Optional. To search for a responsibility based on the namespace of groups that have this responsibility through the group's association with a role, enter an appropriate group namespace. |
|
Group Name |
Optional. To search for a responsibility based on the name of a group that has this responsibility through its association with a role, enter an appropriate group name. |
|
Attribute Value |
Optional. A specific responsibility detail value associated with a responsibility. |

The Responsibility results display contains the fields described in the table below.
Responsibility Lookup results fields
|
Title |
Description |
|
Actions |
Actions allow selection of edit or copy for each responsibility displayed. |
|
Template Namespace |
The code identifying the application and module the template pertains to. Because responsibilities pertain to workflow, most responsibility templates are associated with the KR-WKFLW (Kuali Rice-Workflow) namespace. |
|
Template Name |
The template the responsibility is based on. A template usually defines, in a broad sense, what the responsibility is. Since responsibilities normally are normally associated with action requests for user review, most responsibilities have a template name of 'Review. |
|
Responsibility Namespace |
The code designating the application and module this responsibility is associated with. This code usually corresponds to the namespace of the document type for which the responsibility generates action requests. |
|
Responsibility Name |
The name of this responsibility. In most cases the responsibility name will be the same as the associated template name ('Review'). Like permission names, responsibility names are not unique. Most OLE responsibilities have a name of 'Review. |
|
Responsibility Detail Values |
Display only. Detailed information that defines what document this responsibility generates action requests for, when the requests are generated and how they are handled by workflow. Unlike permissions, which sometimes have different detail values, responsibility detail values generally contain the elements defined below. routeNodeName: The point in a document's workflow routing at which this responsibility generates requests. documentTypeName: The name of the document type for which this responsibility generates action requests. This value may also be a parent document type, which indicates that this responsibility applies to all child documents that contain the appropriate route node. actionDetailsAtRoleMemberLevel: A True or False indicator that defines where the system collects details of this workflow action request. If the value is 'True,' the system collects action details when members are assigned to the role. If the value is 'False,' the system collects action details when this responsibility is assigned to a role. required: A True or False value that indicates whether the system is required to generate an action request for this document type. If the value is 'True' and the document generates no requests associated with this responsibility, then the document will go into exception status. If the value is 'False' and the responsibility generates no action requests, then the document continues to route as normal. |
|
Granted to Roles |
Lists the namespace and name of roles that have this responsibility. Click on the linked name to view the Role Inquiry. |
To view an Inquiry screen for a responsibility, select the Responsibility Name of the appropriate row in the search results. The Inquiry contains the same information displayed in the search results in a slightly different format.
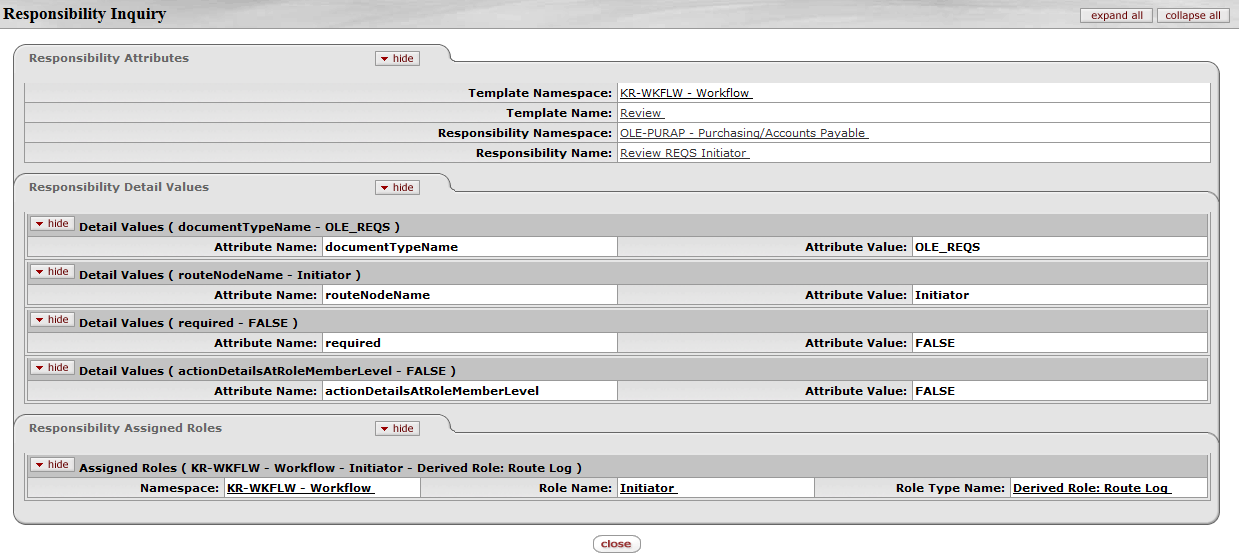
The Responsibility document includes Document Overview, Responsibility Info, and Responsibility Details tabs.
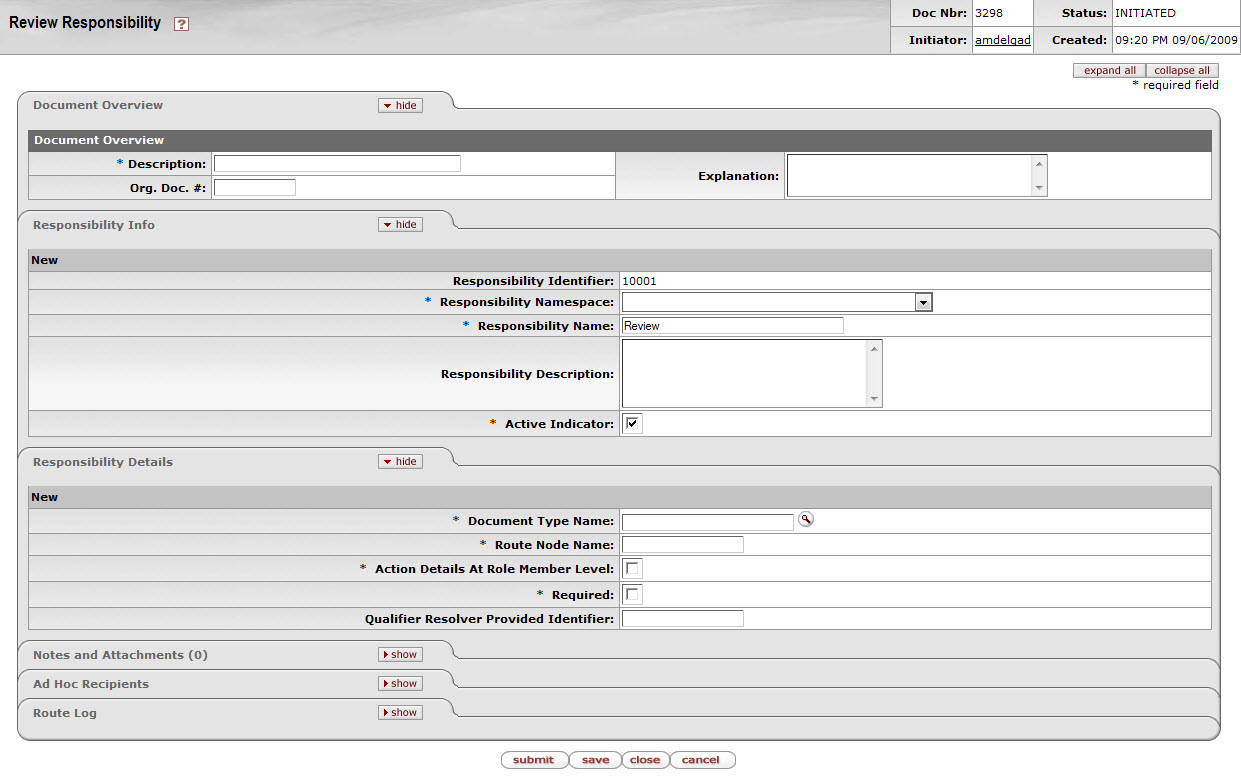
This tab identifies the responsibility with a unique system-assigned ID number, a namespace, name and description.

Responsibility Info tab definition
|
Title |
Description |
|
Responsibility Identifier |
Display only. The unique, system-assigned ID number that identifies this responsibility. |
|
Responsibility Namespace |
Required. An indicator that associates the responsibility with a particular application and module. |
|
Responsibility Name |
Required (defaults to 'Review'). A text name identifying this responsibility. Note that this is the only valid value for this document. You cannot use the Responsibility document to establish or modify Responsibilities with the name 'Resolve Exception' -these require a technical resource to modify. |
|
Responsibility Description |
Optional. Enter a text description of what this responsibility does. |
|
Active Indicator |
Required (defaults to 'Yes'). Change the default selection if you wish this responsibility to be inactive. Inactive responsibilities will be disregarded by Workflow. |
This tab identifies the document type and route node associated with this responsibility. It also defines other responsibility information such as whether or not the action details reside at the role member level.

Responsibility Details tab definition
|
Title |
Description |
|
Document Type Name |
Required. Enter the name of the document type this responsibility is
associated with or use the Document Type Lookup
|
|
Route Node Name |
Required. The name of the route node at which this responsibility should be invoked. |
|
Action Details at Role Member Level |
Required (defaults to False). Check this box if you want role members associated with this responsibility to be able to define the type of workflow action they will need to take in order to fulfill the action request it generates. |
|
Required |
Required (defaults to False). Check this box if you wish documents of this type to go into Exception status if this responsibility does not generate at least one action request. |
|
Qualifier Resolver Provided Identifier |
Optional. In most cases this field should be blank. It can be used as an additional identifier KIM will use to choose the correct responsibility information for a given doc type. The document type must pass the provided identifier to KIM. This is only used in OLE based data for the routing of group documents. The group type ID is populated here and determines how the document routes (Chart and Organization type groups do organization review routing and default group types do not). |
 >
>  >
> 
The Locations submenu group provides access to screens in which you define valid values for various types of location information in OLE.
All OLE users may look up valid values in these documents, but only members of the KR-SYS Technical Administrator or OLE-SYS Manager roles may copy, edit and create new codes via these documents. These documents do not route for approval.
 >
>  >
>  >
>  >
>  >
> 
The CampusMaintenanceDocument is used to identify the different fiscal and physical operating entities of an institution for use in OLE. A campus may be identified as a fiscal entity, a physical entity, or both.
When the user chooses the Campus option, the system displays the Campus Lookup screen. After the user selects a campus or clicks the create new button, the system presents the CampusMaintenanceDocument.
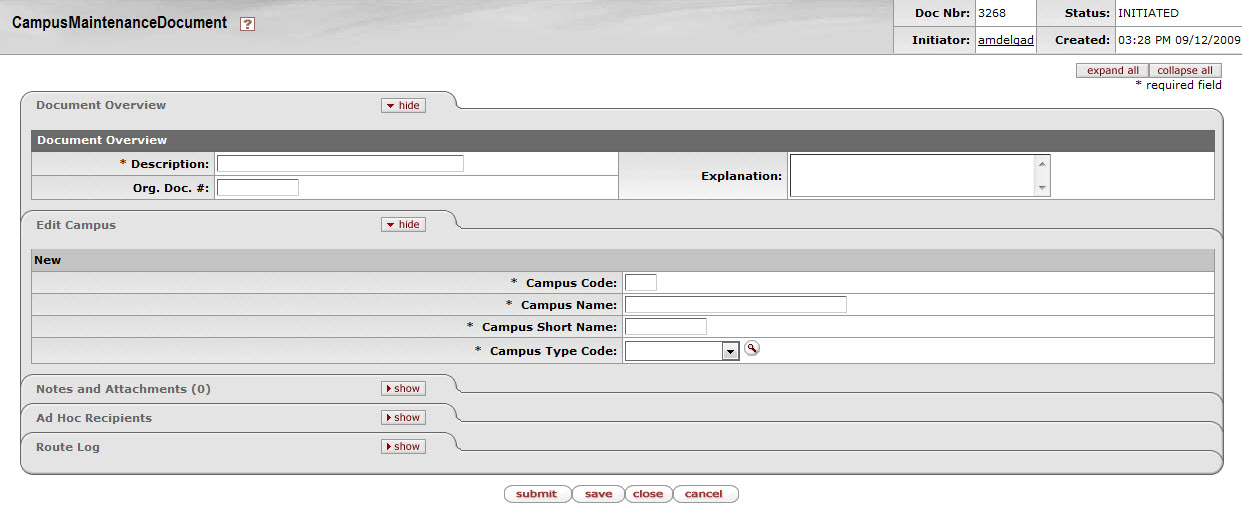
The CampusMaintenanceDocument includes the Edit Campus tab.
In edit mode, the Edit Campus tab presents a display-only set of fields on the left and editable fields on the right in which the user may enter changes.
Edit Campus tab definition
|
Title |
Description |
|
Campus Code |
Required. The unique identifying code assigned to a campus. |
|
Campus Name |
Required. The familiar name for a specific university campus. |
|
Campus Short Name |
Required. An abbreviated name for a specific campus; used in reports in which space is limited. |
|
Campus Type Code |
Required. Indicates the type of campus. Valid values are: B: - Both F - Fiscal P - Physical |
 >
>  >
>  >
>  >
>  >
> 
The Country Maintenance document is used to assign specific identifying codes to country names.
When the user chooses the Country option from the menu, the system displays the Country Lookup screen. After the user selects a country or clicks the create new button, the system presents the Country Maintenance document.
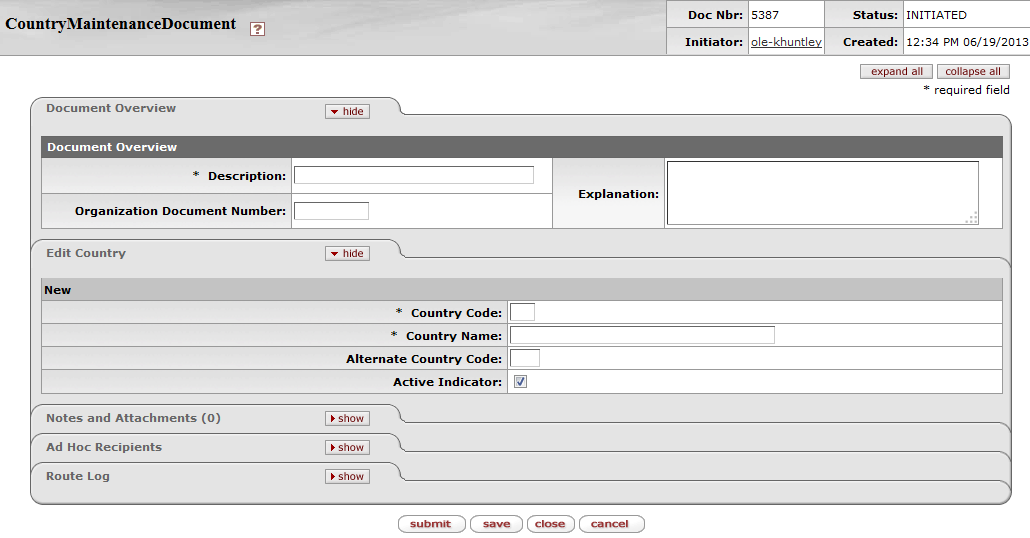
The Country Maintenance document includes the Edit Country tab.
In edit mode, the Edit Country tab presents a display-only set of fields on the left and editable fields on the right in which the user may enter changes.
Edit Country tab definition
|
Title |
Description |
|
Country Code |
Required. A unique identifying code assigned to a country. |
|
Country Name |
Required. A familiar name of a specific country. |
|
Alternate Country Code |
An alternative code assigned to a country. |
|
Active Indicator |
Indicates whether this country code is active or inactive in OLE. Remove the check mark to deactivate this country code. |
 >
>  >
>  >
>  >
>  >
> 
The County Maintenance document is used to assign specific identifying codes to county names.
When the user chooses the County option from the Admin menu tab, the system displays the County Lookup screen. After the user selects a county or clicks the create new button, the system presents the County Maintenance document.
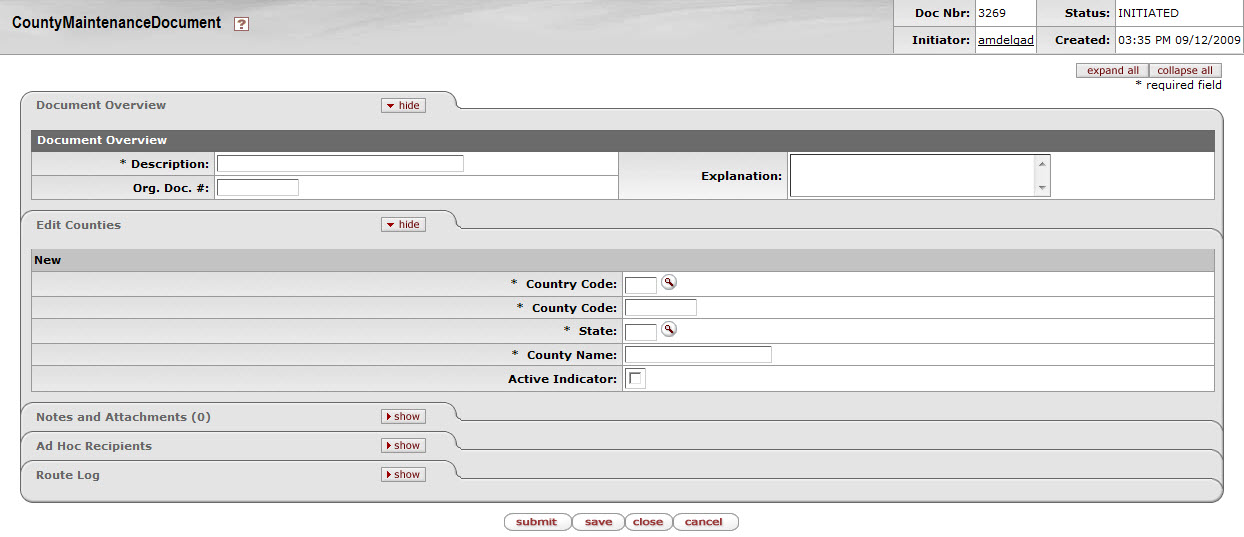
The County Maintenance document includes the Edit Counties tab.
In edit mode, the Edit Counties tab presents a display-only set of fields on the left and editable fields on the right in which the user may enter changes.
Edit Counties tab definition
|
Title |
Description |
|
Country Code |
The country code for the country in which this county is located. |
|
County Code |
A unique identifying code assigned to this county. |
|
State |
The state abbreviation assigned to the state in which a county is located. |
|
County Name |
Required. The familiar name of this county. |
|
Active Indicator |
Indicates whether the county code is active or inactive in OLE. Remove the check mark to deactivate this county code. |
 >
>  >
>  >
>  >
>  >
> 
The Postal Code Maintenance document defines the zip code by city and state. When the user chooses the Postal Code option from the Admin menu tab, the system displays the Postal Code Lookup screen. After the user selects a postal code or clicks the create new button, the system presents the Postal Code Maintenance document.
Note
The user may also enter a city and state to find the associated zip code.

The Postal Code Maintenance document includes the Edit Postal Codes tab.
In edit mode, the Edit Postal Codes tab presents a display-only set of fields on the left and editable fields on the right in which the user may enter changes.
Edit Postal Codes tab definition
|
Title |
Description |
|
Country Code |
The country code for the country associated with the zip (postal) code. |
|
Postal Code |
Identifies a Postal Service code. |
|
State |
Required. The state associated with the zip (postal) code. |
|
County Code |
The unique identifying code for the county associated with the zip (postal) code. |
|
City Name |
Required. The name of the city associated with the zip (postal) code. |
|
Active Indicator |
Indicates whether the postal code is active or inactive in OLE. Remove the check mark to deactivate this postal code. |
 >
>  >
>  >
>  >
>  >
> 
The State Maintenance document defines the U.S. Postal Service codes used to identify states. When the user chooses the State option from the Admin menu tab, the system displays the State Code Lookup screen. After the user selects a state code or clicks the create new button, the system presents the State Maintenance document.
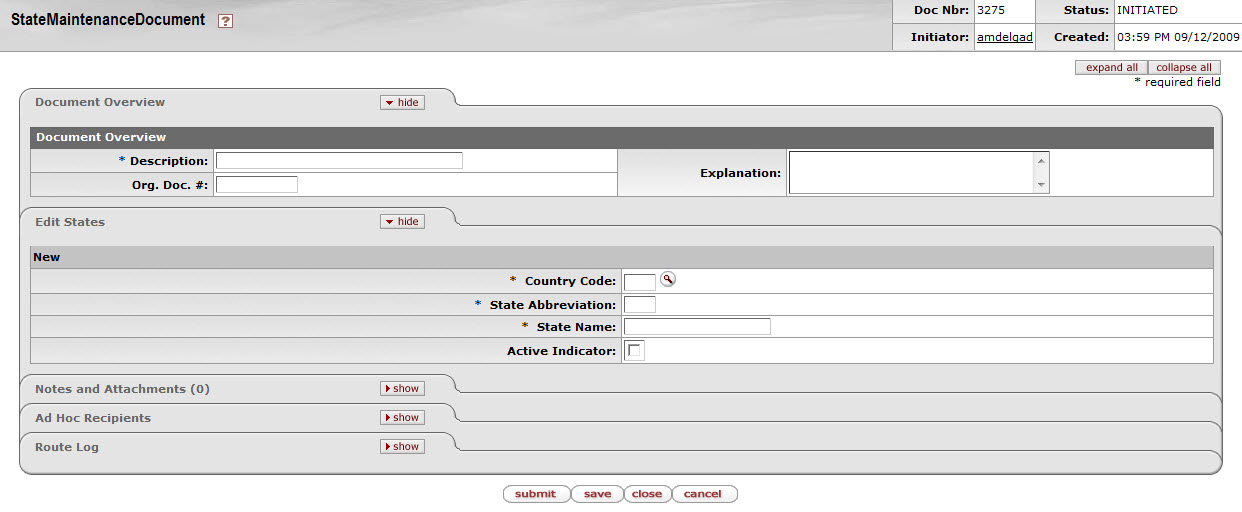
The State Maintenance document includes the Edit States tab.
In edit mode, the Edit States tab presents a display-only set of fields on the left and editable fields on the right in which the user may enter changes.
Edit States tab definition
|
Title |
Description |
|
Country Code |
A unique identifying code assigned to the country of which this state is a part. |
|
State Abbreviation |
The state abbreviation. |
|
State Name |
Required. The full name of the state associated with the state abbreviation. |
|
Active Indicator |
Indicates whether the state code is active or inactive in OLE. Remove the check mark to deactivate the state code. |
 >
>  >
> 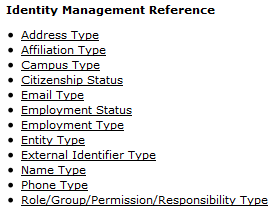
The Reference submenu group allows you to define valid types of personal information collected for KIM.
All OLE users may look up valid values in the reference tables.
Most of these tables cannot be updated directly by functional users. Adding new values or modifying existing values requires technical assistance to ensure that code is in place to handle the new or modified values.
Where editing is possible, only users with an appropriate role may copy, edit or create new codes in the tables.
 >
>  >
>  >
>  >
> 
The Address Type Lookup displays the types of addresses that may be associated with Person records in KIM.
Note
Address types cannot be edited via the interface. Technical assistance is required to add new or edit existing address types.

Address Type Lookup results definition
|
Title |
Description |
|
Address Type Code |
Display only. The unique code for this type of address. |
|
Address Type Name |
Display only. The familiar title of this address type. |
|
Display Sort Code |
Display only. An alphabetical character used to determine the order in which address types are displayed in the list on the Person document. |
|
Active Indicator |
Display only. Indicates whether this address type is active (in which case the system displays it in the Address Type list on the Person document). |
 >
>  >
>  >
>  >
> 
Affiliation types specify codes and text descriptions for the different types of affiliations that can be associated with a Person record in KIM. These codes may be used for data sorting or retrieval purposes. The Affiliation Type Lookup displays the valid affiliation code types.
Note
Affiliation types cannot be edited via the interface. Technical assistance is required to add new or edit existing affiliation types.

Affiliation Type Lookup results definition
|
Title |
Description |
|
Affiliation Type Code |
Display only. A unique code that identifies this type of affiliation. The base values are: AFLT = Affiliate, FCLTY = Faculty, STAFF = Staff, STDNT = Student |
|
Affiliation Type Name |
Display only. A text description of this type of affiliation. |
|
Display Sort Code |
Display only. An alphabetical character used to determine the order in which the system displays affiliation types in the list. |
|
Active Indicator |
Display only. Indicates whether this type of affiliation is active (in which case the system displays it in the Affiliation Typelist on the Person document). |
 >
>  >
>  >
>  >
>  >
> 
When the user selects Campus Type from the Admin menu tab, the system displays the Campus Type Lookup. From this screen, the user may either create a new type or search for an existing type. This defines the valid types of campuses that can be selected when creating a new campus.
After performing a search based on user-specified criteria, the system displays a results table. The user may then choose to edit or copy a retrieved record.
After the user selects create new, edit, or copy, the system displays the Campus Type Maintenance document. This document allows users to add and maintain campus types.
Note
While anyone can view the current values for campus type, only members of OLE-SYS Manager or KR-SYS Technical Manager roles can create new campus types or edit existing values. This document does not route for approval.
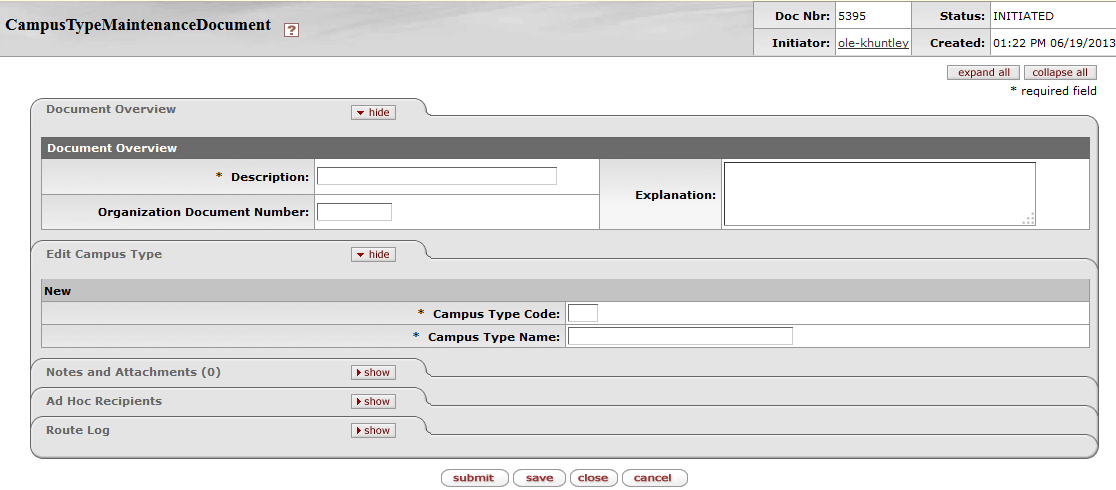
The Campus Type Maintenance document includes the Edit Campus Type tab.
In edit mode, the Edit Campus Type tab presents a display-only set of fields on the left and editable fields on the right in which the user may enter changes.
Edit Campus Type tab definition
|
Title |
Description |
|
Campus Type Code |
Required. Enter a code to identify this type of campus. |
|
Campus Type Name |
Required. Enter a descriptive name for this campus type. |
 >
>  >
>  >
>  >
> 
The Citizenship Status Lookup is used to display the types of statuses that may be entered on a Person record in KIM.
Note
Citizenship Status cannot be edited via the interface. Technical assistance is required to add new or edit existing status types.

Citizenship Status Lookup results definition
|
Title |
Description |
|
Citizenship Status Code |
The code used to identify citizen status. |
|
Citizenship Status Name |
The familiar name of the citizen status. |
|
Active Indicator |
Display only. Indicates whether this citizen status type is active (in which case the system displays it in the Citizen Status list on the Person document). |
 >
>  >
>  >
>  >
> 
The Email Type Lookup is used to display the types of email addresses that may be entered on a Person record in KIM.
Note
Email types cannot be edited via the interface. Technical assistance is required to add new or edit existing email types.

Email Type Code Lookup results definition
|
Title |
Description |
|
Email Type Code |
Display only. A unique code identifying this type of email address. The base data values are: HM = Home, OTH = Other, WRK = Work |
|
Email Type Name |
Display only. A descriptive label for this type of email address. |
|
Display Sort Code |
Display only. An alphabetical character used to determine the order in which email address types are displayed in the list on the Person record. |
|
Active Indicator |
Display only. Indicates whether this email address type is active (in which case the system displays it in the Email Type list on the Person document). |
 >
>  >
>  >
>  >
> 
The Employee Status Lookup allows you to view the various status codes that can be assigned to a faculty or staff type of affiliation on the Person document in KIM.
Note
Employee statuses cannot be edited via the interface. Technical assistance is required to add new or edit existing employee statuses.
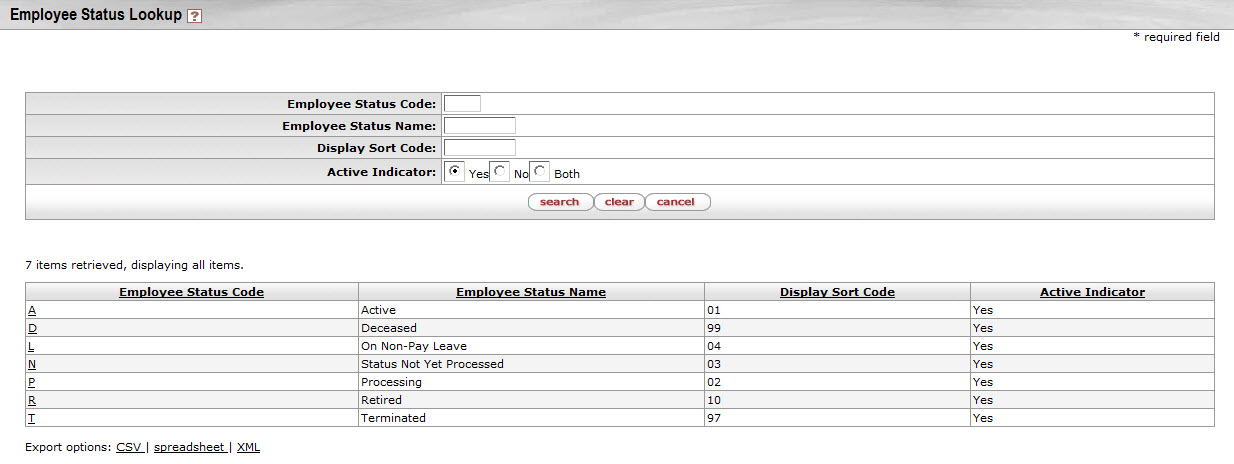
Employee Status Lookup definition
|
Title |
Description |
|
Employee Status Code |
Display only. A unique code to identify this employee status code. The base data values are: A = Active, D = Deceased, L = On Non-Pay Leave, N = Status Not Yet Processed, P = Processing, R = Retired, T = Terminated |
|
Employee Status Name |
Display only. A descriptive label for this employee status. |
|
Display Sort Code |
Display only. A numeric value used to determine the order in which employee statuses are displayed in the list. |
|
Active Indicator |
Display only. Indicates whether this employee status is active (in which case the system displays it in the Employee Status list on the Person document). |
 >
>  >
>  >
>  >
> 
The Employee Type Lookup allows you to view the various status codes that can be assigned to a faculty or staff type of affiliation on the Person document in KIM.
Note
Employee types cannot be edited via the interface. Technical assistance is required to add new or edit existing employee types.

Employee Type Lookup results definition
|
Title |
Description |
|
Employee Type Code |
Display only. A unique code identifying this type of employee. The base data values are: N = Non-Professional, O = Other, P = Professional |
|
Employee Type Name |
Display only. A descriptive label for this type of employee. |
|
Display Sort Code |
Display only. A numeric value used to determine the order in which employee types are displayed in the list. |
|
Active Indicator |
Display only. Indicates whether this employee type is active (in which case the system displays it in the Employee Type list on the Person document). |
 >
>  >
>  >
>  >
> 
The Entity Type Lookup displays the various entity types recognized in KIM.
Note
Entity types cannot be edited via the interface. Technical assistance is required to add new or edit existing entity types.

Entity Type Lookup results definition
|
Title |
Description |
|
Entity Type Code |
Display only. A unique code that identifies this entity type. The base data values are: PERSON = Person, SYSTEM = System |
|
Entity Type Name |
Display only. A descriptive label for this entity type. |
|
Display Sort Code |
Display only. A numeric value used to determine the order in which entity types would be displayed in a list. |
|
Active Indicator |
Display only. Indicates whether this entity type is active. Because entity types are not viewable elsewhere in the application, inactivation will have no apparent effect. |
 >
>  >
>  >
>  >
> 
The External Identifier Type Lookup displays the identifiers that may be associated with a Person record that has been generated by a non-Kuali system. The only example in OLE base data is Tax ID number.
Note
External identifier types cannot be edited via the interface. Technical assistance is required to add new or edit existing external identifier types.

External Identifier Lookup results definition
|
Title |
Description |
|
External Identifier Type Code |
Display only. A unique code that identifies this external identifier type. The base data value is: TAX = Tax ID |
|
External Identifier Type Name |
Display only. A descriptive label for this external identifier type. |
|
Display Sort Code |
Display only. A numeric value that determines the order in which external identifier types are displayed in the list. |
|
Active Indicator |
Display only. Indicates whether this external identifier type is active. |
 >
>  >
>  >
>  >
> 
The Entity Name Type Lookup allows you to view the types of names that can be associated with a person on the Contact tab of a KIM Person document.
Note
Name types cannot be edited via the interface. Technical assistance is required to add new or edit existing name types.

Entity Name Type Lookup results definition
|
Title |
Description |
|
Entity Name Type Code |
Display only. A unique code that identifies this type of name. The base data values are: OTH = Other, PRFR = Preferred, PRM = Primary |
|
Entity Name Type Name |
Display only. A descriptive label for this name type. |
|
Display Sort Code |
Display only. An alphabetic value that determines the order in which name types are displayed in the list. |
|
Active Indicator |
Display only. Indicates whether this name type is active (in which case the system displays it in the Name Typelist on the Person document). |
 >
>  >
>  >
>  >
> 
The Phone Type Lookup displays codes that identify various categories of phone numbers on the Person document.
Note
Phone types cannot be edited via the interface. Technical assistance is required to add new or edit existing phone types.

Phone Type Lookup results definition
|
Title |
Description |
|
Phone Type Code |
Display only. The code that identifies the type of phone number. |
|
Phone Type Name |
Display only. The descriptive name for this type of phone number. |
|
Display Sort Code |
Display only. An alphabetic value that determines the order in which phone types are displayed in the list. |
|
Active Indicator |
Display only. Indicates whether this phone type is active (in which case the system displays it in the Phone Type list on the Person document). |
 >
>  >
>  >
>  >
> 
When the user selects the Role/Group/Permission/Responsibility Type option from the Admin menu tab, the system displays the Kim Type Lookup screen. Types are used to associate similar roles, groups, permissions and responsibilities. For example, all roles with the type of 'Campus' will collect a campus code for each member as a piece of qualifying data to tell KIM which campus that member is associated with. New types cannot be created via the interface. Development work needs to occur to make sure that KIM knows how to handle any new type added to the system.

Kim Type Lookup results definition
|
Title |
Description |
|
Namespace Code |
Display only. The namespace code associated with this type. |
|
Type Name |
Display only. The descriptive name of this type. Clicking the name takes you to the Type Inquiry and displays the same information available in the lookup plus the name of the KIM service this type is associated with. The 'service' is the piece of code that tells KIM how to interpret roles, groups, permissions or responsibilities of a given type. |
|
Type Identifier |
Display only. The unique identifying number assigned to this type. |
|
Active Indicator |
Display only. Indicates whether this type is active. Inactive types are not eligible for selection when creating new roles, groups, permissions, or responsibilities. |
Table of Contents
 >
> >
> 
Location attribute maintenance e-docs are available via the Location submenu on the Admin menu tab.
Maintenance docs may be viewed by OLE users but only those in an administrative role may edit any of the e-docs.
 >
>  >
> ![]() >
> ![]() >
> ![]()
Locations are structured so that a location can be part of another location. The various levels that make up a location are named and structured in this maintenance document.
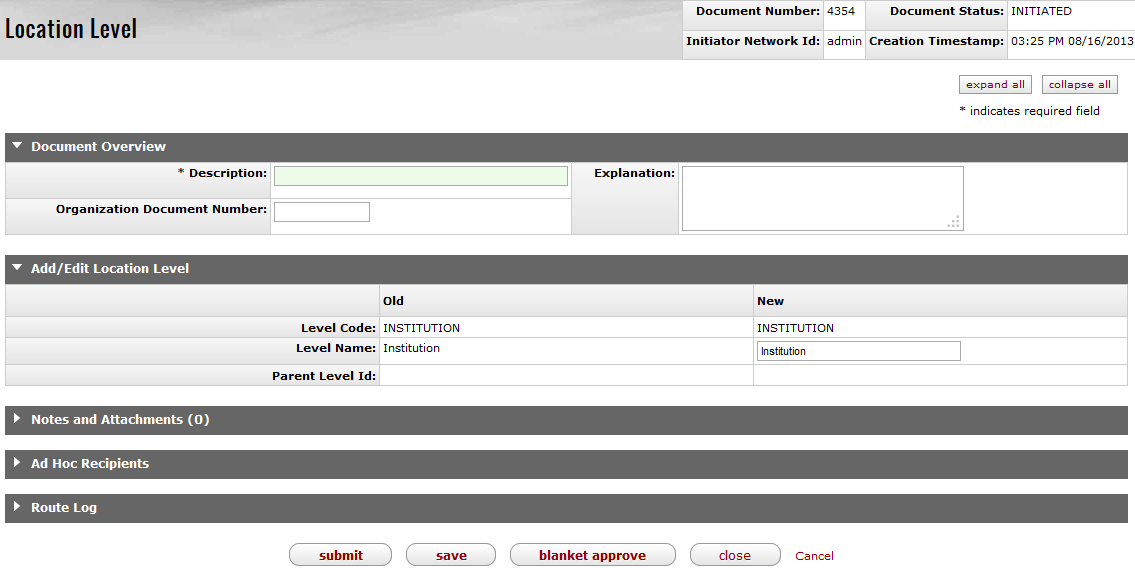
The OLE Location Level document includes the Add/Edit Location Level tab. The system automatically enters data into both the Old and New sections in this tab. Selected data fields are available for editing.
Add/Edit Location Level tab definition
|
Title |
Description |
|
Level Code |
The code to identify location level |
|
Level Name |
Required. The familiar title of this location level |
|
Parent Level ID |
The level in the hierarchy above this location level |
 >
> ![]() >
> ![]() >
> ![]() >
> ![]()
The goals of the location system are to:
Model the organization’s structure clearly and accurately.
Support storing configuration information at the appropriate level of the organizational structure.
Allow libraries to establish policies for a location that apply to the organization’s components. This makes administration easier.
Support modeling relationships between parts of the organization.
Support consortial models.
The general idea is that a location’s setting or policy will automatically apply to the location’s children, unless the children override the setting.
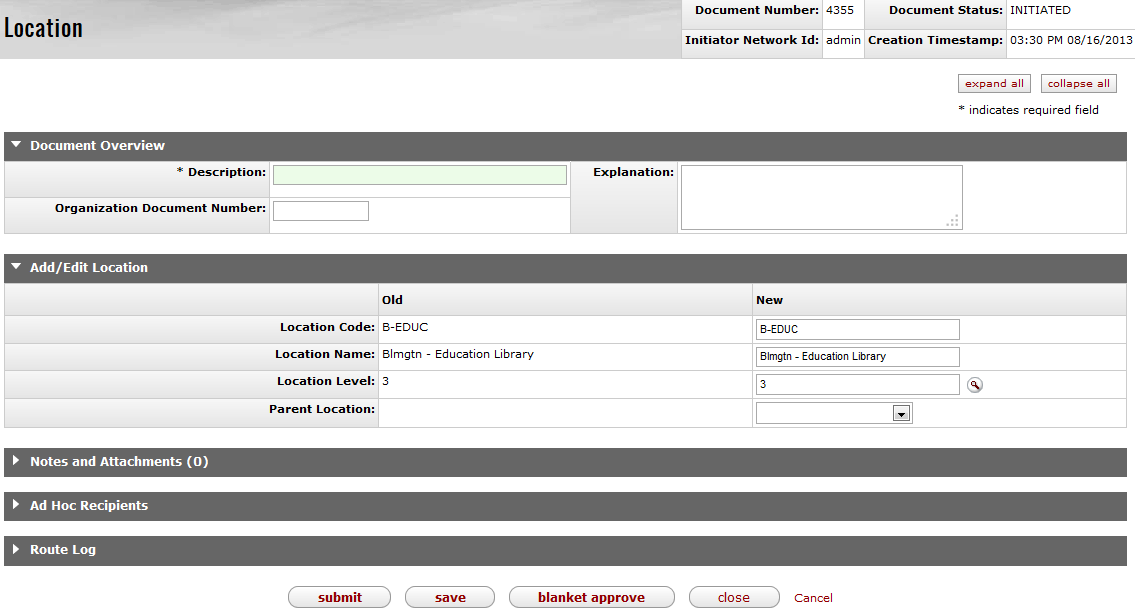
The OLE Location document includes the Add/Edit Location tab. The system automatically enters data into both the Old and New sections in this tab. Selected data fields are available for editing.
Add/Edit Location tab definition
|
Title |
Description |
|
Location Code |
The code to identify the location of the Instance Record. Each location must have a unique code with a maximum length of 40 characters. |
|
Location Name |
Required. The familiar title of the location. Maximum length is 100 characters. |
|
Location Level |
Required. The numerical representation of the location hierarchy. Locally configured, valid values are 1-5. |
|
Parent Location |
If the location level is NOT 1, chose a parent location by clicking on the magnifying glass icon. A valid parent location must be at a higher level than the new location being created. |
 >
>![]() >
> >
>
As an alternative to inputting locations manually, OLE allows users to load locations using an XML file conforming to a simple schema. The upload will collect data from a single XML file, parse it, and load the locations. The upload will match on location codes and create new locations for entries without a code, and update existing locations with a code.
Note
Location Import would most likely be used only during system setup or refresh or any time you need to batch load locations.
Once Locations are loaded, you may access them in OLE Locations.
Note
For more information about OLE Locations, see above.
A sample location file that validates to our current coded schema is found at the OLE demo Web site:
https://wiki.kuali.org/display/OLE/OLE+Sample+Files+for+0.8
From the Location Import screen, select a file to upload.
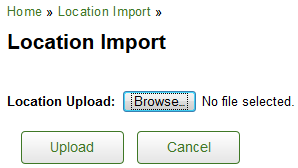
Note
You may need to pre-process files to match the schema.
Click the
 button to process the file.
A success or failure message will appear above the upload field:
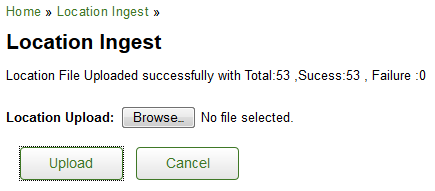
To review the summary, return to the Admin menu and click on the Location Summary located on the Location submenu.
Note
For more information about the Location Summary, see below.
You may also view locations from Location (also on the Location submenu).
Note
For more information about locations, see above.
Locations will be rejected if:
A location’s parent location references a location that does not exist.
A location’s parent location matches a location at a lower level of the location hierarchy.
A location’s level code does not match a level code in the system.
Note that when loading locations that reference parent locations, the parent locations must already be in the system for the child locations to be created. If you try to load the child locations first, they will be rejected because OLE will not find their location codes. Users need to order the load file so that the parent locations come before the child locations, or load the higher-level locations before the lower-level locations.
 >
>![]() >
>![]() >
>![]()
The Location Summary stores uploaded files and allows users to review the xml files uploaded to OLE. It will also give basic information as to record creation, deletion and modification.
From the lookup screen, click
 to perform a blank search:
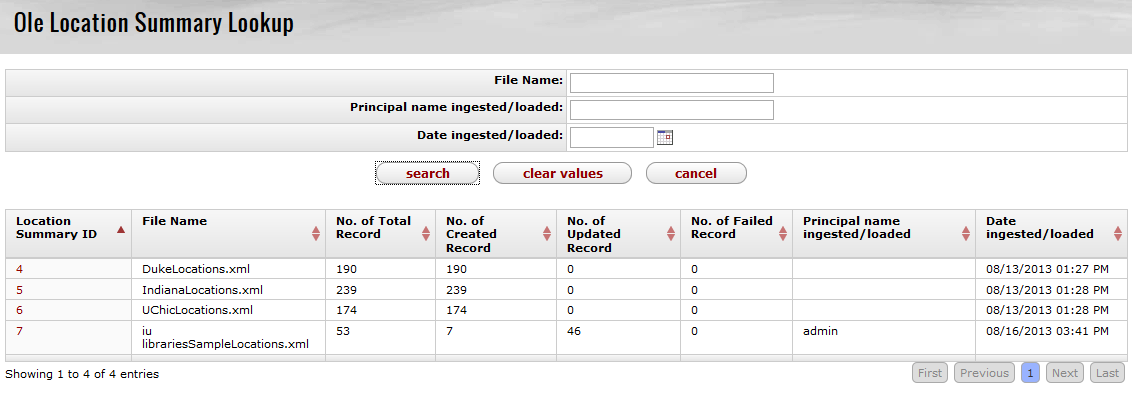
The location summary search results will present users with the Location Summary ID, File Name, No of Total Records, No. of Created Records, No of Updated Records, No. of Failed Records.
You may now view locations from Location.
Note
For more information about locations, see above.
Table of Contents
 >
> 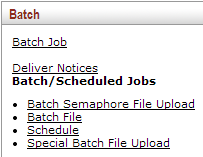
These screens represent places where users can upload files used by various OLE batch jobs, run batch jobs and see files generated by those jobs for Accounts Receivable, Financial Processing, General Ledger, and System processes.
 >
>  >
> 
These options allow users to run OLE batch jobs and to view the files that they output.
 >
>  >
>  >
>  >
> 
The Batch File lookup allows users to view OLE files, reports and logs. Users can search for files by name, date and by indicating what OLE file directory they reside in. Batch files can be downloaded or deleted.
Only members of OLE-SYS Manager group can download and act on batch files through this interface.

Batch File Lookup screen definition
|
Title |
Description |
|
File Path |
Select the directory or sub-directory in which the file you wish to retrieve resides. Click the directory you wish to search. In the default configuration the 'reports' directory contains reports and log files generated by batch jobs. These reports exist in sub-directories corresponding to the module that owns the batch job. The Staging directory contains input files brought into OLE (such as procurement card or collector upload files) as well as export files generated by OLE (such as check files from PDP). These reports also exist in sub-directories corresponding to the module they are associated with. Some modules may have additional sub-directories further dividing their Staging output. |
|
File Name |
Enter the file you wish to retrieve. |
|
Last Modified Date From |
Enter or use the calendar to select a beginning date range for your search. |
|
Last Modified Date To |
Enter or use the calendar to select an ending date range for your search. |
Reports that match your search will be displayed, showing their name, location and file size (in bytes.) Options in the Actions column allow you to Download or Delete the files.

Note that manually deleting files via this interface should be done with great caution. There is no interface to undo a deletion and removing certain files may cause batch jobs or processes to fail.
The most common use for deleting a file is to remove a '.done' file from data files such as those created by the GLCP, LLCP or uploaded via the Collector. OLE creates two files for these particular processes, one ending in a '.data' extension and another ending in a '.done' extension. Deleting the '.done' extension file will keep the associated '.data' file from being processed by its associated batch processes but leave the data file itself for reference.
 >
>  >
>  >
>  >
>  >
> 
The Schedule option allows users to view, schedule or execute OLE batch processes (commonly called 'jobs' or 'batch jobs').
Only members of OLE-SYS Operations or KR-SYS Technical Administrator role modify batch jobs though this interface though all users can use the batch job lookup. Members of OLE-SYS Operations can edit any existing schedule job belonging to an OLE namespace. Members of KR-SYS Technical Administrators can edit any existing schedule job belonging to the KR namespace.
When you select the Schedule option from the Admin menu, the system displays the Batch Job Lookup. This screen allows you to search for batch jobs by namespace, name, group, and statuses.

Batch Job Lookup screen definition
|
Title |
Description |
|
Namespace |
Select the Namespace (application and module) the job is associated with. |
|
Job Name |
Enter the name of the job prescribed by the system. |
|
Job Group |
Select from the Job Group list. The valid selections are Scheduled: Jobs which are on the standard schedule. Jobs in this group are automatically executed by the schedulerJob. Unscheduled: Normal groups, all jobs are present in this group. These jobs must be executed manually. |
|
Job Status |
Select from the Job Status list. The valid selections are: Scheduled: Job has been scheduled for later execution Succeeded: Job finished executing successfully Cancelled: Job was cancelled, either before or during execution Running: Job is currently executing Failed: Job failed during execution For more detail about the status of a job or any problems it encountered while executing you can view its associated log file using the Batch File Lookup. |
The screen returns the applicable list of jobs:

Click the Modify link to open the Modify Batch Job maintenance e-doc.
From the Modify Batch Job e-doc, you can run the standard scheduler.
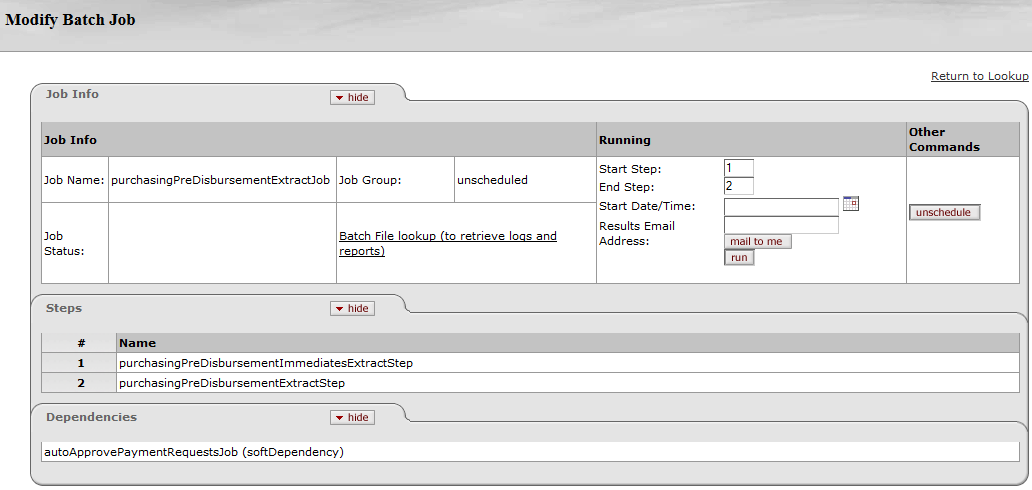
Note
When the server is restarted, the Job Info values revert back to the original setting unless the configuration is changed.
This e-doc contains the Job Info tab, the Steps tab, and the Dependencies tab.
The Job Info tab displays the basic information about the job and allows you to schedule or unscheduled the job. The Job Infotab includes three sections: Job Info, Running, and Other Commands.
In addition to listing the basic information about the job, clicking the Batch File Lookup URL takes you to the Batch File Lookup screen where you may view logs and reports generated by batch jobs.
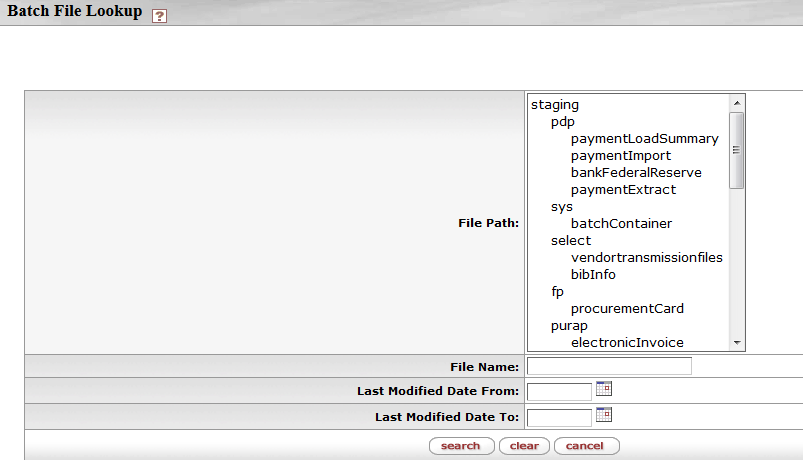
The Running section allows a user to control a job schedule. When the user has appropriate access, the Running section displays information necessary to schedule a job.
By default, when clicking the run button, the system runs all steps of the job immediately or you may schedule the job to start at the specified date and time.
Note
These parameters can be modified to only run a subset of steps on a job (shown in the Steps tab).
If you want to receive an email after the job completes, fill in the email address field or click the Mail to Mebutton to populate the email address from your user profile into the field. Otherwise, an email will be sent only on job failure, and it will be sent to the batch mailing list.
You may issue the following commands from this section:
Click
 to remove the job from the scheduled group. Clicking 'Unschedule' will remove
the job from the scheduled group even if you are viewing an unscheduled version of the job when you
click it.
 If a job is currently running, you can request that it be interrupted. This does not guarantee an immediate stop.
The Steps tab displays all the steps that make up this batch job. Steps are displayed in the order they are performed.

The Dependencies tab displays all the other jobs on which the scheduled version of the current job depends. Batch jobs can have hard or soft dependencies. A soft dependency means that this job will not run until that dependent job has completed, but will run regardless of whether or not the job it depends on completed successfully. A hard dependency indicates that the job must not only complete before this job runs but it must complete successfully.
Note that you can run an unscheduled job without regard to the specified dependencies. The job will run automatically when the run button is clicked.

Table of Contents
 >
> 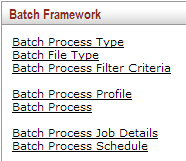
The Batch Framework submenu allows you to perform a variety of functional and technical activities that process cataloging records in batch.
 >
>  >
>  >
> 
The Batch Process Type is a maintenance document used to support batch process profile. You cannot add or edit Batch Process Types.
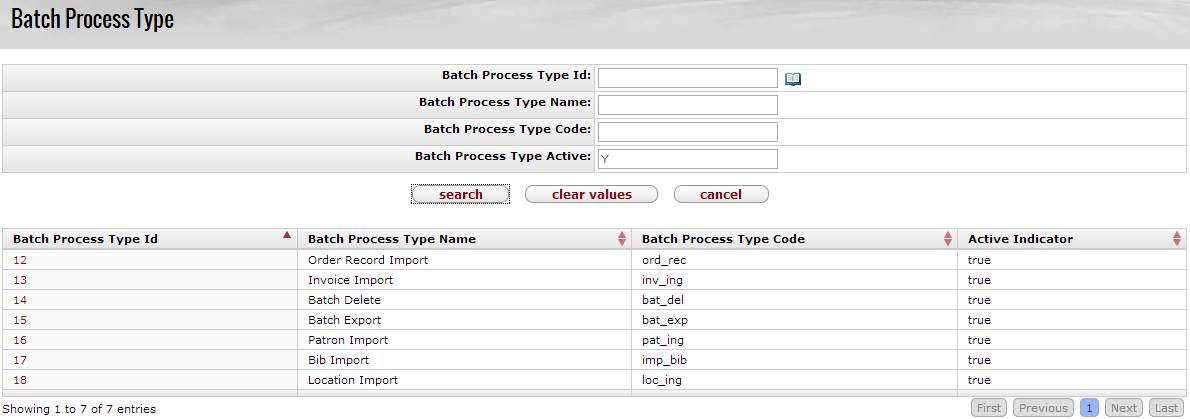
As a function of OLE, you may search for batch process types. Execute a blank search to review the available batch process types.
 >
>  >
>  >
> 
The Batch File Type is a maintenance document used to support batch process profile. You cannot add or edit Batch File Types.

As a function of OLE, you may search for batch file types. Execute a blank search to review the available batch file types.
 >
>  >
>  >
> 
The Batch Process Filter Criteria is a maintenance document used to support batch process profile. You cannot add or edit Batch Process Filter Criteria.

As a function of OLE, you may search for batch process filter criteria. Execute a blank search to review the available batch process filter criteria.
 >
>  >
>  >
> 
When you select the Batch Process Profile link from the Admin menu, the system displays the Batch Process Profile lookup. This screen allows staff to search for and edit preexisting Batch Process Profiles or create new.
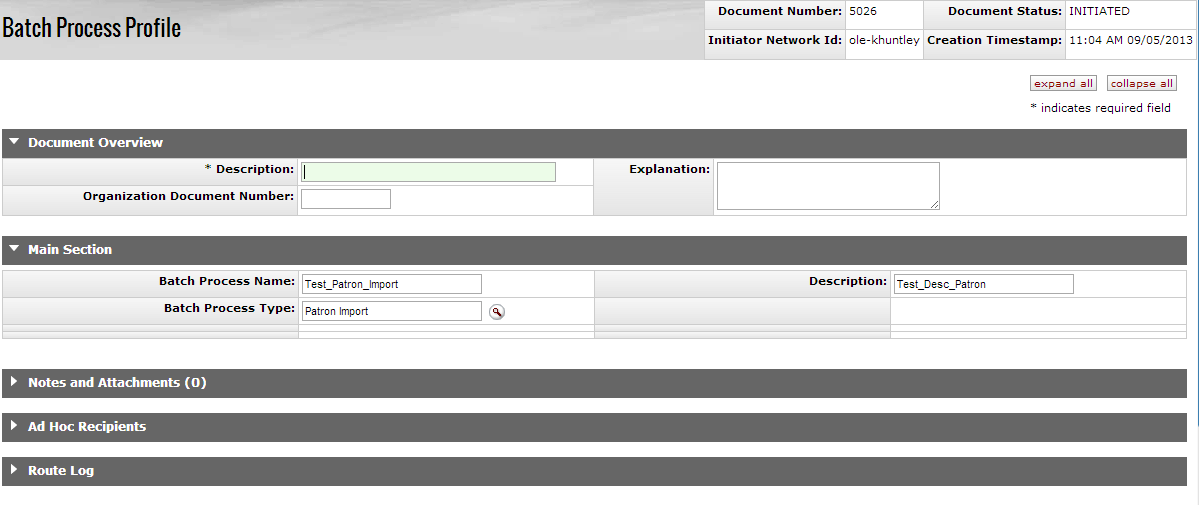
When creating a new Batch Process Profile, the only unique tab is the Main Section. However, depending on the Batch Process Type that is selected, different tabs are available for adding or modifying information for the profile.
The Main Section tab contains basic information about the Batch Process Profile. Additional fields will appear in the Main Section tab depending on the Batch Process Type that is selected.

Main Section definition
|
Title |
Description |
|
Batch Process Name |
Enter the name of the Batch Process. |
|
Batch Process Type |
Required. Enter the type of batch process or search for it from the lookup |
|
Description |
Display only. Indicates whether the vendor is a parent or child record. |
|
KRMS Profile |
If the Order Record Import type is selected, select the KRMS Profile from the dropdown list. NoteFor 1.0, choose YBP. |
|
Requisitions for Titles |
If the Order Record Import type is selected, select from the dropdown list to have one requisition created per title or one requisition created for the order. |
|
Data to Export |
If the Batch Export type is selected, select from the drowdown list to have only bibliographic data exported or bibliographic and instance data exported. |
| Export Scope |
If the Batch Export type is selected, select from the dropdown list how much should be exported: full export, filtered, incremental, or full except staff only bibs. |
For Patron import, Location import, and Invoice import, the Main Section is the only tab available for adding or editing information.
Click  .
.
Additional information for all other batch process types will be addressed below.
If the Order Record Import type is selected from the
Main Section, a new tab will load. The Constant and Default Values tab is used to keep MARC bib, holding, or item fields as
default or constant values. Enter the constant or default values and click  .
.
Note
Do not forget to select items for the additional Main Section fields.

Constant and Default Values definition
|
Title |
Description |
|
Data Type |
Select the type of date (bib, holding or item) from the dropdown list. |
|
Select Field Name | If you selected holding or item from the Data Type, select the field name from the dropdown list. |
|
Enter Field Name |
Enter the field name to be defined as the constant or default value. |
|
Field Value |
Enter the field value to be defined as the constant or default value. |
|
Default/Constant |
Select the radio button for default or constant. |
|
Action |
Click |
Once your Order Record Import profile is completed, click  .
.
If the Batch Delete type is selected from the Main Section, a new tab will load. The Bib Match
Point tab is used to determin what bibliographic records will be deleted from OLE. Enter
the match point and click  . Users may add as many match points as is necessary.

If the Batch Export type is selected from the Main Section, four additional tabs will load: Filter Criteria, Data Mapping, Delete Field, and Rename Field .
Note
Do not forget to select items for the additional Main Section fields.
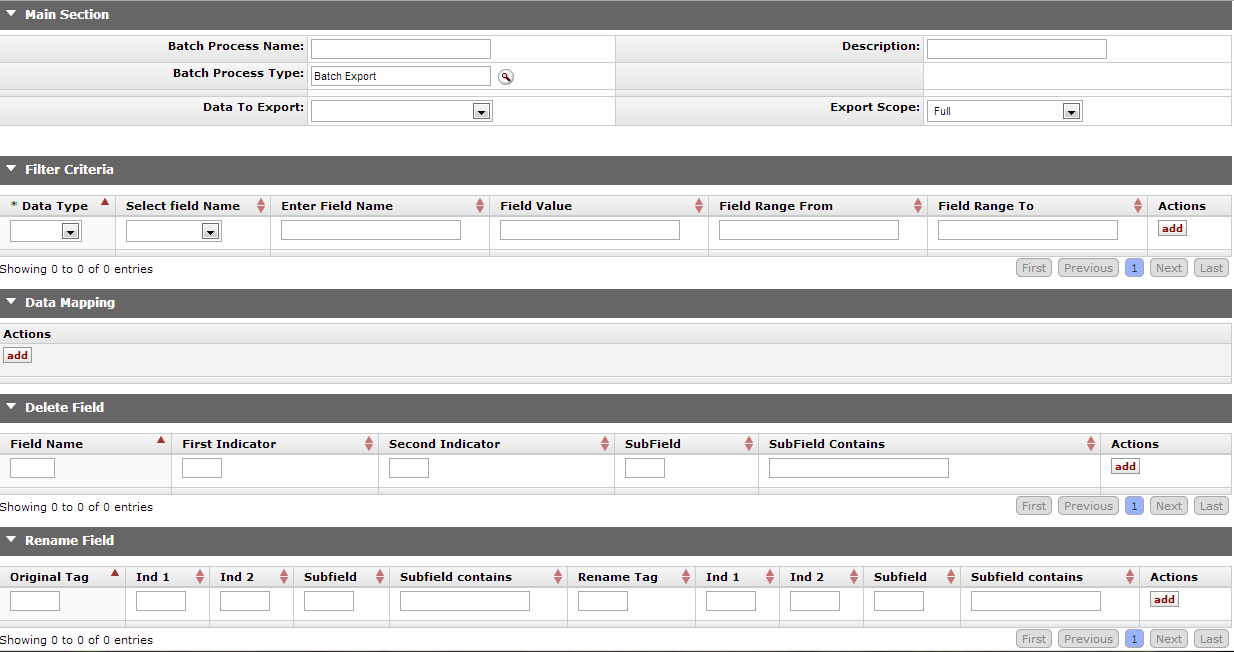
If you chose filter in the Export Scope field of the
Main Section, enter the filter criteria in the Filter Criteria tab and click  .
.

Filter Criteria definition
|
Title |
Description |
|
Data Type |
Select the type of date type (bib, holding or item) from the dropdown list. |
|
Select Field Name | Select the field name from the dropdown list. |
|
Enter Field Name |
If the field name does not appear in the Select Field dropdown list, enter the field name to be defined as the constant or default value. |
|
Field Value |
Enter the field value to be defined as the constant or default value. |
|
Field Range From |
Enter a beginning field range to limit the filter. |
| Field Range To |
Enter an ending field range to limit the filter. |
|
Action |
Click |
Click  to add data mapping options.
Data mapping is divided into two sections. The first
identifies the source field for the export and the second identies the destination field for which
OLE will map to. Enter the source and destination information and click the  button next to Priority.

Data Mapping definition
|
Title |
Description |
|
Data Type |
Select the type of date type (bibmarc, holding or item) from the dropdown list. |
|
Source Field | If you have chosen holding or item as the data type, select the OLE source field from the dropdown menu. |
|
Enter Source Field |
If you have chosen bibmarc as the data type, enter a source field. For example "100$a" |
|
Source Field Value |
If you have chosen bibmarc as the data type, enter a source field value. |
|
Destination Data type |
Select the type of destination date type (bibmarc, holding or item) from the dropdown list. |
| Destination Field | If you have chosen holding or item as the data type, select the destination field from the dropdown menu. |
| Enter Destination Field |
If you have chosen bibmarc as the destination data type, enter a destination field. For example "100$a" |
| Destination Field Value |
If you have chosen bibmarc as the data type, enter a destination field value. |
| Priority |
If the same source field is given multiple destinations, you may prioritize which should be first, second, third, and so on. |
|
Action |
Click |
The Delete Field tab allows you to identify fields that will
be deleted during the export. Enter the field information and click  . Add as many fields as is needed.

Delete Field definition
|
Title |
Description |
|
Field Name |
Enter the bibliographic field name to be deleted. For example "101" or "245" |
|
First Indicator | Optional. Enter the first indicator to be deleted. |
|
Second Indicator |
Optional. Enter the second indicator to be deleted. |
|
SubField |
Optional. Enter the subfield to be deleted. |
|
SubField Contains |
Optional. Enter the information the subfield contains that will be deleted during the export. |
|
Action |
Click |
The Rename Fieldtab is used to overlay fields during the
export. It is divided into two sections. The first identifies the original tag within OLE for the
export and the second identies the newly named field in the exported record. Enter information for
both the original and rename tags and click  .
.

Rename Field definition
|
Title |
Description |
|
Original Tag |
Enter the OLE tag that you wish to overlay. |
|
Ind 1 | Enter the Indicator 1 that will be overlay. |
|
Ind 2 |
Enter the Indicator 2 that will be overlay. |
|
Subfield |
Enter the subfield that will be overlay. |
|
Subfield Contains |
Enter the information that the subfield contains that will be overlay. |
| Rename Tag |
Enter the replacing tag name. |
| Ind 1 | Enter the replacing Indicator 1. |
| Ind 2 | Enter the replacing Indicator 2. |
| Subfield | Enter the replacing Subfield. |
| Subfield Contains |
Enter the information that will be replacing what subfield contains. |
|
Action |
Click |
If the Batch Import type is selected from the Main Section, additional tabs will load: Bib Match Point, Bib Overlay/Add, Instance Overlay/Add, Set Bib Status, Staff Only Treatment, Changes to Imported Bibliographic Record, Data Mapping, Protected Field, Delete Field, and Rename Field .
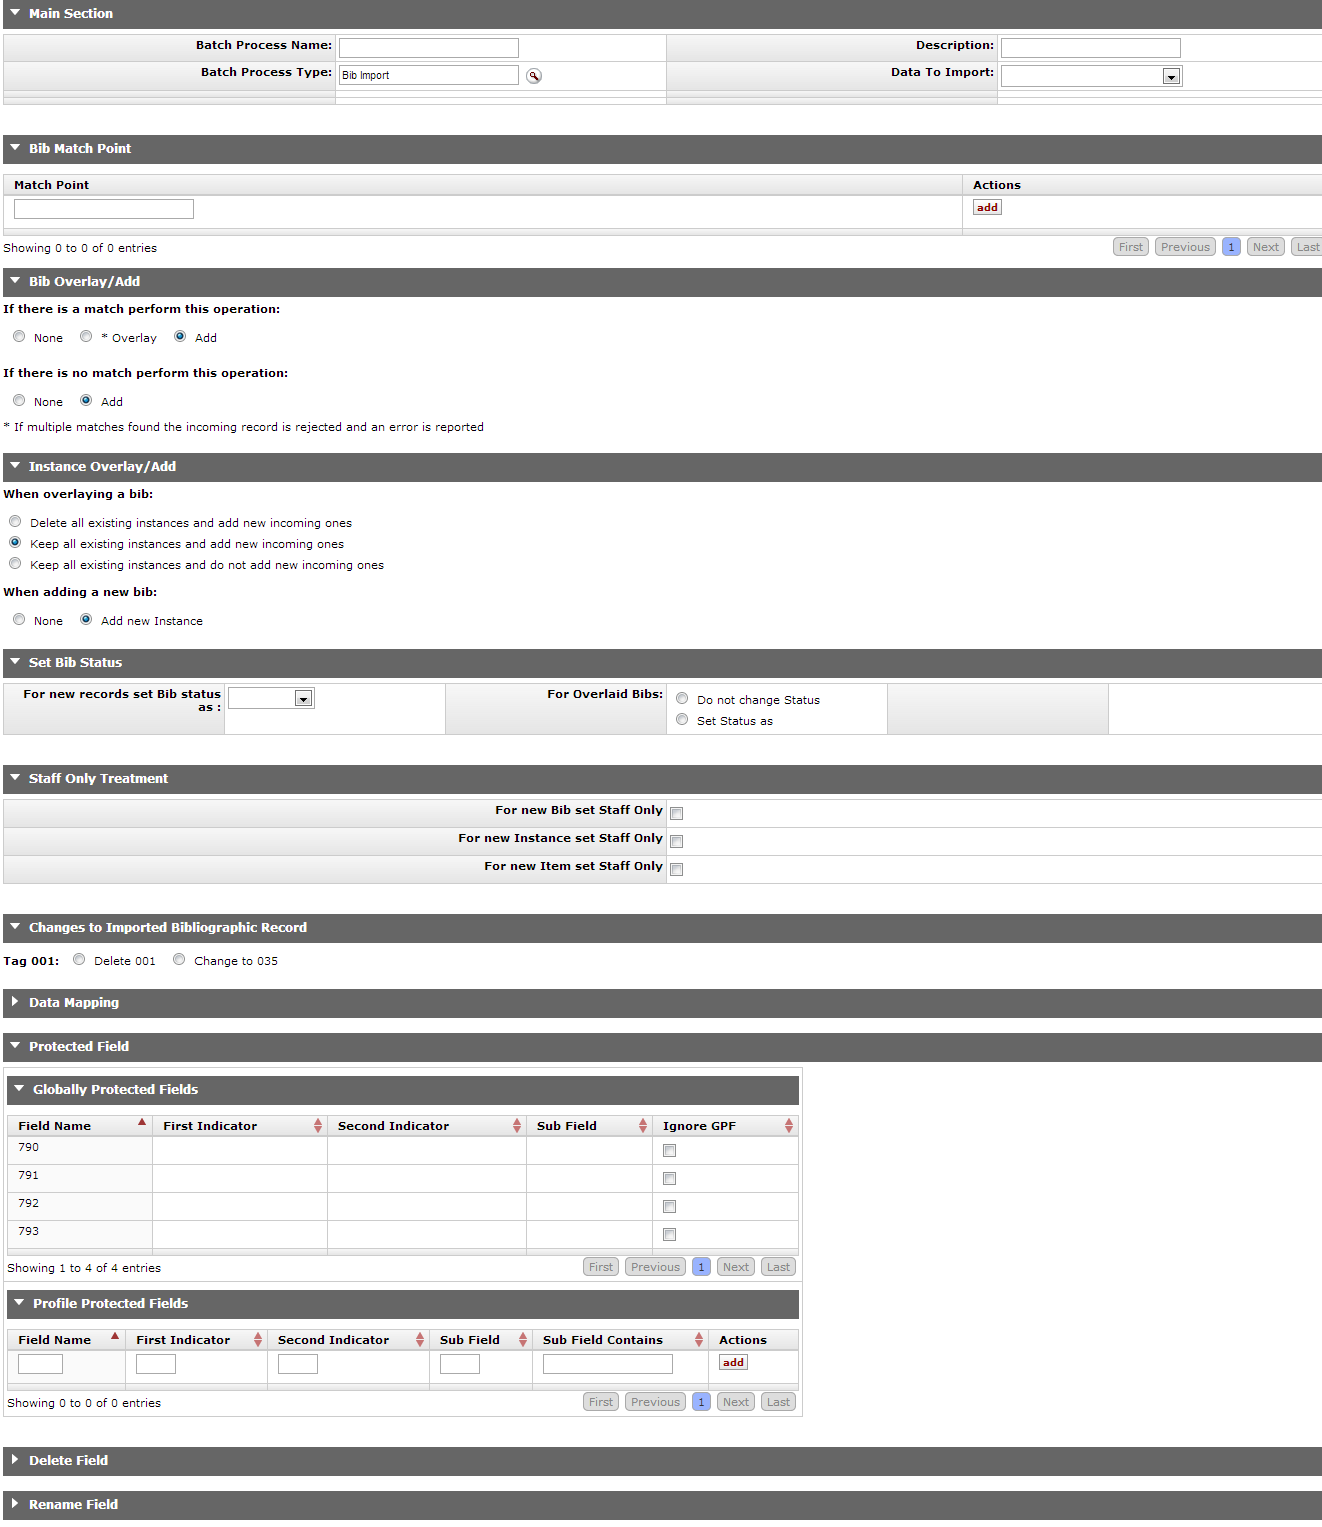
On the Bib Match Point tab, you may enter the match point for
the bibliographic records, for example . If you add additional match points, OLE will prioritize
them by the order they have been entered (First entered, first matched). Enter up to three match
points, and click  .
.

Depending on the Data to Import selection you have chosen on
the Main Section Tab, the Bib Overlay/Add tab allows user to
determine what the course of action will be when importing records. If there is a matched record,
you may have OLE Overlay the current record, Add an additional record, or do nothing by selecting None. If you choose to overlay the records, you may decide to ignore this rule for bib
statuses of catalogued or catologuing
records. Click the  button.
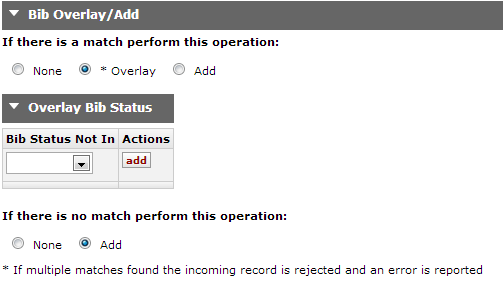
If no match is found, you may choose to Add the new records or not add them by selecting None.
Depending on the Data to Import selection you have chosen on the Main Section Tab, the Instance Overlay/Add tab allows user to determine what to do about Instance records when importing new records. Click the radio button to make your selection.
Depending on the Data to Import selection you have chosen on the Main Section Tab, the Set Bib Status tab allows user to set the statuses of the new or overlaid bibliographic records. Select the statuses from the dropdown menu. For overlaid records, you may choose not to change the status.

The Staff Only Treatment tab allows user to turn on the staff only flag in the cataloging record. Click the checkbox to apply the staff only flag to new records.

The Changes to Imported Bibliographic Record tab allows user to modify or delete the 001 field if one exists in the incoming record. If you choose to replace the 001 with a new 035, you will be asked about prepending the contents of the 001 with the 003 field in parenthesis or with a stated value (the prepended contents of the 003 field then the 001 field will appear on a new 035 field in the imported record).
![]()
The Data mapping tab is divided into two sections. The first
identifies the source field for the import and the second identies the destination field for OLE.
Enter the source and destination information and click the  button next to Priority.

Data Mapping definition
|
Title |
Description |
|
Data Type |
Select the type of date type (bibmarc, holding or item) from the dropdown list. |
|
Source Field | If you have chosen holding or item as the data type, select the OLE source field from the dropdown menu. |
|
Enter Source Field |
If you have chosen bibmarc as the data type, enter a source field. For example "100$a" |
|
Source Field Value |
If you have chosen bibmarc as the data type, enter a source field value. |
|
Destination Data type |
Select the type of destination date type (bibmarc, holding or item) from the dropdown list. |
| Destination Field | If you have chosen holding or item as the data type, select the destination field from the dropdown menu. |
| Enter Destination Field |
If you have chosen bibmarc as the destination data type, enter a destination field. For example "100$a" |
| Destination Field Value |
If you have chosen bibmarc as the data type, enter a destination field value. |
| Priority |
If the same incoming record could have the same information in multiple fields (for example call numbers), you may prioritize which should fill the OLE record first or second, and so on. |
|
Action |
Click |
The Protected Fields tab is divided into two tabs.
The Globally Protected Fields allows user to view and ignore the globally protected fields. Click the checkbox to ignore any of the fields listed.
Note
For information on how to add and maintain globally protected fields, see the section of the Guide to OLE Select and Acquire: Purchasing and Accounts Payable.
The Profile Protected Fields allows users to add fields to protect only when using the profile. Input field information and click
 .
.
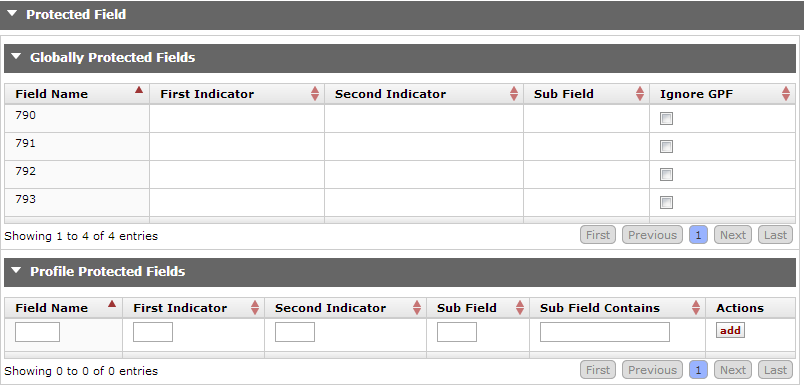
The Delete Field tab allows you to identify fields that will
be deleted during the import process. Enter the field information and click  . Add as many fields as is needed.

Delete Field definition
|
Title |
Description |
|
Field Name |
Enter the bibliographic field name to be deleted. For example "101" or "245" |
|
First Indicator | Optional. Enter the first indicator to be deleted. |
|
Second Indicator |
Optional. Enter the second indicator to be deleted. |
|
SubField |
Optional. Enter the subfield to be deleted. |
|
SubField Contains |
Optional. Enter the information the subfield contains that will be deleted during the export. |
|
Action |
Click |
The Rename Field tab is used to overlay fields during the
import. It is divided into two sections. The first identifies the original tag for the import and
the second identies the newly named field on the OLE record. Enter information for both the original
and rename tags and click  .
.

Rename Field definition
|
Title |
Description |
|
Original Tag |
Enter the tag that you wish to rename during import. |
|
Ind 1 | Enter the Indicator 1 that will be renamed. |
|
Ind 2 |
Enter the Indicator 2 that will be renamed. |
|
Subfield |
Enter the subfield that will be renamed. |
|
Subfield Contains |
Enter the information that the subfield contains that will be renamed. |
| Rename Tag |
Enter the replacing tag name. |
| Ind 1 | Enter the replacing Indicator 1. |
| Ind 2 | Enter the replacing Indicator 2. |
| Subfield | Enter the replacing Subfield. |
| Subfield Contains |
Enter the information that will be replacing what subfield contains. |
|
Action |
Click |
 >
>  >
>  >
> 
The Batch Process interface, available from the Admin menu, allows staff to run import and export jobs in OLE. Once the job has run, staff may receive notifications of completion, view reports and, for importing, make changes to records as necessary.
Open the Batch Process interface from the Admin tab.

Enter a name to distinguish your batch process. This field is not required but it will be helpful. If left blank, the profile name chosen and a number is used by OLE.
Choose the Batch Process Profile. You may enter the name or search for it from the lookup
 .
. Modify the batch size to suite your needs.
If you wish to receive the batch process job report via email, enter your email in Send Job Report To.
Depending on the Batch Process Type (autopopulated when the Batch Process Profile Name is selected), an Input Section or an Output Section will appear.
Output Section is made available for exporting records types. Select the Output Format from the dropdown.
Enter the location of the Output File.
Note
For 1.0, leave this field blank. You will find the exported files here: http://tst.ole.kuali.org/home/kuali/main/tst/olefs-webapp/work/staging/batchExport/

Input Section is made available for most importing record types. Select Choose File to search for the file from your local machine.

Input Section for Order Records requires you to choose both a Marc and Edi file.
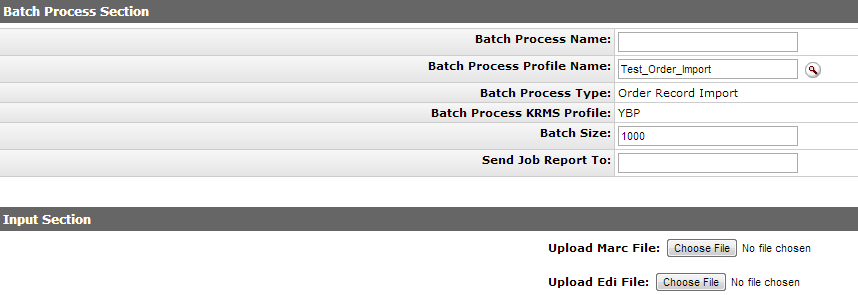
Click
 to begin the job immediately.
Alternatively, you may click
 to schedule the job.
To review completed batch jobs, review the report, or restart the job see Batch Process Job Details.
Note
For additional information on Batch Process Job Details, see Batch Process Job Details
To Review jobs that are scheduled, reschedule or remove the job from OLE, see Batch Process Job Schedule.
Note
For additional information on Batch Process Job Schedule, see Batch Process Job Schedule
If you click  to schedule the Batch Process job, an
additional tab will appear to assist in the scheduling process.
You may choose to schedule by Cron Expression. Select the radio button next to Cron Expression and enter the expression in the available text box.

You may also choose the radio button Schedule to manually enter when the job should occur. You will have two options:
One Time: Enter the date or search for it from the calendar icon
 and time for the job to begin.
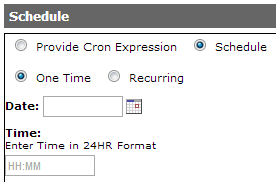
Recurring:Enter the time for the job to begin. If you choose Weekly or Monthly, you will also need to select the day(s) for the job to occur.
Once your schedule has been determined, click  .
.
 >
>  >
>  >
> 
The Batch Process Job Details screen displays the batch jobs that have run or are currently running. Staff may also restart a job, view the job report and remove the job from OLE.
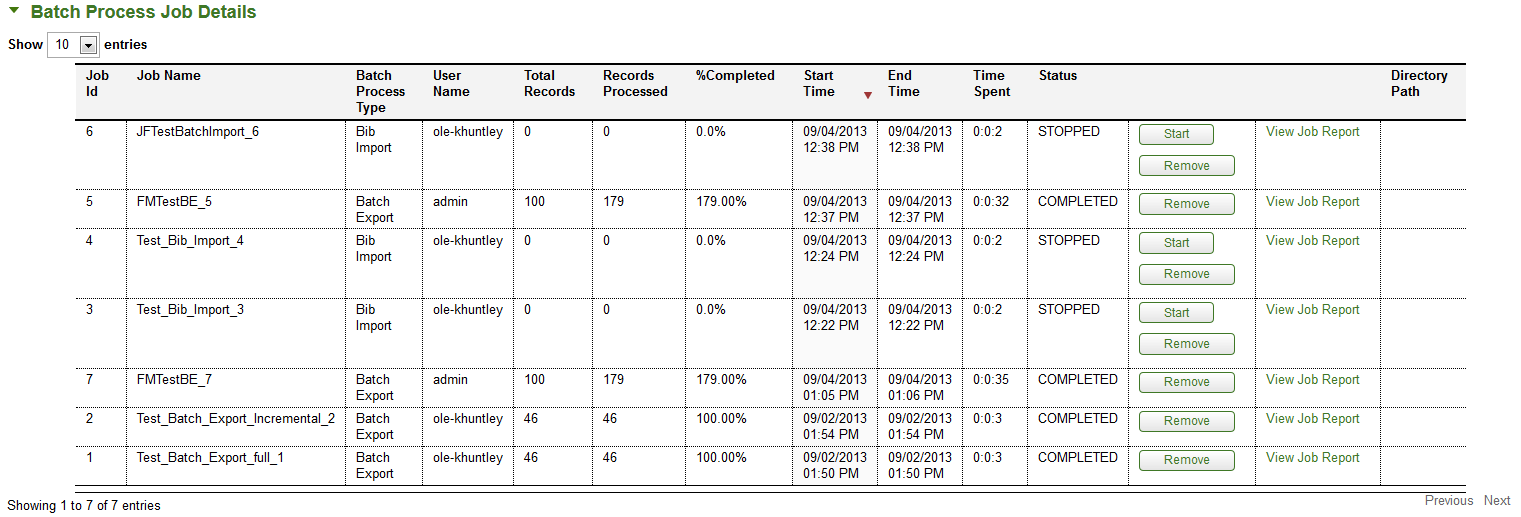
 >
> 
The Kuali OLE Modules submenu allows you to perform a variety of functional and technical activities that affect the entire system. This includes uploading XML and People Flow rules to modify workflows. Users may also access the Staff Upload interface.
Kuali's Rule Management System (KRMS) supports the creation, maintenance, storage and retrieval of business rules and agendas (ordered sets of business rules) within business contexts (e.g., for a particular department or for a particular university-wide process). KRMS enables you to define a set of rules within a particular business unit or for a particular set of applications. These business rules define logical conditions and the set of actions that result when those conditions are met. KRMS enables you to call and use this logic from any application, without having to re-write and manage all the rules' maintenance logic within the application.
The Staff Upload Interface is used to import batch records. This link described in Select and Acquire: Purchasing and Accounts Payable
Note
For more information about importing batch records, see the Import section of the Guide to Purchasing and Accounts Payable. This and other OLE user guides are available for download from OLE 0.8 Milestone User Documentation.
 >
>  >
>  >
>  >
> 
PeopleFlow is, for all intents and purposes, a prioritized list of people to send requests to. It does not require you to specify a hard coded route node in the document type for each individual who might need to approve or be notified. You can define "Stops" in a PeopleFlow, where everything in the same stop proceeds in parallel, but all must be done within the stop before proceeding to the next stop. You can call/execute a PeopleFlow from within a KEW workflow node directly, or you can invoke the Kuali Rules Managment System (KRMS) engine from an application and any PeopleFlows that get selected during rule execution, defined in a KRMS agenda, will be called. In this way, you can integrate business rules across applications and workflows. The same PeopleFlow that defines a routing order among a set of persons, groups or roles can be called by KRMS rules, with the KRMS rules defining which type of request to pass to the PeopleFlow.
You can search for a PeopleFlow to copy from and modify (be sure to give it a new unique name) or can create a new one (see the top right of the lookup screen).
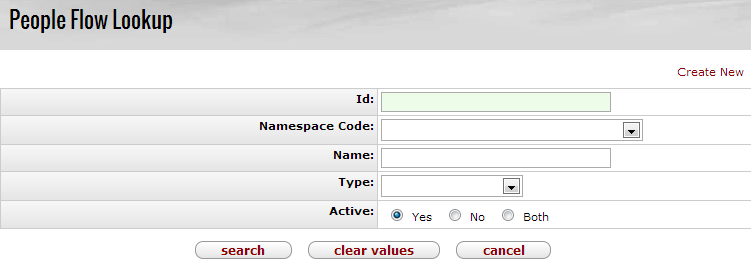
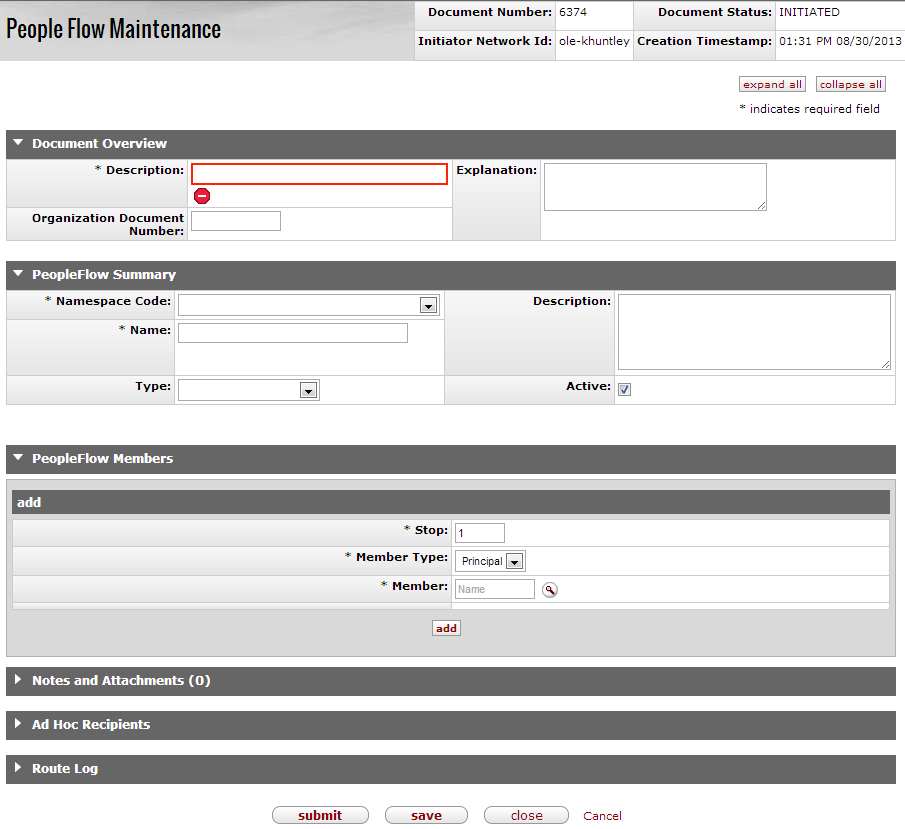
The PeopleFlow document includes several unique tabs—PeopleFlow Summary and PeopleFlow Members.
The PeopleFlow Summary tab contains information in which to both identify the PeopleFlow and where the PeopleFlow is applicable.

PeopleFlow Summary tab definition
|
Title |
Description |
|
Namespace Code |
The Namespace to which this PeopleFlow will belong. A Namespace is a way to set both Permissions and Entity Attributes. Each Namespace instance is one level of Permissions and Entity Attributes and is one record in OLE. Select the Namespace from the dropdown list. |
|
Name |
Required. The name of the PeopleFlow. |
|
Type |
Select the type of PeopleFlow from the dropdown list to assign the PeopleFlow to more specific attributes. NoteIn 1.0, selecting the KR-SAP Sample Type results in an Incident Report. |
|
Description |
Enter a description of the PeopleFlow. |
|
Active |
Indicates whether this PeopleFlow is active or inactive. Remove the check mark to deactivate. |
The PeopleFlow Members tab allows users to add stops and add
members to the PeopleFlow. PeopleFlows that you create can be called by rules, with the rules
determining whether the PeopleFlow will be called for an action (such as approvals) or for
notifications. Enter the required information and click  .
.

PeopleFlow Summary tab definition
|
Title |
Description |
|
Stop |
Required. The stops in the workflow. Everything assigned to each stop must be complete before moving on to the next stop. |
|
Member Type |
Required. Select the Member Type from the dropdown list. PeopleFlows can be assigned to a Principal, a group, or a role. |
|
Member |
Enter the member to be assigned to the PeopleFlow stop or search for them
from the lookup |
|
All or First Action | If the Member Type Role or Group is selected, select ALL or FIRST from the dropdown. Selecting ALL means every person in the role or group must take action. Selectiong FIRST requires action from only one person. |
After clicking  , an additional menu appears. Below shows an example of two stops added already
added:
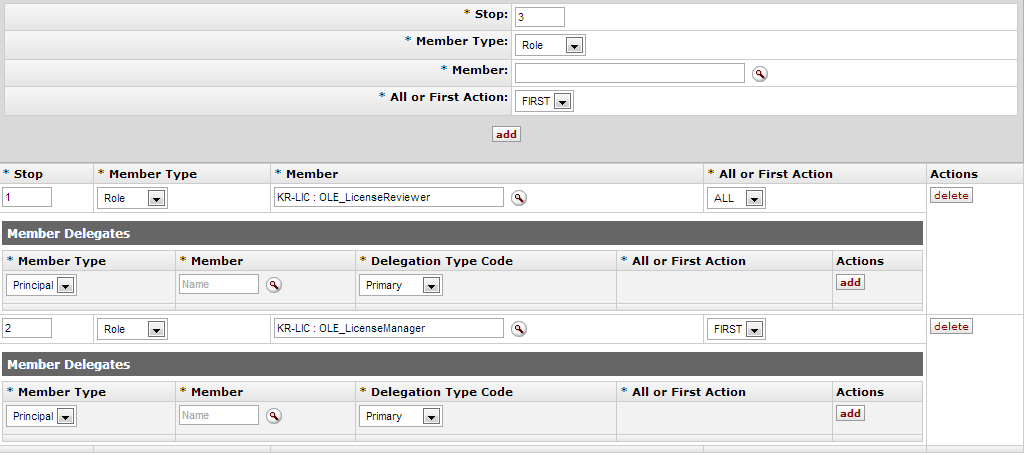
From here, Member Delegates may be added to allow others to take action for another person.
Enter the Member Type and the Member.
Select the Delegation Type Code from the dropdown. The two choices are:
Primary Delegate: The delegator turns over his or her full authority to a primary delegate. The Action Requests for the delegator only appear in the Action List of the primary delegate.
Secondary Delegate: The secondary delegate acts as a temporary backup and has the same authority as the delegator when the delegator is not available to take action. Documents appear in the Action Lists of both the delegator and the delegate. When either acts on the document, it disappears from both Action Lists. People often have a secondary delegate who takes care of their action requests when they are out of the office.
Select All of First Action from the dropdown list.
Click
 .
.
Click  to remove the PeopleFlow stop.
Table of Contents
 >
> 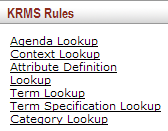
The KRMS submenu allows you to perform a variety of functional and technical activities that affect the entire system.
 >
>  >
>  >
>  >
> 
Rules in KRMS are placed into ordered sets called Agendas. The order of the Rules in an Agenda determines the sequencing: which rule gets evaluated first, second and so on. The Agenda also enables you to include conditional branching logic between Rules. In turn, Agendas are created in Contexts, which may represent any categories that are relevant within your institution. For example, they could correspond to document types or business processes or any other categories, such as licensing. Each Context contains its own agendas, and each Agenda contains its own rules. Rules aren't shared across agendas (though you can copy/paste, they become unique Rule instances), and Agendas aren't shared across Contexts. There is no Context hierarchy, that is, Agendas and Rules cannot be inherited across contexts within any sort of hierarchy.
Tip
Copy rules to save time and typing.
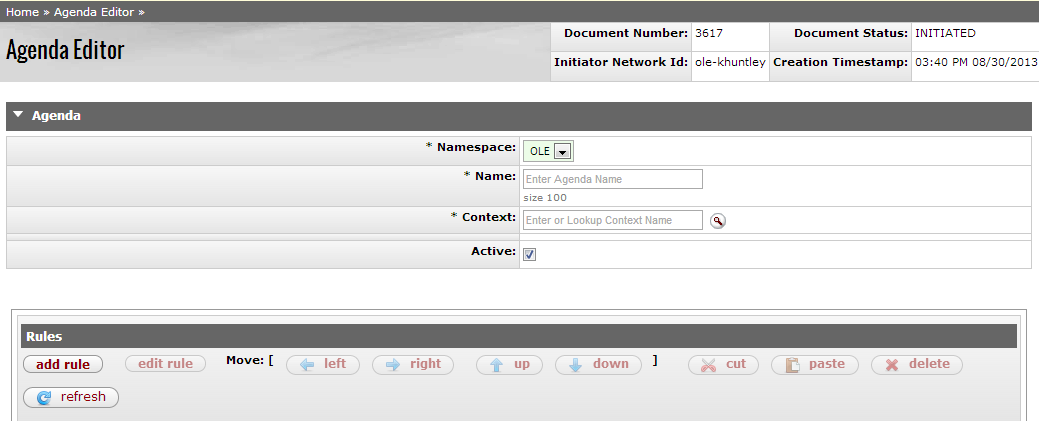
The Agenda Editor includes two unique tabs—Agenda and Rules.
The Agenda tab contains information in which to both identify the Agenda itself and where the Agenda will be applied.

Agenda tab definition
|
Title |
Description |
|
Namespace |
Required. The Namespace to which this Agenda will belong. |
|
Name |
Required. The name of the Agenda. This is a unique identifier and must be unique to the namespace selected. |
|
Context |
Required. A collection of agendas, rules, terms, term specifications.
Enter a Context or search for it from the lookup |
|
Type |
Select the type of Agenda from the dropdown list to assign the Agenda to more specific attributes. NoteIn 1.0, this is only a placeholder. |
|
Active |
Indicates whether this Agenda is active or inactive. Remove the check mark to deactivate. |
From the Rules tab, users can add multiple rules to an agenda, move rules around in the workflow, and can cut, paste and delete.

Click add rule to open the Rule editor and add a rule. If a rule is already listed, select the rule and click edit rule. The Rule Editor will open. The Rule Editor includes two unique tabs—Rule which also contains the Propositions subtab and Action.
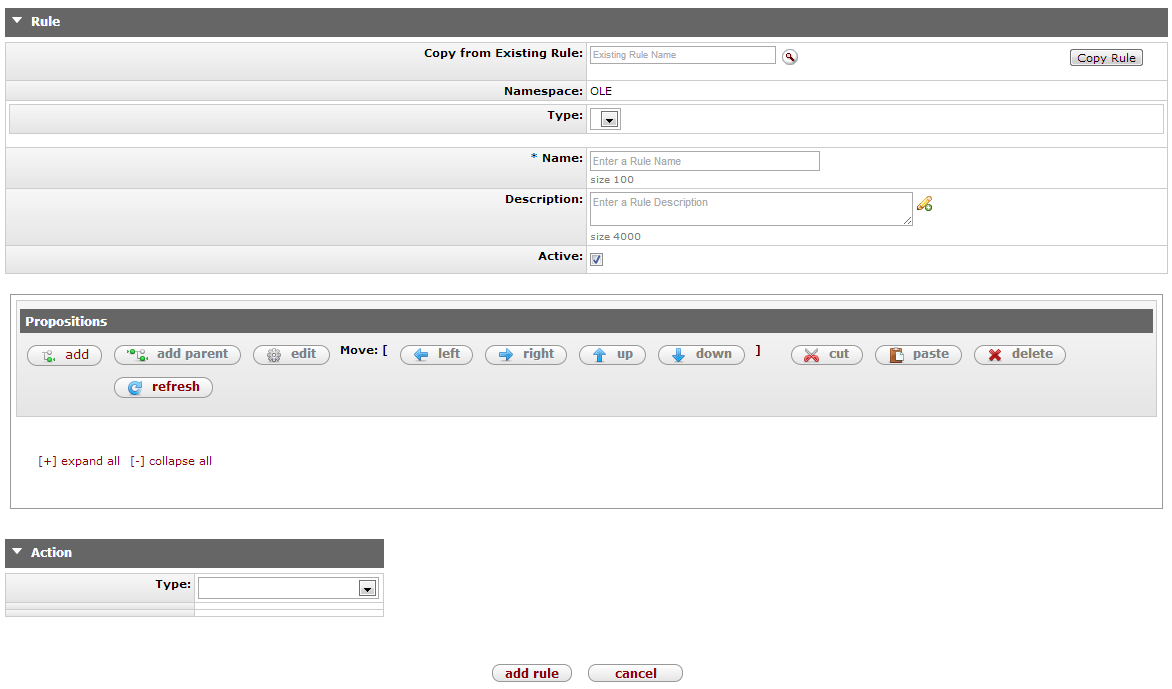
Fill in the descriptive information for the rule in the Rule tab
Rule tab definition
|
Title |
Description |
|
Copy from Existing Rule |
If a similar rule already exists, you may enter the name or search for the rule from the
lookup |
|
Namespace |
Display only. The Namespace to which this Rule will belong. |
|
Type |
Select the type of rule from the dropdown list to assign the rule to more specific attributes. NoteIn 1.0, this is only a placeholder. |
|
Name |
Required. The name of the Rule. This is a unique identifier and must be unique to the namespace selected. |
| Description | Enter a description for the
rule. To expand the description field, click the expand icon |
|
Active |
Indicates whether this rule is active or inactive. Remove the check mark to deactivate. |
Add a simple proposition by clicking  under the Proposition tab (click add parent to add compound propositions). Propositions are functions made up
of true and false conditions. Actions can be set to occur when proposition requirements are met.
Once add is clicked, OLE brings up a new set of fields.
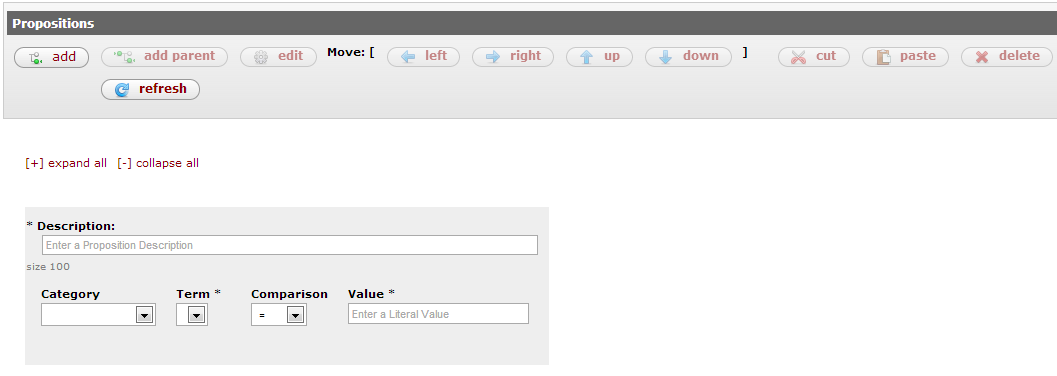
Give the proposition a Desciption.
Select a Category, Term, and Comparison from the dropdown lists. Categories help to narrow down the terms. Terms define a piece of business data that can be used in the construction of proposition (i.e. student GPA, account number, salary, etc.). Enter the Value to set the term (i.e. a student GPA of 4.0, "4.0" is the value)
In the Action tab, users can define the action that will be fired when the Proposition is evaluated.
Select the Type of action from the dropdown menu. Depending on your selection, additional fields will become available.
No matter what Type is selected, enter a Name.
This is an example of the type Route to PeopleFlow, which includes additional required fields:
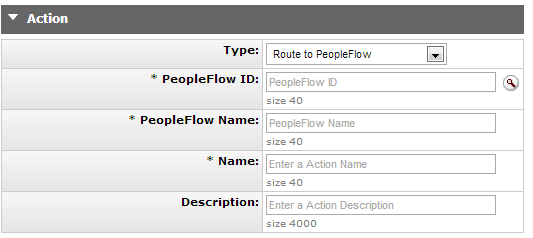
Click  to add this rule to the agenda.
Continue to add as many rules as necessary for the agenda. Once complete click 
 >
>  >
>  >
>  >
> 
Contexts are a collection of agendas, rules, terms, term specifications. In OLE a context of "License" has been established for easy identification of the items related to the licensing business rules.
Each Context contains its own agendas, and each Agenda contains its own rules. Rules aren't shared across agendas (though you can copy/paste, they become unique Rule instances), and Agendas aren't shared across Contexts. There is no Context hierarchy, that is, Agendas and Rules can't be inherited across contexts within any sort of hierarchy.
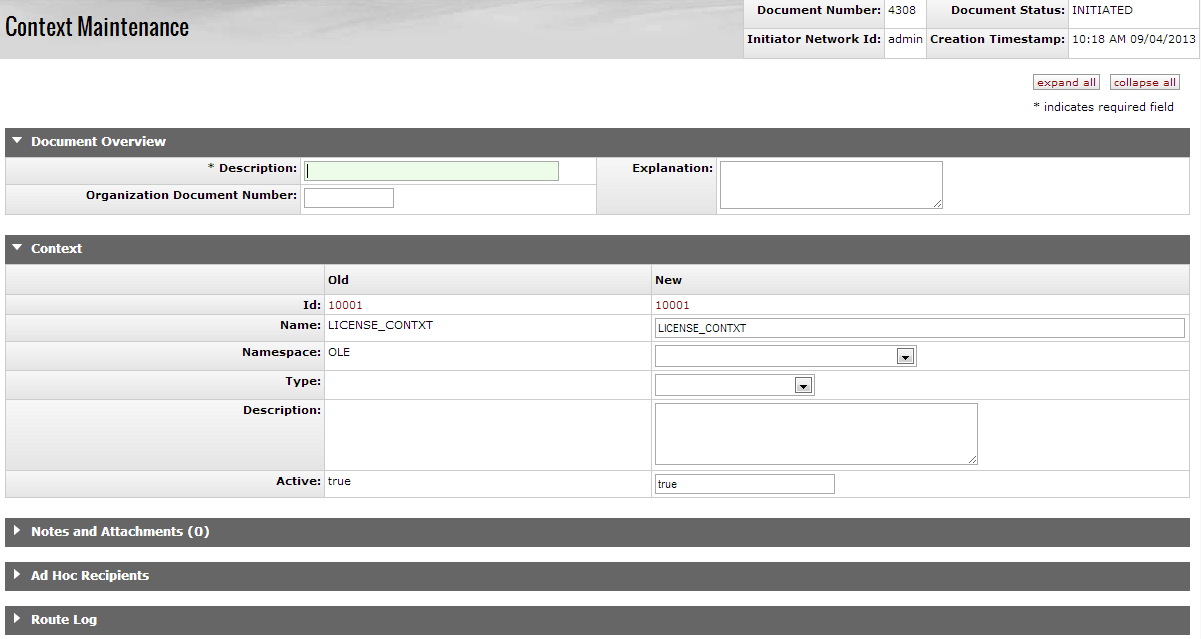
The Context Maintenance document includes the Context tab. The system automatically enters data into both the Old and New sections. Selected data fields are available for editing.
Context tab definition
|
Title |
Description |
|
Name |
The name of the Context. This is a unique identifier and must be unique to the namespace selected. |
| Namespace | The Namespace to which this Context will belong. Select the namespace from the dropdown list. |
| Type | Select a type from the dropdown list to assign the context to more specific attributes. |
| Description | Enter a description of the context. |
|
Active Indicator |
Indicates whether this context is active or inactive. Remove the check mark to deactivate the code. |
Table of Contents
 >
> 
Global Configuration maintenance e-docs are available via the Global Configuration Settings submenu on the Admin menu tab.
 >
> ![]() >
> ![]() >
> ![]()
As the Import Bib from External Data Source option is available to show the possibility for institutions to import bibliographic records through a Z39.50 protocol, this interface exists to support the functionality. This e-doc can be used to create and maintain the sources for the import.
Note
Users will need to implement the Z39.50 protocol before using this e-doc.
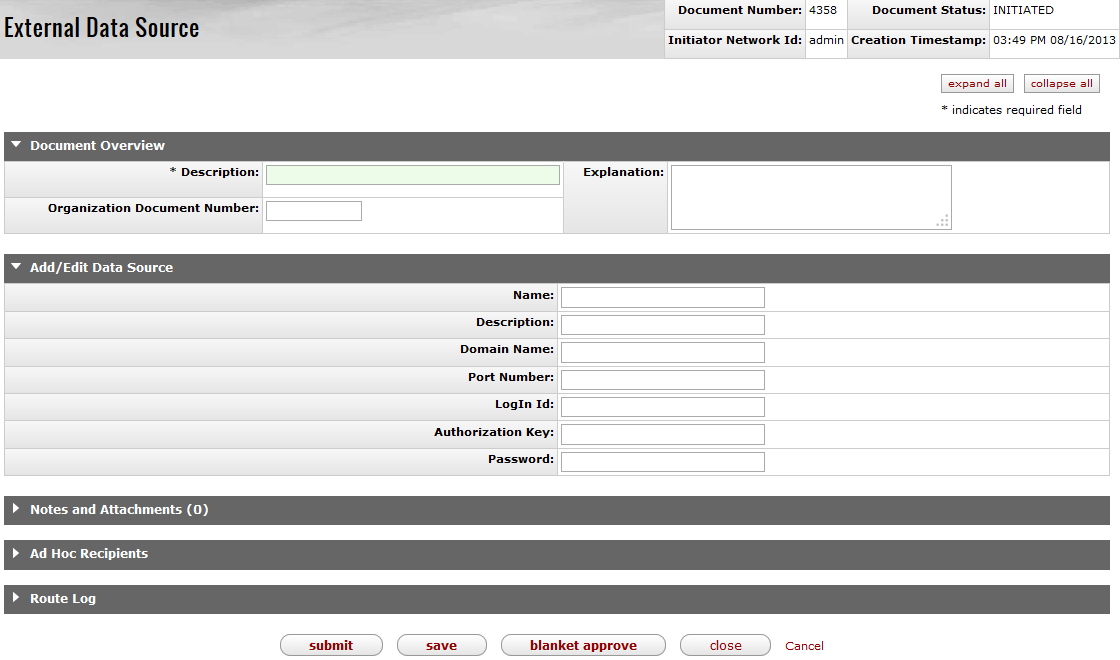
Add/Edit Data Source tab definition
|
Title |
Description |
|
Name |
The familiar title of the data source. |
|
Description |
The description of the data source. |
|
Domain Name |
Enter the web address of the data source. |
|
Port Number |
Enter the port number required for accessing the data source. |
|
Login ID |
Enter the login ID of the data source. |
|
Authorization Key |
Enter the authorization key of the data source. |
|
Password |
Enter the password for the data source. |
 >
> ![]() >
> ![]() >
> ![]() >
> ![]()
Users may set preferences to apply to all records during the import process. These settings can be overridden during the import process.

The User Preferences document includes the Add/Edit User Preference tab. The system automatically enters data into both the Old and New sections in this tab. Selected data fields are available for editing.
Add/Edit User Preference tab definition
|
Title |
Description |
|
Name |
The familiar title of the user preference. |
|
Import Type |
Select the type of import to be performed from the dropdown list. |
|
Import Bib Status |
Select a status for the bibliographic records to inherit upon import completion. |
|
Temporary Location |
Optional. Select a temporary location for the bibliographic records to inherit upon import completion. |
|
Permanent Location |
Select a permanent location for the bibliographic records to inherit upon import completion. |
|
Removal Tags |
Enter any tags to be removed when importing bibliographic records |
|
Protected Tags |
Enter any tags that will not be affected when importing bibliographic records |
|
Classification Scheme |
Select the classification scheme for the bibliographic records to inherit upon import completion. |
|
Call Number Source 1 |
Enter a first priority for mapping MARC fields and subfields into OLE item’s call number fields. |
|
Call Number Source 2 |
Enter a second priority for mapping MARC fields and subfields into OLE item’s call number fields. |
|
Call Number Source 3 |
Enter a third priority for mapping MARC fields and subfields into OLE item’s call number fields. |
Table of Contents
 >
>  >
> 
The Configuration submenu allows you to perform a variety of functional and technical activities that affect the entire system.
 >
>  >
> 
The OLE configuration submenu group provides access to high-level configuration options available to functional users. These include functions that allow authorized users to maintain the message of the day and various parameters and business rules, define many high-level definitions of a fiscal year, and perform other functions that affect users and transactions throughout the system. Some functions are only lookups, such as the ability to view data mapping fields and others are inquire screens like the Routing & Identity Management Document Type Hierarchy.
 >
>  >
>  >
>  >
> 
The Data Mapping Field Definition lookup displays definitions related to a given field in OLE. This information includes definitions such as the functional field description, the length of the field, whether or not it is encrypted, and the name of the field at the database level
Note
This data can only be updated by a technical resource and many of the values here are only meaningful to a technical user.

Data Mapping Field Definition Lookup definition
|
Title |
Description |
|
Namespace |
Required. Select the namespace (large functional category) associated with the field you wish to search for. |
|
Component |
Required. Enter or search for and return the component (more specific functional category, such as a given screen or document section) associated with the field you wish to search for. |
|
Field |
Optional. Enter the field name of the field you wish to search for or use the lookup to search for it. |
|
Description |
Optional. Search for a field by its description. Remember that wildcards can be used, such as *account* to return all fields with the word 'account' in their description. |
|
Database Table Name |
Optional. Enter the name of the table in which the field you're searching for resides. |
|
Database Field Name |
Optional. Enter the name that identifies the field in the database. |
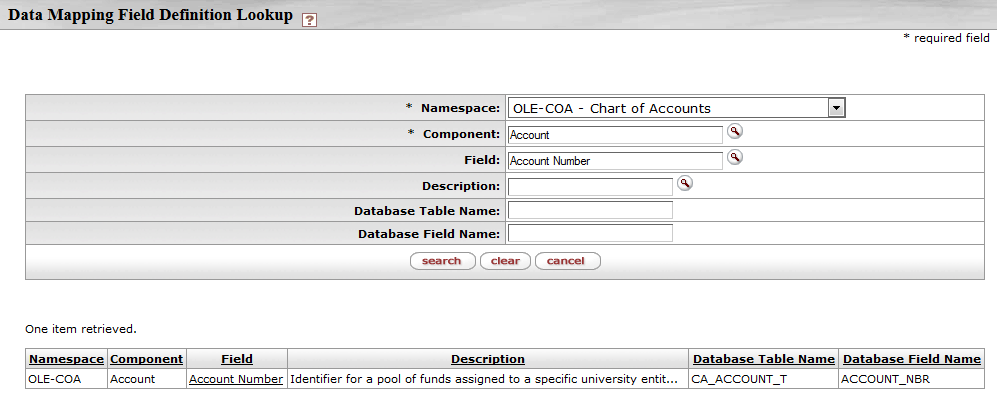
The results display the namespace, component, field name, description and database field name and table name. Click on the linked field name to view the inquiry which contains additional data fields.

Fields appearing on the inquiry and not previously described above are detailed here.
Data Mapping Field Definition Inquiry definition
|
Title |
Description |
|
Database Data Type |
The type of data expected for this field by the database. |
|
Application Data Type |
The type of data the application expects in this field. |
|
Database Defined Length |
The maximum character length of the field in the database. |
|
Application Defined Length |
The maximum character length of the field in the application. |
|
Decimal Places |
The number of decimal places supported by this field. |
|
Reference Component |
OLE component where this field originates. For example, an account number field has a reference component of 'account' indicating it is defined on the Account document. |
|
Required |
Indicates if the field must be completed for this particular component. |
|
Validation Pattern |
The technical pattern used to determine if the data in the field is valid. |
|
Encrypted |
Indicates if the field is encrypted at the database level. |
|
Mask Pattern |
If a field is masked (its content partially or fully obscured to unauthorized users) this field defines the type of masking used. |
 >
>  >
>  >
>  >
>  >
> 
The Functional Field Description document is used to maintain descriptions for various fields throughout the application. Note that these values are for data mapping purposes only and cannot actually be viewed elsewhere in the application.
This document can only be initiated by members of OLE-SYS Manager role and does not route for approval. You can only edit existing field descriptions (by choosing 'edit' from the lookup). Creating new values requires technical assistance.
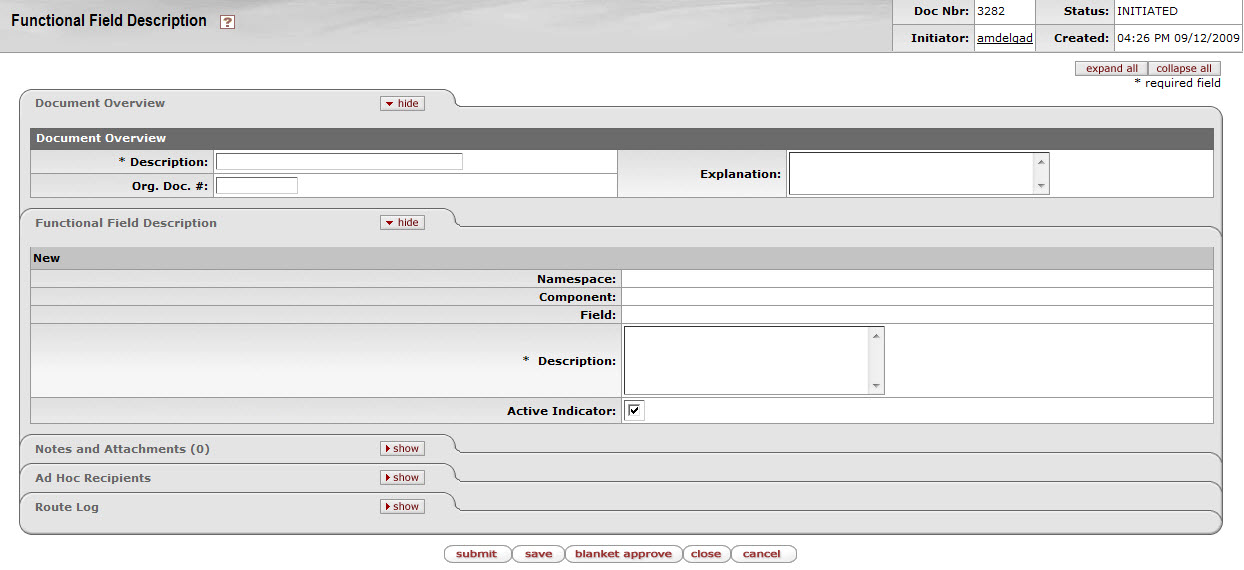
The Functional Field Description document contains the Functional Field Description tab.
Functional Field Description tab definition
|
Title |
Description |
|
Namespace |
Display only. The namespace (large functional category) associated with the field you wish to edit the description for. |
|
Component |
Display only. The component (more specific functional category, such as a given screen or document section) associated with the field you wish to edit the description for. |
|
Field |
Display only. The field name of the field you wish to edit the description for. |
|
Description |
Required. Enter the description you wish to associate with this field. |
|
Active Indicator |
Required. Leave checked if you wish this functional description to be active. Uncheck the box if you wish to inactivate the description. Since these are not viewable elsewhere in the application inactivation will have no apparent effect. |
 >
>  >
>  >
>  >
>  >
> 
The Message of the Day document updates a message that appears OLE portal. It is an easy way to share information with OLE users and can be updated at any time.
Note
Only members of OLE-SYS Manager role can create or edit Message of the Day documents.

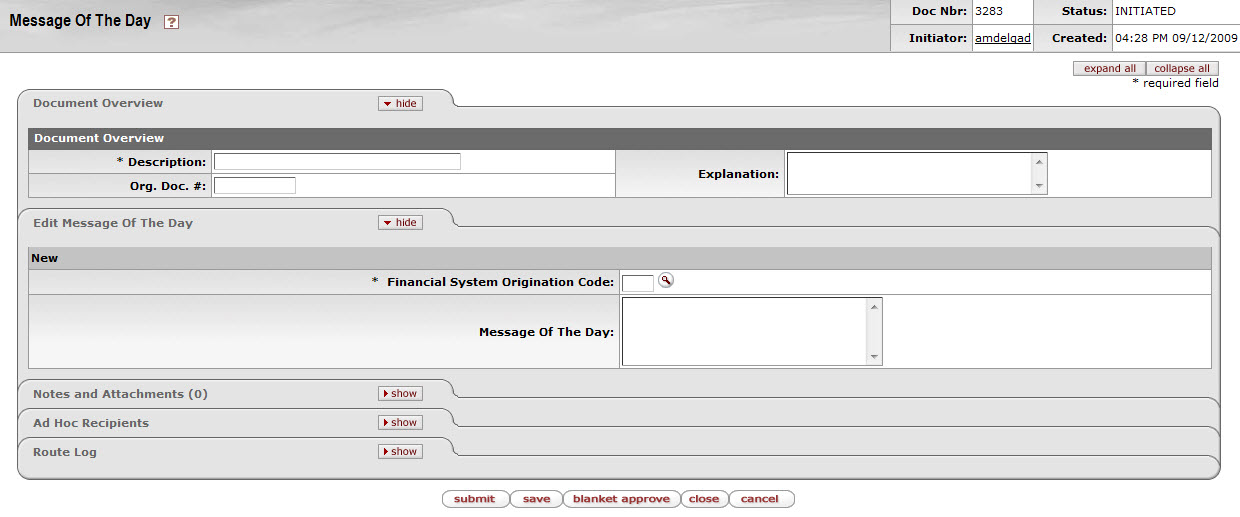
The Message of the Day document contains the Edit Message of the Day tab.
Edit Message of the Day tab definition
|
Title |
Description |
|
Financial System Origination Code |
Required. Enter the code that identifies the instance of OLE in which you want the message to appear. |
|
Message of the Day |
Optional. Enter the text you want OLE users to see as the message of the day. |
 >
>  >
>  >
>  >
>  >
> 
The System Options document defines many high-level definitions of a fiscal year, including balance types, object types and the university chart level. It also contains values that have an impact on how sufficient funds checking works for a given fiscal year.
Note
Only members of OLE-SYS Manager role can create or edit System Options documents. These documents do not route for approval.
Tip
When you are configuring object types, it is important to cross reference the Object Type Table, System Options Table and the OBJECT_TYPES parameters in the Parameter Table.

The System Options document includes the Edit System Options tab.
Edit System Options tab definition
|
Title |
Description |
|
Fiscal Year |
Required. Enter the fiscal year for which values are being defined. |
|
Fiscal Year Name |
Required. Enter the descriptive name of the fiscal year. |
|
Fiscal Year Start Year |
Required. Enter the calendar year when the fiscal year begins. |
|
Fiscal Year Start Month |
Required. Enter the calendar month when the fiscal year begins |
|
Fiscal Year |
Required. Enter the fiscal year for which values are being defined. |
|
Beginning Balances Loaded Indicator |
Optional. Select the check box if the beginning balances for the fiscal year have been loaded. If beginning balances have not been loaded then cash level sufficient funds checking must check both the previous and current fiscal years. Clear the check box if the beginning balances for the fiscal year have not been loaded. |
|
Budget Checking Options Code |
Required. Select the check box if sufficient funds checking is enabled for the fiscal year. Clear the check box if it is not. |
|
Chart Code |
Required. Enter the university level chart code defined for the fiscal
year, or search for it from the Chart lookup |
|
Actual Balance Type |
Required. Enter the balance type used to identify Actuals in the fiscal
year, or search for it from the Balance Typelookup |
|
Budget Checking Balance Type |
Required. Enter the balance type used to identify Budget Checking in the
fiscal year, or search for it from the Balance Typelookup |
|
External Encumbrance Balance Type |
Required. Enter the balance type used to identify External Encumbrances in
the fiscal year, or search for it from the Balance Typelookup |
|
Internal Encumbrance Balance Type |
Required. Enter the balance type used to identify Internal Encumbrances in
the fiscal year, or search for it from the Balance Typelookup |
|
Pre-Encumbrance Balance Type |
Required. Enter the balance type used to identify Pre-Encumbrances in the
fiscal year, or search for it from the Balance Typelookup |
|
Eliminations Balance Type |
Required. Enter the balance type used to identify Eliminations in the
fiscal year, or search for it from the Balance Typelookup |
|
Expenditure/Expense Object Type |
Required. Enter the object type used to identify the Expenditure/Expense
category in the fiscal year, or search for it from the Object
Typelookup |
|
Expenditure Not Expense Object Type |
Required. Enter the object Type used to identify the Expenditure Not
Expense category in this fiscal year, or search for it from the Object
Type lookup |
|
Expense Not Expenditure Object Type |
Required. Enter the object Type used to identify the Expense Not
Expenditure category in the fiscal year, or search for it from the Object
Type lookup |
|
Income/Cash Object Type |
Required. Enter the object Type used to identify the Income/Cash category
in the fiscal year, or search for it from the Object Type lookup |
|
Income Not Cash Object Type |
Required. Enter the object type used to identify the Income Not Cash
category in the fiscal year, or search for it from the Object Type
lookup |
|
Cash Not Income Object Type |
Required. Enter the object type used to identify the Cash Not Income
category in the fiscal year or search for it from the Object Type
lookup |
|
Assets Object Type |
Required. Enter the object type used to identify the Asset category in the
fiscal year, or search for it from the Object Type lookup |
|
Liabilities Object Type |
Required. Enter the object type used to identify the Liabilities category
in the fiscal year, or search for it from the Object Type lookup |
|
Fund Balance Object Type |
Required. Enter the object type used to identify the Fund Balance category
in the fiscal year, or search for it from the Object Type lookup |
|
Cost Share Encumbrance Balance Object Type |
Required. Enter the object type used to identify cost share encumbrances in
the fiscal year, or search for it from the Object Type lookup |
|
Base Budget Balance Type |
Required. Enter the object type used to identify Base Budget in the fiscal
year, or search for it from the Object Type lookup |
|
Monthly Budget Balance Type |
Required. Enter the object type used to Monthly Budget in the fiscal year,
or search for it from the Object Type lookup |
|
Transfer In Object Type |
Required. Enter the object type used to identify Transfer In transactions
in the fiscal year, or search for it from the Object Type lookup |
|
Transfer Out Object Type |
Required. Enter the object type used to identify Transfer Out transactions
in the fiscal year, or search for it from the Object Type lookup |
|
Nominal Closing Balances Balance Type |
Required. Enter the object type used to identify Nominal Balance closing
entries in the fiscal year, or search for it from the Object Type
lookup |
 >
>  >
> 
The options in this submenu group are used primarily by technical users to upload and configure data to maintain the Kuali Enterprise Workflow (KEW) system. Because these two options are intended for technical users, they will not be dealt with in detail here.
Use of these options is restricted to users with the KR-SYS Technical Administrator role.
 >
>  >
>  >
>  >
>  >
> 
The Document Type document defines basic information about the document types that exist in OLE. It also defines document types specific to workflow and KIM. Many definitions of a document type not defined here are included in its workflow process definition and the data dictionary (a technical resource). The workflow process definition for a document type can be viewed using the Document Type lookup.
Note
For more information about workflow, see the OLE Workflow Overview and Key Concepts wikipage.
Document Type documents can only be created by members of OLE-SYS Manager or KR-SYS Technical Administrator roles and they do not route for approval.
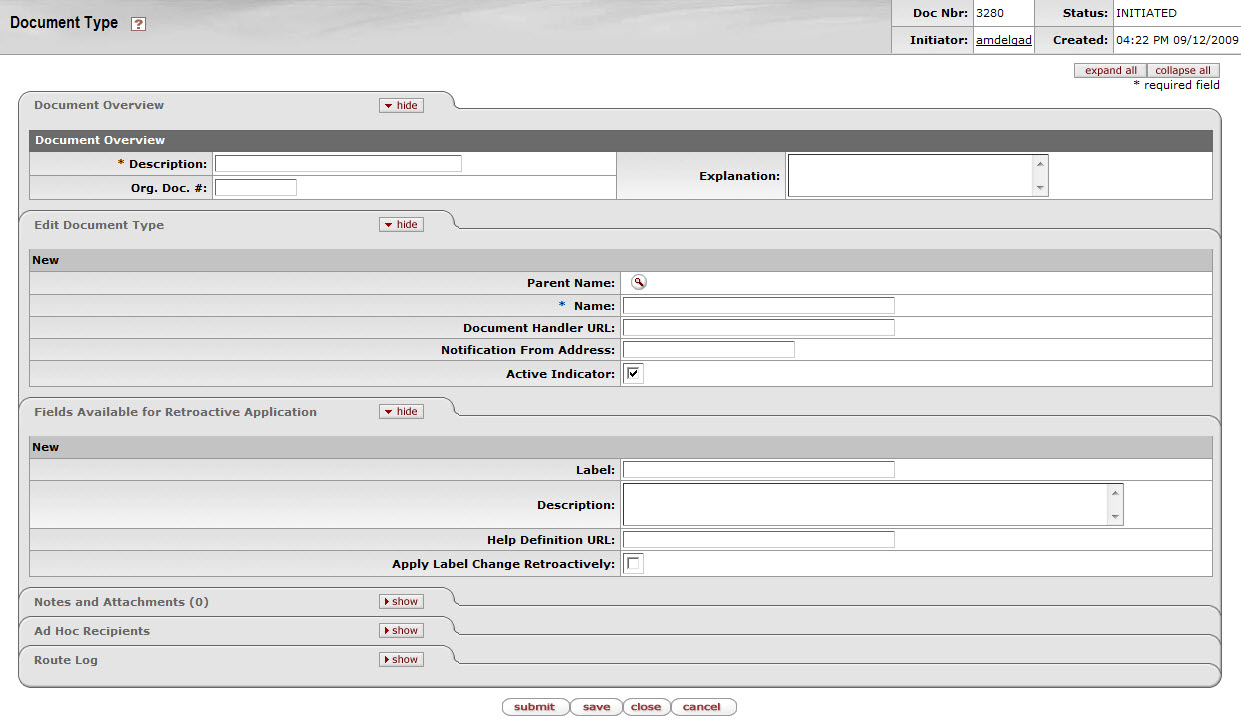
The Document Type document contains the Edit Document Type tab and the Fields Available for Retroactive Application tab.

Edit Document Type tab definition
|
Title |
Description |
|
Parent Name |
Required. Every document type must answer to another document type in a parent/child relationship. Use the lookup to search for the document type to which this document type will answer. Document types can inherit important definitions from their parent document types, including permissions and responsibilities. |
|
Name |
Required. The common name of the document type. For most OLE documents the name is a four-character abbreviation. Note that while the name field can support longer names (and KEW and KIM documents are examples of these) the Labor Ledger and General Ledger can only support document names up to four characters in length. If you are creating a new document type that will eventually populate the ledgers be sure to abide by this four character convention. |
|
Document Handler URL |
Optional. (Technical) Identifies the basic URL that will take a user to this document type. |
|
Notification From Address |
Optional. The email address that will appear as the 'From' address on any action list notifications sent by workflow for this document type. This allows several applications using workflow to maintain separate notification email addresses. |
|
Active |
Required. The box should be checked if the document type is active and available for use. Uncheck the box to inactivate the document type. Note that you cannot post labor or General Ledger OLE entries with inactive document types. |
These are Document Type definitions that can be edited retroactively if need be. This means that should you decide to change one of these values for a given document type it is possible to apply the change retroactively to any documents of this type already created. For example, if you decided to change the Label of the Budget Adjustment document type you could choose to have that label change apply to historical Budget Adjustment documents in your OLE system.

Fields Available for Retroactive Application tab definition
|
Title |
Description |
|
Label |
The Label appears in most places where document types are displayed in results (including the action list and document search screens) and is commonly longer than the document Name, which is often an abbreviation. |
|
Description |
Optional. A text description of this document type. |
|
Help Definition URL |
Optional. (Technical) Identifies the URL where the online help content for this document type resides. |
|
Apply Label Change Retroactively |
Optional. Check this box only when updating an existing document type and only if you wish the fields on this tab to be updated on previously created versions of documents of this type. |
The Document Type Inquiry contains some additional fields that are not defined on this document but referenced from their source (either the corresponding workflow process definition or data dictionary information). These fields are defined below.
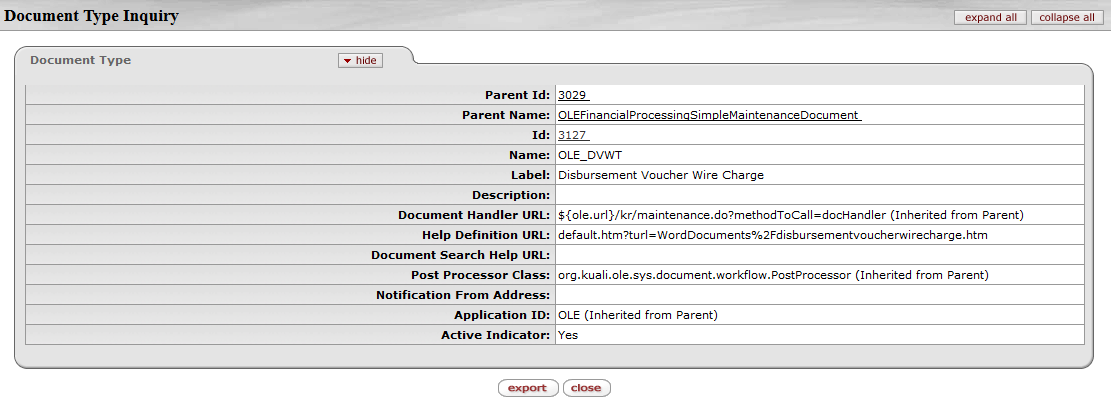
Document Type Inquiry definition
|
Title |
Description |
|
Parent ID |
Display only. The unique, system-generated ID number that identifies the parent document of this Document Type. |
|
ID |
Display only. The unique, system-generated ID number that identifies this document type. |
|
Post Processor Class |
Display only. (Technical.) Identifies the post processor this document type calls upon reaching a completed workflow status (usually 'Final' or 'Processed'). The post processor is the code that tells OLE what tables to update when a document is approved. |
|
Application ID |
Display only. The namespace (large functional category) that is associated with this document type. |
 >
>  >
>  >
>  >
> 
This special view combines KIM data with OLE Document Type Hierarchy. It visually displays the parent and child relationships between OLE document types and the route nodes that are associated with each. Users may also choose to view detailed configuration for each document type, including all KIM permissions and responsibilities related to that document.
Users who are authorized to edit document types, permissions and responsibilities may access these options directly via this screen.
When you access the Routing & Identity Management Document Type Hierarchy screen, the system initially displays the document hierarchy itself. Document types are indented under their parent document types.
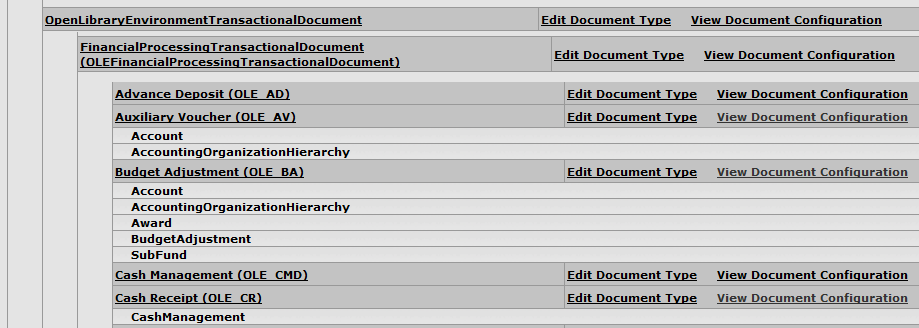
To display the Document Type Inquiry for a document, click the document type name.
Users with permissions to edit document types will see an extra link displayed for each type. To initiate an OLE Document Type Maintenance document to edit a document type, click the Edit Document Type link for it.
If a given document type does workflow routing, then the system displays the route nodes associated with this type directly below the name of the document. Route nodes are listed in the order in which this document passes through them. Document types with branching routing logic may have further indentation displaying route nodes that a document may only pass through under certain conditions.
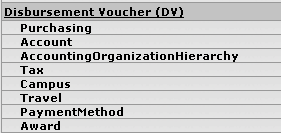
To open a separate window displaying additional information about a document type, click the View Document Configuration link.
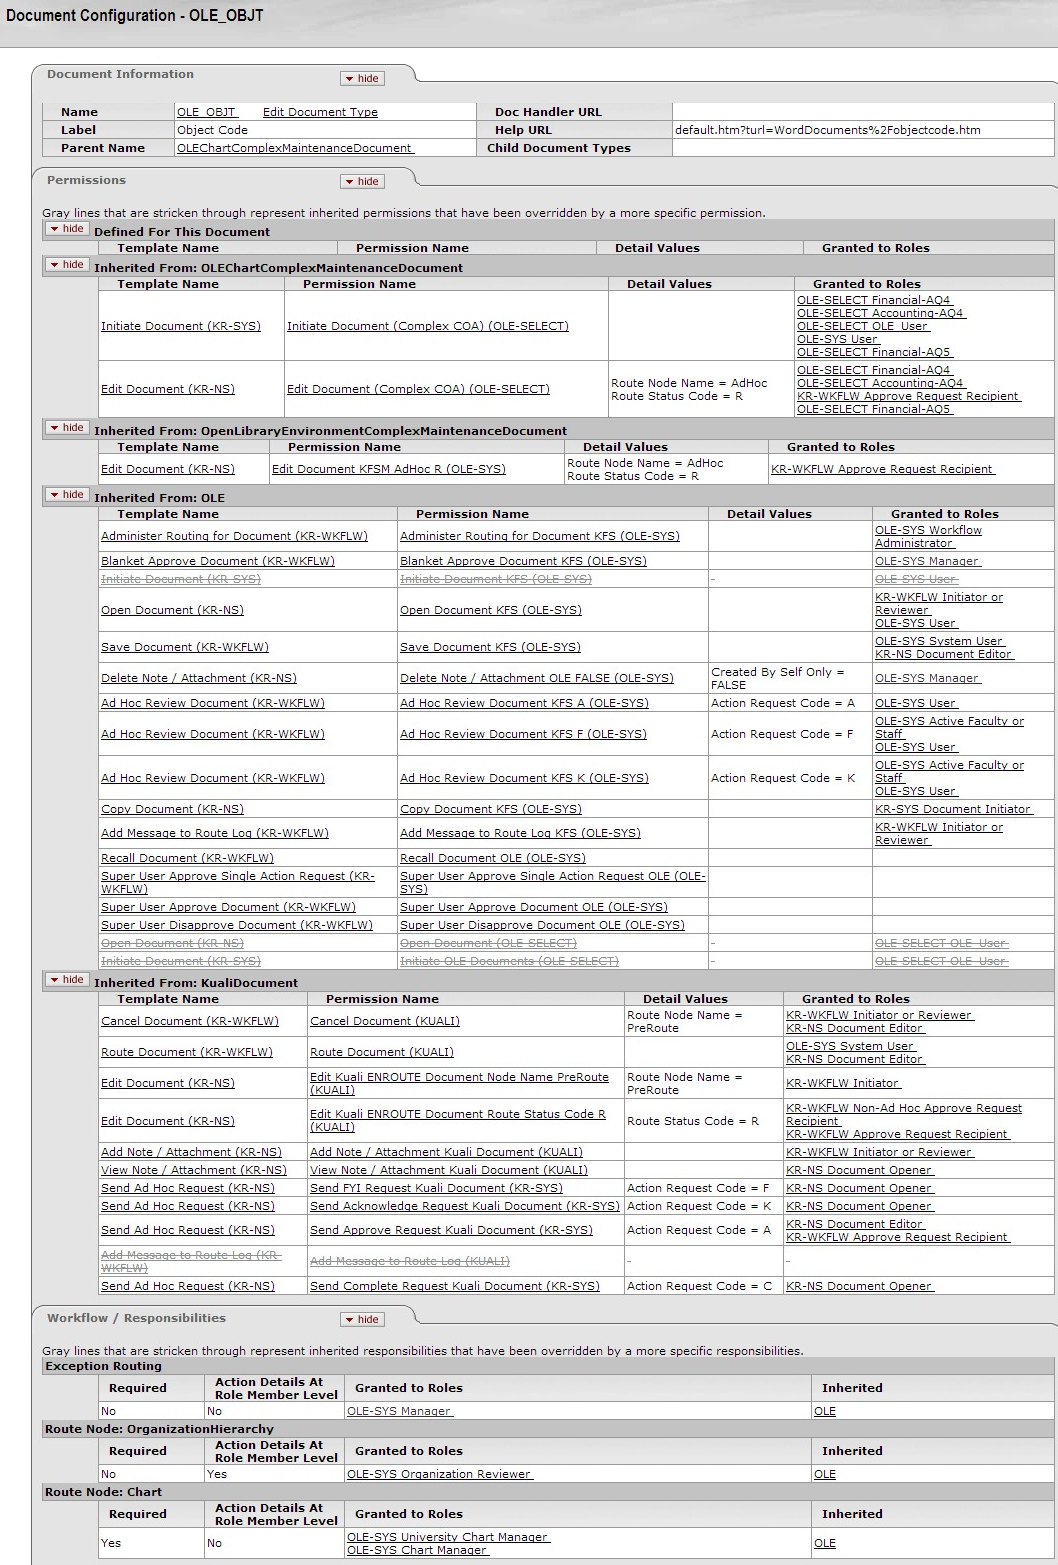
This view includes Document Information, Permissions and Workflow / Responsibilities tabs.
This tab provides basic information about the document type. Much of the information here is identical to that available in the Document Type Inquiry.

Document Information tab definition
|
Title |
Description |
|
Name |
The name that uniquely identifies this type of document. If the user viewing the Configuration screen has permission to edit document type maintenance documents, the system also displays the Edit Document Type link. |
|
Label |
A longer, more descriptive name for this type of document. In some cases the name and the label may be identical. |
|
Parent Name |
The type of document that is the parent to (i.e., higher than) this document type in the document type hierarchy. To display the Document Configuration view for the parent document type, click the linked parent name. |
|
Doc Handler URL |
The URL for the document handler associated with this document type. This information is helpful for technical users. |
|
Help URL |
The URL for the online help associated with this document type. |
|
Child Document Types |
If this document type is a parent, the system displays all of its types for all of its children document types. To see the document configuration view for a child document type, click the link for the desired child document type. |
This tab identifies the KIM permissions that are invoked by this type of document. Collapsible sections indicate how the document type is associated with each permission.
The Defined for This Document section lists permissions that specifically refer to this document type. But many document types receive most, if not all, their associated permissions by inheriting them from parent document types. Additional tabs display this inherited information and the name of the document type from which the permissions are inherited. For example, in the screenshot below, this document type inherits permissions from both OLEChartComplexMaintenanceDocument and OpenLibraryEnvironmentComplexMaintenanceDocument.
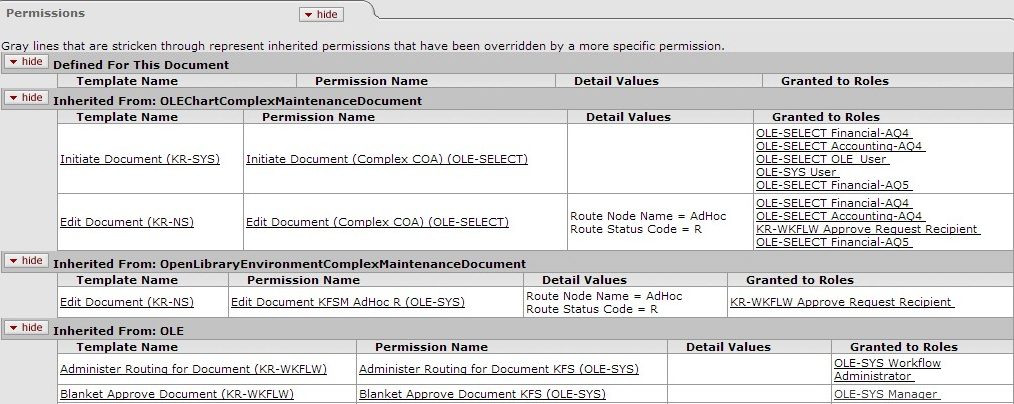
Because more specific permissions override more general ones, some listed permissions may not apply. The system displays overridden permissions as gray strike-through text. In the example below the 'Initiate Document' permission inherited from OLE is overridden by a more specific permission displayed in Inherited From: OLEChartComplexMaintenanceDocument section.
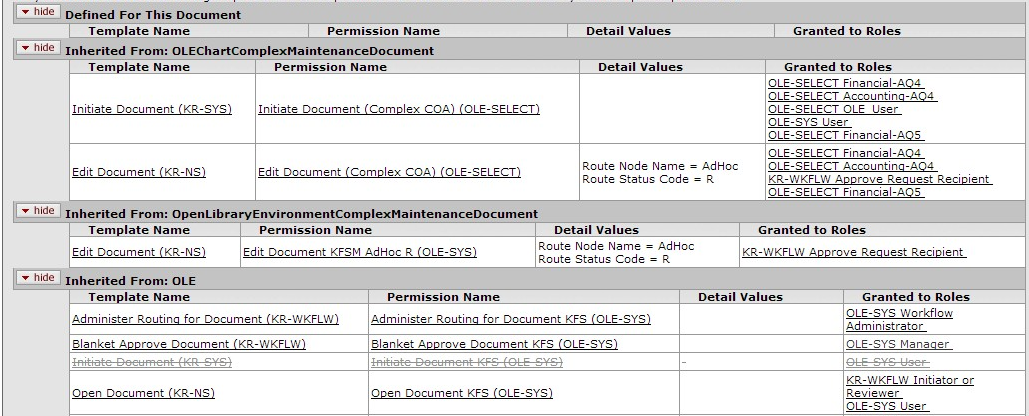
Permissions tab definition
|
Title |
Description |
|
Template Name |
Display only. The name of the permissions template on which this permission is based. The template often defines, in a broad sense, what the permission controls. Similar types of permissions have the same template. |
|
Permission Name |
Display only. The name of this permission. In most cases the permission name is the same as the associated template name. NotePermission names are generally not unique because they describe types of authorization that may appear in many places throughout the application. |
|
Detail Values |
Display only. Additional detailed information that, when taken with the permission name, defines the permission's function. |
|
Granted to Roles |
Display only. The roles (i.e., the namespace and name of each role) associated with this permission. In some cases multiple roles may be associated with the same permission. To view the Role Inquiry, click the linked name of the desired role. |
This tab identifies the route nodes associated with this document type and displays critical information about the KIM responsibilities associated with them.
On this tab, the system displays route nodes in the order in which the document passes through them. The system also displays responsibility information for the Exception Routing node that will be invoked for this document type only if the document encounters an error that prevents it from completing its normal routing.
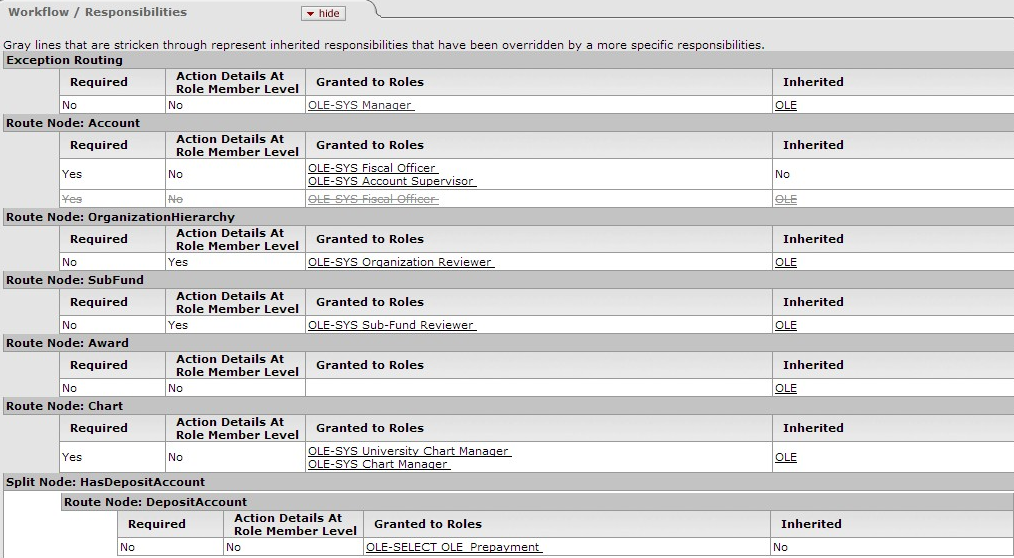
Responsibility information is presented for each route node in a standard format.
Workflow / Responsibilities tab definition
|
Title |
Description |
|
Required |
Display only. A Yes or No value that indicates whether this responsibility must generate action requests for this document type. If the value is 'Yes' and the document generates no requests associated with this responsibility, then the document goes into exception status. If the value is 'No' and the responsibility generates no action requests, the document continues to route as normal. |
|
Action Details at Role Member Level |
Display only. A Yes or No value that indicates where the details of this workflow action request are defined. If the value is 'Yes,' the system collects action details when members are assigned to the role. If the value is 'No,' the system collects action details when this responsibility is assigned to a role. |
|
Granted to Roles |
Display only. The roles (that is, the namespace and name of each role) associated with the responsibility at this route node. To view the Role Inquiry, click the linked name of the desired role. |
|
Inherited |
Display only. Indicates whether this responsibility is inherited from another document type. If the value is 'No,' the responsibility is specifically associated with this document type. If a document type name appears here, the responsibility is inherited from the specified document type. To view the Document Configuration Inquiry for this document type, Click the linked name. |
 >
>  >
>  >
>  >
> 
The Rule Definition Lookup allows you to search for and report on workflow rule definitions and export the definition data in .xml format. OLE no longer uses workflow rules to route documents (handling this through KIM responsibilities instead), but rule definitions are still used by document search and the action list.
This option consists only of a lookup and inquiry screen. There is no document type associated with rule definitions.

Clicking the ID number of a given rule definition will take you to the Rule Definition Inquiry screen.

Click the ![]() button to download the .xml associated with a particular rule
definition.
button to download the .xml associated with a particular rule
definition.
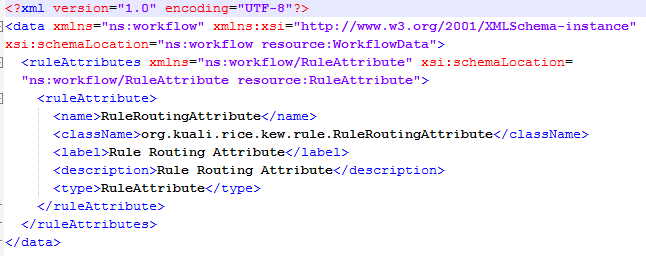
 >
>  >
> 
The options in this submenu group are used primarily by technical users to upload and configure data to maintain the Kuali Enterprise Workflow (KEW) system. Because these two options are intended for technical users, they will not be dealt with in detail here.
Use of these options is restricted to users with the KR-SYS Technical Administrator role.
 >
>  >
>  >
>  >
>  >
> 
The Namespace document allows you to add new or maintain existing namespace codes. Namespace codes are used to identify various pieces of functionality and generally correspond to large functional areas. The namespaces in OLE base data normally take the form of a Kuali application followed by one of that application's modules. For example OLE Purchasing /Accounts Payable module would be associated with the namespace OLE-PURAP.
This document can only be initiated by members of OLE-SYS Manager or KR-SYS Technical Administrator role and does not route for approval.

The Namespace document contains the Edit Namespace tab.
Edit Namespace tab definition
|
Title |
Description |
|
Namespace Code |
Required. Enter the namespace code for this namespace. OLE convention for most namespaces is application abbreviation and module abbreviation separated by a dash (OLE-PURAP, KR-WKFLW, etc.) |
|
Namespace Name |
Required. A longer text description for this namespace code. |
|
Application ID |
Optional. An additional namespace identifier which identifies which application should recognize this namespace code. This is generally only used in instances where the regular namespace code is not enough to make a definition unique. This definition is normally used directly on the Parameter document and not assigned specifically to a namespace on this table. |
|
Active Indicator |
Required. Leave checked to indicate that this namespace is active and can be associated with permissions, responsibilities, roles and Kuali data elements organized by namespace. Uncheck the box to inactivate this namespace and make it an invalid choice. |
 >
>  >
>  >
>  >
>  >
> 
The Parameter document is used to define parameters and business rules in OLE. A specific value of a parameter can vary based on what the parameter is used to define. Some parameters create business rules. These rules create restrictions and enforce valid values and combinations on various document types or batch processes. Other parameters simply define institution-specific values not defined elsewhere in OLE. The value may, for example, be text that OLE is to display in a given location or it may be a simple yes or no value to turn an option on or off.
Only members of the KR-SYS Technical Administrator or OLE-SYS Manager role can create or edit Parameter documents.
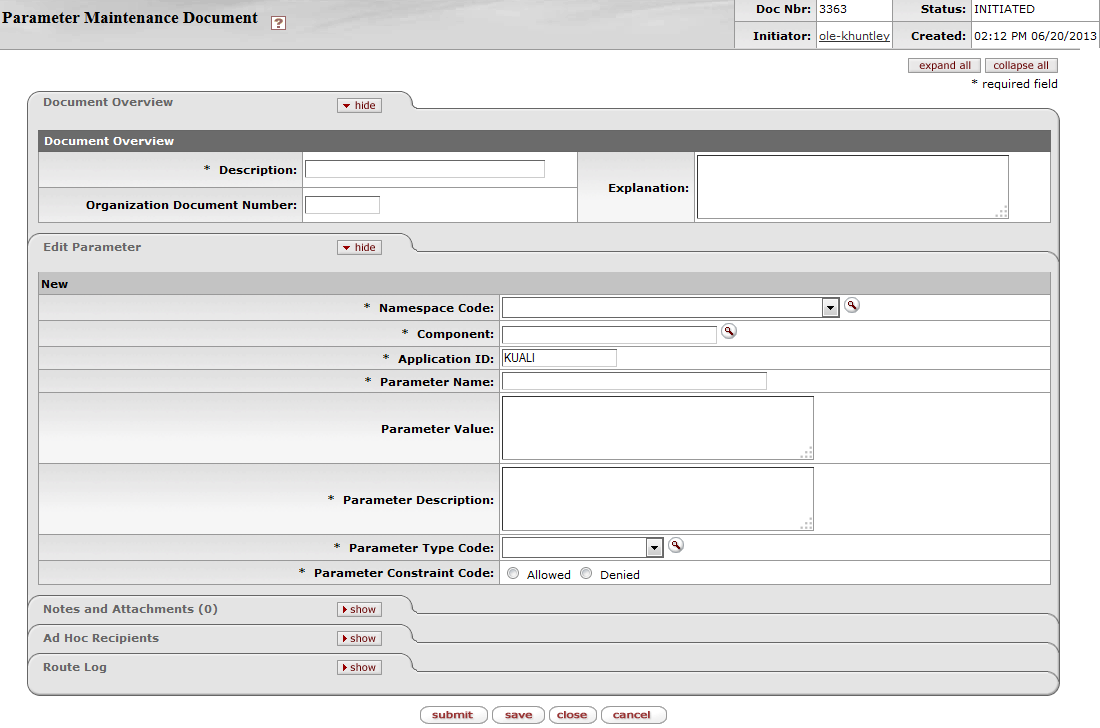
The Parameter document includes the Edit Parameter tab. This tab is where you define the modules, type, rules, and description of the parameters.
Edit Parameter tab definition
|
Title |
Description |
|
Namespace Code |
Required. Select the appropriate Namespace code for the parameter from the Namespace Code list or search for it from the lookup. |
|
Component |
Required. Enter the parameter component code or search for it from the
Parameter Component lookup |
|
Application ID |
Required. Enter the application namespace to identify the application to which this parameter applies. Note that the same parameter can have different values for different applications. |
|
Parameter Name |
Required. Enter the name of the parameter being defined. |
|
Parameter Value |
Required. Enter the value for the parameter. The nature of a given parameter determines what form the parameter value should take. In some cases it is text for an OLE user to view or it could be a value such as an account number or an object code. In cases where multiple values are allowed they should be separated by a semi-colon. Consult with technical resources if you are unsure what format a specific parameter value should take. |
|
Parameter Description |
Required. Describe the purpose and usage of the parameter. The description is used for a documentation purpose. |
|
Parameter Type Code |
Required. Select the parameter type code from the Parameter Type list or search for it from the lookup Default types include: System Configuration: Used to establish institution values not specific to validation. Document Validation: Used to establish business rules for documents. |
|
Parameter Constraint Code |
Required. Select Allowed if the parameter is to allow the defined parameter value within OLE application. Select Denied if the parameter is to deny the defined parameter value within OLE application. Consult with technical resources if you are unsure of the appropriate constraint code for a given parameter. |
 >
>  >
>  >
>  >
>  >
> 
The Parameter Component document defines valid components that can be associated with a parameter. Parameter components indicate a general or specific piece of OLE functionality to which a parameter applies. Some Parameter Components are generic (batch, lookup, all) while others are very specific and refer to particular documents or even specific tabs or fields on documents.
Only members of the KR-SYS Technical Administrator or OLE-SYS Manager role can create or edit Parameter Component documents.

The Parameter Component document includes the Edit Component Type tab.
Edit Component tab definition
|
Title |
Description |
|
Namespace Name |
Required. Select the appropriate Namespace code for the parameter from the Namespace Name list or search for it from the lookup. |
|
Component |
Required. Enter the parameter component code or search for it from the
Parameter Component lookup |
|
Component Name |
Required. Enter the descriptive name of the parameter component being defined. |
|
Active Indicator |
Required. Leave checked to indicate that this parameter component is active and can be associated with parameters. Uncheck the box to inactivate this component and make it an invalid choice. |
 >
>  >
>  >
>  >
>  >
> 
The parameter type broadly defines what a parameter is used for. Parameters used for document validation (such as business rules) and parameters used for System Configuration (customizing OLE for your institution) are two types of parameters used in OLE.
The Parameter Type document allows you to create new or edit existing parameter types. Code must be developed to support any additional types or changes to existing types.
Only members of the KR-SYS Technical Administrator or OLE-SYS Manager role can create or edit Parameter Type documents and they do not route for approval.
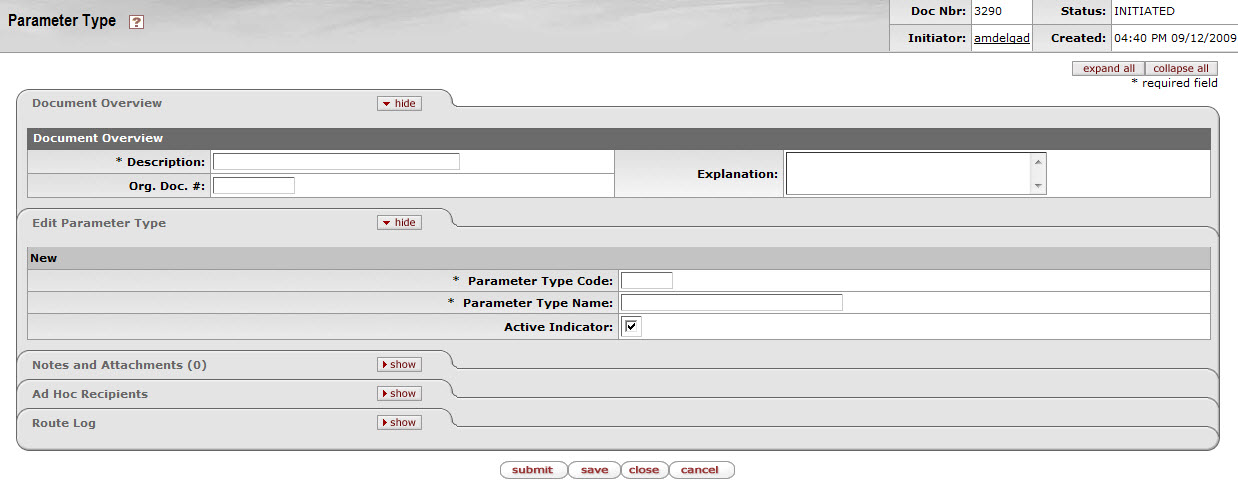
The Parameter Type document includes the Edit Parameter Type tab.
Edit Parameter Type tab definition
|
Title |
Description |
|
Parameter Type Code |
Required. Enter the code by which this parameter type will be identified. |
|
Parameter Type Name |
Required. Enter the long descriptive name for this parameter type. |
|
Active Indicator |
Required. Check the box to make this parameter type active and available for selection when creating parameters. Uncheck the box if you wish to inactivate this type of parameter and prevent its selection when creating new parameters. |
 >
>  >
> ![]()
The options in this submenu group are used primarily by technical users to upload and configure data to maintain the Kuali Enterprise Workflow (KEW) system. Because these two options are intended for technical users, they will not be dealt with in detail here.
Use of these options is restricted to users with the KR-SYS Technical Administrator role.
 >
>  >
>  >
>  >
> 
The Configuration Viewer is used to review a table of configured properties. Click Refresh Page to update the values.
Table of Contents
 >
> 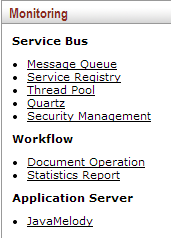
The items in the Monitoring submenu pertain to the Kuali Service Bus and the Kuali Enterprise Workflow (KEW) as well as the Application Server.
An Enterprise Service Bus is a middleware architecture construct which allows for integrating enterprise applications in an implementation-independent fashion. The Kuali Service Bus (KSB) specifically provides a messaging fabric as well as allowing acquisition of services on the bus using a service registry and invocation of those services using various protocols (java serialization over HTTP and SOAP). Because these are primarily technical operations, they are not covered in great detail here.
Use of these options is restricted to users with the KR-SYS Technical Administrator role.
 >
>  >
> 
 >
>  >
>  >
> 
The Message Queue allows administrators to monitor messages that are flowing through the Service Bus. Messages can be edited, deleted or forwarded to other machines for processing from this screen.

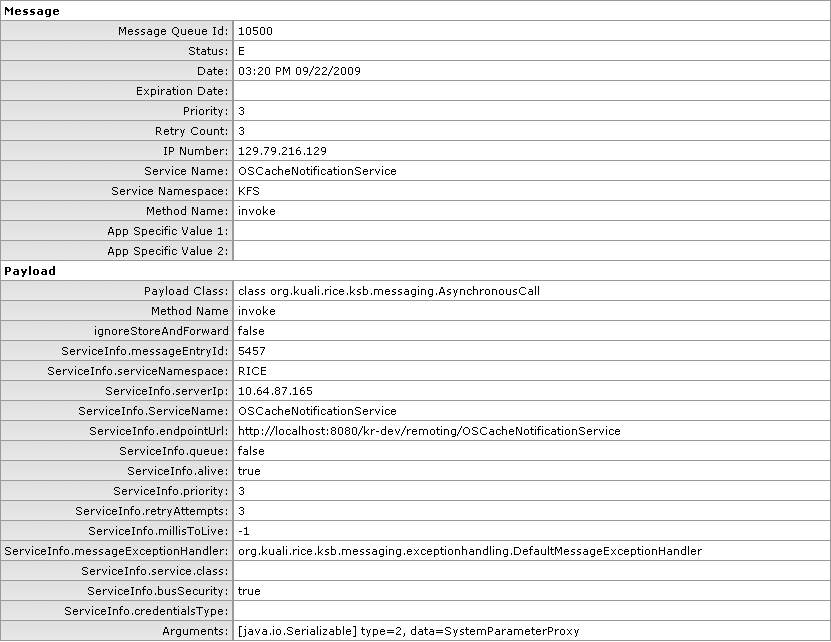
 >
>  >
>  >
> 
The Service Registry displays a read-only view of the Service Bus's Service Registry. The Service Registry shows all services that are exposed on the Service Bus and includes information about them (such as IP Address, endpoint URL, etc.). The Service Registry also includes an administrative function which allows the administrator to refresh its view of the registry.

 >
>  >
>  >
> 
The Thread Pool provides a means by which an administrator can change the size of the Thread Pool used by the Service Bus for processing messages.
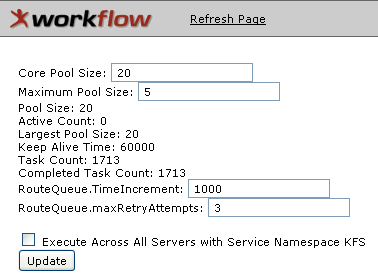
 >
>  >
>  >
> 
Quartz provides a means by which an administrator can schedule delayed tasks, including retry attempts for messages that cannot be sent the first time.
 >
>  >
> 
The options in the Workflow submenu group are used to configure and maintain the Kuali Enterprise Workflow (KEW).
Use of these options is restricted to users with the KR-SYS Technical Administrator role.
 >
>  >
>  >
> 
The Document Operation option allows you to manipulate the XML data in the document and save the document. The screen is divided into several sections: Document Action, Document, Action Requests, Actions Taken, Action Items, Route Node Instances, Brach States, and Annotation for Admin Change.

Enter the document ID you are searching for and click
 .
.Make changes to the appropriate section of the document.
Click
 .
.
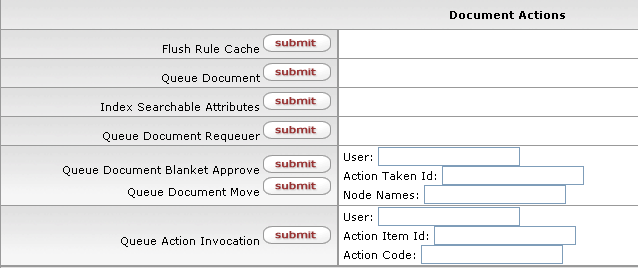
Document Actions section

Document section
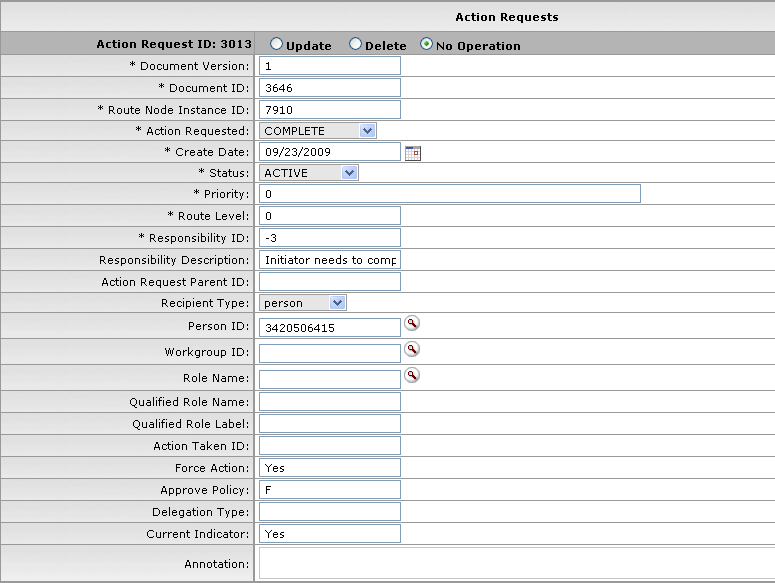
Action Requests section
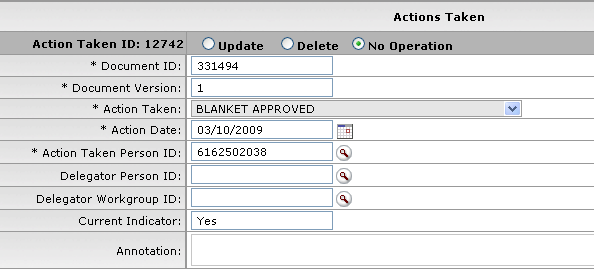
Actions Taken section
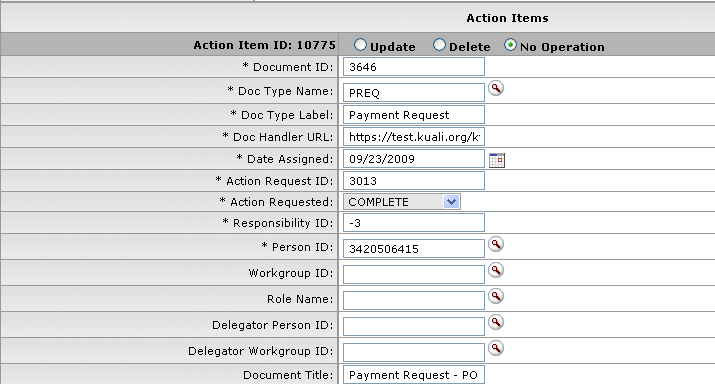
Action Items section
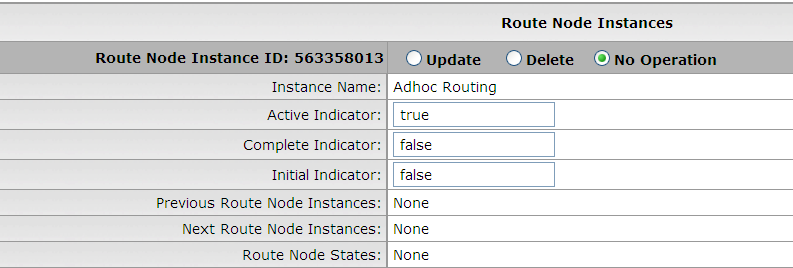
Route Node Instances section

Branch States section

Annotation for Admin Change section


